There’s something oddly calming about sitting with clay on a hot afternoon.
I don’t know… maybe it’s the slow pace, or just the fact that your hands get messy in a good way.
If you’ve been looking for summer clay decor that actually feels personal, you’re going to enjoy this.
These aren’t perfect, showroom-type pieces. They’re slightly uneven, a bit raw, and full of character.
I haven’t personally made these, but I dug deep into what works for beginners.
So if you’re exploring ideas to do with air dry clay or just want simple home decor pieces, you’re in the right place.
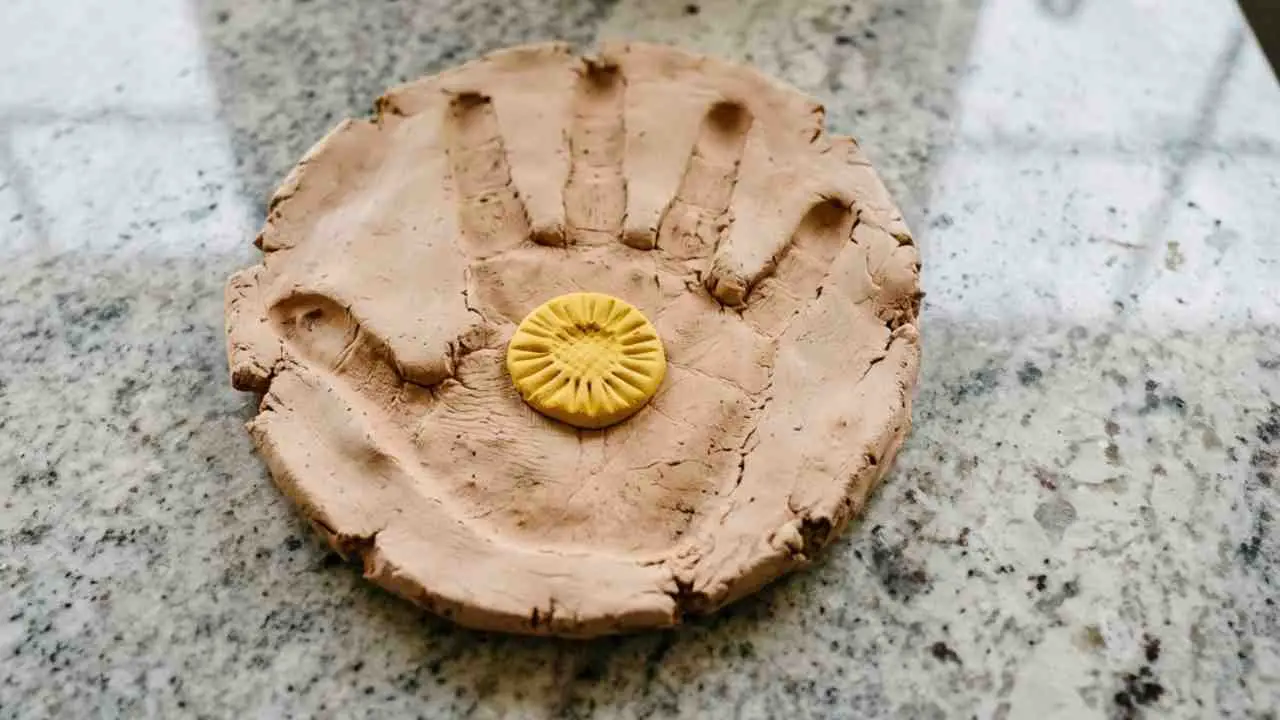
1. Coastal Shell Trinket Dish
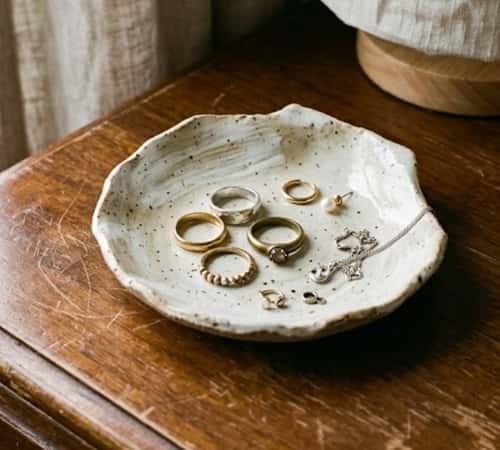
Let’s start simple, yeah? This one is perfect if you’re new to clay crafts.
Take a small chunk of air-dry clay. Roll it into a ball, then flatten it gently using your palm or a rolling pin.
Not too thin though, or it might crack later. Now grab a real seashell (or even a textured object) and press it lightly into the clay to create that shell-like pattern. Don’t overthink it.
Use your fingers to slightly pinch the edges upward so it forms a shallow dish.
Let it dry for 24 to 48 hours. Once dry, paint it with soft whites, sandy beige, or even a faded blue. A matte finish works best here.
Seal it with a clear varnish if you want durability. Or leave it raw… it looks nicer that way sometimes.
2. Mini Clay Beach Houses
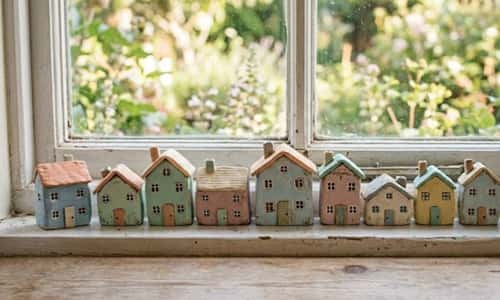
This one feels like a tiny vacation on your shelf.
Roll clay into small rectangular blocks. These will be your houses.
Now pinch the top gently to form a triangle roof. If it looks crooked, good… it should. Use a toothpick to carve doors, windows, and tiny lines for texture.
Let them dry completely. After that, paint each house in pastel coastal shades – mint, pale blue, faded coral.
Add tiny details like window frames or dots. You don’t need steady hands, trust me.
Line them up on a shelf or window sill. It instantly gives that breezy summer clay craft vibe.
Why does this feel so relaxing to make?
3. Starfish Wall Hangings
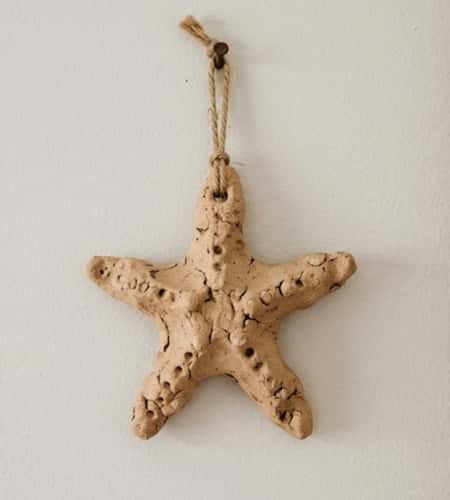
This is one of those cool thing to make with clay that looks harder than it is.
Roll out your clay flat. Use your hand or draw a rough star shape with a toothpick.
Cut it out using a knife or even a blunt edge. Don’t worry if the arms aren’t even – real starfish aren’t perfect either.
Now, here’s the trick: use a pin or toothpick to poke tiny holes all over the surface. This gives it that natural texture. Make a little hole near the top for hanging.
Once dry, paint it in off-white or sandy tones. You can even dab a sponge lightly to create texture.
Thread a jute string through the hole and hang it.
Honestly, it looks like something you’d buy at a beach shop.
4. Ocean Wave Coasters
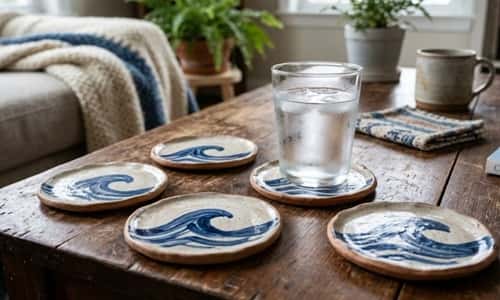
Okay this one is fun, and slightly addictive.
Roll clay into a flat sheet, about 5mm thick. Circular shapes can be cut with a circular cutter or a glass. These will be your coasters.
Now take a toothpick or sculpting tool and draw wavy lines across the surface. Think ocean waves, but don’t overdo it. Keep it loose.
Once dry, paint using shades of blue and white. Blend slightly while painting to mimic waves. It doesn’t need to be perfect… actually it shouldn’t be perfect.
Seal with a waterproof varnish if you plan to use them.
These are one of those things to make with dry clay that people actually use daily.
5. Driftwood Style Clay Wall Hooks
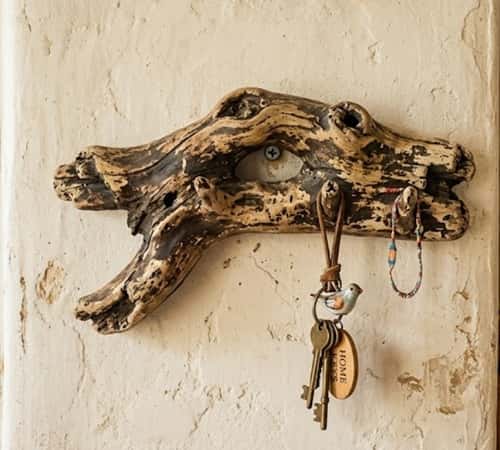
This one surprised me. It looks rustic, but it’s clay.
Roll clay into uneven log-like shapes. Think driftwood, not perfection. Flatten the back slightly so it can sit against a wall.
Before drying, insert small hooks or create curved protrusions using clay itself. Let it dry fully.
Paint in earthy tones – brown, grey, even a hint of white dry brushing to mimic aged wood. You can also leave some parts unpainted for a raw look.
Attach it to a wooden base or directly mount it using adhesive hooks.
It’s one of those things to make out of clay that actually solves a problem too.
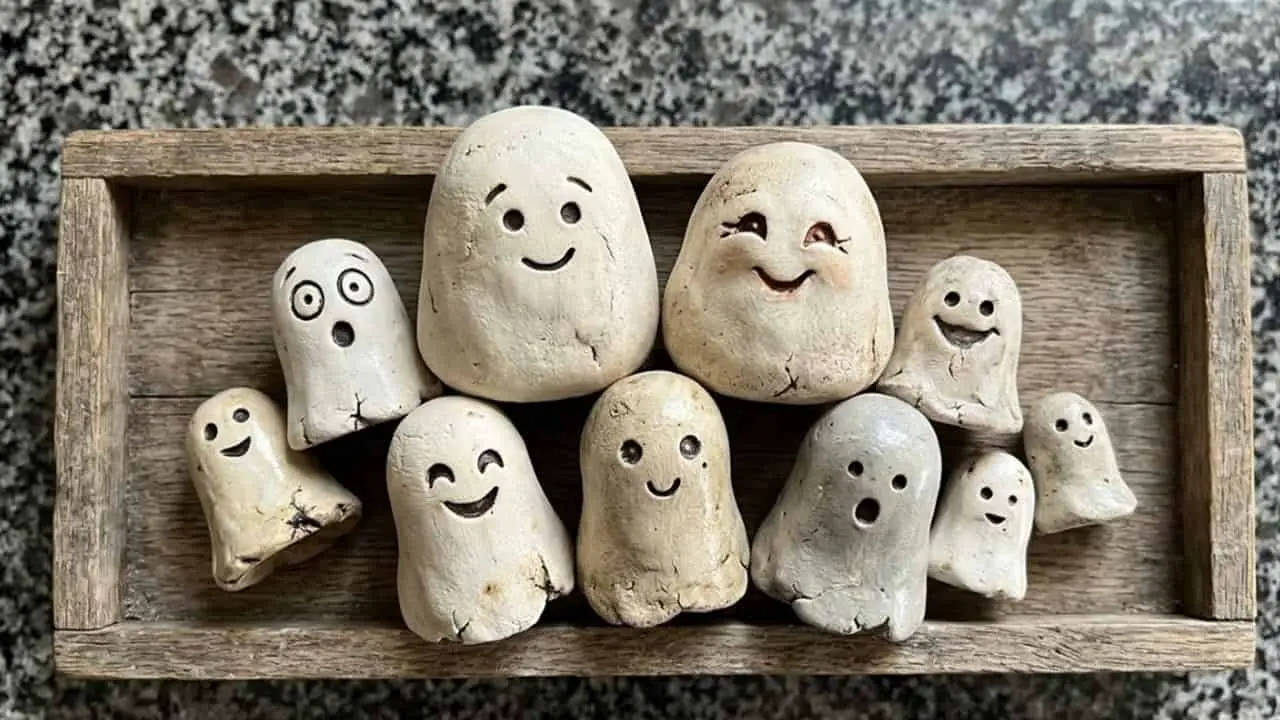
6. Sea Glass Inspired Clay Pebbles
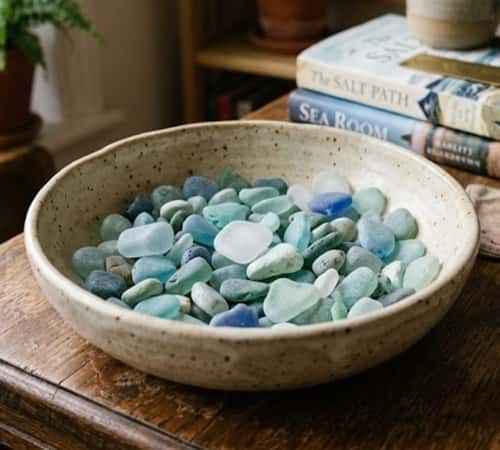
Ever seen those smooth sea glass pieces? This is my low-effort version of that.
Take small bits of clay and roll them into irregular pebble shapes. Don’t aim for perfection.
Flatten them slightly and smooth the edges with damp fingers.
Let them dry completely. Once dry, paint them in soft translucent tones – light teal, frosted white, pale green.
Then lightly sand the surface to dull the shine. This step makes a huge difference, don’t skip it.
You can use these as bowl fillers or just scatter them around shelves. It’s one of those random clay ideas that somehow makes your space feel calmer.
7. Hanging Clay Fish Charms
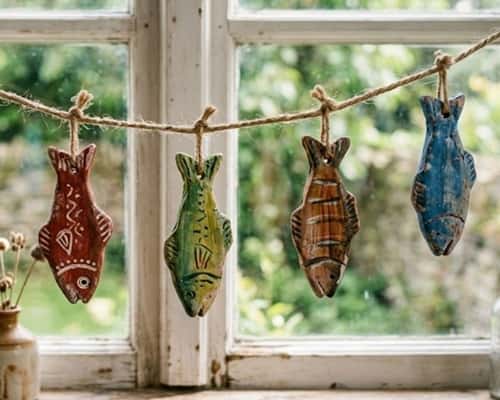
This one feels very beach shack-ish. And yes, that’s a good thing.
Roll out clay flat and draw small fish shapes using a toothpick. Cut them out carefully. You don’t need perfect outlines… fish aren’t measuring themselves.
Use a pin to poke a hole near the top. Add texture with small lines or dots. Let them dry fully.
Paint them in faded coastal colors – dusty blue, coral, off-white. You can even leave some parts unpainted for contrast.
Thread them onto a jute string or hang individually.
It’s a very summer clay decor vibe, especially near windows or balconies.
8. Coral-Inspired Clay Sculptures
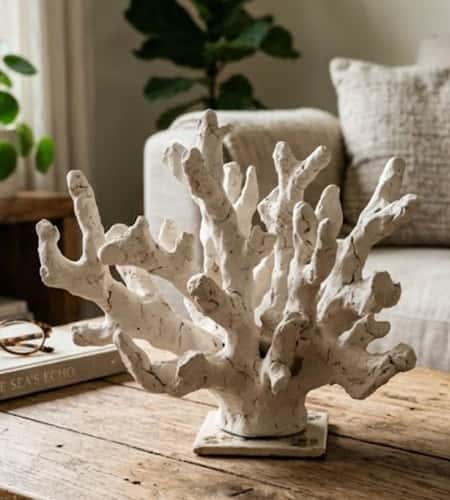
Okay, this one looks fancy… but it’s honestly just controlled randomness.
Start by rolling thin clay tubes. Twist and bend them into organic, branching shapes – like coral. Attach pieces together by gently pressing them. Use a bit of water if needed.
Let it dry slowly. If it cracks slightly, that’s fine… it adds character.
Once dry, paint it in white or very soft pink. Matte finish works best here. You can even leave it unpainted for a raw, natural look.
Place it on a shelf or coffee table.
This is one of those clay stuff cute pieces that people will ask about.
9. Beach Quote Clay Plaques
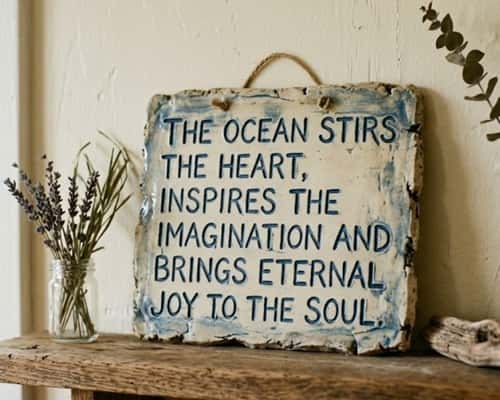
Feeling a little creative today? Or maybe not, but let’s try anyway.
Roll out a flat slab of clay, about 0.5 cm thick. Cut it into a rectangle or organic shape. Smooth the edges slightly.
Now use a toothpick or blunt tool to carve a simple beach quote. Something like “stay salty” or “good vibes only”. Keep it messy… handwritten looks better.
Let it dry. Paint the base in a neutral tone, then lightly highlight the text using a contrasting color.
You can hang it or just lean it against a wall.
This falls under those clay things to do when you want something personal.
10. Clay Candle Holders (Sand Texture Style)
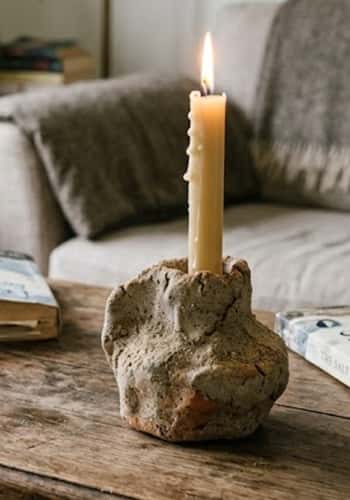
This one? Slightly messy. Slightly fun. Definitely worth it.
Take a chunk of clay and shape it into a small cylinder. Press a candle gently in the center to create a holder space, then remove it.
Now for texture – press real sand or coarse salt onto the outer surface. Don’t be shy here. The rougher it looks, the better.
Let it dry completely. You can leave it raw or lightly dry brush with white or beige paint.
Pop in a candle once done.
It’s one of those things to make with dry clay that instantly upgrades your home decor without trying too hard.
11. Coastal Clay Photo Frame Accents
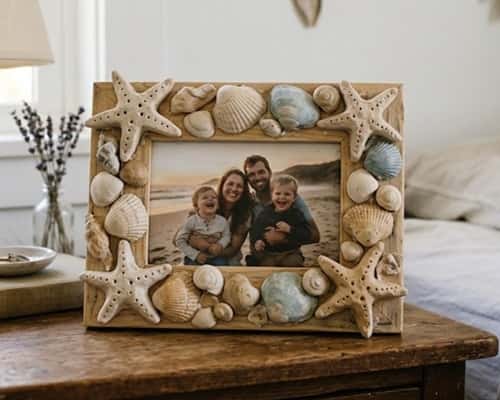
This one lets you mix a bunch of things to make out of clay into one project.
Take a basic photo frame – wood, plastic, anything.
Now create small clay elements like shells, tiny starfish, pebbles, even abstract blobs. Keep them slightly rough. Overly polished pieces look fake… and we don’t want that.
Let all pieces dry separately. Then glue them onto the frame in a scattered, organic layout.
Paint everything together in a cohesive palette – soft whites, sandy tones, maybe hints of blue. Or leave some pieces raw for contrast.
It becomes a very personal summer clay decor piece. Also, kind of a cool thing to make with clay when you’re bored but still want something meaningful.
Final Thoughts
Here’s the thing… most clay projects don’t fail because of skill.
They fail because we expect perfection too soon. That’s not how this works.
The slightly crooked edges, the uneven paint, the tiny cracks – those are what make handmade home decor feel real.
If you’re exploring clay things to do this summer, try focusing less on outcome and more on the process.
You’ll notice your hands start remembering shapes before your brain does, which is kinda fascinating.
And honestly, that’s where the magic of summer clay decor really sits… not in how it looks, but in how it’s made.