That strange little moment before the new school year starts? It’s equal parts chaos and fresh energy.
Maybe your kid is nervous about the first day of school, maybe you just need something creative for after school that doesn’t involve screens.
That’s where back to school clay projects can honestly shine. I haven’t personally made or tried all of these myself, but these ideas are designed to feel doable, playful, and beginner-safe for families, classrooms, or even an after school club looking for hands-on fun.
Some are practical. Some are silly. All of them lean into clay crafts for kids with personality, messy charm, and enough room for mistakes because thats where the magic usually happens.
1. Pencil Topper Monster Buddies
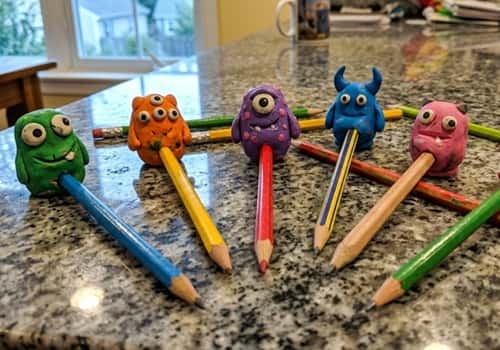
Who said pencils from the new school have to look boring? These goofy little clay creatures turn plain writing tools into something kids actually get excited about.
Start with air-dry clay in bright colors like neon green, blue, yellow, or pink.
Pinch off a grape-sized ball and roll it between your palms until smooth.
Push a pencil eraser gently into the bottom to create the topper hole, then remove it carefully before shaping.
This matters more than people think because if the hole is too tight later, the clay can crack.
Now the fun part begins. Add one eyeball. Or three. Maybe giant ears? Maybe horns? There really isnt a wrong answer here.
Use tiny clay dots flattened for eyes, then poke pupils using a toothpick. A smile face works great, but crooked monster teeth can look even cooler. Let kids lean weird. Weird is memorable.
For texture, press a pencil tip lightly for scales or use an old toothbrush for fuzzy skin effects.
Leave it drying upright on parchment paper for 24 hours. Once hardened, paint with acrylics and seal lightly if you’d like.
This back to school clay craft feels especially perfect for clay crafts for kids who want school supplies with personality.
2. DIY Mini Locker Magnets for The New School Year

School lockers can feel cold. So why not make tiny clay magnets that feel personal?
Use polymer clay for this one if possible because it holds sharper details. Roll clay flat with a cup or smooth bottle until about ¼ inch thick.
Cut shapes using bottle caps, cookie cutters, or even carefully with butter knives. Think stars, tiny books, apples, rainbows, smile face circles, or initials.
For beginners, simple shapes work best. Don’t overcomplicate it right away, seriously.
Press in designs with paperclips, pencil tips, or buttons for pattern. You could stamp a tiny ABC, create notebook lines, or shape mini backpacks.
If a child is joining an after school club, this project can become a whole social thing.
Bake according to package instructions if using polymer clay. Once cool, glue small magnets to the back. Strong craft glue usually works fine. Personalize with paint pens or glitter glaze.
And yes, imperfections kinda make them better. Too perfect can look store-bought, which misses the point.
These little pieces can celebrate the school year while making lockers or study boards feel less sterile.
3. Name Plate Desk Tiles for First Day Excitement
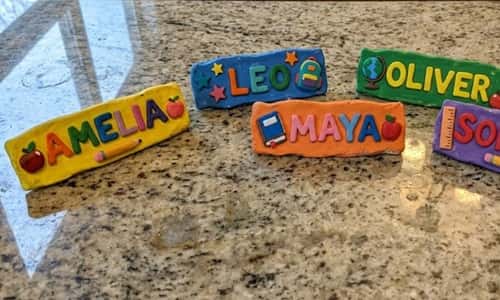
Starting the first day of school can feel big, especially for younger kids. A custom clay desk tile? Weirdly confidence-boosting.
Grab air-dry or polymer clay and flatten it into a rectangular slab about the size of an index card. Not too thin though, or it may snap, which would be tragic honestly.
Smooth edges with damp fingers. Then sketch the child’s name lightly using a pencil before pressing deeper.
You can either carve letters inward or roll thin clay snakes to build raised bubble letters. Raised letters are easier for little hands, even if they gets messy.
Decorate around the name with mini rulers, crayons, books, or tiny school bus shapes. This is where a back to school clay projects theme really comes alive.
Try sectioning with colors. Blue border, yellow stars, red apples. Bright but readable. Add holes with a straw if you want to string it later.
Dry fully, then paint carefully. Acrylic markers help with cleaner lines for names. Seal for durability if it’ll be handled often.
This project can become an annual tradition too—make one every new school year and compare growth.
4. Clay Bookmark Corner Clips That Actually Stay Put
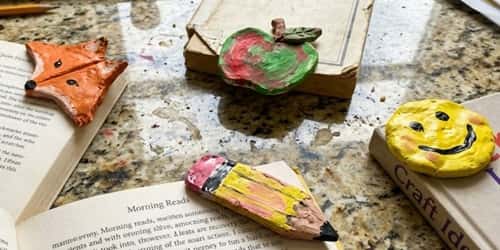
Bookmarks are nice. Corner bookmarks made from clay? Way more fun, and honestly they feel a little magical when clipped onto reading pages after school.
For this back to school clay craft, use lightweight air-dry clay so the bookmark doesn’t become weirdly heavy.
Start by rolling clay about ¼ inch thick, then cut a triangle shape large enough to fold over a book page corner.
You’re basically making a pocket, not just decoration, so test the size with an actual paper corner before drying. If it don’t fit now, it definitely won’t later.
Create two matching triangle layers. One becomes the front design, one becomes the back support.
Join only two sides gently, leaving the top open for sliding onto pages. Smooth seams with damp fingers.
Now decorate. Turn it into a fox face, pencil tip, apple, smile face, or even a tiny chalkboard.
Add raised details using tiny clay pieces. Keep designs flat-ish though, because bulky clay can crack or snap off inside backpacks.
Dry thoroughly. Paint with acrylics once hardened, then seal lightly. These are surprisingly useful for reading logs, chapter books, or even planners during the school year.
And if your child joins an after school club focused on reading? This one fits beautifully.
5. Mini Clay Lunchbox Notes Charms
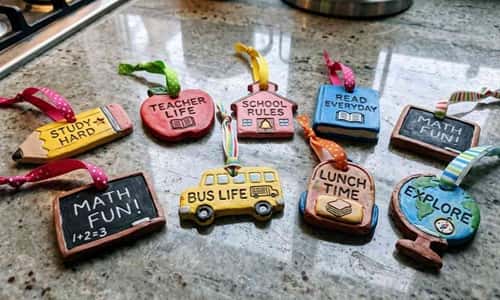
Lunch notes are sweet, but reusable clay message charms? That’s kinda genius for the new school.
Use polymer clay for durability since these will get tossed around more. Roll out small flat circles, hearts, or speech bubbles roughly the size of large coins.
Keep them thin but not flimsy. Before baking, use a toothpick or blunt pencil to carve encouraging phrases like “You Got This,” “Smile,” “Good Luck,” or tiny first day of school messages.
Simple works best here. Tiny letters can get messy fast, and honestly messy can become unreadable.
You can also add miniature icons like stars, sunshine, books, or lunchbox doodles. Punch a small hole if you’d like to attach ribbon or keychain loops later. Bake as directed, cool completely, then paint words for better contrast.
Slip one into lunchboxes, backpacks, or pencil pouches. It becomes this small unexpected emotional boost, which feels extra meaningful during back to school transitions.
I haven’t made these personally, but they seem especially lovely for younger kids adjusting to the new school year.
6. DIY Clay Crayon Holder Creatures
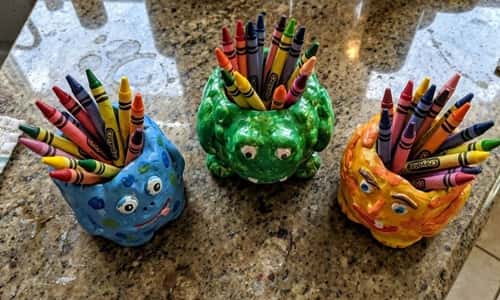
Loose crayons rolling everywhere? Chaos. These little clay creatures can actually solve that while still feeling playful.
Start with air-dry clay and roll medium-sized balls, roughly tennis ball sized for younger kids’ chunky crayons or smaller for pencils.
Flatten the bottom slightly so it sits stable. Then poke holes into the top using crayons themselves before drying. This part is important – twist gently while removing so holes stay smooth.
Now shape the body. Maybe it’s a sleepy bear. Maybe it’s a goofy alien. Maybe a rainbow blob with giant ears. There really are no rules, which is why clay crafts for kids often work so well.
Add features like tiny feet, noses, glasses, or scales using extra clay. Keep details attached firmly with a bit of water blending. If pieces fall off during drying, no one enjoys that drama.
Dry for 24 to 48 hours depending on thickness. Paint boldly afterward. Bright desk colors can make homework spaces feel less dull, especially during after school routines.
This project mixes organization with imagination, which honestly is a solid combo for back to school clay projects.
7. Clay Homework Helper Paperweight Stones
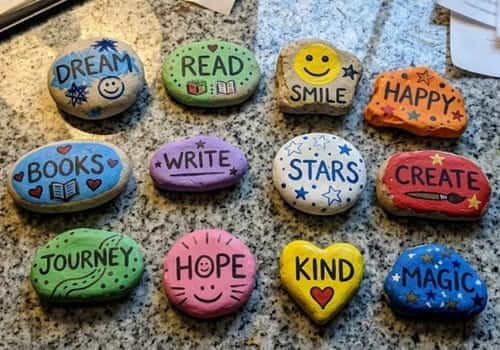
Homework papers have this mysterious habit of vanishing under couches, don’t they? A handmade clay paperweight can feel oddly grown-up while still being playful enough for kids.
For this one, use air-dry clay or oven-bake clay and shape palm-sized flattened domes.
Think smooth river rock, but homemade and less polished. Roll a large ball, press gently downward, and smooth cracks with damp fingertips. Don’t rush this part because deeper cracks can split later.
Now personalize it. Maybe stamp “Focus Mode,” “You Can Do It,” or a crooked smile face into the top. You could also sculpt mini books, stars, or pencils right onto the surface.
If the child is nervous about the school year, adding “One Step At A Time” can feel surprisingly grounding.
Texture matters too. Press mesh fabric lightly for patterns, or use a ruler edge to create notebook-style lines.
Once dried or baked, paint in school-themed colors or soft calming shades. You don’t need perfection here – it’s a desk tool, not museum pottery.
This back to school clay craft blends practical use with emotional support, which honestly feels smart for the first day of school jitters.
8. Mini Clay School Bus Pencil Tray
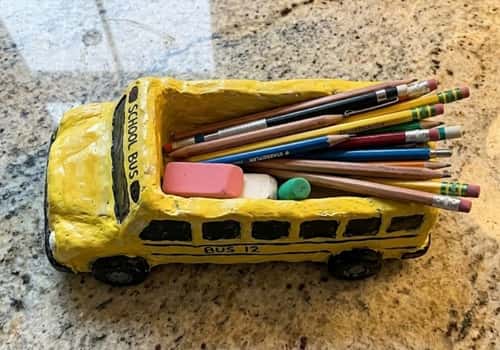
Some kids love school buses. Others maybe don’t, but this project still turns desk clutter into something hilariously useful.
Roll out a thick clay slab and cut an oval or rectangle base about 6 to 8 inches long.
Curve the edges upward slightly to create tray walls. This doesn’t need to be fancy, just functional.
Shape the front and back into a bus silhouette if you’d like, or keep it simple and decorate later.
Next, build small side walls from rolled clay strips. Attach carefully with blended water smoothing.
Add bus windows, wheels, headlights, or even tiny passengers. Little fingerprints may show, and honestly thats part of the charm.
Keep compartments simple by adding interior dividers for erasers, sharpeners, and pencils.
Let dry thoroughly before painting classic yellow school bus colors… or go wild with rainbow shades if your child prefers something louder.
For kids in after school programs, this can double as a supply organizer at home. It’s creative, practical, and kinda adorable.
One thing though: don’t make walls too thin or they can warp while drying.
9. Clay Badge Pins for After School Club Fun
There’s something wildly satisfying about wearing something you made yourself, even if it’s a little crooked.
This project works especially well for after school club groups, friend circles, or celebrating the new school year.
Use polymer clay for durability. Roll clay about ¼ inch thick and cut badge-sized circles, stars, shields, or quirky shapes. Keep edges smooth-ish, but don’t obsess.
Decide on a theme. Art club? Music notes. Reading group? Tiny books. Science team? Beakers. Or maybe just bold smile face badges because joy counts too.
Use stamps, toothpicks, or sculpted mini details to personalize each one. Add names, initials, or funny sayings. Bake according to instructions, then glue pin backs or safety pins securely once cooled.
Paint with personality. Metallic accents can look cool, but simple bright colors often pop better.
These badges become wearable little identities, which can be surprisingly confidence-building during social transitions.
And yes, if letters look wonky, that’s okay. Handmade things should sometimes look handmade… otherwise what’s even the point?
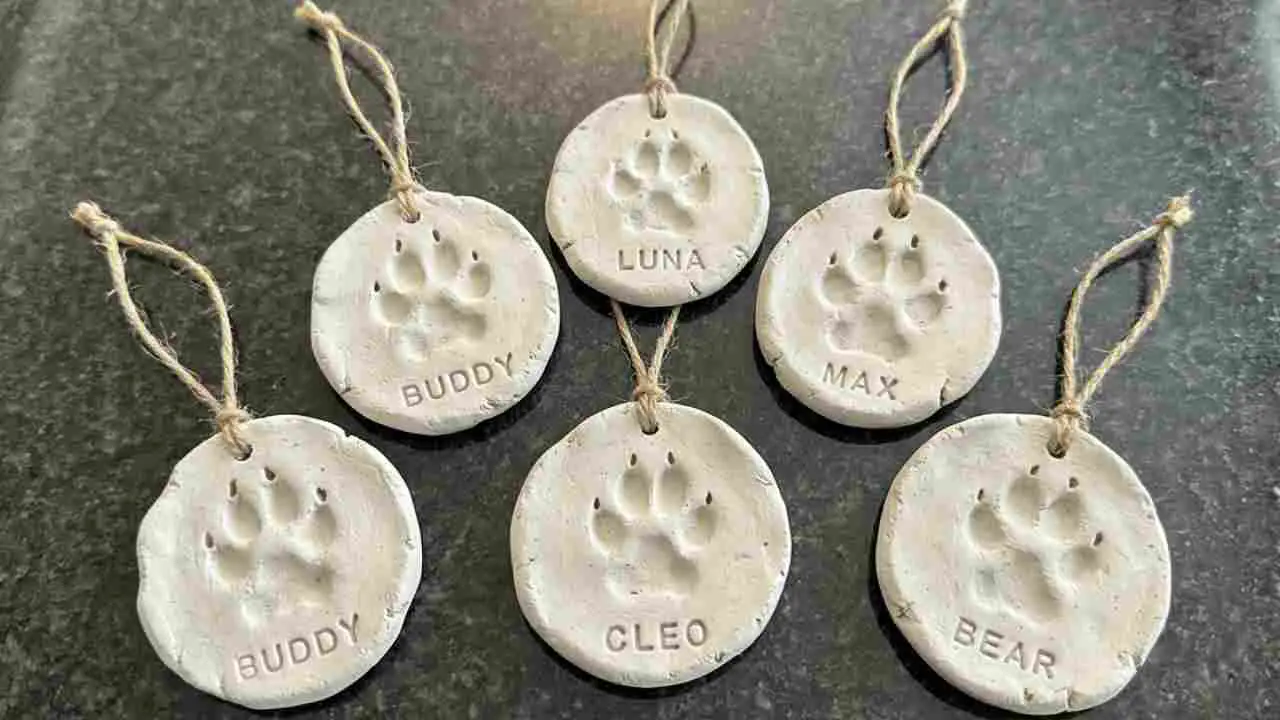
10. Personalized Clay Backpack Tag Charms

Backpacks all start looking weirdly identical once the new school year begins. One personalized clay tag can fix that fast, and honestly, it adds a little identity before kids even walk through the door.
For this back to school clay project, polymer clay works best because backpack tags need durability.
Start by rolling clay to about ¼ inch thickness. Cut into shapes that actually reflect personality – initial letters, mini crayons, stars, rainbows, apples, or even tiny notebooks.
A basic rectangle with rounded corners works too if your kid likes cleaner designs.
Before decorating, poke a hole near the top using a straw or skewer for the keyring. Don’t skip testing the hole size.
If it shrinks too much during baking, threading later becomes unnecessarily annoying.
Now build dimension. Add raised initials, layered smile face icons, favorite colors, or school symbols.
Keep attachments pressed firmly so they doesn’t pop off later. Use a toothpick to carve details like notebook lines or sneaker laces. Bake according to package directions, cool fully, then paint.
Acrylic paint pens can really help beginners here because brush painting tiny names can get messy real quick.
Once dry, seal with clear glaze for extra wear resistance. Add to backpacks, lunchboxes, or even sports bags.
This one feels especially fitting for the first day of school because it’s both practical and personal without being complicated.
Plus, it can help younger kids instantly spot their bags, which honestly saves chaos.
Final Thoughts
What makes back to school clay projects genuinely valuable isn’t just the finished craft – it’s the problem-solving hidden inside the mess.
Kids experiment, mess up, adjust, and quietly build patience while creating something real with their hands.
That matters more than perfect results. Whether it’s clay crafts after school, a back to school clay craft for the classroom, or just a rainy afternoon idea, these projects can turn nervous school year energy into confidence.
The cool part? Handmade things often carry more emotional memory than store-bought stuff ever could.
So maybe the slightly crooked apple pencil holder or weird little badge isn’t imperfect after all… maybe it’s exactly what makes the new school feel a little more theirs.