There is something oddly satisfying about turning a lump of clay into a tiny animal with its own personality.
This clay fox craft became one of my favorite weekend projects because it doesn’t require fancy tools, expensive supplies, or years of experience. Just a little patience and some air dry clay.

What makes this project special is that we are not aiming for perfection.
Tiny fingerprints, uneven edges, and small bumps actually make the fox look more handmade and charming.
Ever notice how handmade creations often feels more alive than factory-made decorations? That’s exactly the vibe we’re going for today.
Whether you enjoy clay modelling, love animal crafts, or simply want an easy clay fox project to make with kids, this tutorial walks through every detail.
Supplies Needed To Make Clay Fox Craft
- Air dry clay (white or terracotta)
- Acrylic paints (orange, white, black, and brown)
- Small paintbrushes
- Clay sculpting tool or toothpick
- Water in a small bowl
- Soft cloth or paper towel
- Pencil for sketching details
- Clear matte sealer (optional)
Step 1: Build The Main Body Foundation
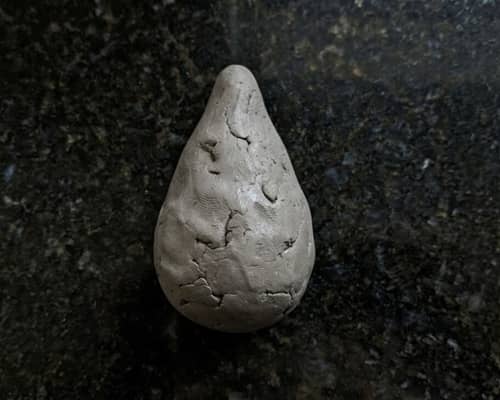
Start by taking a ball of air dry clay about the size of a small lemon.
Roll it gently between your palms until smooth. Now place it on your work surface and shape it into a thick teardrop.
The rounded side becomes the fox’s chest while the narrower end becomes the back.
This foundation matters more than people think. If the body shape is wrong here, every step after this can feel awkward.
Spend a few extra minutes adjusting the proportions. The fox should look slightly chunky and relaxed rather than tall and skinny.
Press the bottom lightly against the table to create a stable base. It don’t need to be perfectly flat. Small imperfections actually help the finished piece look handmade.
Run a damp fingertip over any large cracks but avoid overworking the clay.
Step 2: Shape The Head And Attach It
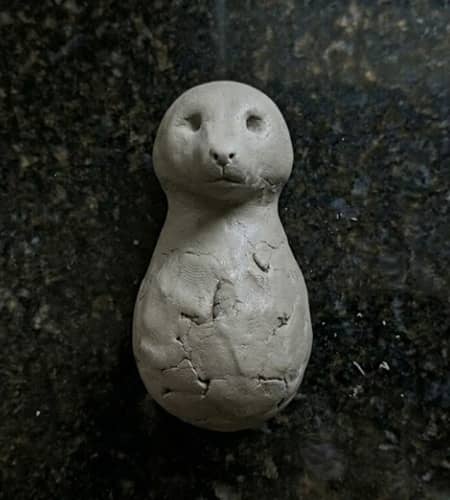
Roll another clay ball about half the size of the body.
Gently pinch one side to create a rounded muzzle. Think of a fox’s face as a soft triangle rather than a sharp point. Place the head onto the wider end of the body.
Before attaching, scratch both contact surfaces using a toothpick. Add a tiny drop of water. This acts like glue and helps prevent cracking later.
Press carefully. Not too hard though.
Blend the seam using your fingertip until the neck area looks natural. The fox should now have a clear body and head structure. Already starting to resemble a woodland creature, right?
Step 3: Create Oversized Fox Ears
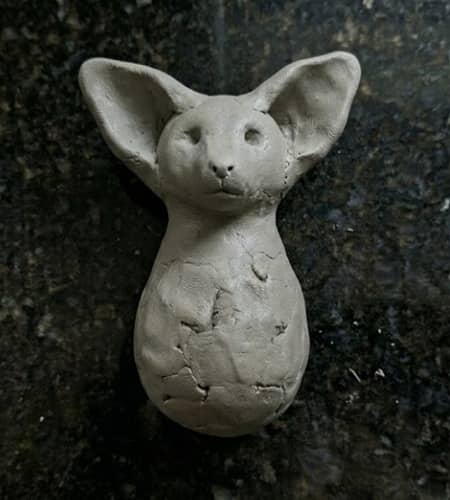
Fox ears bring the personality.
Roll two equal clay balls. Shape each into a triangle by pinching one end.
Flatten slightly while keeping thickness. Super thin ears may crack during drying.
Put one ear on each side of the head. Tilt them outward just a little. Perfect symmetry is overrated anyway. Real animals aren’t perfectly symmetrical and your fox don’t need to be either.
Blend the bottom edges where the ears meet the head.
Step back and look at the silhouette. Those oversized ears should immediately make the fox recognizable.
Step 4: Add Tiny Front Legs
Take two small clay cylinders.
Attach them vertically beneath the chest area. These front legs should look short and sturdy.
Instead of sculpting individual paws, keep the shape simple. Minimal details often look cleaner on small clay figurine projects.
Blend the tops into the body. Leave the lower ends slightly rounded.
At this stage the fox may look a little funny. That’s normal. Every sculpt reaches an awkward phase before details bring it to life.
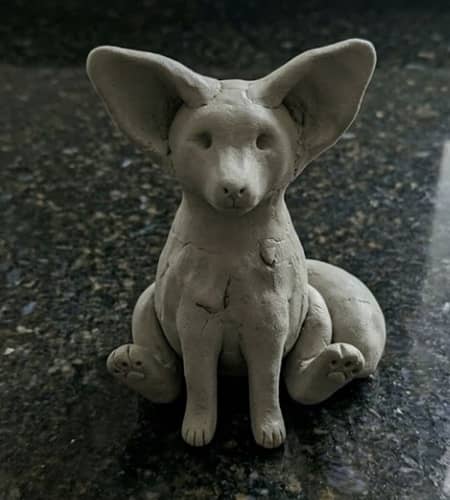
Step 5: Add Back Legs And Shape The Sitting Pose
Create two slightly larger clay pieces.
Attach them near the back of the body. Press gently and shape them into tucked sitting legs.
The goal is a relaxed woodland fox resting quietly. Not every clay fox diy needs to be standing. Sitting poses often feel warmer and more decorative.
Smooth connections using a damp fingertip.
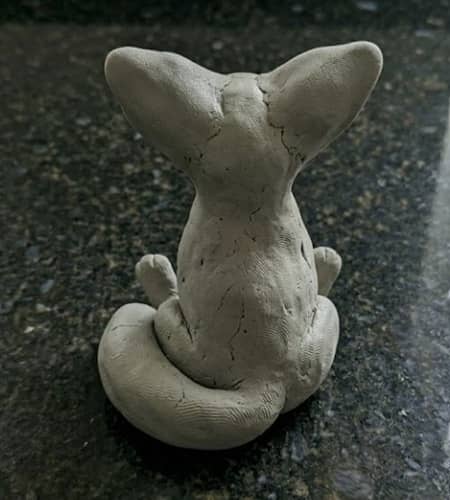
Step 6: Build The Signature Curled Tail
This is where the project starts becoming unique.
Roll a long clay rope.
Make one end slightly thicker than the other. Attach the thicker end near the back of the body.
Curve the tail around the fox’s side so it wraps partially around the front paws.
Fox tails are wonderfully dramatic. A curled tail instantly creates movement even though the sculpture is completely still.
Blend only the attachment point. Keep the rest of the tail distinct.
Step 7: Sculpt Facial Details
Using a toothpick, create two shallow eye indentations.
Press a tiny hole for the nose.
Add subtle lines where the muzzle meets the face. Avoid deep grooves because they can look harsh after painting.
The face is surprisingly powerful. Tiny adjustments change the fox’s expression completely.
I usually aim for a peaceful sleepy look rather than an exaggerated cartoon face.
Let the sculpture dry completely according to the manufacturer’s instructions. Most air dry clay craft projects need 24 to 48 hours.
No shortcuts here. Seriously.
Step 8: Paint The Woodland Colors
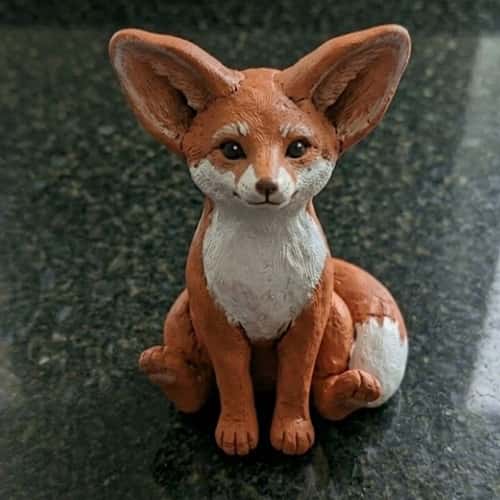
Once fully dry, paint the body a warm orange.
Leave areas for:
- White chest
- White muzzle
- White tail tip
- Black nose
- Black eyes
Allow the first coat to dry before applying another. Thin layers usually look better than one thick coat.
You may notice small bumps from the clay underneath. Thats actually part of the handmade charm.
Step 9: Add Character And Finish
Paint miniature noses and eyes using a delicate brush.
Add a little brown shading around the ears if desired.
Once dry, apply a matte sealer for extra durability.
Don’t overdecorate it.
The goal is a cozy woodland fox, not a toy store mascot. Sometimes the smallest details create the strongest visual impact.
Creative Variations
Once you’ve mastered this clay fox craft, try:
- Sleeping fox ornament
- Winter fox with scarf
- Mini fox family set
- Forest-themed shelf decor
- Fox magnet
- Fox pencil topper
- Seasonal autumn display
These ideas work equally well with clay toys, kids craft activities, and decorative clay fox crafts for adults.
Final Thoughts
One thing I love about making clay animals is how they quietly teach observation skills.
When you study a fox closely enough to sculpt one, you begin noticing details that usually get ignored – the curve of the tail, ear placement, body posture, even how balance affects appearance.
That awareness carries into other creative hobbies too. The interesting part is that handmade projects don’t become valuable because they’re flawless.
They become memorable because they capture decisions, mistakes, and personality. Every fingerprint left in this little fox tells part of the story, and no machine can really duplicate that.