There is something about a tiny black cat that instantly feels magical.
Maybe it’s the mystery. Maybe it’s the playful Halloween vibe. Or maybe black cats just have a way of stealing attention without even trying.
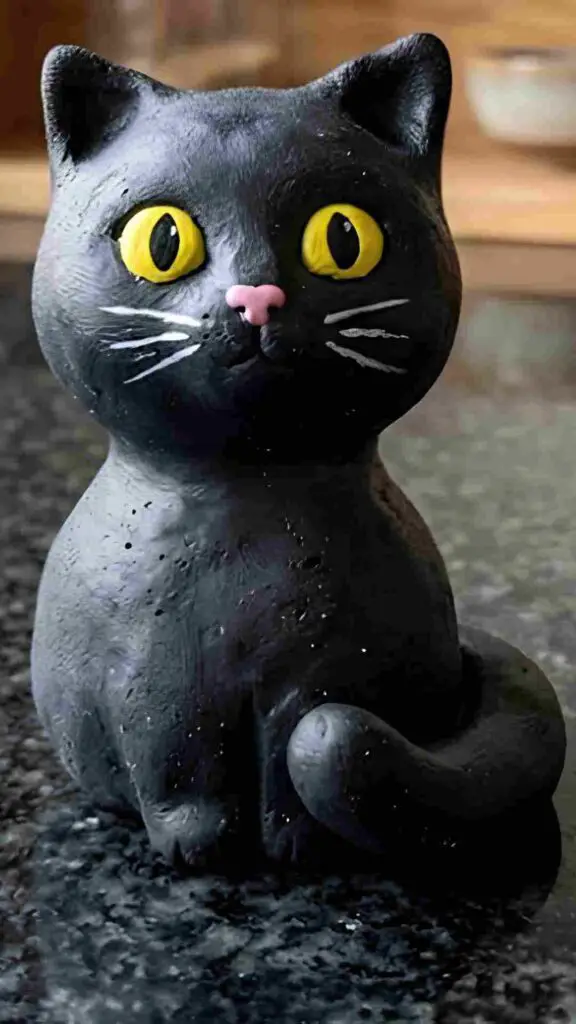
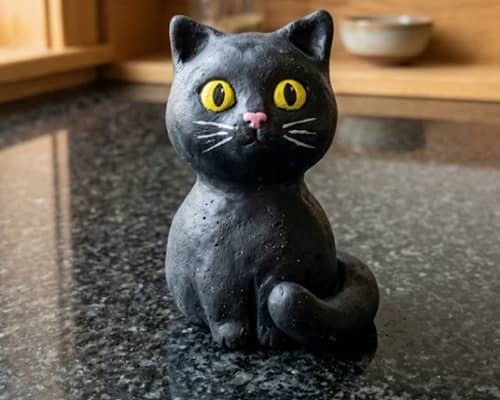
This black cat clay craft combines all of that into one beginner-friendly project that looks handmade, and charming.
I made this design intentionally simple so anyone can create it using air dry clay, even if you’ve never touched clay before.
If you enjoy clay animal crafts, mini clay figures, fall crafts, or creative Halloween crafts, this little cat might become your favorite weekend project.
Why This Black Cat Clay Craft Is Different
Most black cat tutorials focus on making a realistic cat. That’s nice, but I wanted something with more personality.
This version has an oversized head, tiny paws, a curled tail, and slightly uneven features that make it look like a fun project to be honest.
The imperfections actually make it cuter… and the funny thing is, the less perfect it looks, the more people seem to love it… atleast I noticed that.
And with this project… the finished cat sits upright and can be displayed on a shelf, tiered tray, desk, or Halloween centerpiece.
Supplies Needed To Make Clay Black Cat
- Air dry clay (black paint can be used later if needed)
- Acrylic black paint
- Small paintbrush
- Toothpick
- Clay sculpting tool or butter knife
- White acrylic paint
- Yellow acrylic paint
- Clear sealer (optional)
- Small cup of water
- Paper towel
Step 1: Create The Main Body Foundation

Start with a golf-ball-sized ball of clay.
Roll it gently between your palms. Don’t rush this part. A smooth base makes everything easier later.
Now shape the ball into a short pear shape. The wider section becomes the bottom while the narrower section becomes the neck area.
Place it on your work surface and lightly press the bottom so it stands by itself.
At this stage it should resemble a chunky bowling pin without arms.
Some people skip this shaping stage but it make a huge difference later.
Check that it stands upright without wobbling. If it leans, gently flatten the base again.
Step 2: Build The Oversized Head
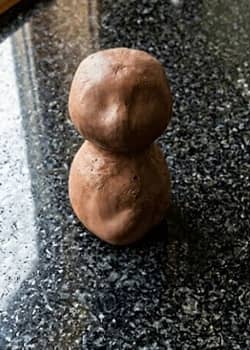
Take another piece of clay slightly larger than a ping pong ball.
Roll it into a round sphere.
Don’t worry if it isn’t perfectly round. Actually, a slightly uneven shape gives the cat more character.
Using a toothpick, insert half of it into the body.
Press the head onto the exposed portion.
Blend the connection carefully using your fingers.
You should now have a figure that looks a little bit like a snowman.
Not gonna lie, at this point it look weird. That’s completely normal.
Spend a few minutes smoothing the neck transition.
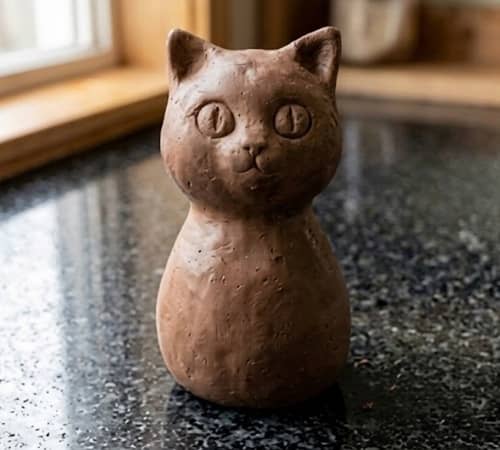
Step 3: Shape The Ears And Face
Pinch two small triangles of clay.
Attach them to the top of the head.
Make sure to press the base of each ear firmly into the head.
Now gently flatten the front portion of the face.
Using a rounded tool, press two shallow eye sockets.
Add a tiny raised nose in the center.
Keep everything soft and simple.
Many mini cats become difficult because creators add too much detail too early.
Less is more here.
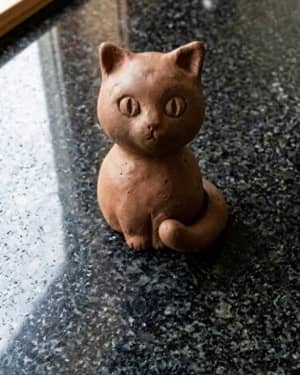
Step 4: Add Tiny Paws And Curled Tail
Roll four small clay cylinders.
Attach two to the front of the body as visible paws.
The rear paws can stay subtle and partially hidden.
Now roll a thin clay rope for the tail.
Curve it around the side of the body.
Let the tail wrap toward the front.
This little detail turns the project from ordinary to memorable.
A curled tail also helps create visual balance.
Honestly, the tail is where the whole cat starts feeling alive.
Smooth every attachment point carefully using a damp finger.
Step 5: Refine The Details Before Drying
Take a final look at the shape.
Is one ear too large?
Does the cat lean slightly?
Now is the time to fix those things.
Use a toothpick to lightly define the mouth.
Add tiny indents where whiskers will later be painted.
Avoid carving deep lines.
Air dry clay can crack if details become too aggressive.
The figure should now look complete even without paint.
Leave it somewhere safe to dry.
This could take 24 to 48 hours, depending on your clay.
It were tempting for me to paint early once. Big mistake.
Let it dry fully.
Step 6: Paint The Cat
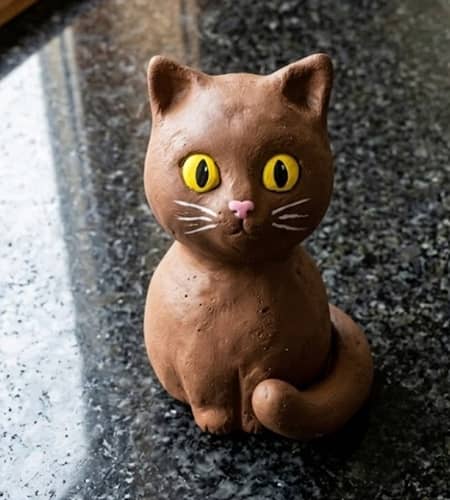
Once dry, apply black acrylic paint.
Two thin coats usually work better than one thick coat.
Allow each coat to dry before applying another.
Paint the eyes bright yellow.
Add tiny white highlights to make them sparkle.
Use white paint for whiskers.
You can even add a tiny purple bow if you want a whimsical Halloween look.
This is where the project crosses into spooky season crafts territory.
Suddenly it feels ready for October.
Step 7: Optional Aging Effect
Want something a little different?
Dry-brush a tiny amount of dark gray paint across raised areas.
The effect is subtle.
Very subtle.
But it creates depth and gives the cat an appearance similar to small decorative pieces found in cat ceramic ideas collections.
This technique is often used in DIY pottery and other fun ceramic projects to highlight texture.
That being said don’t overdo it.
One light pass is usually enough.
Creative Display Ideas
- Halloween tiered tray decoration
- Bookshelf accent piece
- Desk companion
- Fall centerpiece accessory
- Handmade gift for cat lovers
- Decorative piece for October crafts
- Addition to larger air dry clay crafts collection
Final Thoughts
Black cats have carried symbolism for centuries.
In some cultures they represent bad luck, while in others they’re considered protectors and bringers of good fortune.
That’s part of what makes this project interesting. You’re not just making another clay animal.
You’re creating something connected to folklore, seasonal traditions, storytelling, and creativity.
The next time you browse through Halloween crafts or fall crafts, notice how often black cats appear.
They have survived trends for generations. And honestly, a slightly crooked handmade black cat often feels far more special than something factory-made because every fingerprint tells a tiny part of the story.