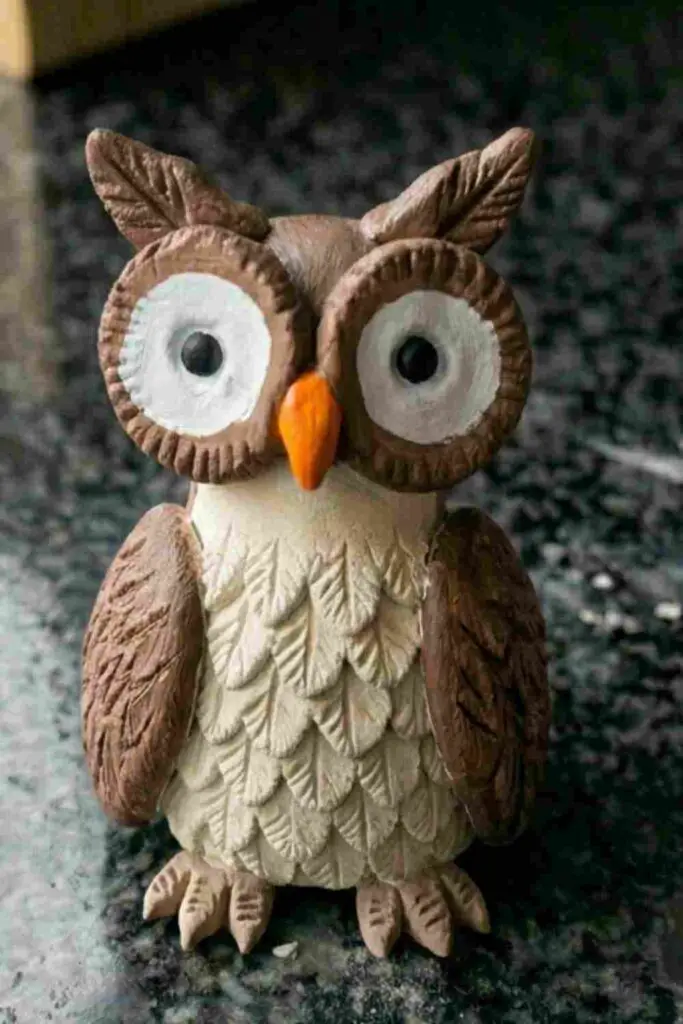
Have you ever looked at a tiny owl sitting on a tree branch and thought, “I wish I could make one myself”? That’s exactly what inspired this clay owl craft.
Instead of creating a perfectly polished owl, this project embraces tiny dents, uneven textures, and handmade character.
Those little imperfections make it feel alive. The best part? You only need a few basic supplies and some patience.
Whether you are exploring clay modelling for the first time or already enjoy making clay animals, this beginner-friendly project walks you through every detail.
By the end, you’ll have an adorable woodland owl that looks handcrafted, unique, and full of personality.
Supplies Needed To Make Clay Owl Craft
- Air dry clay (light brown or white)
- Clay sculpting tool or butter knife
- Toothpick
- Small paintbrush
- Acrylic paints (brown, cream, white, black, orange)
- Water in a small bowl
- Soft cloth
- Clear matte sealer (optional)
Why This Clay Owl Craft Is Different
Many clay owl crafts focus on making cartoon owls with oversized eyes.
This version creates a cozy woodland owl with layered feather textures and a slightly rounded body shape.
It feels more like a handmade clay figurine you might discover at a local craft fair.
If you’ve worked with Model Magic, polymer clay craft projects, or simple kids craft ideas before, you’ll find this project surprisingly relaxing.
Step 1: Shape The Owl Body
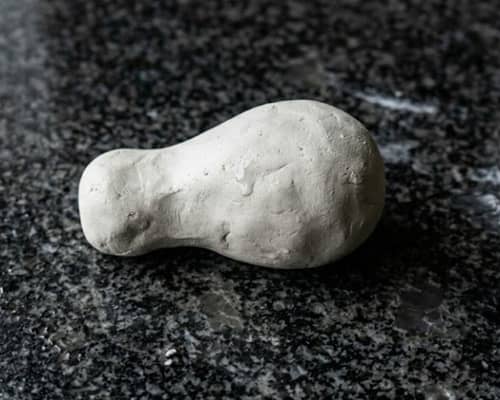
Take a ball of air dry clay about the size of a small lemon.
Roll it gently between your palms until smooth. Now press one side slightly narrower than the other. The wider side becomes the owl’s lower body while the narrower section forms the head.
Place it on your work surface and gently flatten the bottom. This helps the owl stand upright without wobbling.
Don’t worry if it isn’t perfectly symmetrical. Real handmade pieces rarely are perfectly even.
Step 2: Create The Facial Disc
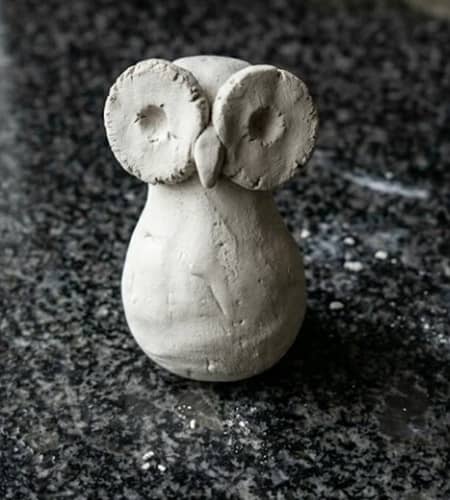
Owls have a distinctive face shape called a facial disc.
Roll two small clay balls.
Flatten them into thin circles roughly the size of coins.
Attach them side-by-side near the upper portion of the owl’s body. Use a tiny amount of water to help them stick.
Blend the outer edges carefully with your finger while keeping the center sections raised.
At this stage it may look a little funny. That’s normal, and it gets better fast.
Step 2.1: Form The Beak
Now, Roll a tiny piece of clay into a miniature triangle.
Position it directly between the eyes.
Press gently so the top edge blends into the face while the tip remains slightly raised.
A toothpick can help refine the shape.
Take your time here because the beak gives the owl much of its personality.
Mine always look slightly crooked and honestly it makes them more charming.
No owl are exactly alike anyway.
Step 3: Add Oversized Owl Eyes
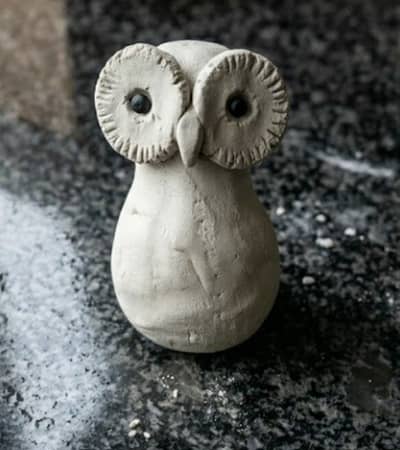
Roll two equal clay balls.
Press them into the center of the facial discs.
These become the eye sockets.
Use the back end of a paintbrush to create shallow indentations in the center.
Next, roll two tiny clay balls and place them inside the indentations as pupils.
Suddenly the owl starts looking back at you. Kinda weird, but also adorable.
Step 4: Build The Wings
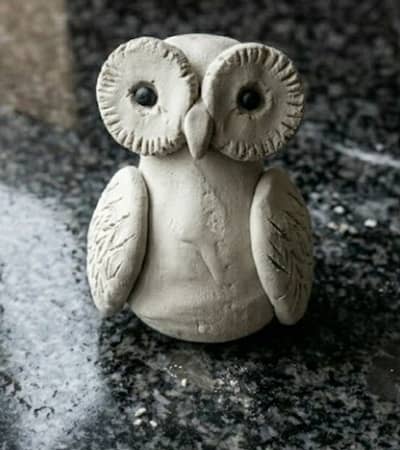
Take two equal portions of clay.
Shape each into a flat teardrop.
Attach one wing to each side of the body.
Blend only the upper section into the body while keeping the lower portions slightly lifted.
This creates depth and shadow.
Use a toothpick to draw short feather lines running downward.
Not too many though. A few textured marks often looks better than hundreds.
Step 5: Create Layered Feather Texture
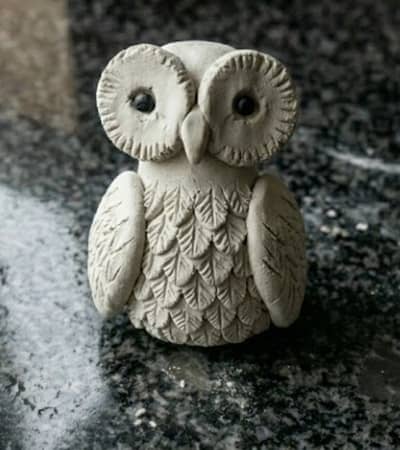
This is where the project becomes special.
Use the rounded end of a paintbrush, pen cap, or sculpting tool.
Starting near the chest area, press overlapping semicircle impressions across the owl’s belly.
Work row by row.
Each row should slightly overlap the previous one.
The texture creates the illusion of fluffy feathers without requiring advanced sculpting skills.
The process takes a little while but its strangely relaxing.
Step 6: Add Ear Tufts And Tiny Feet
Many woodland owls have subtle feather tufts.
Pinch two tiny pieces of clay and place them above the eyes.
Shape them into soft points.
For the feet, roll two thin clay strips.
Cut small notches to form toes.
Attach them at the bottom front of the owl.
Keep them slightly oversized because small details tend to shrink visually after drying.
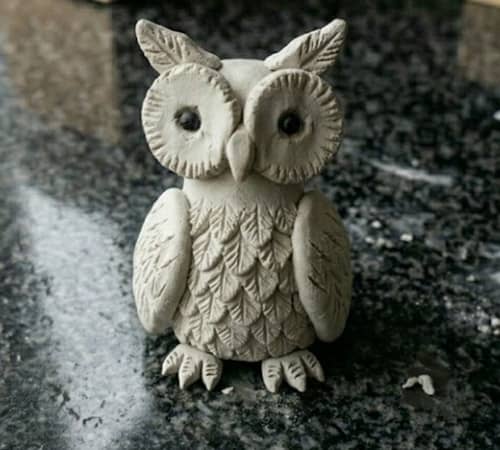
Step 7: Let The Owl Dry Completely
Place the owl somewhere flat and dry.
Most air dry clay projects require 24 to 48 hours.
Avoid direct sunlight.
Turning the owl occasionally helps ensure even drying.
This part tests patience. Seriously.
Touching it every hour wont make it dry faster.
Step 9: Paint The Woodland Owl
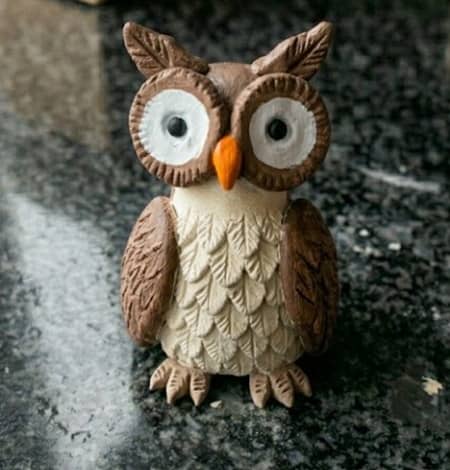
Start with a light cream base coat.
Allow it to dry fully.
Paint the wings and upper body in warm brown shades.
Use a darker brown to lightly highlight feather textures.
Add white around the eyes.
Paint the pupils black.
Finish with a small orange beak.
Dry brushing works wonderfully here because it enhances texture without hiding details.
The owl begins looking almost storybook-like at this point.
Step 10: Seal And Display
Once the paint is fully dry, apply a matte sealer if desired.
This protects the surface and reduces dust buildup.
Display the owl on a shelf, desk, reading nook, or seasonal nature-themed centerpiece.
You can even create a family of owls using different sizes.
That’s where things starts getting addictive.
Creative Variations
Once you’ve mastered this easy clay owl project, try:
- Snowy owl version with white paint
- Autumn owl with orange feather accents
- Miniature owl ornaments
- Owl magnets
- Owl family display sets
- Forest-themed clay toys
- Mixed-media animal crafts with twigs and acorns
You can even adapt the design for polymer clay craft projects if you’d like a more durable finished piece.
Final Thoughts
Something interesting about owls is that humans naturally connect with them because of their forward-facing eyes.
Most birds have eyes positioned on the sides of their heads, but owls appear to “look back” at us.
That simple feature makes them feel expressive and relatable. When creating a clay owl craft, you’re not just shaping air dry clay into a bird.
You’re building a tiny character with its own personality. The small dents, uneven feathers, and imperfect details often become the parts people notice first. That’s why handmade creations feel different from factory-made decorations.
They carry evidence of the maker’s hands, and that’s a quality no machine can truly replicate.