A plain lighter works. But a clay lighter case turns something ordinary into a tiny piece of pocket-sized art. That is exactly why I love this project.
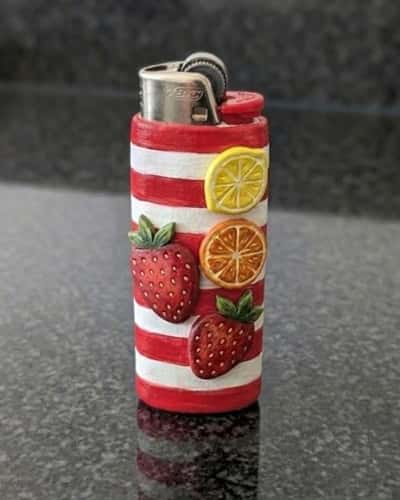
For this tutorial, we’re creating a handmade clay lighter case inspired by a miniature fruit basket.
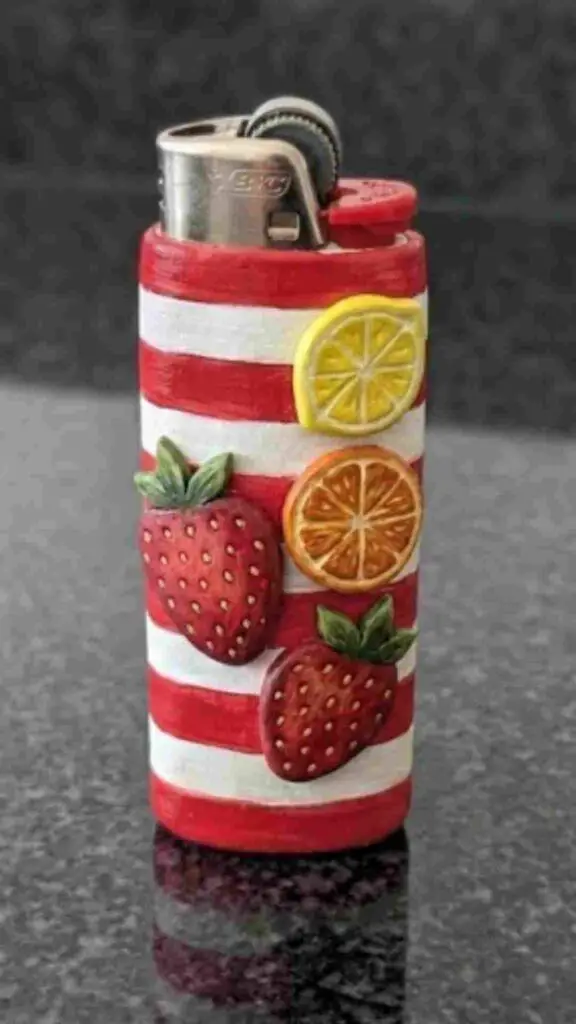
Instead of making another generic cover with random flowers or hearts, this design uses tiny sculpted fruits wrapped around the lighter for a playful and textured finish.
The final result looks homemade, slightly imperfect, and full of personality.
The best part? You don’t need advanced sculpting skills. If you can roll tiny balls of clay and press shapes with your fingers, you can make this diy clay lighter case. I actually think small imperfections makes it look even more charming.
This project uses air dry clay, simple household tools, and optional resin coating for extra shine and durability. Ready to make something people will actually stop and look at?
Materials Needed To Make Clay Lighter Case
- Standard disposable lighter
- Air dry clay
- Light clay for small fruit details (optional)
- Clay sculpting tool or toothpick
- Rolling pin or smooth bottle
- Small paintbrush
- Acrylic paints
- Clear varnish or UV resin
- Sandpaper (fine grit)
- Craft knife
- Small cup of water
- Silicone mat or baking paper
Step 1: Create the Base Shell
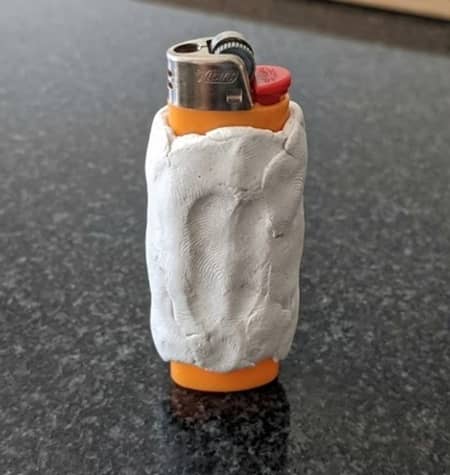
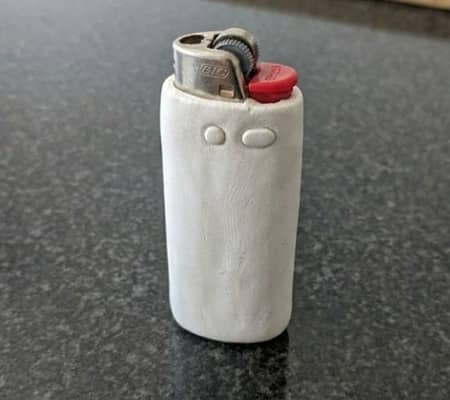
Every good clay lighter case starts with a solid foundation.
Place your lighter on a sheet of baking paper. Roll your air dry clay until it is roughly 3 to 4 mm thick.
Don’t make it paper thin because it may crack later. Also don’t make it too thick or your lighter starts looking like a brick.
Wrap the clay around three sides of the lighter. Leave the ignition wheel, gas button, and flame opening completely exposed.
Press gently with your fingers to remove large air pockets. Smooth the seams using a tiny bit of water on your fingertip.
At this stage it looks boring. Thats perfectly normal.
Let the shell sit for about 20 minutes so it firms up slightly before adding decorations.
Step 2: Sketch the Fruit Basket Layout
Before sticking random fruits everywhere, plan the design.
Use a toothpick and lightly draw guide lines across the clay surface. Think of the lighter as a tiny basket overflowing with fruit.
Place larger fruits near the center and smaller fruits near the edges. This creates balance and prevents the design from feeling crowded.
I like to leave small gaps between fruits. Many beginners don’t, and then everything turns into one giant clay blob.
Mark locations for:
- Strawberries
- Mini oranges
- Lemons
- Cherries
- Tiny leaves
The case already starts feeling alive here.
Step 3: Sculpt the Strawberries
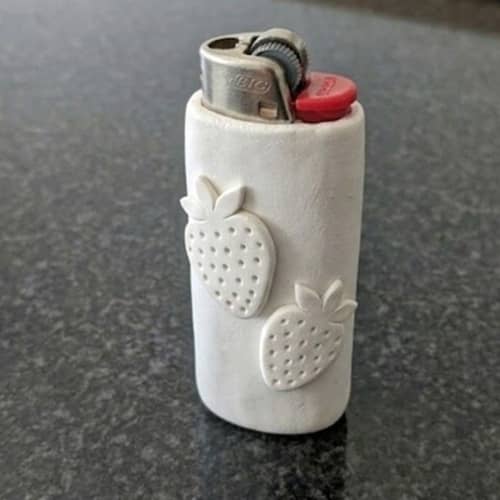
Roll several small red-clay-sized balls.
Turn each ball into a teardrop shape. Flatten slightly.
Use a toothpick to create tiny seed dents all over the surface. Don’t make them perfectly aligned. Real strawberries aren’t manufactured in a factory.
Attach the strawberries using a small dab of water.
Press gently so they bond to the base shell.
One strawberry may look weird. Three together suddenly looks amazing.
Step 4: Add Tiny Oranges and Lemons
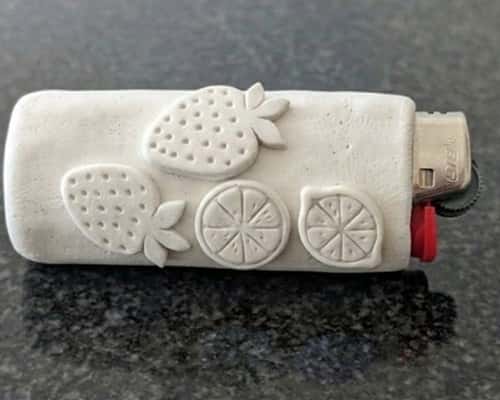
Now comes my favorite part.
Roll tiny balls for oranges and slightly oval shapes for lemons.
Instead of leaving them smooth, gently tap the surface with a rough sponge or toothbrush. This creates subtle citrus texture.
Attach them around the strawberries.
Try clustering fruits naturally. Fruits rarely sit in perfect rows, and neither should yours.
This part is surprisingly relaxing.
You will probably start inventing more fruit combinations than you originally planned.
Step 5: Build Small Cherries and Leaves (No compulsions)
Roll tiny cherry-sized balls.
Join two together with a thin clay stem.
For leaves, flatten tiny pieces of green clay and score veins using a toothpick.
Place leaves between fruits rather than on top of them.
The leaves create separation and make each fruit design stand out better.
Honestly, this is the step where the entire clay craft suddenly transforms from “interesting” to “wow.”
Step 6: Create the Basket Texture
Without basket texture, the fruit theme feels incomplete.
Roll very thin clay ropes.
Lay them diagonally across empty spaces between fruits.
Add another set crossing in the opposite direction.
This creates a woven basket effect.
Press lightly where the strands intersect.
Some lines may not be perfectly straight. That actually helps the handmade appearance.
Mine never comes out perfectly straight and nobody have ever complained.
Allow everything to dry completely.
Depending on humidity, this may take 24 to 48 hours.
Step 7: Sand and Refine
Once fully dry, inspect the surface carefully.
Use fine-grit sandpaper to soften rough edges.
Remove accidental fingerprints.
Don’t over-sand the fruit texture. Those details are what make the clay lighter case interesting.
If small cracks appear, fill them with watered-down clay and let dry again.
Take your time here.
The final finish depends heavily on this stage.
Step 8: Paint the Fruit Details
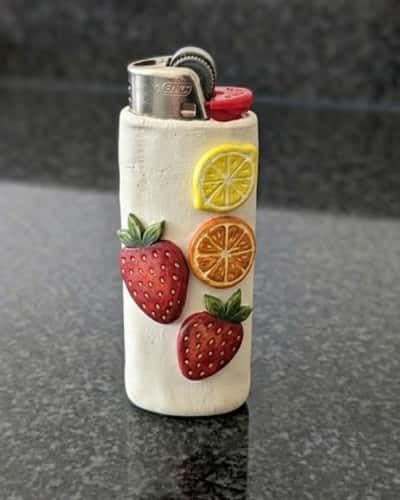
Use acrylic paints.
Paint strawberries rich red.
Paint oranges warm orange.
Paint lemons bright yellow.
Paint leaves various shades of green rather than a single flat green.
Add tiny highlights using a lighter color on one side of each fruit.
This creates depth even on a miniature surface.
A little shading goes a long way.
Too much shading looks strange real fast.
Step 9: Apply Protective Finish
You can stop here.
Or make it look extra special.
For a matte finish, use clear craft varnish.
For a glossy candy-like appearance, apply a thin resin coating using UV resin. Some crafters search for uv rfesin products online and use them for projects like this.
Work in thin layers.
Too much resin creates drips.
Allow proper curing according to the product instructions.
The glossy finish makes the cute fruit details pop beautifully.
Tips for Beginners Working With Clay
- Use smaller fruit pieces than you think you need.
- Let the base shell firm up before decorating.
- Keep the ignition area completely uncovered.
- Work in layers instead of adding everything at once.
- Air dry clay shrinks slightly during drying.
- Light clay can be useful for tiny decorative details.
- Practice one fruit shape before attaching multiple versions.
This project works well as one of those quick crafts that can be completed over a weekend while still looking surprisingly detailed.
Final Thoughts
Miniature craft projects teach something bigger than technique.
They train your eye to notice scale, texture, and composition.
A clay lighter case might seem like a small object, yet it combines sculpting, design planning, painting, and finishing skills into one compact project.
That’s why so many beginner crafts eventually lead people toward more advanced clay art.
The fruit basket concept can also be adapted into best fruits themes, seasonal designs, or even personalized gifts.
Once you understand how to build layered textures around a simple object, suddenly dozens of new clay craft ideas start appearing everywhere you look.