There is something oddly satisfying about turning a lump of clay into a keepsake you actually want to display.
Most people think of a clay ornament as a holiday project, but honestly, some of the most beautiful clay ornament designs feel right at home during warm weather too.
This collection leans into nature, sunshine, and creative textures rather than traditional seasonal themes.
If you enjoy summer clay crafts, experimenting with air dry clay, or simply want fresh clay designs that don’t look like everyone else’s Pinterest projects, these ideas are for you.
Grab your clay, clear a small workspace, and let’s make something that feels handmade in the best possible way.
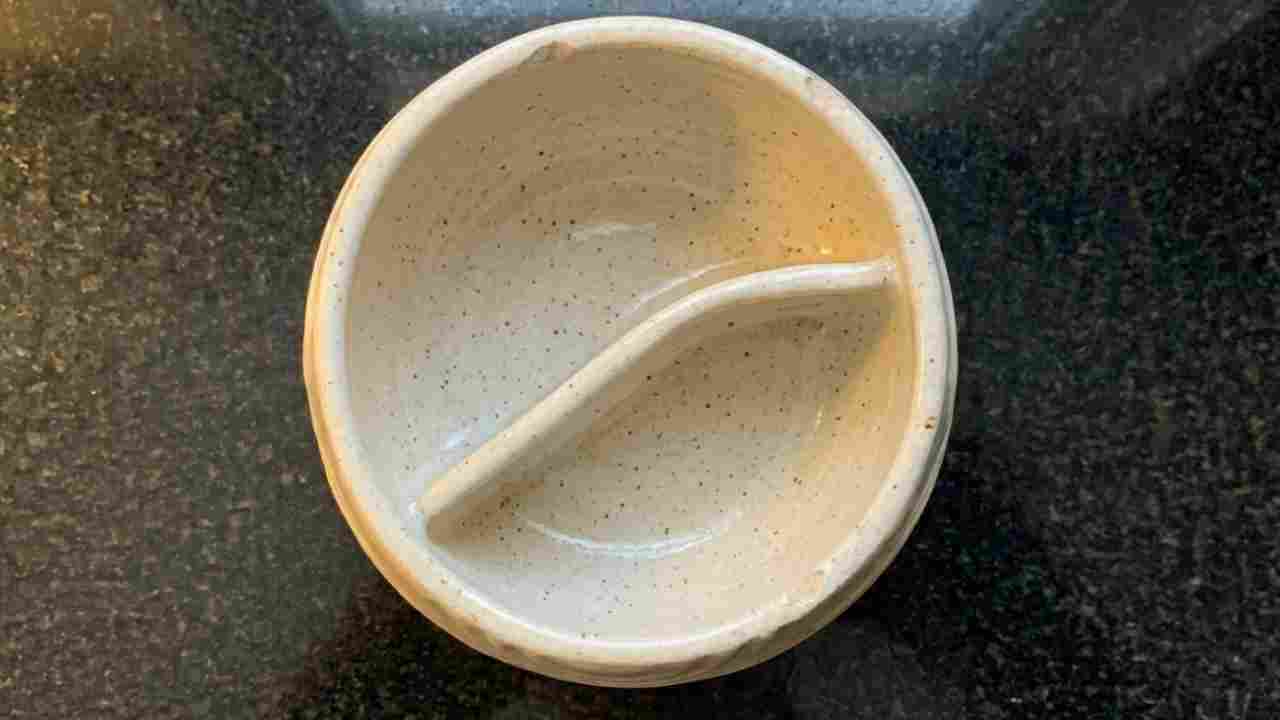
1. Sunburst Ripple Clay Ornament
This ornament captures the look of sunlight spreading across calm water. It feels modern yet handmade, which is why I love it for summer clay craft projects.
Start with a golf-ball-sized piece of air dry clay. Roll it into a smooth ball first. Then flatten it using an acrylic roller until it is about ¼ inch thick.
Use a round cookie cutter or the rim of a glass to cut a perfect circle. Smooth the edges with your fingertip dipped lightly in water.
Now find the center of the circle. Using a toothpick, gently press a tiny dot into the middle.
From that center point, create curved ripple lines radiating outward. Do not make them perfectly straight. Real water doesn’t behave that way.
Next, use the back of a paintbrush handle to deepen every second ripple line. This creates contrast and gives the ornament more dimension.
Poke a hanging hole about ½ inch from the top edge using a straw.
Give the clay a full day or two to dry. Flip it halfway through drying so both sides cure evenly.
Once dry, lightly sand rough spots with fine-grit sandpaper.
Paint the raised ripples with soft white paint while leaving the recessed lines natural clay color. Seal with a matte varnish.
The best part? No two ripples ever turns out identical.
2. Pressed Lavender Stem Ornament
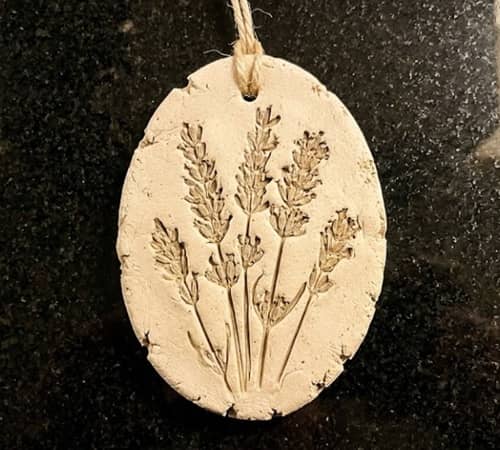
This design feels like summer trapped inside clay.
Take a piece of air dry clay and roll it into an oval shape approximately 4 inches tall.
Smooth the surface carefully because every little bump will show after pressing.
Find a fresh lavender stem. If lavender isn’t available, use rosemary or any thin flowering stem.
Place the stem gently on the clay. Roll over it very lightly using your roller. Lift the stem straight upward rather than pulling sideways.
You should see a detailed botanical impression left behind.
Now refine the edges using a craft knife. Slightly irregular edges actually looks prettier here.
Create a hanging hole near the top.
Let the clay dry completely.
After drying, use diluted purple paint and lightly brush over the flower impressions. Immediately wipe the surface with a paper towel. The paint remains inside the recessed details, highlighting the pattern.
Finish with a satin sealer.
Many easy clay ornaments rely on paint for beauty. This one gets most of its charm from texture alone.
3. Driftwood Texture Pendant Ornament
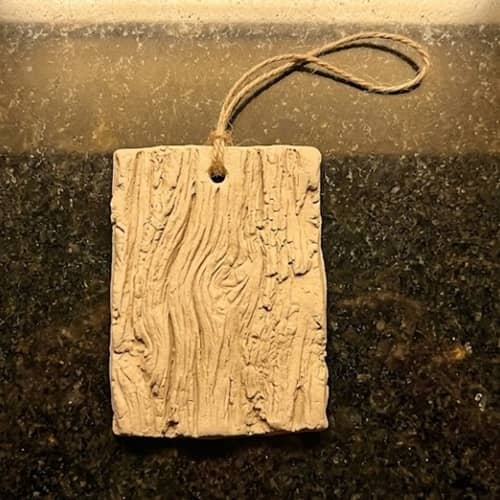
Most diy clay ornaments focus on smooth surfaces. This one celebrates roughness instead.
Roll out your clay into a rectangle approximately 4 inches long.
Round the corners slightly using your fingers.
Before adding texture, gently brush the clay surface with a damp paintbrush.
Find a piece of clean driftwood, tree bark, or even a rough wooden kitchen utensil. Press it firmly into the clay surface.
Lift carefully.
You should see an organic grain pattern that resembles weathered wood.
Now use a toothpick to add tiny cracks and irregular grooves in random areas. Keep them subtle.
Create a hanging hole at the top.
Allow the ornament to dry thoroughly.
Once cured, dry-brush tan and cream paint across the raised texture. Use very little paint. The goal is to mimic aged driftwood rather than fully cover the clay.
Seal with matte varnish.
This project works especially well for people exploring clay ornament crafts for the first time because the imperfections actually improve the final result.
It don’t need perfect carving skills to look impressive.
4. Seashell Spiral Memory Clay Ornament
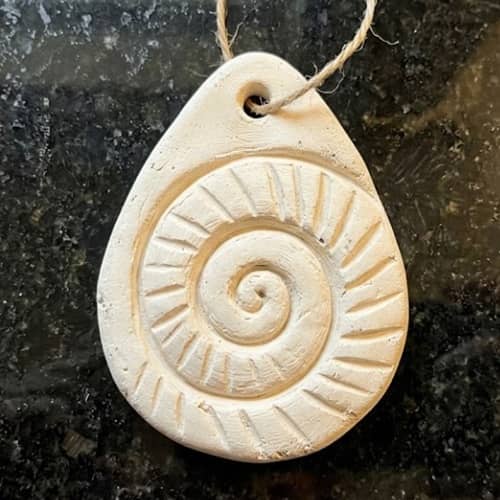
Summer and seashells go together naturally, but instead of attaching an actual shell, this ornament captures the shape in clay itself. It feels a little more artistic and a lot more unique.
Start with a piece of air dry clay about the size of a small lemon. Roll it out until it is roughly ¼ inch thick.
Using a craft knife, cut a teardrop shape about 4 inches long. This will become the shell body.
Beginning at the pointed end, use a pencil tip to lightly sketch a spiral that gradually expands toward the wider end.
Once you’re happy with the placement, trace over the lines again with slightly more pressure.
Now comes the fun part. Take a toothpick and create tiny curved grooves following the spiral path. Work slowly. Don’t rush this section because the texture creates most of the realism.
Use the rounded end of a paintbrush handle to press shallow dents between some grooves. Real shells have irregularities and tiny imperfections.
Smooth the outer edges with a damp fingertip.
Create a hanging hole near the top.
Allow the ornament to dry fully. Turn it over after about 12 hours so both sides dry evenly.
After curing, lightly sand rough spots.
Paint with a very diluted mixture of ivory and beige paint. Let some natural clay show through. A shell that is overly painted can lose its charm.
Apply a matte sealer when finished.
Funny enough, the tiny imperfections often makes this look more realistic than a perfectly sculpted version.
5. Citrus Slice Window Clay Ornament

This is one of those clay ornament designs that instantly feels cheerful without needing bright paint.
Roll your air dry clay into a circle approximately 4 inches wide.
Use a smaller round object to lightly mark a center circle. This becomes the fruit core.
Next, divide the ornament into eight equal wedge sections using a ruler and toothpick.
Here’s where it gets interesting.
Using a craft knife, carefully cut small triangular openings between the center circle and outer edge. Leave enough clay between sections so the ornament remains strong.
The openings create a stained-glass effect when hung near a window.
Round the edges of every cutout using a damp paintbrush.
Add tiny texture marks inside each fruit segment with a needle tool or toothpick.
Create a hanging hole at the top.
Let dry completely.
Paint the outer ring a soft orange, lemon yellow, or grapefruit pink. Keep the center lighter for contrast.
Once sealed, the ornament catches light beautifully through the open sections.
There are lots of summer crafts out there, but few feel this bright without being overly complicated.
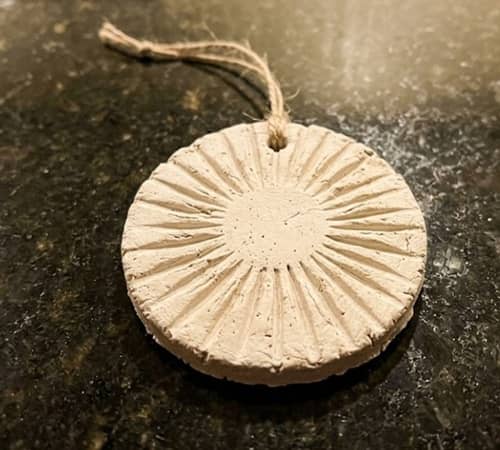
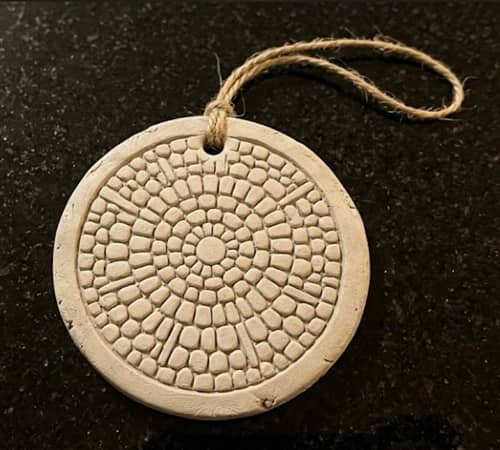
6. Sand Dollar Inspired Texture Ornament

If you’ve ever found a sand dollar at the beach, you’ll recognize the inspiration behind this project immediately.
Roll a piece of clay into a circle about 3½ inches across.
Flatten evenly and smooth the surface carefully.
Lightly sketch a five-petal star shape in the center using a pencil. Keep it soft and delicate.
Using a toothpick, deepen the lines slightly.
Now create rows of tiny dots radiating outward from the center design. The easiest method is pressing the tip of a mechanical pencil into the clay repeatedly.
Work slowly in circular rows until the surface develops that distinctive sand dollar texture.
Don’t worry if the spacing isn’t perfect. Nature rarely follows a ruler.
Add a hanging hole.
Allow the ornament to dry for 24 to 48 hours.
Once dry, paint with a very thin wash of ivory or cream paint. Wipe away excess immediately so the recessed textures remain visible.
Finish with matte sealer.
This ornament photographs beautifully because the texture creates shadows from almost every angle.
Sometimes the simplest diy air dry clay ornaments end up looking the most sophisticated.
7. Floating Water Lily Clay Ornament
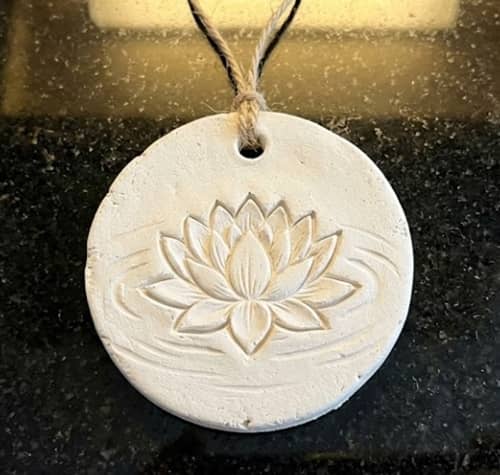
Most clay ornament designs focus on objects. This one captures a tiny summer moment instead.
Start by rolling air dry clay to about ¼ inch thickness.
Cut a circle roughly 4 inches wide.
Now lightly sketch a water lily shape in the center. Draw several pointed petals radiating outward from a small circular middle.
Using a craft knife, carefully carve shallow lines between each petal. Do not cut all the way through.
Next, use a ball stylus or the rounded end of a paintbrush to gently press the center of each petal downward. This gives the flower a natural layered appearance.
Around the flower, create soft curved lines representing ripples on water. Vary the spacing. Nature likes surprises.
Smooth all edges using a damp fingertip.
Create a hanging hole near the top.
Allow the ornament to dry completely.
Once dry, paint the flower pale pink or white. Leave the surrounding clay mostly natural. A little contrast goes a long way.
Seal with a matte finish.
This project looks complicated at first glance, but it actually comes together quicker than you’d think.
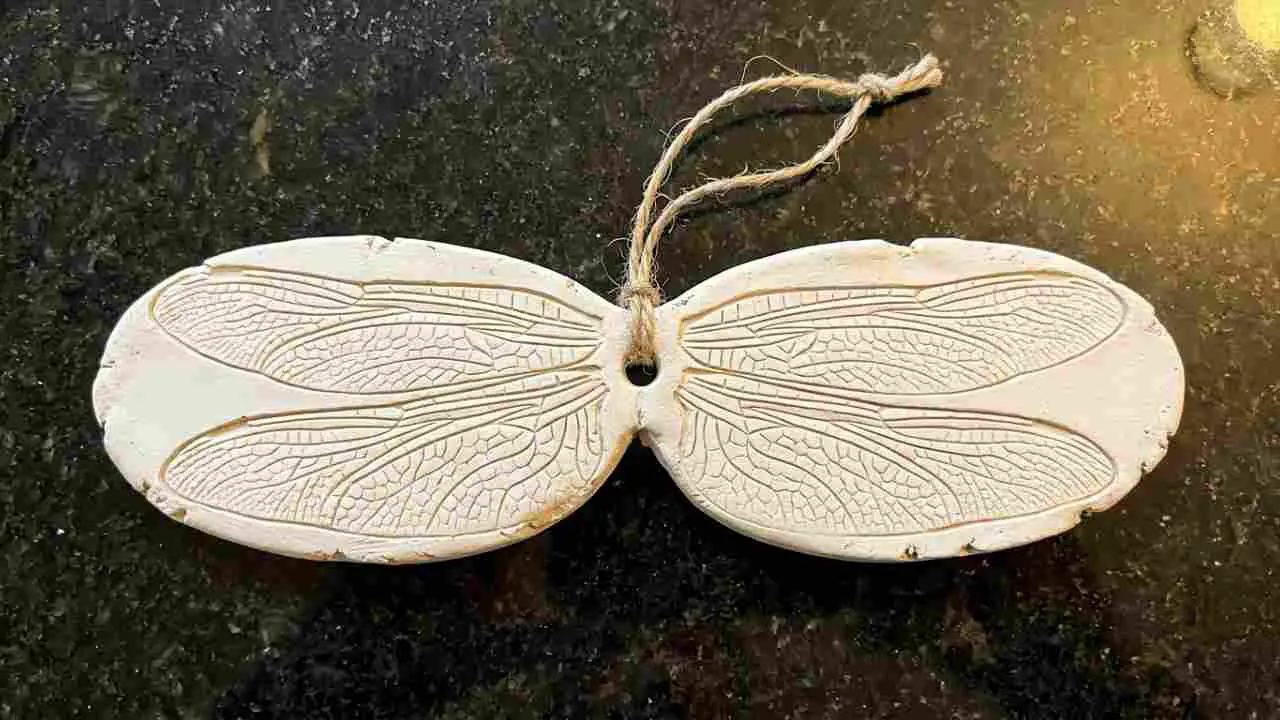
8. Dragonfly Wing Impression Ornament
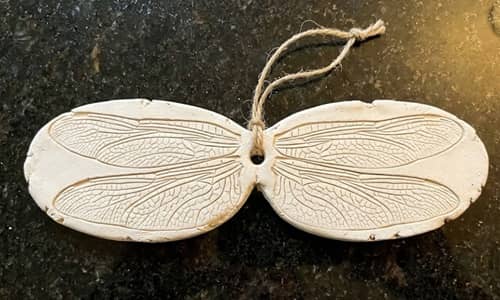
Dragonflies seem to appear everywhere once summer arrives. This ornament captures their delicate wings without needing advanced sculpting skills.
Roll out a slab of air dry clay approximately ¼ inch thick.
Cut a long oval shape around 4 inches tall.
Lightly sketch a dragonfly silhouette in the center.
Now use a toothpick to create the body first. Keep it simple.
For the wings, draw four elongated shapes extending from the body.
Here’s where the magic happens.
Use a needle tool or toothpick to create a network of intersecting veins inside each wing. Work from the body outward just like real dragonfly wings.
Do not make every line identical. Slight variations create realism.
Add tiny texture dots along the body.
Create a hanging hole at the top.
Allow the clay to dry thoroughly.
After drying, lightly brush pearl white paint across only the wing sections while leaving the body natural clay color.
Seal with a satin finish.
A lot of people think intricate wing patterns are difficult. They isn’t as hard as they looks once you start.
9. Sun-Faded Beach Umbrella Ornament
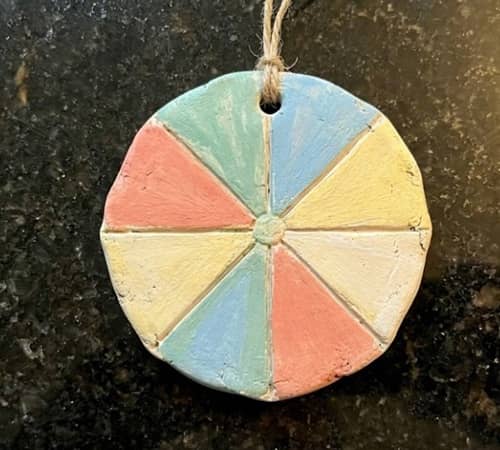
This ornament feels playful and nostalgic. It reminds me of old beach photographs where the colors have softened over time.
Begin by rolling your clay into a circle about 4 inches wide.
Use a ruler to divide the circle into eight equal pie-shaped sections.
In the center, press a tiny circular indentation.
Using a toothpick, deepen each dividing line so the ornament resembles an umbrella viewed from above.
Next, slightly round every section by pressing gently with your fingertip. This subtle shaping adds depth.
Around the outer edge, create tiny stitched marks using a needle tool. These imitate fabric seams.
Smooth the ornament edges carefully.
Create a hanging hole.
Allow it to dry completely.
Paint alternating sections in faded coral, pale yellow, and soft turquoise. Keep colors slightly muted rather than bright.
Once dry, apply a matte sealer.
Many clay ornament crafts lean heavily into flowers and leaves. This one feels summery without using either.
It were inspired by those vintage seaside postcards people used to send decades ago.
10. Tide Pool Pebble Mosaic Clay Ornament
If you’ve ever looked into a shallow tide pool, you know how beautiful random little stones can look together. This ornament recreates that feeling using texture rather than actual pebbles.
Begin with a piece of air dry clay and roll it into a circle about 4 inches wide and ¼ inch thick.
Smooth the surface completely.
Using the rounded end of a paintbrush, press overlapping pebble shapes across the entire ornament. Make some large, some tiny. Avoid making rows because nature never organizes itself that neatly.
Once the pebble outlines are in place, deepen a few randomly to create depth.
Now use a toothpick to add tiny cracks and irregular marks inside some of the pebble sections.
Create a hanging hole near the top.
Let the ornament dry fully.
After drying, lightly paint individual pebble sections using muted shades of beige, sandstone, pale gray, and soft cream. Leave a few completely unpainted.
Do not aim for perfection. A perfectly colored mosaic often looks fake.
Seal everything with a matte finish.
One thing I really like about this project is that every version ends up looking different, even when following the exact same steps.
11. Fern Shadow Silhouette Ornament

Most botanical ornaments focus on pressing leaves directly into clay. This one creates a shadow effect instead, which makes it stand out from many common diy clay ornaments.
Roll out your clay until it reaches approximately ¼ inch thickness.
Cut a tall arch shape about 4 inches high.
Place a fern frond on the clay surface.
Instead of pressing it deeply, lightly trace around the outside edges using a needle tool.
Remove the fern.
You should now see a faint outline.
Using a toothpick, carefully lower the clay surrounding the outline by pressing it down slightly. Leave the traced fern raised.
Work slowly and gradually. This step creates the illusion of a shadow silhouette.
Smooth rough spots using a damp paintbrush.
Add a hanging hole.
Allow the ornament to dry thoroughly.
After drying, apply a very light wash of greenish-gray paint around the lowered background area while keeping the raised fern mostly natural.
Seal with matte varnish.
The raised silhouette catches shadows beautifully, especially when displayed near a wall.
And honestly, it look much harder to make than it actually is.
12. Starfish Trail Clay Ornament
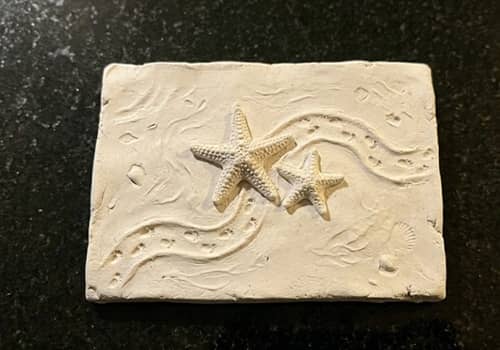
This ornament tells a tiny story rather than simply showing an object.
Start by rolling air dry clay into a rounded rectangle approximately 4 inches long.
Smooth the surface carefully.
In one corner, sketch a small five-armed starfish.
Use a toothpick to define the arms and create tiny dotted textures across the surface of the starfish.
Now create a winding trail extending away from the starfish. Imagine it slowly moving across wet sand.
Use the rounded end of a paintbrush to create shallow footprints and small depressions along the path.
Add tiny shell-like marks and miniature ripple textures around the trail.
Do not overcrowd the design. Empty space helps the story feel believable.
Create a hanging hole at the top.
Allow the ornament to dry completely.
Paint the starfish a soft sandy beige while keeping the rest of the ornament mostly natural clay color.
Finish with matte sealer.
Many easy clay ornaments show a single shape. This one feels more alive because there is movement built into the design.
The little trail almost makes you wonder where the starfish is heading next.
Final Thoughts
One thing that often gets overlooked in clay ornament crafts is storytelling.
A great clay ornament does not need complicated sculpting, expensive tools, or advanced artistic skills.
What makes people stop and look is usually the idea behind it. A ripple can remind someone of a lake vacation.
A shell texture can bring back memories of a beach walk. That’s why many experienced makers focus less on perfection and more on creating texture, movement, and emotion.
The next time you try air drying clay Christmas ornaments, diy air dry clay ornaments, or other clay activities, think beyond shapes.
Try capturing a moment instead. That’s where truly memorable clay designs often begin.