Have you ever looked at an axolotl and thought, “That face would be ridiculously cute in clay”? This air dry clay axolotl craft takes that idea and turns it into a tiny handmade creature with a chunky body, oversized head, rosy gills, and a wonderfully imperfect expression.
It’s an easy project for beginners, and you don’t need a pottery wheel, kiln, or complicated sculpting tools.
Just some air dry clay, your fingers, and a little patience. The best part? Every axolotl comes out slightly different.
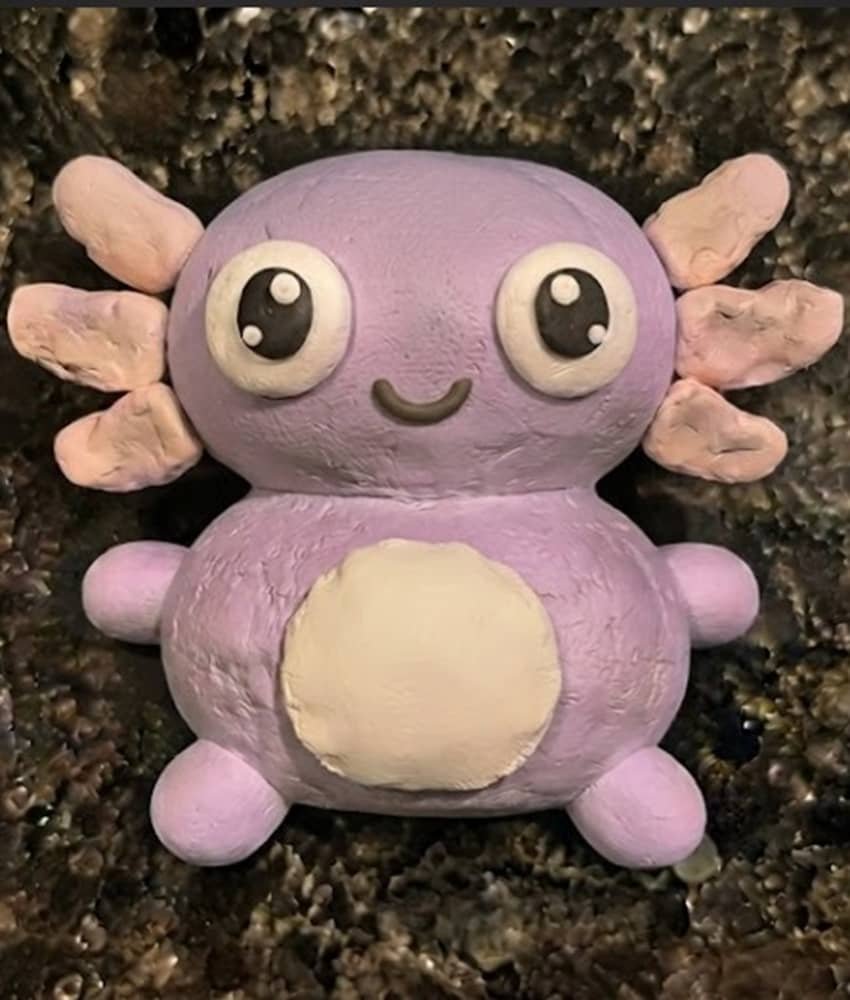
That handmade wobbliness is actually what makes this air dry clay craft so charming.
What Makes This Air Dry Clay Axolotl Craft Different?
Instead of creating a flat axolotl shape, we’re making a small three-dimensional clay figurine that looks almost like it could waddle across your desk.
The special twist is the oversized head-to-body ratio.
Axolotls naturally have broad heads and tiny limbs, so exaggerating those features makes the finished sculpture instantly recognizable.
We’ll also add:
- Soft pink external gills
- Large rounded eyes
- A tiny smiling mouth
- Four simple feet
- A subtle belly detail
- Slightly uneven handmade textures
And yes, those imperfections are welcome. In fact, they make the little creature look handmade rather than factory-produced.
Choose Your Air Dry Clay Type
Regular Air Dry Clay | Cornstarch Clay | Homemade Clay
Affiliate Disclaimer: Some of the links in this post may be affiliate links, which means I may earn a small commission if you choose to make a purchase through them – at no extra cost to you. I only share products that genuinely fit this project and can help make your ceramic mug clay craft process easier and smoother. Your support helps keep ideas like this coming.
Materials Needed To Make Air Dry Clay Axolotl Craft
Keep the supply list simple, especially if children are joining in.
- Child-friendly air dry clay
- Small amount of pink or peach clay
- Black clay for the pupils
- White clay for eye highlights
- Optional green, blue, or pale pink clay for the belly detail
- A smooth work surface such as shiny granite
- A clean damp fingertip for smoothing
Choose a non-toxic, kid-friendly air dry clay suitable for the child’s age.
You don’t really need sculpting tools for this version. Fingers work surprisingly well!
Avoid sharp modeling tools. Little fingers can do almost everything needed here.
Step 1: Prepare the Main Clay Ball
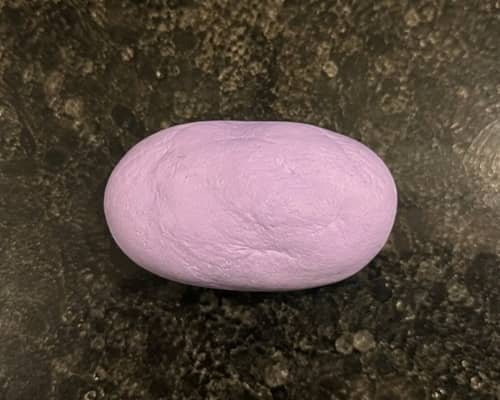
Start by taking a generous piece of your main body-color clay.
A soft lavender, pale pink, light blue, or creamy white can work beautifully, but you can absolutely invent your own axolotl color.
Roll the clay gently between your palms until it becomes a smooth ball.
Don’t obsess over making it perfectly round.
Now press the ball very lightly against the work surface and rotate it between your fingers.
The goal is to create a short, chunky oval, not a flat pancake.
This will become the axolotl’s body, so keep it fairly thick.
A useful beginner trick is to imagine a small marshmallow rather than a pebble. The body should have enough volume to support the head later.
Step 2: Shape the Oversized Head
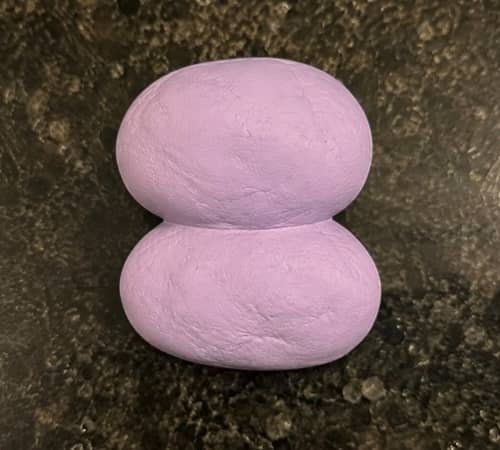
Take another piece of the same clay, slightly smaller than the body.
Roll it into a ball first.
Now gently press the sides and bottom with your fingers to create a wide rounded head.
The head should be noticeably wider than the body. That’s important because it gives our axolotl that adorable cartoon-like silhouette.
Place the head against the top portion of the existing body.
Don’t flatten it completely into the body. Instead, gently press around the joining area until the two pieces hold together.
Use your fingertip to soften the seam.
If a small seam remains, don’t worry. Handmade clay is allowed to look handmade.
At this stage, the sculpture should already resemble a tiny creature with a large head and little body.
Step 3: Give the Axolotl Its Four Little Feet
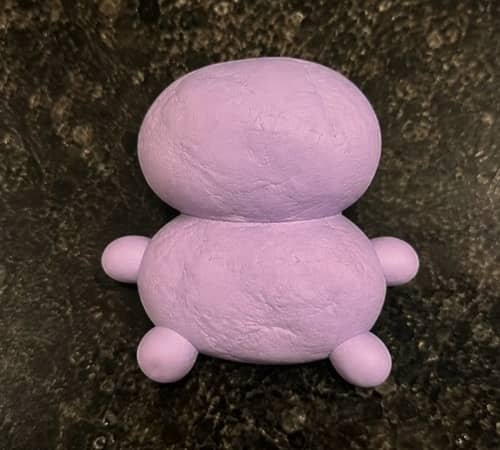
Now comes one of the easiest parts.
Pinch off four tiny pieces of the main clay.
Roll each into a little ball, then gently flatten each one between your fingertips.
You want stubby rounded feet, not long animal legs.
Attach two near the lower front sides of the body and two toward the rear.
Press each foot into the body firmly enough that it stays attached, but don’t squash it completely.
The feet should stick slightly outward.
Try making the front feet a tiny bit smaller than the back feet. This gives the sculpture a more natural little-creature posture.
Kids especially enjoy this part because there isn’t much precision involved.
Step 4: Add the Axolotl’s Signature Gills
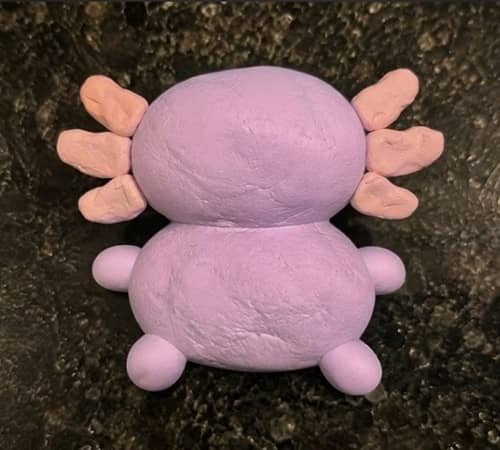
This is where the creature really starts looking like an axolotl.
Take a small amount of pink or peach clay.
Divide it into six tiny pieces.
Roll each piece into a thin little teardrop or short curved strand. They don’t need to match perfectly.
Arrange three on each side of the head.
The gills should begin close to the sides of the head and fan outward slightly.
Press the base of each piece gently against the head.
Don’t make them extremely thin. Very delicate clay pieces can become difficult for small hands to attach securely.
Instead, make them slightly chunky.
Want an extra-cute effect? Curve the outer ends upward just a little.
Now your axolotl has its most recognizable feature.
Step 5: Make the Big Round Eyes
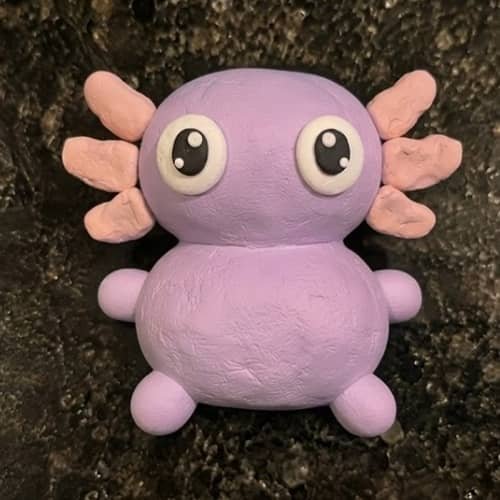
For the eyes, make two small balls from white clay.
Try to keep them similar in size.
Flatten each one just slightly and place them on the front of the head.
Don’t push them too deeply into the clay.
Next, add two tiny black clay circles in the middle of the white eyes.
Finally, add a microscopic white clay dot to each black pupil.
That tiny highlight changes everything!
Suddenly the axolotl looks awake and friendly instead of like a blank sculpture.
The eyes don’t need to be perfectly aligned either. A very slight difference can create a wonderfully goofy handmade expression.
Step 6: Add the Tiny Axolotl Smile
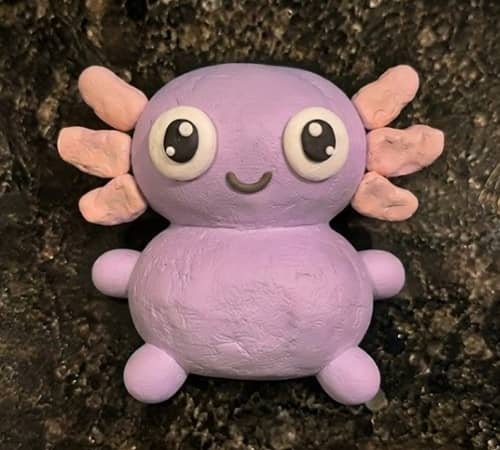
You can make the mouth surprisingly simply.
Take an extremely thin piece of dark clay and roll it between your fingers.
Create a tiny curved line.
Place it underneath the eyes and press the middle gently into the face.
You can make a tiny upward curve at each end.
That’s it.
Don’t make the mouth too large. Axolotl faces are naturally simple, and a tiny expression works better with those oversized eyes.
If your child wants a different personality, make one end slightly higher than the other. Suddenly you’ve got a mischievous axolotl.
Step 7: Give the Belly a Small Handmade Detail
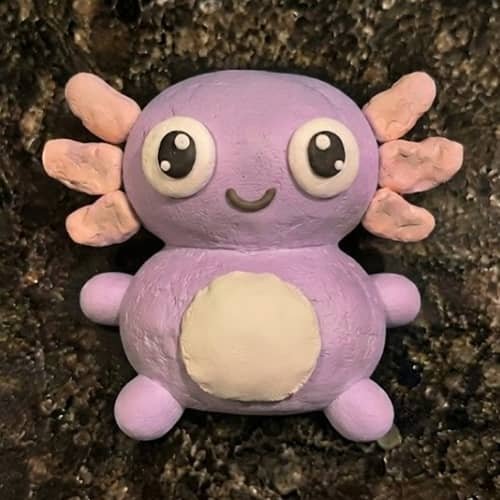
Here’s our little twist.
Take a very small amount of a contrasting clay color, such as pale cream, soft pink, mint, or light blue.
Flatten it into a small rounded oval.
Place it on the front of the body underneath the head.
Press around the edges gently so it sits naturally against the body.
Don’t cover the entire body.
This little belly patch creates visual separation between the oversized head and chunky body, making the finished sculpture look more intentional.
For younger kids, this can become a fun color-choice activity. What color should your axolotl’s belly be?
Step 8: Add Tiny Texture Without Complicating It
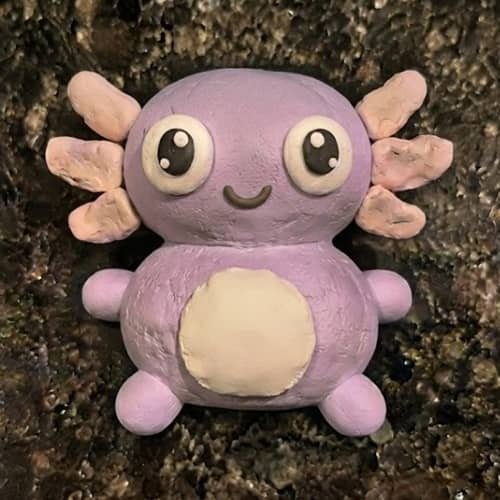
The sculpture is basically finished, but here’s a simple way to make it feel more handmade.
Use the pad of your fingertip to gently press a few very shallow marks into the belly or around the feet.
Keep them subtle.
You are not carving the clay. You’re simply creating a little variation in the surface.
You can also gently smooth any fingerprints that look too deep.
But don’t remove every fingerprint!
A completely flawless surface can actually make a kids craft look less authentic.
This is one of those air dry clay projects where imperfection is part of the finished design.
Step 9: Let the Axolotl Dry Naturally
Place the completed figurine somewhere clean and dry where it won’t be bumped.
Don’t put it directly beside a heater or use intense heat to speed up the process.
Air dry clay needs time for moisture to leave the material naturally.
The exact drying time depends on the clay brand, thickness, humidity, and room conditions, so follow the drying instructions on your clay package.
Check the underside only after the outside feels firm.
A thicker sculpture can take considerably longer than a thin clay ornament.
So, patience wins here.
Step 10: Display Your Finished Axolotl
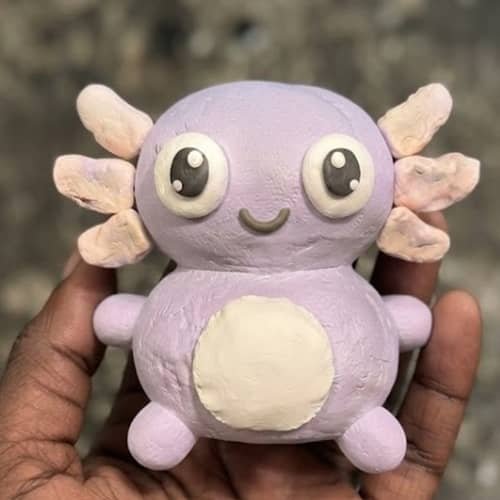
Once fully dry, your little clay creature is ready to become a tiny desk buddy, shelf decoration, dollhouse accessory, or part of a miniature underwater scene.
Want to take it one step further?
Make a second axolotl in a completely different color.
You could create a tiny family with lavender, pink, blue, cream, and green versions. Just keep the same oversized-head design so they look like a little collection.
This is also where the project becomes a great kids craft because children can make choices about colors, expressions, belly patches and gill shapes without changing the basic construction.
And if the first one looks a little wonky?
Honestly, that might be the cutest one.
Helpful Tips for Making Air Dry Clay Figurines
If you’re learning how to make air dry clay figurines, remember that joining pieces properly matters more than perfect shaping.
When attaching the head, feet, eyes or gills, gently press the pieces together rather than simply placing them on top.
If your clay brand recommends moistening surfaces, follow its instructions; otherwise, avoid adding excessive water because too much moisture can make the surface mushy.
Keep small pieces reasonably chunky for children. Extremely thin gills, whiskers or decorations are harder for little fingers to handle and can break while drying.
Another useful trick is to work from large shapes to small details.
Build the body first, then head, then feet, then gills, eyes and expression.
That’s the basic principle behind this clay axolotl tutorial, and it makes the sculpture much easier to control.
Most importantly, don’t keep rebuilding the same piece again and again.
Sometimes the slightly crooked eye is what gives the axolotl its personality.
Easy Variations Kids Can Try
Once the basic sculpture is comfortable, you can turn this into several different DIY clay projects using air dry clay.
Rainbow Axolotl
Use a different color for each gill or make a pastel rainbow body.
Sleepy Axolotl
Replace the large open eyes with simple curved closed eyes.
Tiny Baby Axolotl
Make the entire body smaller while keeping the head slightly oversized.
Underwater Buddy
Create tiny clay pebbles, plants and bubbles around the axolotl after you’ve mastered the main figure.
Axolotl Family
Make three or four creatures with different expressions and body colors.
These variations are especially useful for classroom clay activities, because everyone can follow the same basic construction while still producing a completely different-looking result.
Final Thoughts
The interesting thing about an axolotl sculpture isn’t actually the tiny details, it’s the way a few basic shapes can communicate an entire animal.
A rounded ball becomes a head, a thick oval becomes a body, and six little clay pieces suddenly read as external gills.
That’s why this air dry clay axolotl craft works so well for beginners and children.
It teaches shape recognition, proportion, attachment and simple character design without feeling like a formal lesson.
Next time, try changing only one feature… perhaps the eyes or gills… and notice how dramatically the personality changes.
That’s where simple air dry clay craft starts becoming your own DIY clay sculpture language.





