I love the look of Mediterranean gardens because nothing feels too perfect.
The pots often have rounded bodies, wide rims, little handles, carved details and those lovely aged colors that make them feel like they have been sitting outdoors for years.
That is exactly what I wanted to capture with these mediterranean clay pot craft ideas.
These aren’t ordinary flower pots with a coat of blue paint. Think amphora-inspired planters, olive motifs, rustic relief work and sun-baked colors.
You can make most of these with air-dry clay and basic tools, even if your pottery skills are still very new. Ready to bring a little Mediterranean garden feeling home?
NOTE: If you don’t want DIY and are looking for ready-made options, check out the ready-made clay Mediterranean clay pots here.
Choose Your Air Dry Clay Type
Regular Air Dry Clay | Cornstarch Clay | Homemade Clay
Affiliate Disclaimer: Some of the links in this post may be affiliate links, which means I may earn a small commission if you choose to make a purchase through them – at no extra cost to you. I only share products that genuinely fit this project and can help make your ceramic mug clay craft process easier and smoother. Your support helps keep ideas like this coming.
1. Blue and White Amphora Flower Pot
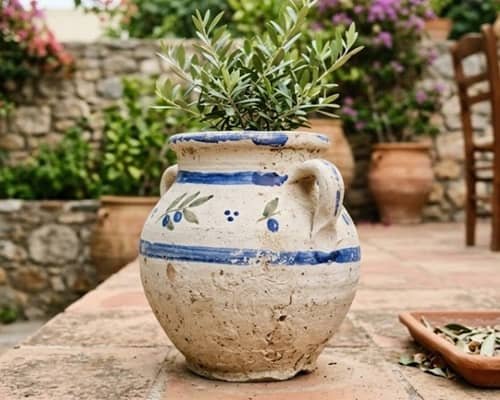
An amphora shape instantly makes a clay pot feel Mediterranean. You don’t need a pottery wheel either.
How to make it
Start with an air-dry clay ball roughly the size of a grapefruit.
Press your thumbs into the center and slowly pinch the walls outward, turning the clay as you work. Keep the bottom fairly thick because it needs to support the plant.
Shape the body into a rounded vessel that becomes slightly narrower toward the shoulders. Pinch a smaller opening at the top, then add a thick rolled clay rim.
For the handles, roll two equal clay coils. Bend each into a soft C shape and attach one to each side.
Score both surfaces first, add a little water or clay slip, then press them together firmly.
Let the vessel firm up before painting. Use an off-white base, followed by uneven cobalt-blue bands around the shoulder and rim. Add two small blue olive-leaf motifs on the front.
Don’t make the blue perfectly even. A slightly wobbly edge makes the piece feel hand painted rather than factory made.
2. Greek Key Relief Clay Planter
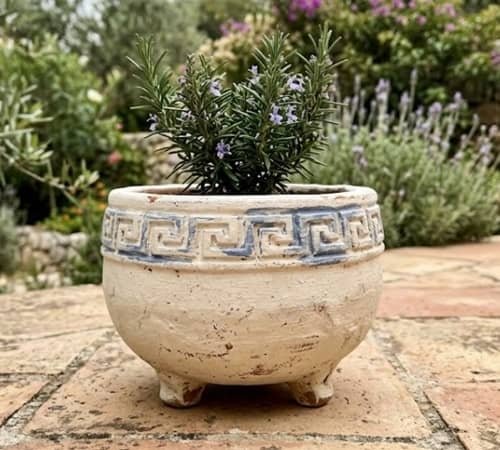
Instead of painting the Greek key pattern, why not actually build it into the clay?
How to make it
Create a short, wide Mediterranean-style planter using the pinch-pot method. Keep the body slightly rounded rather than perfectly cylindrical.
Roll a very thin clay rope and cut it into short straight sections.
Arrange these pieces around the upper portion of the pot to form a simple repeating meander or Greek key pattern.
Press each section gently into the surface. Don’t flatten everything completely. You want the pattern to have a shallow raised relief.
Add four tiny clay feet underneath. These make the pot look more like an old decorative garden vessel and also raise it slightly from the patio surface.
Once dry, paint the entire pot creamy limestone white. Then brush muted blue over the raised Greek key design. Wipe a little of the blue away from the flat areas so the relief remains the star.
This one works beautifully for herbs or a small trailing plant.
3. Olive Branch Mediterranean Clay Pot
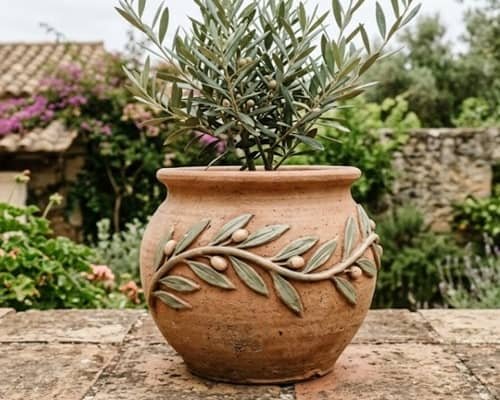
Olive branches are one of the easiest ways to give a pot that Mediterranean identity.
How to make it
Build a rounded flower pot with a slightly flared lip. You can use the coil method if you prefer more control over the shape.
Before the clay becomes completely dry, sketch a long curved olive branch around the front using a blunt pencil or wooden skewer.
For a stronger relief effect, add tiny flattened clay leaves along the branch. Keep them irregular. Real leaves aren’t perfectly matched, and your pot shouldn’t be either.
Paint the body a dusty terracotta color. Once dry, add a thin creamy-beige wash around the olive branch and muted sage-green leaves.
Use a dry brush to lightly drag beige over the raised areas. The result should look softly aged rather than freshly manufactured.
A useful tip
Keep the olive branch concentrated on one side instead of covering the entire pot. That little bit of empty space makes the design feel much more sophisticated.
4. Mediterranean Lemon Motif Pot
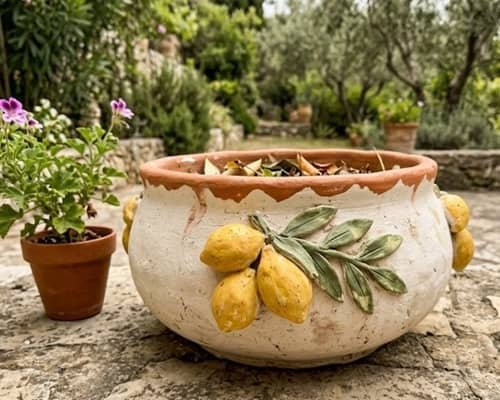
This one brings in the sunny coastal side of Mediterranean decor without becoming overly decorative.
How to make it
Make a wide, low clay flower pot with a generous rim. Add three small raised lemons to one side of the pot using flattened oval pieces of clay.
Press a tiny indentation into each lemon to suggest the natural surface. Add two or three narrow clay leaves beside them.
Paint the pot a soft chalky cream. Paint the lemons warm yellow and the leaves muted olive green.
Now add a thin terracotta line around the rim. Don’t use a ruler. The slightly uneven line is part of the charm.
For an older appearance, mix a very small amount of brown acrylic paint with water and brush it lightly into the recessed areas. Wipe most of it away with a dry cloth.
5. Arched Window Relief Clay Pot
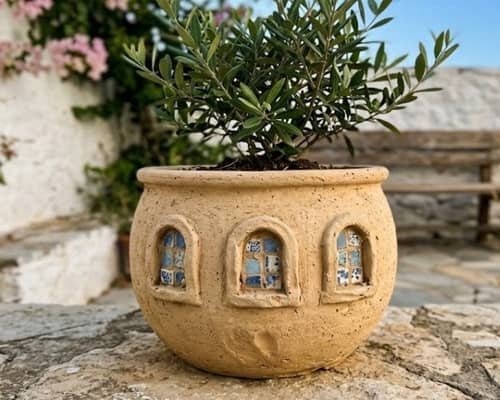
This design takes inspiration from old Mediterranean architecture.
How to make it
Shape a medium-sized clay planter with gently curved sides. Let it become leather-hard before adding the architectural details.
Roll thin clay strips and create three small arch shapes around the front. Press them gently onto the surface to create raised window-like forms.
Inside each arch, add a tiny blue tile-style rectangle.
Paint the pot warm sand beige. Paint the arches slightly darker and the little inset tiles faded blue.
The trick here is restraint. You are suggesting an old Mediterranean building rather than literally painting a house onto a flower pot.
6. Moorish Tile Inspired Clay Planter
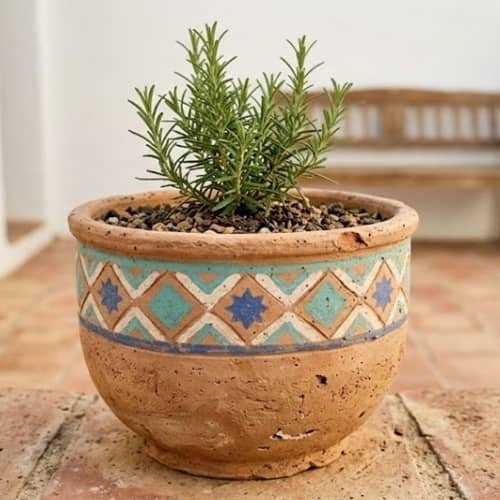
Want something slightly more detailed? Try a tile-inspired pattern.
How to make it
Build a sturdy rounded clay flower pot and leave the upper third fairly smooth.
Use a pencil to lightly divide the area into small geometric sections.
You can create diamonds, stars and simple curved shapes without attempting a complicated tile pattern.
Paint the base muted ivory. Fill selected shapes with dusty turquoise, faded blue and terracotta.
Leave some of the ivory visible between the shapes. It stops the design from becoming visually heavy.
Finish with a very thin dark terracotta line around the rim.
7. Rustic Mediterranean Urn Planter
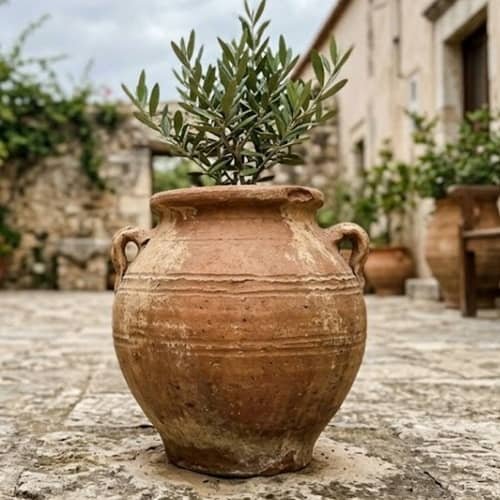
This is one of my favorites because it looks like something you might actually find in an old courtyard.
How to make it
Build the lower body as a rounded coil-built vessel. Make the shoulders broad and the opening slightly narrower.
Add a thick rolled rim and two small decorative handles near the shoulders.
Create shallow horizontal grooves around the body with a wooden skewer.
Paint the whole piece a muted burnt terracotta. Once dry, lightly brush pale beige over the grooves and rim.
Add a few darker stains around the bottom.
It shouldn’t look dirty. Just aged.
8. Mediterranean Sun Face Pot
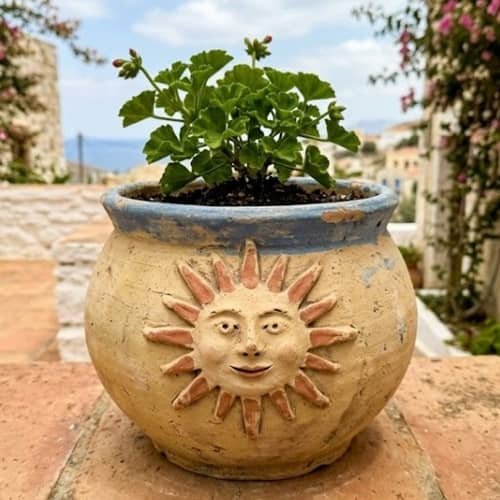
A little personality can work surprisingly well in a garden.
How to make it
Make a rounded clay planter with a wide front surface.
Roll thin clay coils and create a simple sunburst around the upper front. In the center, press two small clay circles for eyes, a tiny curved clay strip for the nose and a simple crescent mouth.
Keep the facial features understated.
Paint the pot pale ochre with muted terracotta rays. Add faded blue around the rim.
Don’t make the face perfectly symmetrical. That handmade unevenness is what makes it charming.
9. Terracotta Vine Drawing Pot
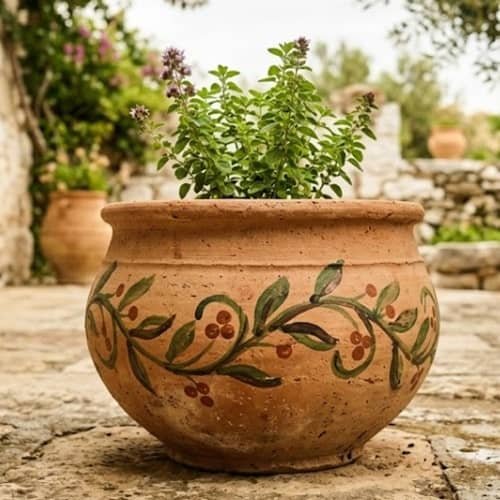
Here’s where a simple vine drawing becomes the main design.
How to make it
Create a medium-sized rounded clay flower pot with a broad upper band.
Once the clay has dried, draw a long curling vine around the pot using a pencil. Add pairs of simple leaves rather than highly detailed botanical illustrations.
Paint the pot pale warm beige.
Use dark olive green for the vine and leaves, then add tiny terracotta-red berries at intervals.
This is a lovely introduction to painted clay pots because the design looks complicated from a distance but is actually very forgiving.
10. Flower Typography Mediterranean Pot
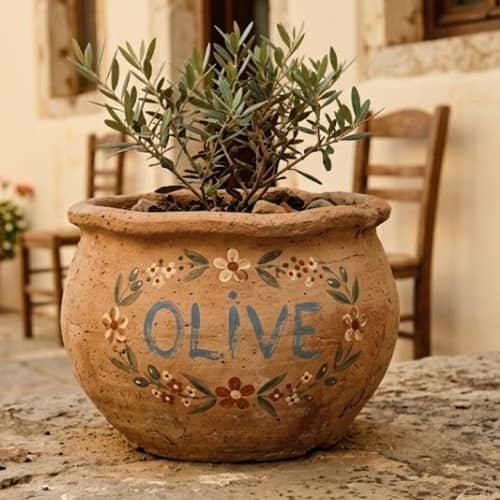
Why paint ordinary flowers when you can turn the lettering itself into part of the decoration?
How to make it
Build a squat Mediterranean-style clay planter with a thick rim.
On the front, lightly pencil a short word such as “OLIVE,” “SUN” or “BLOOM.”
Use a narrow brush to paint the letters in faded blue. Surround the word with tiny hand-painted flowers and leaves.
This is your chance to experiment with flower typography without needing perfect lettering.
If you are making these as DIY clay gifts, personalize the word or name for the recipient.
11. Bohemian Mediterranean Hanging Clay Pot
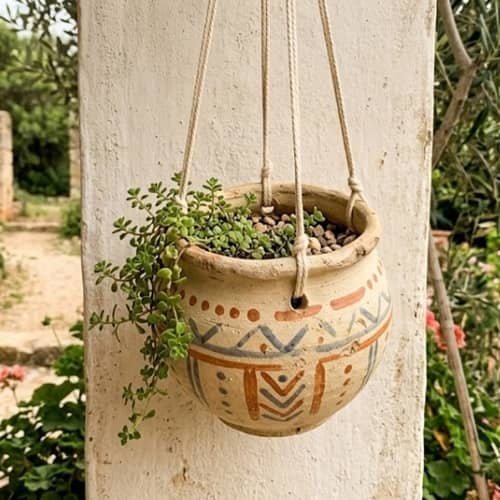
This one moves away from the usual tabletop planter.
How to make it
Make a small rounded clay vessel with a thicker upper rim. Before it dries, create three evenly spaced holes below the rim using a straw or wooden dowel.
Paint the pot a warm cream color and add irregular terracotta and muted blue geometric marks.
Once completely dry, thread three lengths of strong cotton cord through the holes and knot them securely above the pot.
Keep the pot lightweight and use a small plant.
The result sits somewhere between Mediterranean garden decor and bohemian style painted flower pots.
Safety note
Don’t use this method for a large heavy planter. A small vessel is much safer for hanging.
12. Aged Mediterranean Relief Flower Pot
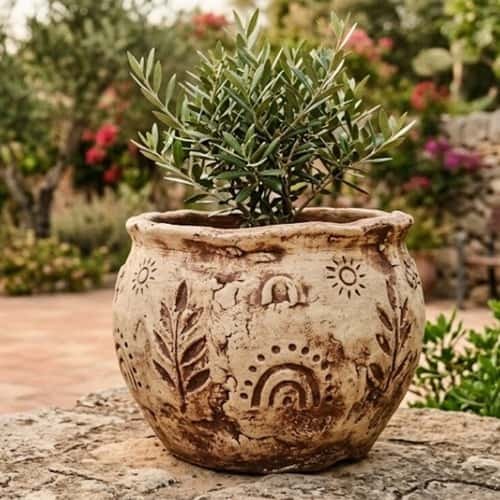
For the final one, I would go for an old-world look rather than a bright painted finish.
How to make it
Build a medium rounded clay flower pot with a slightly uneven rim.
Add small hand-pressed relief shapes around the body. Try leaves, tiny arches, dots and simple sun symbols. Don’t arrange them too perfectly.
After drying, paint the entire pot muted limestone beige.
Mix a little terracotta and brown paint with water and brush it over the surface. Wipe most of it away, allowing the darker color to remain inside the relief.
Finally, dry-brush a small amount of cream over the raised areas.
Now you have depth.
This could also become a strong selling craft because every piece can look slightly different while following the same basic design.
Final Thoughts
The biggest trick with a mediterranean clay pot craft is not adding more decoration. It is choosing the right shape first.
A rounded amphora, handled urn, low courtyard planter or relief-covered vessel already feels Mediterranean before the paint goes on.
If you’re new to clay activities, start with the olive branch or sun-face design.
More confident makers can experiment with relief work, handles and architectural details.
These also make excellent diy clay craft projects because small variations become part of the charm.
If you are thinking about selling crafts, resist making every piece identical.
Handmade buyers often like those tiny differences.
A fingerprint here, an uneven line there, and slightly imperfect colors can make the finished pot feel genuinely made by a person.





