There is something wonderfully cozy about a little light glowing through handmade clay.
These clay lanterns for bedroom decor are not meant to look factory-perfect.
The tiny fingerprints, slightly uneven edges and hand-painted details are part of their charm.
I especially like using air-dry clay because it makes these projects approachable even if you have never tried a clay sculpture before.
You can create tiny shelf lanterns, hanging designs, pierced patterns and dreamy moonlit pieces without making an actual lamp. So, ready to turn a simple lump of clay into magical clay decor? Let’s make some.
Safety note: Use only battery-operated LED tea lights or small battery-powered LEDs inside these lanterns. Never use candles or an open flame inside air-dry clay bedroom decor.
NOTE: If you don’t want DIY and are looking for ready-made options, check out the ready-made clay lanterns for bedroom here.
Choose Your Air Dry Clay Type
Regular Air Dry Clay | Cornstarch Clay | Homemade Clay
Affiliate Disclaimer: Some of the links in this post may be affiliate links, which means I may earn a small commission if you choose to make a purchase through them – at no extra cost to you. I only share products that genuinely fit this project and can help make your ceramic mug clay craft process easier and smoother. Your support helps keep ideas like this coming.
1. Moon Cutout Clay Lantern
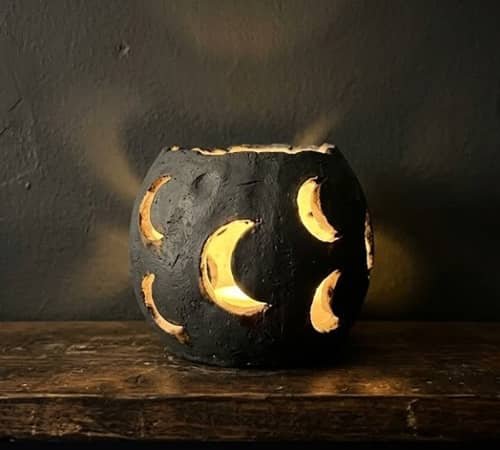
This is probably one of the easiest ways to make clay lanterns for bedroom decor, and the moon cutouts create a beautiful sleepy glow.
What you need
- Air-dry clay
- Rolling pin
- Small moon or crescent cutter
- Craft knife
- Ruler
- Water
- Sandpaper
- Battery-operated LED tea light
- Acrylic paint
How to make it
Roll the clay into a slab about 5 mm thick. Try to keep the thickness fairly even because very thin clay can become fragile after drying.
Cut four rectangular wall pieces, roughly 8 × 10 cm each. Cut a square or circular base that fits the four walls.
Before joining anything, use a tiny moon cutter to make repeated crescent-shaped openings in two opposite walls.
Leave at least 1.5 cm of clay between the cutouts so the sides don’t become weak.
Score and lightly wet the edges. Press the pieces together firmly. Smooth the inside seams with a damp finger.
Attach the base last. Make sure the LED tea light can still be placed inside.
Let the lantern dry completely. Depending on thickness and humidity, this can take 24 to 72 hours.
Paint it a deep charcoal, muted navy or warm cream. A slightly uneven second coat actually looks more handmade.
2. Floral Pierced Clay Lantern
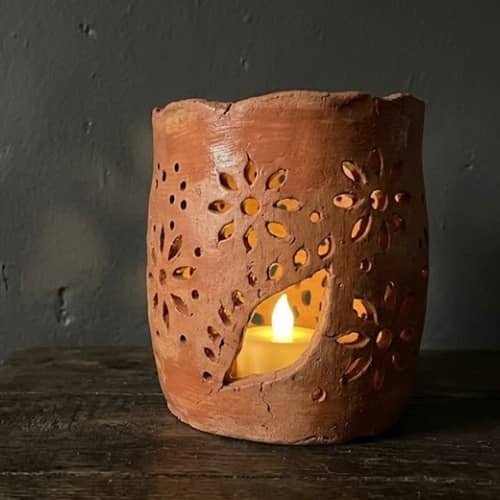
Instead of cutting large shapes, make tiny flower holes across the clay. The result feels softer and more decorative.
Roll a slab to around 6 mm thick. Cut four walls and a base.
Use a small flower-shaped cutter or pointed modeling tool to pierce flowers, dots and tiny leaves into the walls.
Keep the pattern denser toward the middle and more spaced near the edges.
Join the walls using the score-and-slip method. Smooth only the outside seams so you don’t accidentally close the pierced openings.
After drying, paint the lantern a muted terracotta, dusty rose or warm beige. You can gently brush a darker color around the openings to emphasize the pattern.
Place an LED light inside and let the tiny floral holes cast shadows across the bedroom wall.
This one would also work beautifully for selling crafts because the pattern can become a recognizable signature design.
3. Tiny Clay Lantern For A Bedside Shelf
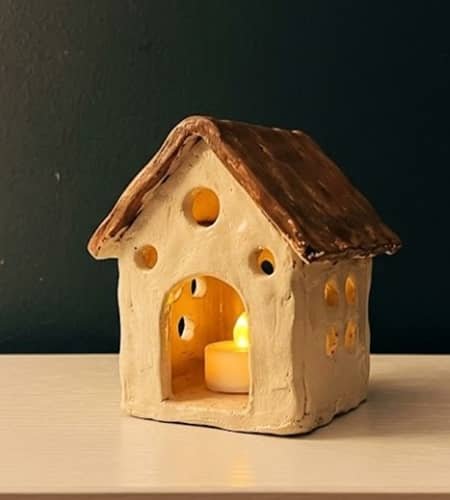
Small is not boring. In fact, tiny lanterns are easier to position around a bedroom.
Make a miniature rectangular lantern using four clay walls approximately 5 × 7 cm.
Cut a simple arched doorway into the front before assembling the lantern. Add two or three tiny circular holes on each side.
Create a small clay roof by cutting two triangular pieces and joining them at the top.
This makes the lantern look like a tiny architectural object rather than a basic box.
Let everything dry separately before attaching the roof.
Paint the walls cream and the roof muted brown or charcoal. Keep the colors slightly uneven for that handmade feel.
Place a tiny LED inside.
It becomes a lovely little clay night light without turning into a lamp. That’s the important difference.
4. Hanging Clay Lantern With A Clay Handle
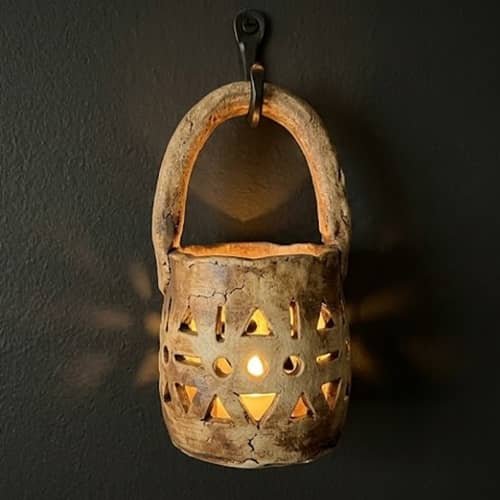
Want to move the light away from the bedside table? Add a sturdy clay handle.
Build a simple cylindrical or rectangular lantern body from a 6 mm clay slab. Pierce small geometric openings around the sides.
For the handle, roll two thick clay ropes and twist them gently together. Shape them into an arch.
Do not make the handle too thin. A handle that looks delicate when wet can become fragile once dry.
Attach the ends to the lantern using scored surfaces and clay slip. Reinforce the connection from the inside.
Let the entire piece dry slowly.
Paint it one color and add a darker wash around the openings. Place an LED tea light inside and hang it only from a secure, suitable hook.
This works especially well as diy clay lighting because the light source remains enclosed inside the lantern.
5. Starburst Cutout Clay Lantern
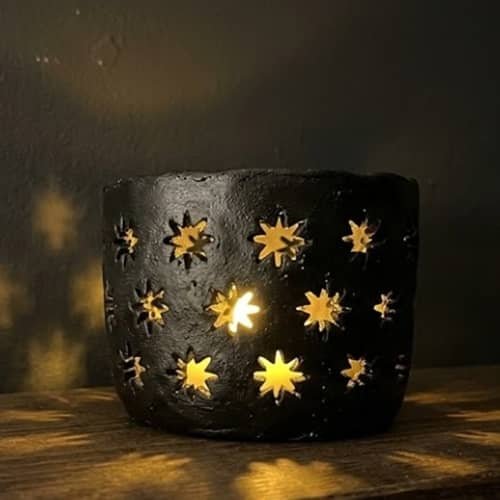
For a slightly more modern bedroom, skip flowers and moons.
Roll your clay evenly and mark a repeating starburst pattern with a pencil before cutting.
Use a sharp craft knife to cut small elongated triangles radiating from tiny central circles. Don’t cut too close together.
Assemble the lantern and reinforce every corner from the inside.
Once dry, paint it matte black, warm white or muted olive. A dry-brushed lighter color across the raised clay edges can make the handmade texture stand out.
Place the LED inside and turn off the room light. The little starburst openings becomes the main attraction.
6. Clay Lantern With A Lace-Like Pattern
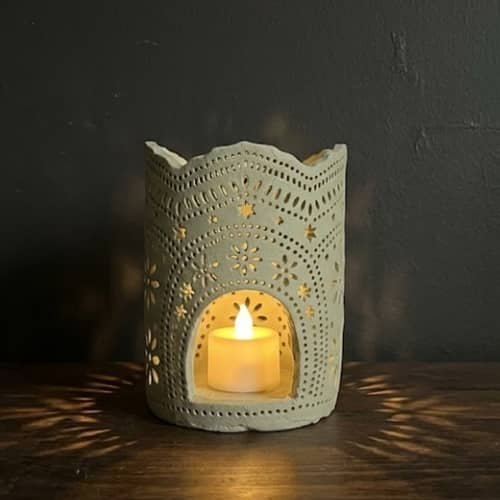
This design looks complicated but it is actually just repeated small holes.
Roll the clay into a slab. Draw rows of dots using a blunt modeling tool.
Pierce each dot carefully, then add tiny connecting slits between selected holes. Keep the clay around the outer border thicker.
Build the lantern with four walls and a base.
After drying, lightly sand only the sharpest edges. Don’t over-sand it; some roughness gives the piece character.
Paint it pale beige, dusty blue or soft sage. The LED glow will make the pattern look almost textile-like.
These are great easy clay projects when you want something decorative without sculpting complicated forms.
7. Terracotta Arch Clay Lantern
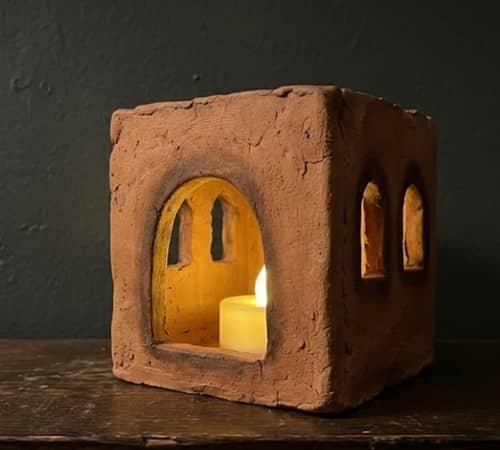
This one takes inspiration from old architectural arches.
Cut four walls from a clay slab. On the front wall, cut one large rounded arch opening.
Add two smaller arched windows on the side walls.
Before drying, reinforce the corners from inside with thin clay coils.
Paint the entire lantern terracotta. Once dry, use a darker brown wash around the arches and wipe the raised areas clean.
The result feels earthy and architectural rather than overly decorative.
It can easily become a signature diy clay craft if you repeat the same arch shape across several designs.
8. Clay Lantern With Raised Vines
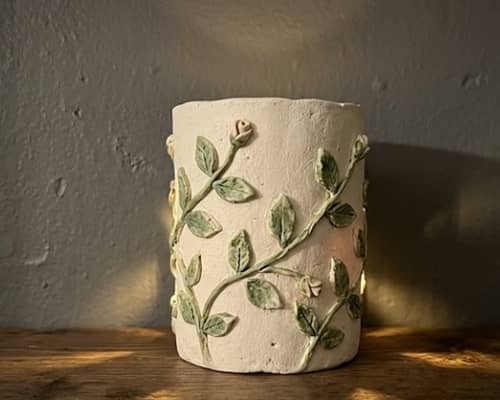
Not every lantern needs pierced patterns.
Create a basic clay lantern with four solid walls. Then roll very thin clay ropes and form them into winding vines.
Add small flattened clay leaves along the vines.
Press the vines gently onto the lantern walls using a little slip. Don’t make them too thick or they may detach during drying.
After the lantern dries, paint the body warm ivory and the vines muted green.
Place the LED inside. The light will glow through the top opening rather than through cutouts.
That gives it a completely different personality from a pierced lantern.
9. Little House Clay Lantern
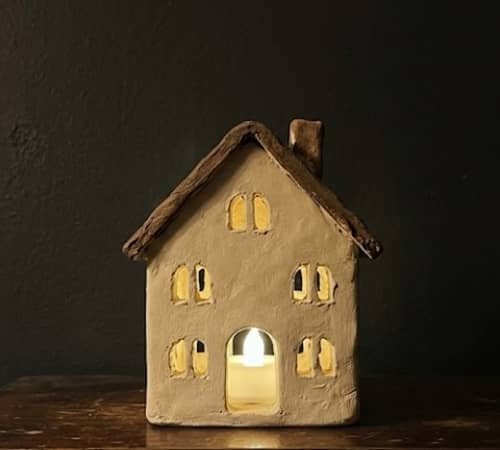
Turn the lantern into a miniature glowing house.
Make four rectangular walls and a simple pitched roof.
Cut windows and a small doorway into the front before assembling it. Keep the windows relatively small so the structure remains strong.
Add a chimney using a tiny rectangular clay tube.
Once assembled, allow the structure to become leather-hard before adding tiny details such as roof lines, bricks or a door frame.
Paint it cream with a muted roof color.
When the LED glows inside, the windows look like a tiny occupied cottage.
It is also a fun diy clay sculpture project for older kids with adult supervision.
10. Pebble-Texture Clay Lantern

Here is a different direction: don’t decorate the lantern with shapes at all.
Build a simple rounded lantern body. While the clay is still soft, press a rough sponge or textured stone-like object gently against the surface.
The goal isn’t deep impressions. You want hundreds of subtle little marks.
Leave several areas open as small windows so the LED can shine through.
Paint the whole lantern warm gray or mushroom beige. Lightly brush a darker shade over the texture and wipe away the excess.
The result feels almost like a handmade stone object.
This kind of home clay project can fit surprisingly well into minimalist bedrooms.
11. Moon Phase Clay Lantern
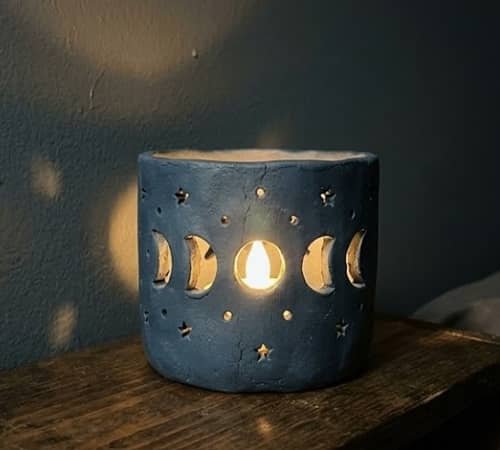
Instead of random cutouts, tell a little story with the openings.
Make a rectangular or slightly rounded lantern body. On the front, cut a sequence of moon phases: crescent, half moon, three-quarter moon and full moon.
Keep the openings aligned in one horizontal or slightly curved row.
Add tiny star holes around them.
Paint the lantern deep blue-gray with a slightly uneven finish.
The moon phases become bright when the LED is switched on, making this one especially suitable for a bedroom.
It has that quiet magical clay decor feeling without needing complicated sculpting.
12. Personalized Initial Clay Lantern

For the final idea, make the lantern personal.
Build a basic four-sided clay lantern and leave the front wall slightly wider.
Cut a large initial into the clay using a printed letter as a tracing guide. Add a border around the letter so the wall doesn’t become weak.
You can add tiny dots or stars around the initial, but don’t overcrowd it.
Paint the lantern in a bedroom-friendly color such as cream, dusty pink, sage or charcoal.
Once completely dry, place the LED inside.
This could also become a thoughtful diy clay gift or a small product idea if you are experimenting with selling crafts.
Just make sure your finished pieces are thoroughly dry and the construction is sturdy before offering them for sale.
Final Thoughts
The easiest way to make these clay lanterns for bedroom decor feel genuinely special is to stop chasing perfect symmetry.
Handmade lighting looks better when the pattern has tiny variations and the clay still shows evidence of the maker.
I also recommend designing the opening pattern before building the lantern because structural strength matters more than decoration.
Large unsupported cutouts can crack as the clay dries. Small repeated openings are usually much safer.
And remember, a lantern is an enclosure for light, not a clay lamp. That simple distinction gives you dozens of directions for diy lanterns, from pierced architectural pieces to tiny personalized bedroom lights, without repeating the same craft.





