A clay slab lantern craft is one of my favorite ways to turn a simple sheet of clay into something that feels like real handmade decor.
Instead of building a rounded vessel, you flatten the clay into even slabs, cut measured panels, pierce openings, and join the pieces into a structured lantern.
That makes this technique perfect for geometric houses, little boxes, cones and architectural shapes.
Want something cozy but still handmade? These 12 ideas bring together warm lighting, imperfect textures, cutout patterns and clever slab building ideas.
They work beautifully as DIY clay decor for bedrooms, living rooms, shelves and quiet corners.
NOTE: If you don’t want DIY and are looking for ready-made options, check out the ready-made clay Clay slab lanterns here.
Choose Your Air Dry Clay Type
Regular Air Dry Clay | Cornstarch Clay | Homemade Clay
Affiliate Disclaimer: Some of the links in this post may be affiliate links, which means I may earn a small commission if you choose to make a purchase through them – at no extra cost to you. I only share products that genuinely fit this project and can help make your ceramic mug clay craft process easier and smoother. Your support helps keep ideas like this coming.
1. Arched Window Cottage Lantern
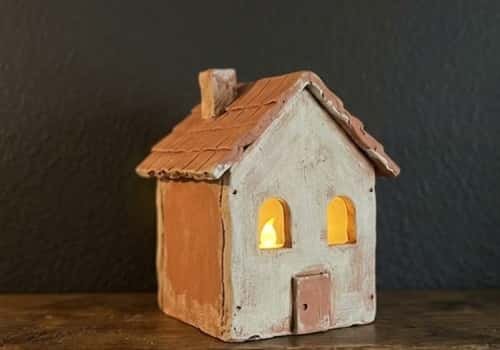
This one looks like a tiny architectural house rather than a basic craft box.
How to make it
Roll one large slab and cut four wall panels. Make the front panel slightly wider and mark two tall arched windows.
Cut the openings using a craft knife while the slab is flat.
For the roof, cut two rectangular slabs and join them along the top edge to create a simple pitched roof.
Score and slip the walls together first, then attach the roof once the walls have become firm enough to support it.
Add a tiny chimney from leftover clay. Don’t make it perfectly straight. A little handmade unevenness actually makes the piece more charming.
Paint the walls a warm off-white, then use muted brown or terracotta around the roof and windows.
Place an LED tea light inside and the cutout windows become the star of the show.
2. Geometric Diamond Cutout Lantern
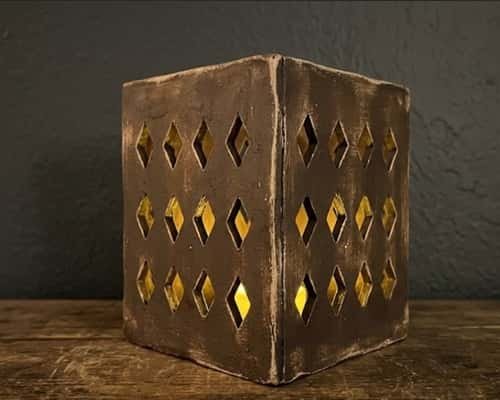
If you enjoy clean shapes, this is one of the easiest slab building ideas to experiment with.
How to make it
Cut four identical rectangular slabs. Before assembling them, mark rows of diamonds on each panel using a ruler.
Cut every second diamond completely through the clay, leaving enough clay between openings so the panel remains strong.
Keep the diamonds reasonably small because large openings can weaken a slab.
Score and slip the four walls together into a square column. Reinforce each inside corner with a thin clay coil.
Add a separate square base underneath. You can leave the top open for easy access to the LED tea light.
Paint the entire lantern a deep earthy brown, then lightly dry-brush a lighter shade over the raised edges. The geometric openings will glow beautifully.
A little selling-craft twist
Make three sizes using the same template. A coordinated set of handmade lanterns can look much more expensive than one oversized piece.
3. Moroccan-Inspired Star Slab Lantern
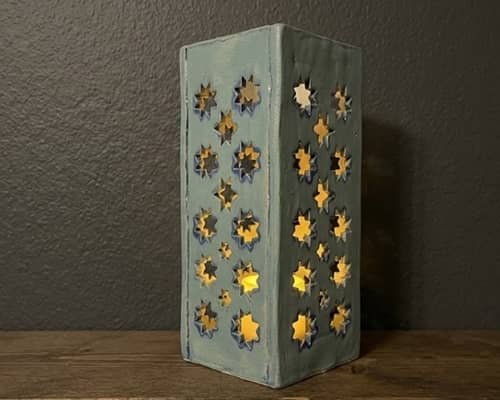
Here the slab technique gives you a more decorative look without needing complicated pottery skills.
How to make it
Prepare four rectangular panels. Use a star-shaped cookie cutter or cardboard template to mark repeated stars across each slab.
Press or cut the stars completely through the clay. Leave at least 1.5 cm between neighboring openings.
Join the panels into a tall square lantern using scored and slipped seams. Add a slightly wider slab base so the lantern feels grounded.
Once dry, paint the outside a dusty blue or muted sage. Add a thin darker wash around the cutouts to make the pattern more noticeable.
This is a lovely clay lanterns idea for a reading corner because the pattern becomes soft and atmospheric once the LED light is switched on.
4. Skinny Vertical Lantern With Slit Windows
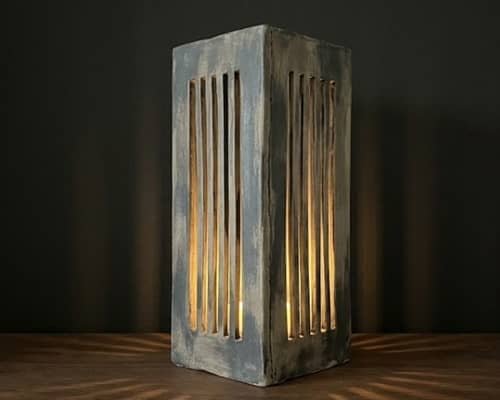
Sometimes less detail makes a stronger piece.
How to make it
Cut four narrow slabs for a tall rectangular lantern. On each panel, draw long vertical slots.
Cut the slots using a sharp craft blade. Keep the openings narrow because they help preserve the strength of the clay walls.
Join the panels using the usual scoring and slipping method. Add a small square base.
Once dry, paint it almost black, then add a thin coat of warm gray over the surface. Wipe some of it away so the rough clay texture remains visible.
The narrow openings create dramatic lines of light. It feels modern, but still handmade.
5. Mini House Lanterns Made From One Template
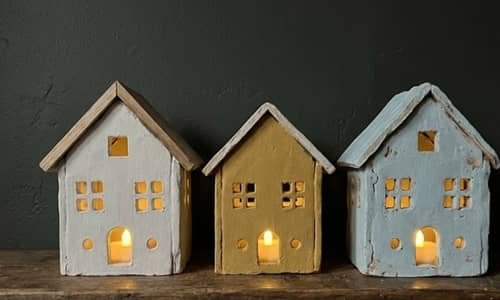
This is a fun option if you want a kids lantern activity with a little more structure.
How to make it
Draw a simple house template on cardstock with two walls and a triangular roof section. Transfer the template onto rolled clay slabs.
Cut two identical front-and-back pieces, then cut two narrow side pieces.
Pierce simple square windows and one tiny circular door opening. Avoid complicated details because children can lose patience with very delicate clay.
An adult should handle the final scoring, slipping and assembly if younger children are involved.
Paint each house in a different muted color. White, mustard, dusty pink and pale blue work especially well together.
Place all three on one shelf with LED tea lights. Suddenly a simple clay activities project becomes a little glowing village.
6. Half-Moon Side Cutout Lantern
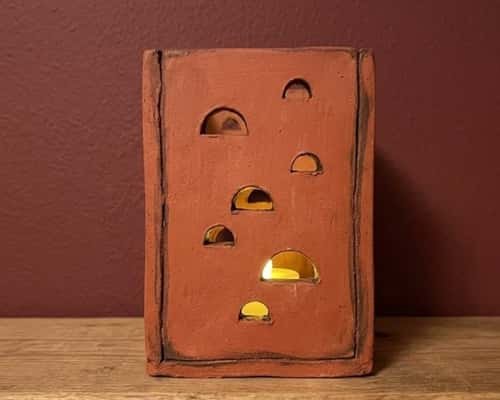
This design feels softer because the cutout pattern isn’t perfectly symmetrical.
How to make it
Create four rectangular slabs and draw several half-moon shapes along the front panel.
Cut them out at slightly different heights. Keep the side panels mostly solid.
Assemble the lantern with scored and slipped corners. Reinforce the seams from inside and add a sturdy base.
Paint it a warm clay-red color. Once dry, lightly sand only the sharpest edges.
Add a darker color around some of the openings. Don’t make every mark identical. Handmade pieces looks better when there is some variation.
7. Triangular Prism Lantern
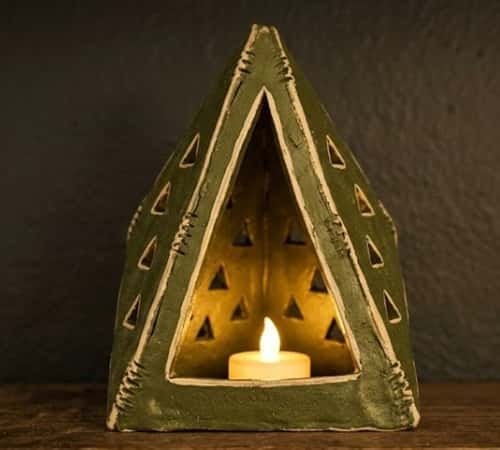
Now let’s move away from the traditional square lantern.
How to make it
Cut three long rectangular slabs of equal width. Trim the long edges carefully so they meet neatly.
Cut small triangular openings down the center of each panel. Then score and slip the three pieces together to create a triangular prism.
Attach a triangular clay base underneath.
This shape is surprisingly stable when the seams are reinforced properly. Paint it deep olive green with a little cream around the edges.
It is a nice example of how slab ceramic ideas can create architectural forms without a pottery wheel.
8. Layered Arch Lantern
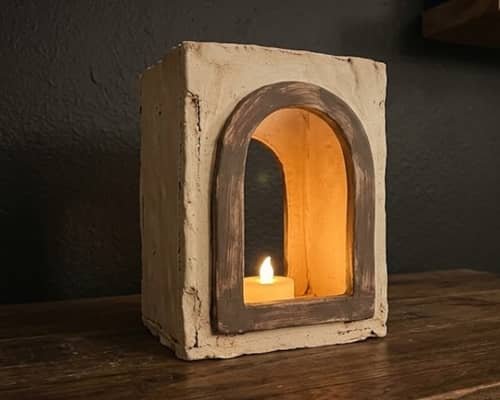
This one gives you depth without making the construction difficult.
How to make it
Build a simple rectangular slab lantern first.
On the front panel, cut one large arch opening. Then make a second, smaller arched clay frame separately from another slab.
Score and slip this raised frame around the opening.
Once everything is dry, paint the lantern cream and the raised arch muted brown.
The extra layer creates a shadow around the opening even before the LED is switched on.
This is also a useful diy clay sculpture exercise because you’re learning how flat clay can create visual depth.
9. Botanical Cutout Lantern
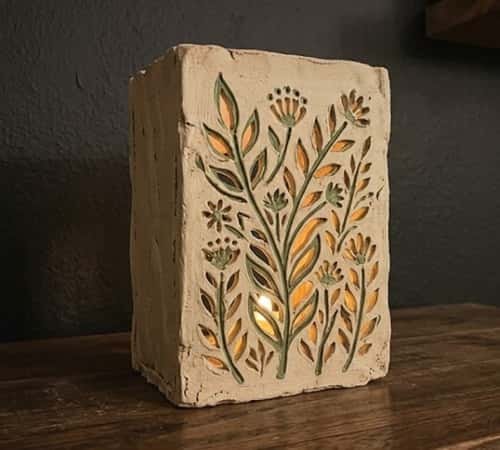
Instead of stamping flowers onto clay, turn the botanical shapes into actual openings.
How to make it
Roll your slabs and draw simple leaves, stems and small flowers on the front panel.
Cut the shapes completely through the clay. Keep the stems thicker than the leaves so they don’t snap.
Join the panels into a square lantern and reinforce the inside seams.
Paint the body muted cream and add soft green around selected botanical edges.
When the LED light shines through, the leaves appear as little shadows on the nearby wall.
10. Tiny Corner House Lantern
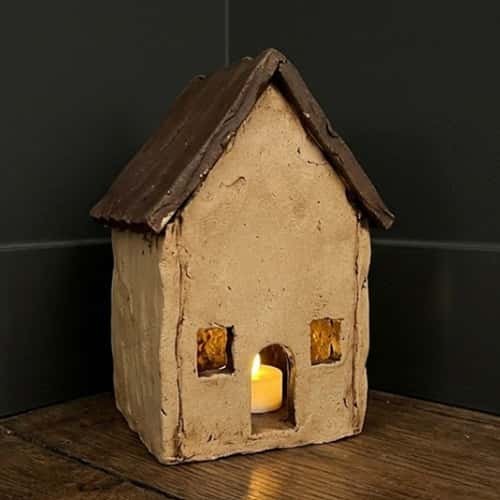
Have an awkward little shelf corner? Build a lantern specifically for it.
How to make it
Instead of making a four-sided box, create a narrow three-sided structure that sits neatly against a wall.
Cut one wide front slab and two narrow side slabs. Add a pitched roof using two small slabs.
Pierce a small door and two windows into the front.
Score and slip every joint carefully, especially where the roof meets the walls.
Paint the house warm beige with a dark brown roof. Because the back is open or mostly closed depending on your preference, the LED light can cast a gentle glow toward the wall.
That makes this one particularly useful for small-space diy clay decor.
11. Perforated Cone Lantern
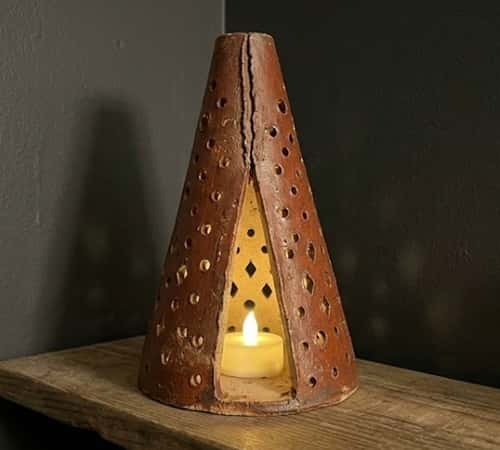
A cone gives the slab technique a completely different silhouette.
How to make it
Cut a large triangular sector from a clay slab. Before joining it, punch small circular and diamond openings across the surface.
Curve the slab gently into a cone and overlap the long edges slightly.
Score, slip and press the seam together. Add a circular clay base after the cone has become leather-firm.
The clay will naturally want to move while drying, so support the form with a soft rolled towel underneath until it becomes firm.
Paint it deep rust with a slightly lighter interior. The result looks like a small architectural lantern rather than a conventional pottery vessel.
12. Personal Message Window Lantern

This could be the most interesting one if you’re thinking about selling crafts.
How to make it
Build a simple four-sided slab lantern.
On the front panel, draw a short word such as “HOME”, “LOVE” or a child’s name in large block letters. Cut the letters through the clay carefully.
Keep the lettering thick enough that the panel remains strong.
Score and slip the four walls together and reinforce every interior seam.
Paint the lantern in a neutral cream or warm white. Add a slightly darker color inside the letters so the openings remain visually strong.
For selling, offer several personalized options rather than making one generic design. Birthdays, weddings, housewarming gifts and nursery names could all work.
Just remember that personalization makes measuring and cutting slower, so price the piece for the extra labor.
Final Thoughts
The beauty of a clay slab lantern craft is that you aren’t limited by the shape your hands can pinch or coil.
A ruler and a paper template suddenly let you build houses, prisms, cones, arches and geometric structures with surprising control.
I also find that small imperfections actually help these pieces.
A perfectly manufactured edge can make a handmade lantern feel commercial, while a tiny fingerprint or slightly uneven cut reminds people that a person made it.
If you’re creating these for selling craft purposes, don’t rush toward complicated patterns.
A strong silhouette, repeatable template and recognizable style can be much more valuable than dozens of details.
That’s where slab-built pottery becomes really interesting.





