An air dry clay coaster set is one of those little projects that looks much harder than it really is.
I especially like it for kids because there is no oven, pottery wheel, or complicated equipment involved.
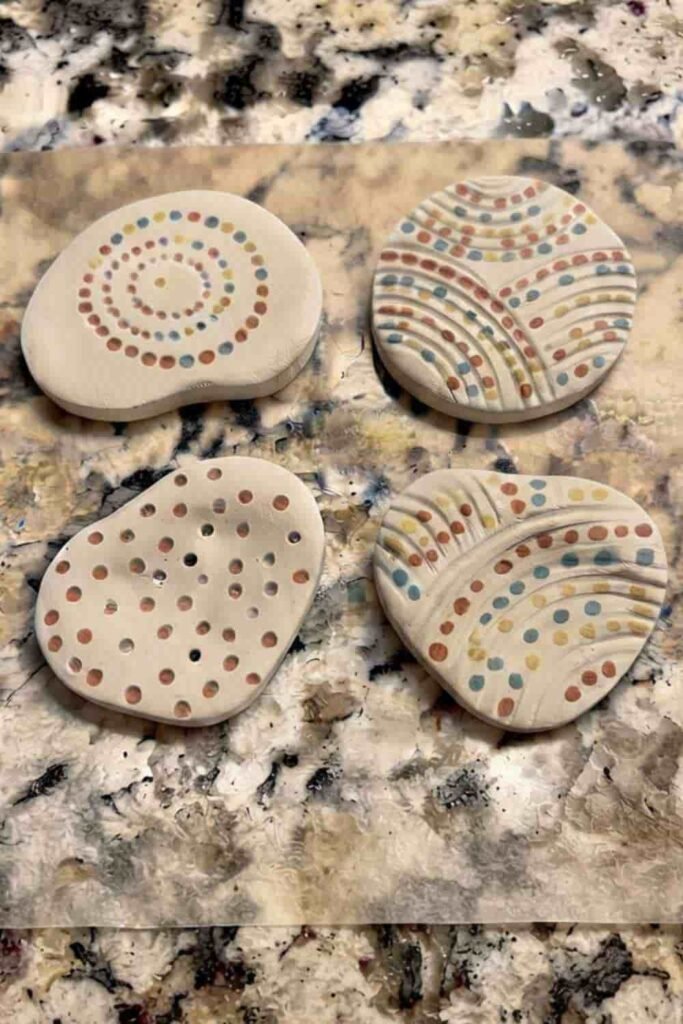
With a lump of air dry clay, a rolling pin and a few household items, you can turn simple clay into four imperfect little coasters.
And instead of making the usual perfectly round Diy coasters, we are going for soft, wavy pebble shapes with tiny stamped details.
The finished set feels handmade, playful and a little bit rustic. That’s exactly what makes this air dry clay craft so charming.
What Makes This Air Dry Clay Coaster Set Different?
I wanted this project to feel less like a miniature factory-made clay set and more like something a child actually made with their own hands.
So, forget perfectly matching circles.
We are making four rounded pebble coasters, each with a slightly different outline but roughly the same size.
The surface gets a simple pressed texture using safe household objects. A few tiny painted dots can then tie the whole set together.
Does every coaster need to look identical? Not at all.
In fact, the tiny differences are the best part.
This also makes the project a nice introduction to beginner pottery, clay Art and simple sculpting without needing an actual pottery wheel.
Choose Your Air Dry Clay Type
Regular Air Dry Clay | Cornstarch Clay | Homemade Clay
Affiliate Disclaimer: Some of the links in this post may be affiliate links, which means I may earn a small commission if you choose to make a purchase through them – at no extra cost to you. I only share products that genuinely fit this project and can help make your ceramic mug clay craft process easier and smoother. Your support helps keep ideas like this coming.
Materials Needed To Make Air Dry Clay Coaster Set
- Air dry clay, preferably a non-toxic kids’ craft variety
- Rolling pin or smooth drinking glass
- Parchment paper or a clean smooth work surface
- Butter knife or plastic clay tool for shaping
- Ruler
- Pencil
- Small bowl or cup for checking the size
- Clean household objects for stamping textures
- Acrylic or washable craft paint
- Small paintbrushes
- Water cup for cleaning brushes
- Clear water-based craft sealer, applied by an adult if the product requires it
- Sandpaper, optional and used by an adult for rough edges
Safety note: Choose a child-friendly, non-toxic modeling clay and craft materials. Kids should not put clay or paint in their mouths, and small texture pieces should not be given to toddlers who may swallow them. An adult should handle sanding and any sealer that carries an age or ventilation warning.
How to Make an Air Dry Clay Coaster Set
Step 1: Prepare the Clay
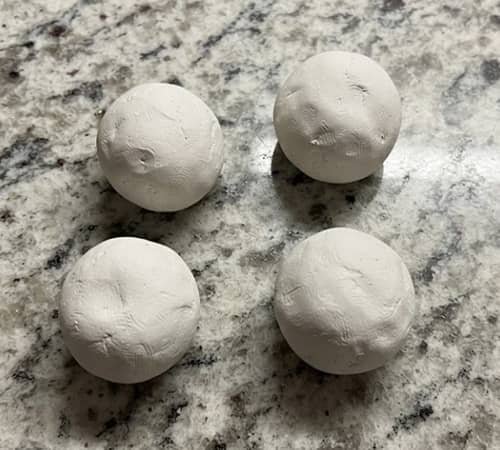
Start by dividing the clay into four fairly similar portions.
Don’t worry about weighing every piece.
We are deliberately making this set handmade, so a tiny difference in size is perfectly fine.
Ask the child to roll each portion gently between their palms to soften it. Then press each ball down into a thick puck.
The clay should feel soft but not sticky.
If it feels dry and starts cracking immediately, knead it gently for a little longer rather than adding lots of water.
Too much water can make air dry clay unpleasantly soft and harder to shape.
For children, I prefer doing this part on parchment paper because the clay can be lifted easily later.
Step 2: Roll Each Piece Into a Flat Slab
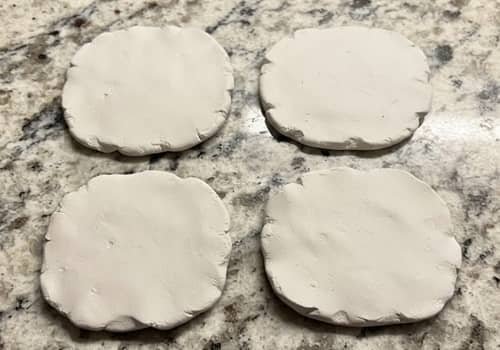
Place one clay puck between two sheets of parchment paper.
Roll gently from the centre outward.
Aim for approximately 6 to 8 mm thickness.
You don’t need laboratory precision here, but try not to make the coaster paper-thin because thin clay can become fragile as it dries.
Lift the parchment and check the thickness from the side.
If the edges are much thinner than the centre, roll again with lighter pressure.
Repeat this with all four pieces.
Now comes the fun bit.
We are not cutting perfect circles.
Step 3: Create the Pebble Shapes
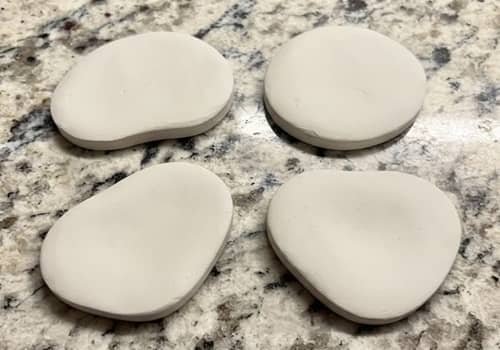
Take a pencil and lightly draw a rounded outline on the surface of each clay slab.
Keep the shapes organic.
Think smooth river stones rather than cookies.
You can make one slightly oval, another a little wider, and another gently asymmetrical.
Just keep them approximately 8 to 10 cm across so they work well beneath a glass or mug.
Cut around the outline using a plastic clay tool or blunt craft tool suitable for children.
Remove the excess clay around each coaster.
Don’t throw the scraps away yet.
Those leftovers can be kneaded together and used for tiny decorative dots later.
Smooth the outside edge using a fingertip. If the clay feels slightly rough, lightly rub the edge with a barely damp finger.
Step 4: Add a Simple Pressed Texture
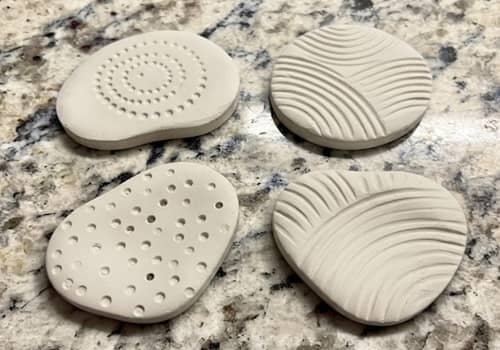
Here’s where I like to give the set its own personality.
Instead of complicated clay stamps, use safe everyday objects with interesting surfaces.
A clean textured fabric, the rounded end of a pencil, a large bottle cap, or a simple household object can create little marks.
Press gently.
Do not push the object completely through the clay.
For our design, create a small cluster of shallow dots near one edge of each coaster. Change the arrangement slightly on every piece.
You could make three dots on one, five on another and a tiny curved line on the third.
The fourth can have a simple border of shallow marks.
That’s enough.
Too much decoration can actually make an air dry clay coaster set look messy.
Step 5: Smooth and Inspect Every Coaster
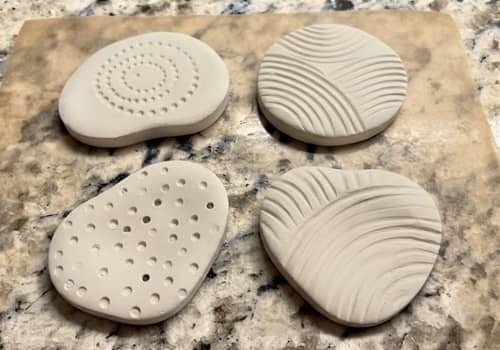
Before leaving the clay to dry, inspect each piece carefully.
Run a fingertip around the outer edge.
See any sharp ridge?
Smooth it.
Notice a deep crack?
Gently press the surrounding clay together.
If a small fingerprint appears, don’t panic. This is a kids’ project, not a pottery competition.
I actually prefer keeping a few fingerprints because they make the homemade crafts feel real.
Make sure the coasters are lying completely flat on the parchment.
If one has started curling, gently flatten it while the clay is still workable.
Step 6: Let the Clay Dry Completely
Now comes the least exciting part.
Let the coasters dry according to the instructions on your specific air dry clay package.
Drying time varies with clay brand, thickness and room conditions, so don’t rely on a fixed number of hours alone.
Turn the pieces carefully when the clay has hardened enough to handle.
This helps the underside dry properly too.
Do not put air dry clay in the oven unless the manufacturer specifically says that the product is designed for it.
Standard air dry clay is intended to harden through air exposure.
Keep the pieces somewhere clean and dry while they cure.
And yes, the child will probably ask, “Are they ready yet?”
Step 7: Paint the Handmade Details
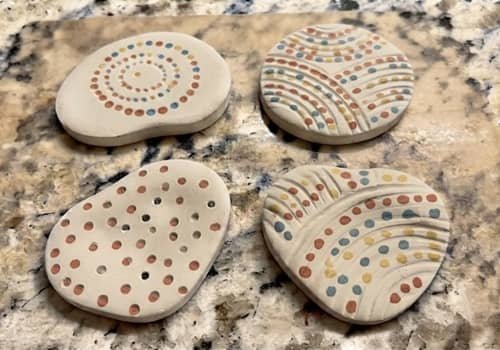
Once completely dry, it’s time to add colour.
For a simple clay decor look, choose two or three coordinating colours rather than painting everything.
I like the idea of leaving most of the clay surface natural and adding small painted dots that follow the pressed textures.
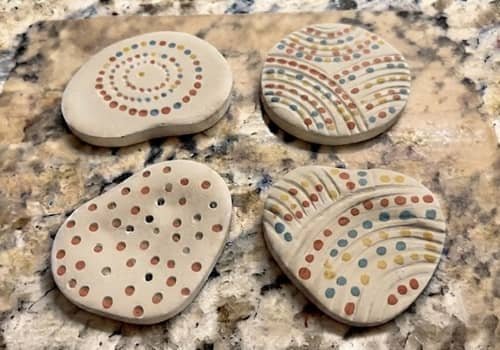
For example, paint tiny terracotta dots on one coaster, muted blue dots on another and soft yellow marks on the third. The fourth can combine all three.
Let the child choose the colours.
That’s part of the kid activities appeal here.
Use light coats instead of flooding the surface with paint. Allow each coat to dry before deciding whether another one is needed.
And don’t worry if the paint isn’t perfectly even. A little wobble actually suits this project.
Step 8: Protect the Finished Coasters
There is one important thing to understand about air dry clay.
It isn’t naturally waterproof.
So if you want to use your pieces regularly with cold drinks that create condensation, the finished surface should be protected with a suitable water-based craft sealer compatible with your clay and paint.
This part is best handled by an adult.
Follow the sealer manufacturer’s instructions carefully, including drying time and ventilation requirements.
Apply thin, even coats rather than one thick layer.
Also remember that a sealed air dry clay coaster is still a handmade craft object. I wouldn’t treat it like a ceramic coaster or leave it soaking in water.
For children, an adult can apply the protective finish after the creative work is finished.
A Few Problems You Might Run Into
The clay keeps cracking: It may be too dry, too thin or not conditioned enough. Knead it gently and avoid excessive water.
The coaster curls while drying: Keep the slab reasonably even in thickness and dry it on a flat surface. Turn it carefully once the clay is firm.
The surface has fingerprints everywhere: That’s okay. For a smoother finish, gently rub the surface with a clean fingertip before the clay dries.
The paint looks patchy: Use thinner coats and let each layer dry properly.
The finished coaster gets wet: Wipe it dry instead of soaking it. Air dry clay remains more delicate around water than fired ceramic.
Final Thoughts
What I like most about this air dry clay coaster set is that it quietly teaches several useful craft skills at once.
Kids get to practise rolling, thickness control, cutting, texture-making, painting and patience while working with a very forgiving material.
It also shows an important difference between modeling clay and finished pottery i.e. air dry clay hardens without a kiln, but it doesn’t magically become ceramic.
That matters when deciding how you use the finished piece.
Treat it gently, keep moisture under control and let the handmade imperfections stay visible.
Those little fingerprints, uneven dots and slightly wonky edges are not mistakes. They’re the part that proves somebody actually made it.





