Have you ever tried turning a small lump of clay into an animal that actually looks like the animal you imagined? That is exactly what makes this air dry clay elephant craft so much fun.
I kept this air dry clay craft deliberately simple, with chunky shapes, a slightly uneven handmade finish, and no complicated sculpting tools.
It is a great animal craft for beginners, kids activities, or a relaxed afternoon diy project with your child.
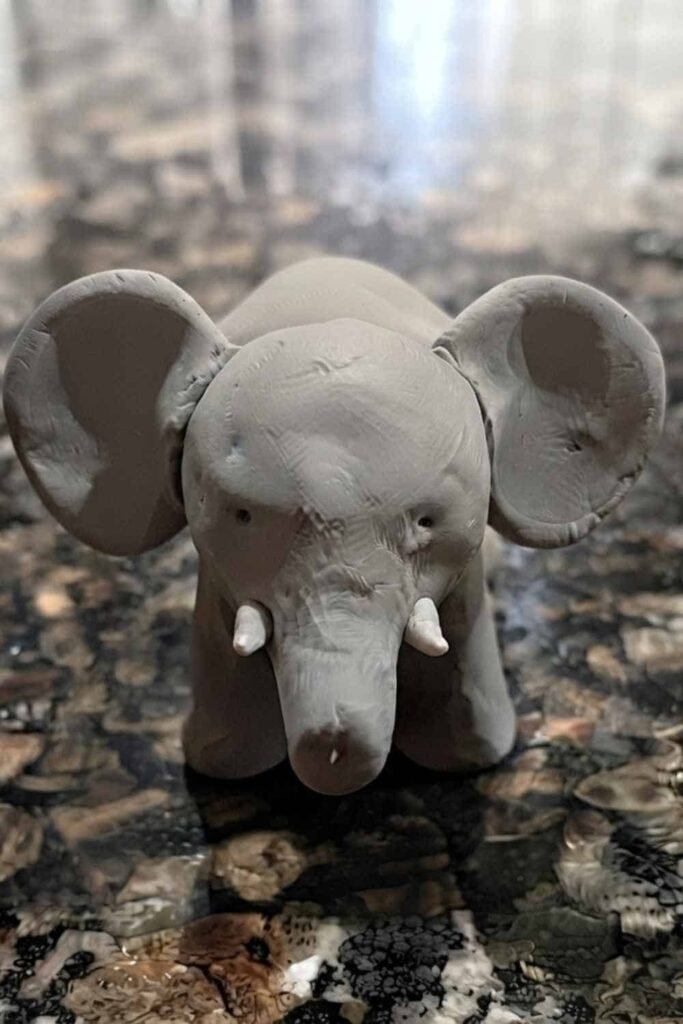
The finished piece works like a tiny clay sculpture, but you don’t need sculpting experience to make it.
We are basically building the elephant from simple clay forms and joining them carefully.
Materials Needed To Make Air Dry Clay Elephant Craft
- Air dry clay – gray, or white clay mixed with a little gray acrylic paint later
- Small rolling pin or smooth glass bottle
- Toothpick
- Craft knife or blunt plastic knife
- Small cup of water
- Acrylic paint – gray, black and a little white
- Small paintbrush
- Clean smooth work surface
- Shiny granite surface for photographing the finished craft
Before you start: Take out only the clay you need and keep the rest sealed. Air dry clay begins forming a skin when exposed to air, and that makes detailed shaping harder.
Step 1: Make the Elephant’s Main Body
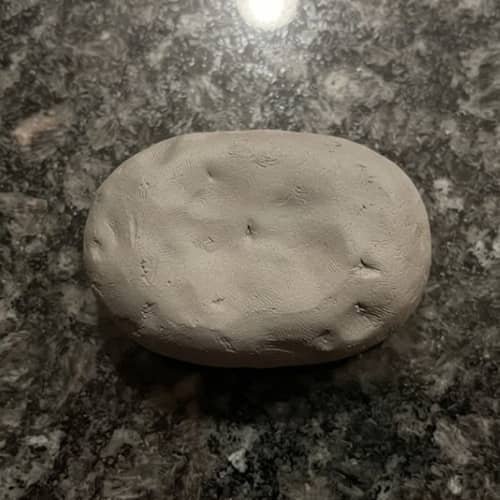
Start by taking a generous piece of air dry clay and kneading it between your palms for a minute or two.
This softens the clay and makes it easier to shape without sudden cracks.
Roll it into a thick oval, roughly the size of a small lemon.
Now gently flatten the bottom slightly. Don’t make it completely flat.
We want the elephant to have a soft, rounded body rather than looking like a clay potato sitting on the table.
Use your fingers to smooth only the obvious cracks. A few tiny fingerprints are actually nice here because this is meant to look handmade.
Check the shape from the front and side. Does it look slightly wider toward the middle? Good.
Step 2: Add the Four Short Legs
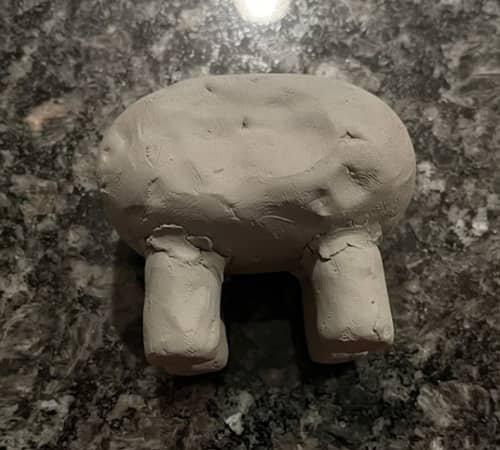
Take four smaller pieces of clay and roll each into a short, thick cylinder.
Try to keep them similar in size, but don’t obsess over perfect symmetry. This is a kids craft, not a factory model.
Place the four legs underneath the body.
Position two toward the front and two toward the back, leaving enough space between them so the elephant doesn’t look crowded.
Press each leg gently against the body. Then blend the joining edges with your fingertip.
The legs should remain fairly chunky. Very thin legs can bend or break while the clay is drying.
Turn the elephant slightly from different angles and check whether all four legs touch the surface evenly.
If one leg is floating, shorten or reposition it now.
Step 3: Shape the Elephant’s Head
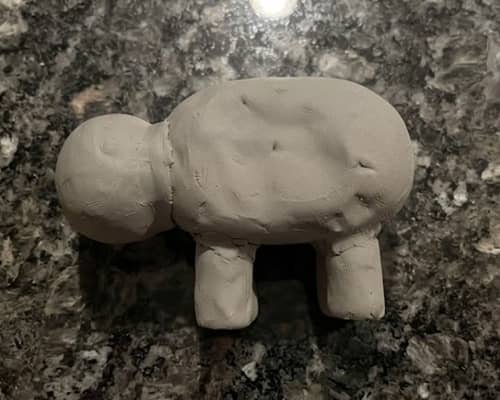
Now take another piece of clay, slightly smaller than the body.
Roll it into a rounded shape, then gently pinch and flatten one side.
This creates a basic elephant head without needing complicated sculpting.
Attach the head to the front of the body. Press it firmly enough that it sticks, but don’t squeeze the whole shape.
Use your fingertip to blend the neck area where the head meets the body.
A small amount of water can help smooth a stubborn seam, but use very little.
Here’s a useful trick: hold the elephant at eye level for a second.
The head should sit slightly higher than the body, not directly in the middle.
If it looks a little wonky, that’s okay. Handmade animals are supposed to have personality.
Step 4: Create the Trunk
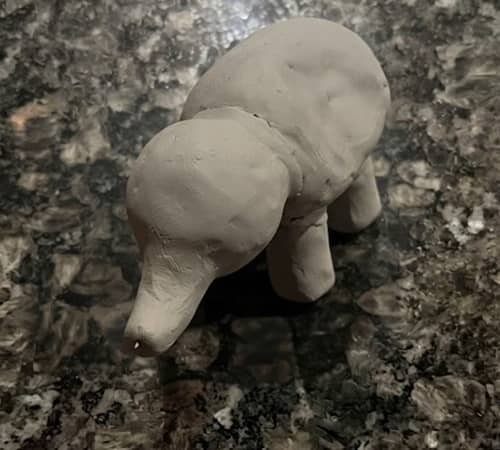
This is the part that makes the piece instantly read as an elephant.
Take a small sausage-shaped piece of clay.
Make one end slightly thicker and taper the other end gradually using your fingers.
Attach the thicker end to the front of the head.
Now gently curve the trunk downward. Don’t make a sharp bend.
A soft hanging curve looks much more natural and is easier for beginners.
Use your fingertip to blend the upper connection into the face.
At the bottom, make a tiny indentation with a toothpick.
You don’t need to carve a detailed trunk. That one small mark is enough to suggest the opening.
The trunk shouldn’t be too long. If it reaches the granite, shorten it before the clay starts drying.
Step 5: Add the Ears
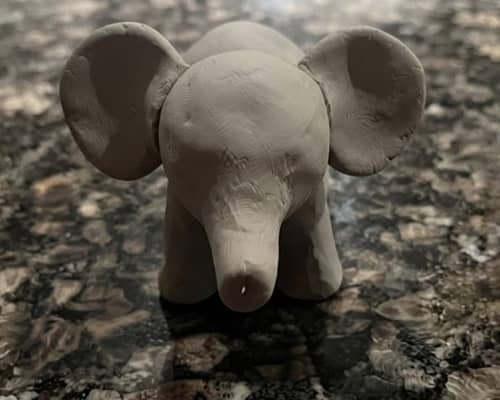
Elephant ears can look complicated, but they are actually one of the easiest parts.
Take two small pieces of clay and flatten each into a rough teardrop or rounded leaf shape.
Don’t make them paper-thin. Slightly thicker ears are easier to attach and less likely to curl while drying.
Press one ear onto each side of the head.
Blend only the inner edge where it touches the head, while leaving most of the ear surface clearly raised.
For a more natural look, gently bend the outer edges backward.
Try looking at the elephant from above. Are the ears roughly balanced? They don’t need to be identical, but they should feel like they belong to the same animal.
And yes, one ear can be a tiny bit larger. That little difference makes the sculpture feel handmade.
Step 6: Add the Eyes and Small Details
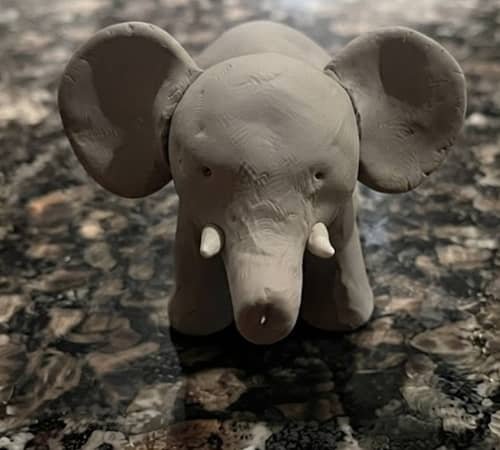
The elephant already has its basic shape, so now we can add just enough detail without making the project fussy.
Use the pointed end of a toothpick to make two shallow eye sockets.
For a very simple version, leave them as tiny indentations.
If you prefer a painted elephant, wait until the clay dries and add small black dots later.
You can also make two tiny tusks from white clay. Keep them short and slightly curved downward.
Press each tusk gently into the front of the face, just beside the trunk.
Don’t add too many wrinkles, lines or decorative details. Too much detail can actually make a beginner clay animal look less natural.
The goal is a friendly little elephant, not a miniature wildlife model.
Step 7: Let the Elephant Dry Completely
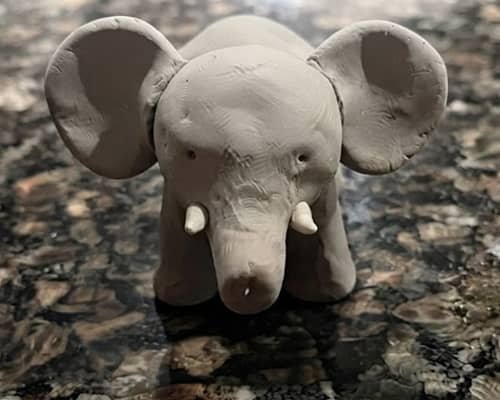
This step looks boring, but it is where many clay projects go wrong.
Place your elephant on a flat, dry surface where it won’t be disturbed.
Don’t put it directly beside a heater, hair dryer or very hot window because rapid drying can cause cracking.
Air dry clay usually needs around 24 to 72 hours to dry fully, depending on the clay brand, thickness and humidity.
Because our elephant has a chunky body, give it plenty of time.
Don’t start painting just because the outside feels hard. The inside can still contain moisture.
Once completely dry, gently tap the body. It should feel firm rather than cool or soft.
If you notice a tiny crack, fill it with a small amount of fresh clay or suitable air-dry-clay filler and let that area dry again.
Step 8: Paint and Finish Your Elephant
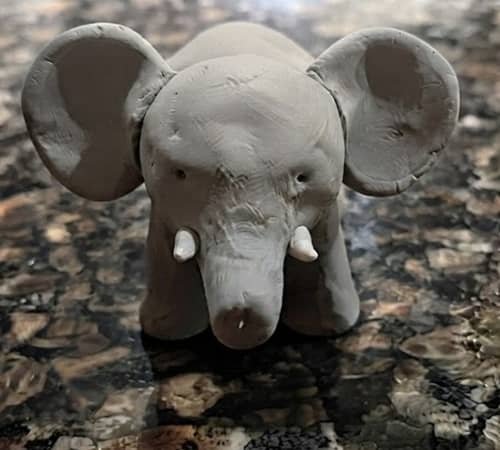
Once completely dry, paint the elephant with a thin coat of gray acrylic paint.
Don’t flood the surface with paint.
Two thin coats usually look cleaner than one thick coat, and the handmade texture remains visible.
Let the first coat dry before adding another.
Use a tiny amount of black paint for the eyes.
A touch of white can be added inside each eye if you want a slightly more lively expression.
For the ears, you can leave them gray or add a very subtle darker gray shade near the inner area.
I wouldn’t overdecorate this one. The simple gray finish is what makes it look like a tiny handmade elephant.
Once the paint is dry, place it on shiny granite and photograph it from directly above or a slightly elevated top angle.
Final Thoughts
What I like most about this air dry clay Elephant craft is that it teaches a surprisingly useful sculpting idea i.e. complicated shapes can be built from very ordinary forms.
An oval becomes the body, cylinders become legs, a tapered sausage becomes the trunk, and flattened pieces turn into ears.
That same approach works for almost any clay animal you want to make later.
Try changing the ear size or trunk position and see how much the personality changes.
If you’re doing this as an Elephant craft for preschoolers, I’d prepare the basic body pieces beforehand and let the child focus on joining, pressing and decorating them.
It becomes a fun little kids craft, but they’re quietly learning shape, balance and three-dimensional construction too.





