Looking for an air dry clay ganpati craft that actually turns out looking adorable instead of lumpy? You’re in the right place.
I wanted a project that was simple enough for beginners yet detailed enough to create a charming lord ganesha statue using air dry clay without fancy sculpting skills.
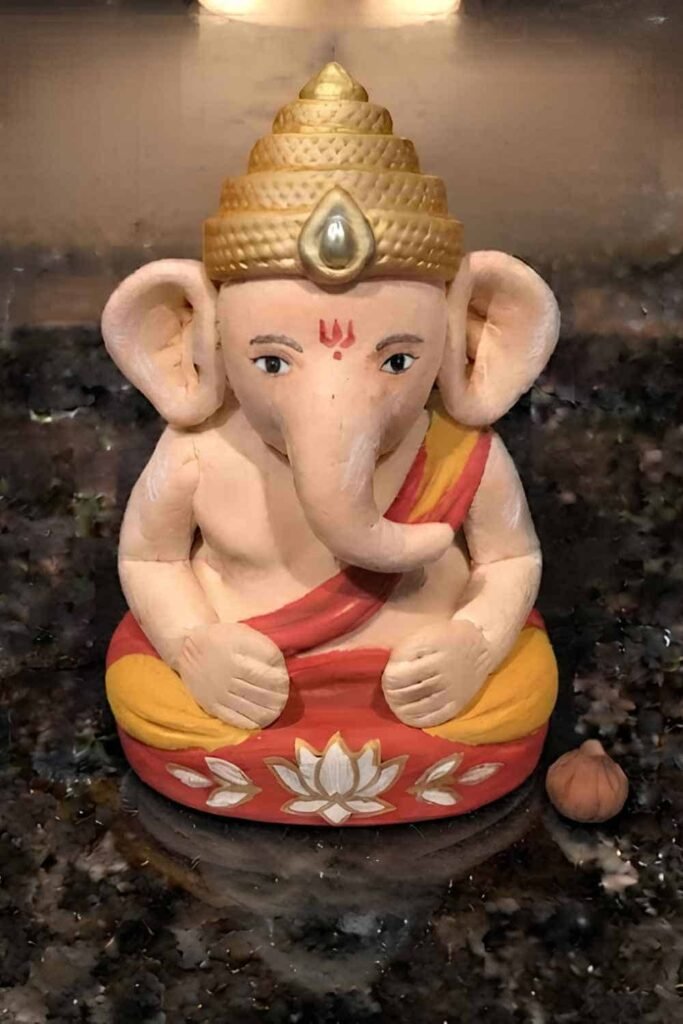
This tutorial breaks everything into manageable pieces, so even if you’ve never tried a clay craft before, you’ll be able to follow along.
Whether you’re making it for Ganesh Chaturthi, a school project, or a relaxing weekend kids craft, every little step builds naturally into a beautiful handmade Ganpati idol.
Choose Your Air Dry Clay Type
Standard Air Dry Clay | DAS Air Hardening Modeling Clay
Affiliate Disclaimer: Some of the links in this post may be affiliate links, which means I may earn a small commission if you choose to make a purchase through them – at no extra cost to you. I only share products that genuinely fit this project and can help make your ceramic mug clay craft process easier and smoother. Your support helps keep ideas like this coming.
Materials Needed To Make Air Dry Clay Ganpati Craft
Keep everything nearby before you begin.
- White air dry clay (250 to 300 g)
- Acrylic paints (orange, pink, yellow, white, black and gold)
- Fine paintbrushes
- Clay sculpting tools or a toothpick
- Small rolling pin or smooth bottle
- Water in a small bowl
- Soft paintbrush for smoothing
- Craft glue (optional)
- Clear matte varnish (optional)
- Plastic sheet or silicone mat
Step 1: Build The Main Body And Head
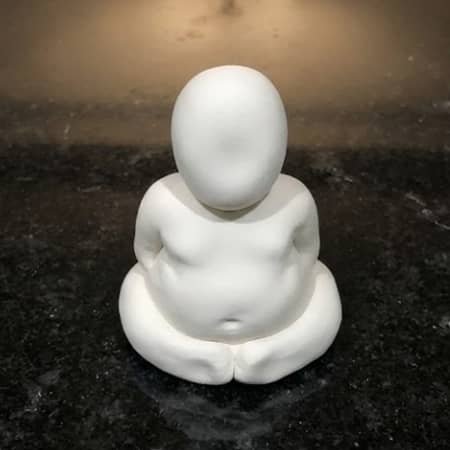
Start by taking about two-thirds of your clay and roll it into a smooth oval.
This becomes the body. Don’t make it too tall.
A wider body gives the idol a stable base and creates that peaceful seated posture everyone instantly recognizes.
Now roll another smaller ball for the head.
The head should be around half the width of the body.
Place it gently on top and blend the joint with your fingers instead of simply pressing it together.
This connection is important because it supports the weight once the clay begins drying.
Next, flatten the bottom slightly so the sculpture sits without wobbling.
Hold it at eye level and check if it leans toward one side. Fix it now because correcting the posture later gets surprisingly difficult.
Wondering why we haven’t made the trunk yet? It actually becomes easier once the face proportions are already established.
Smooth the entire surface using a slightly damp finger or a soft paintbrush. Don’t rush this stage.
Every fingerprint you leave now will still be visible after painting.
At this point your sculpture should resemble a rounded seated figure with a smooth head attached… nothing fancy yet, but the foundation is already there.
It doesn’t look like Ganpati yet, and that’s perfectly normal.
Step 2: Shape The Trunk, Ears And Crown Base
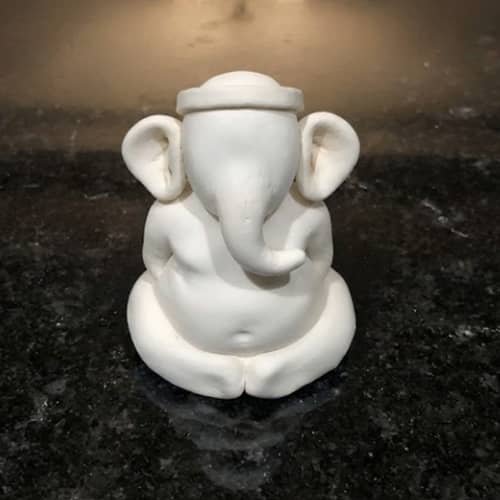
Now the personality starts showing.
Roll a thick clay rope about the thickness of your little finger.
Attach one end to the center of the face and gently curve it downward before curling it slightly toward the left.
Blend only the top where it meets the forehead while keeping the lower portion rounded.
Avoid making the trunk too thin. A thicker trunk not only looks balanced but also survives accidental bumps much better.
For the ears, flatten two equal clay balls into rounded teardrops.
Attach one to each side of the head. Instead of sticking straight out, angle them slightly forward.
This tiny adjustment makes the lord ganesha sculpture appear softer and more expressive.
Use a sculpting tool to create shallow folds inside each ear.
Deep lines should not be carved since painted shadows will eventually make the intricacies stand out.
Next, roll a thin strip of clay and wrap it around the top of the head to create the foundation for the crown.
Don’t worry about decorative details yet. Right now you’re only building the structure.
Take a step back and compare both ears from above. They don’t need to be identical.
Handmade crafts always carry small differences, and honestly, that’s part of the beauty.
Gently smooth every connection with a damp brush.
The face should now begin resembling a ganpati idol using clay instead of just stacked clay shapes.
Step 3: Add The Arms, Hands And Folded Legs
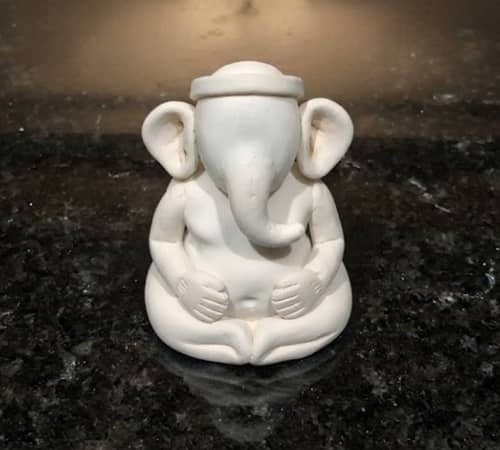
This is where the seated posture finally comes together.
Roll two medium-sized clay cylinders for the upper arms.
Attach them immediately below the neck after slightly flattening one end.
Blend the shoulder joints carefully so they appear naturally connected to the body.
For the forearms, make two slightly thinner pieces.
Bend them gently at the elbows before attaching them.
One hand can rest comfortably on the knee while the other is lifted a little as though giving blessings.
Don’t stress over perfectly sculpted fingers. Instead, lightly press three or four shallow lines with a toothpick.
From a normal viewing distance, those tiny grooves create the illusion of individual fingers without making the sculpture fragile.
Now form two thick curved logs for the legs.
Bend each one into a relaxed seated position before attaching them beneath the body.
Blend the upper portion where the thighs meet the torso, but leave the lower curves visible.
Use a flat sculpting tool to lightly define the knees.
Tiny details like this makes the figure look much more natural without adding unnecessary complexity.
If you’re planning this as a kids DIY project, younger children can skip finger detailing altogether and simply shape rounded hands.
The finished idol still looks wonderful.
Take another look from above. The overall silhouette should now clearly resemble Lord Ganesha sitting peacefully.
Step 4: Sculpt The Crown, Sacred Details And Clothing
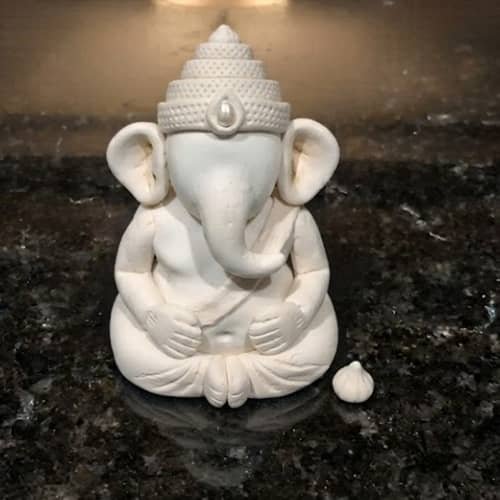
Now comes my favorite part because the idol suddenly starts feeling alive.
Roll several very thin clay ropes and wrap them around the crown base one layer at a time.
Don’t stack them randomly. Let each strip overlap just enough to create depth. Add a tiny round bead in the center as the main jewel.
Use a toothpick to gently press repeating dots around the crown.
These small impressions catch paint beautifully later without making the design look crowded.
Next, roll an ultra-thin strip and place it diagonally across the chest to represent a decorative sash.
Add another thicker strip around the waist for a simple dhoti belt.
You don’t need complicated clothing folds. A few carefully placed lines are enough to suggest flowing fabric.
Using a sculpting tool, lightly mark the separation between the dhoti and the legs.
Add a few shallow folds near the knees to create movement.
Suddenly the entire sculpture begins looking much less like a toy and more like a handmade lord ganesha statue.
If you’d like, create a tiny round modak and place it near the resting hand.
Keep it proportional. Oversized accessories can steal attention from the face.
Finally, smooth every visible seam one last time with a damp brush.
Let the sculpture dry on a flat surface for at least 24 to 48 hours, depending on your clay manufacturer’s instructions.
Resist the urge to paint early. Wet clay may crack if handled too much, and nobody wants that after all this effort.
Step 5: Paint the Base Colors Slowly and Build Up the Layers
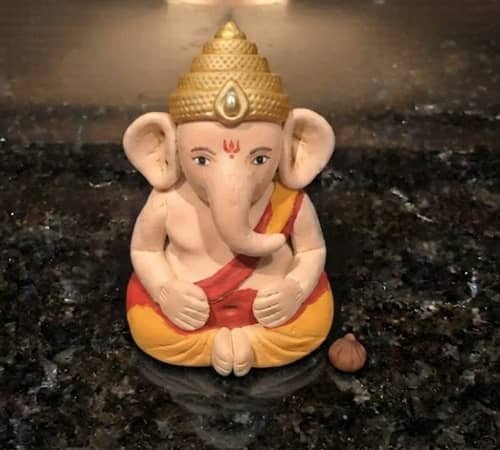
The clay is completely dry now, so it’s finally time to bring your air dry clay ganpati craft to life.
Before opening the paints, wipe away any dust using a soft dry brush.
Even tiny bits of dust can leave rough spots once the paint dries.
Start with a thin coat of white acrylic paint if your clay has uneven patches.
Think of it like priming a wall before painting.
It creates an even surface and helps every color appear brighter. Let it dry completely before moving on.
Next, paint the skin using a peach, light pink, or soft orange shade.
Use thin coats instead of one thick layer. Two or three light coats almost always look smoother than one heavy coat.
Paint the crown with yellow first.
Once dry, lightly brush gold over the raised details so the texture you created earlier becomes more visible.
This simple trick makes even beginner sculpting look surprisingly polished.
For the dhoti, choose colors that contrast with the body.
Deep red, saffron, royal blue, or emerald green all work beautifully.
If you’re decorating for Ganesh Chaturthi craft activities, traditional saffron and red create a festive look without feeling overdone.
Use a very fine brush to paint the eyes. Start with two small white ovals, then tiny black dots for the pupils.
Less is more here. Oversized eyes can completely change the expression.
Finally, add a small red tilak between the eyes and paint the modak a warm golden brown.
Take your time. Seriously. Painting isn’t a race, and the slower you go, the cleaner everything becomes.
It may looks slow at first, but the final result is always worth waiting for.
Step 6: Add Small Details That Make a Big Difference
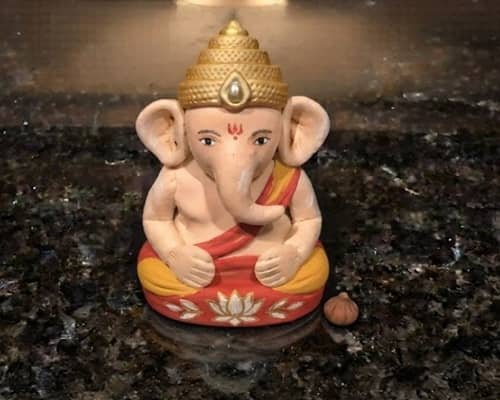
Here’s something I’ve noticed after making several clay idols.
It’s rarely the big pieces that impress people. It’s always the tiny finishing details.
Take a fine brush and add thin gold lines around the crown edges. Don’t outline everything.
A few carefully placed highlights look much more realistic than covering every surface with metallic paint.
Use a darker shade of the clothing color to paint light shadows inside the folds of the dhoti.
Immediately soften those lines using a slightly damp brush. This creates gentle depth instead of harsh stripes.
Now lightly dry-brush a tiny amount of white across the raised parts of the trunk, ears, and hands.
It catches only the highest points, making the sculpture feel more three-dimensional.
If you want to make your lord ganesha sculpture feel even more personal, press a tiny clay bead onto the crown before sealing, or paint a simple lotus symbol on the base beneath the idol.
Keep these additions subtle. The focus should always remain on Lord Ganesha.
Once you’re satisfied, let every painted layer dry completely before applying a matte varnish or clear acrylic sealer.
One thin coat is usually enough. Besides protecting the paint, it also makes cleaning easier later.
Don’t forget to inspect the sculpture from every angle.
A tiny paint smudge near the ears or trunk is much easier to fix now than after sealing.
Final Thoughts
One thing I’ve learned after making several clay idols is that a memorable air dry clay ganpati craft isn’t about sculpting every tiny detail perfectly.
It’s about creating something that carries your own touch while respecting the symbolism of Lord Ganesha.
Even small changes like a different crown pattern, a slightly curved trunk, or softer colors can give your clay craft its own personality without losing its traditional charm.
Over time you’ll naturally become faster and more confident, but don’t rush that journey.
Every handmade kids craft quietly teaches patience, observation, and creativity, and those lessons often last much longer than the lord ganesha statue itself.





