Have you ever wanted to make a little horse without needing a pottery wheel, kiln, or fancy sculpting tools? This air dry clay Horse craft is exactly that kind of project.
I like this version because it feels more like a tiny handmade sculpture than a basic kids craft.
You only need air dry clay, a few household tools, and some patience while shaping the pieces.
The finished horse has a raised head, curved neck, four sturdy legs, pointed ears, and a textured mane.
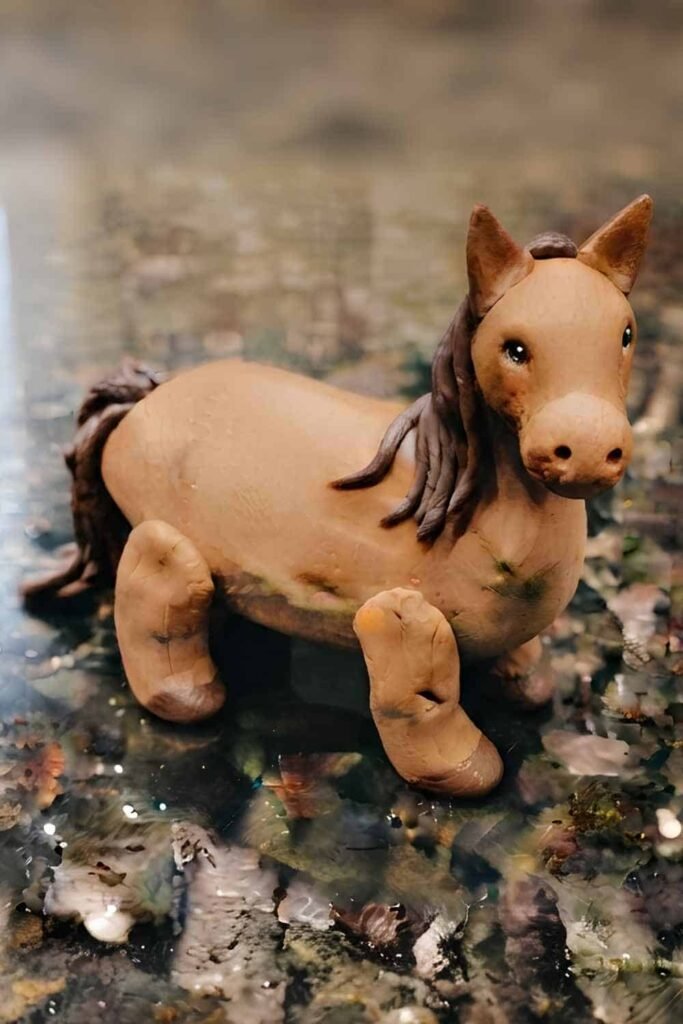
That handmade look is what gives this clay craft its personality, whether you make it as a weekend project, a farm animal craft, or one of those simple kid activities that adults end up enjoying just as much.
What Makes This Air Dry Clay Horse Craft Different?
Instead of trying to create a perfectly realistic horse, we’re going for a small character-style horse sculpture.
Think slightly oversized head, a gently curved neck, chunky legs and a mane made from tiny rolled clay strands. Why? Because realistic proportions are surprisingly difficult when you’re new to clay.
This approach is much more forgiving.
The horse can have tiny imperfections, uneven hoof shapes, or a slightly crooked ear.
In fact, those little quirks make the Horse made of clay feel handmade rather than factory produced.
Choose Your Air Dry Clay Type
Regular Air Dry Clay | Cornstarch Clay | Homemade Clay
Affiliate Disclaimer: Some of the links in this post may be affiliate links, which means I may earn a small commission if you choose to make a purchase through them – at no extra cost to you. I only share products that genuinely fit this project and can help make your ceramic mug clay craft process easier and smoother. Your support helps keep ideas like this coming.
Materials Needed To Make Air Dry Clay Horse
Keep the supplies simple.
- Air dry clay
- Small bowl of water
- Toothpick
- Wooden skewer or blunt craft stick
- Butter knife or plastic clay tool
- Rolling pin or smooth glass bottle
- Acrylic paint
- Small paintbrush
- Black paint or a black fine-tip marker
- White paint for tiny eye highlights
- Optional clear acrylic sealer
Clay recommendation
Use a lightweight or regular air dry clay that can be shaped without cracking easily.
White, natural terracotta, beige, or gray all work beautifully.
You don’t need ceramic clay for this project. Unlike a traditional ceramic Horse sculpture, this piece dries naturally at room temperature.
How to Make an Air Dry Clay Horse Craft
Step 1: Condition the Clay
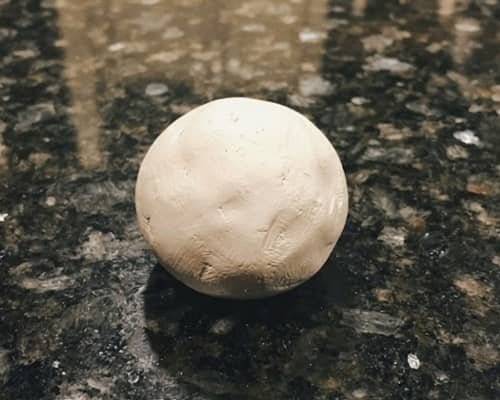
Start by cutting off a generous piece of air dry clay.
Knead it between your palms for a few minutes.
Don’t rush this part.
The goal is to make the clay soft, flexible and evenly conditioned.
If it feels crumbly, warm it between your hands a little longer.
If your clay is extremely dry, a tiny amount of moisture on your fingertips can help, but don’t soak it.
Too much water makes air dry clay sticky and weak.
Once it feels smooth, roll it into a compact ball.
This will become the main body.
Step 2: Shape the Horse’s Body
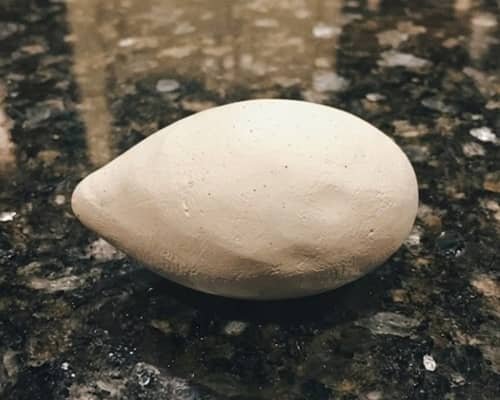
Take the clay ball and roll it gently between your palms.
Turn it into an elongated oval.
You want the body to be roughly twice as long as it is tall.
Don’t make it too thin because the legs will attach underneath and the body needs enough thickness to support them.
Now gently taper one end.
That tapered end will eventually connect to the neck.
The opposite end should remain rounded because it will become the horse’s rear.
Place the body on the granite and check it from the side.
Does it look like a tiny animal body?
If yes, you’re on the right track.
Step 3: Build the Curved Neck
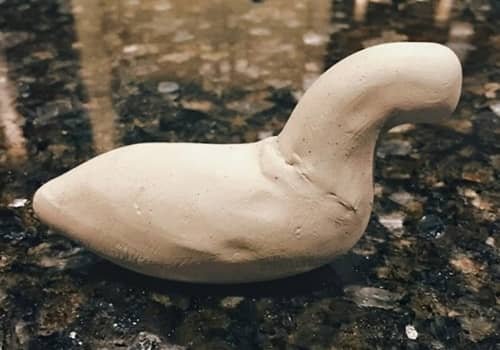
Here’s where our horse starts getting personality.
Take another piece of clay, approximately one-third the size of the body.
Roll it into a thick cylinder.
Now gently bend it into a shallow C shape.
Don’t make the curve too dramatic. A gentle upward sweep is easier to support.
Press the bottom of the neck against the tapered front of the body.
Use your thumb to blend the two pieces together.
Then use a toothpick or blunt tool to make several shallow grooves around the joint.
Smooth them over with your fingertip.
This connection matters because a poorly attached neck can crack away after drying.
Step 4: Make the Horse’s Head
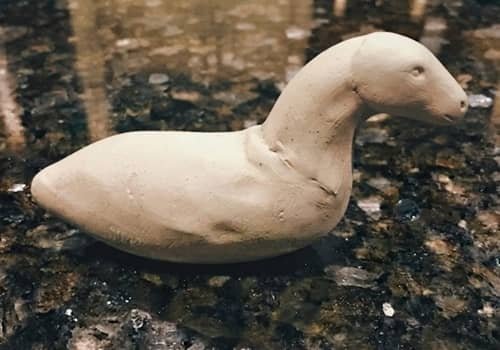
Take a smaller piece of clay.
Roll it into a slightly oval shape.
One end should be broader while the other end becomes narrower.
The broad end connects to the neck.
The narrow end becomes the muzzle.
Next, connect the head to the neck’s top.
Use your fingers to blend the connection.
Now flatten the front of the muzzle very slightly.
Don’t make it perfectly flat.
A subtle flattened area is enough to make the face recognizable.
Want the horse to look friendlier? Tilt the head slightly upward.
That tiny change makes a surprisingly big difference.
Step 5: Add the Muzzle
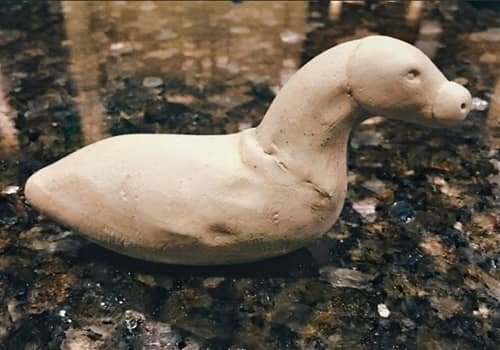
Take a tiny amount of clay.
Roll it into a small flattened oval.
Place it at the front of the horse’s face.
Blend its edges carefully.
Now use the blunt end of a toothpick to create two tiny nostril indentations.
Don’t make them too deep.
You can also create a very shallow horizontal line where the mouth would be.
That’s enough detail.
We’re not trying to make a museum sculpture here.
This is a charming little air dry clay Horse with handmade character.
Step 6: Add the Ears
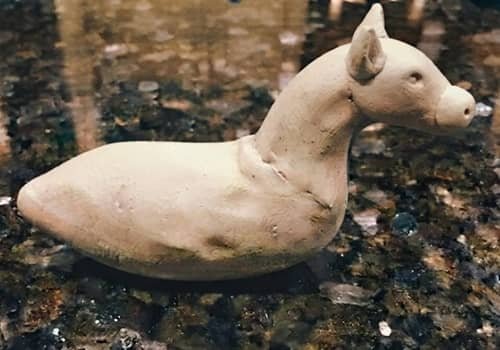
For each ear, pinch off a tiny piece of clay.
Shape it into a small cone.
Flatten the base slightly.
Then press the bottom onto the top of the horse’s head.
Tilt both ears slightly outward.
Use your toothpick to create a shallow inner line on each ear.
Be gentle.
Tiny pieces can break if you keep moving them around.
At this point the animal should finally start reading as a horse.
If the ears look a little uneven, leave them. Mine usually do, and honestly, that is part of the charm.
Step 7: Make Four Sturdy Legs
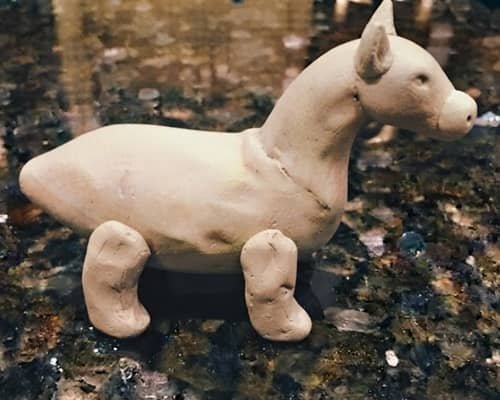
This is the step where beginners often make the legs too thin.
Don’t.
Roll each of the four comparable clay pieces into a thick, short cylinder.
Keep them chunky.
Press each leg underneath the body.
Position two toward the front and two toward the rear.
Check the horse from the side.
Then check it from the front.
Are all four feet touching the granite?
If one leg is floating, adjust it now.
Blend the top of every leg into the body.
Use a toothpick to create a shallow line near the bottom of each leg to suggest a hoof.
You don’t need separate hoof pieces.
The thicker legs also help the sculpture stand while drying.
Step 8: Create the Mane
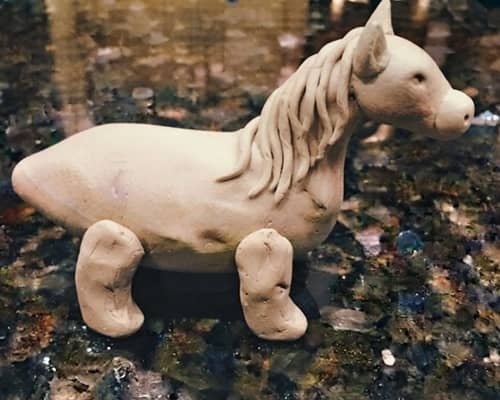
Now let’s give this horse its most recognizable handmade feature.
Take tiny pieces of clay.
Roll each into a thin strand.
Flatten them slightly.
Press the strands along one side of the neck, starting behind the ears and moving toward the body.
You can make them slightly wavy.
Use the toothpick to create small grooves in each strand.
Don’t make every piece identical.
A few can be shorter.
A few can curve differently.
This uneven mane gives the clay Horse a much more interesting silhouette.
Step 9: Add the Tail
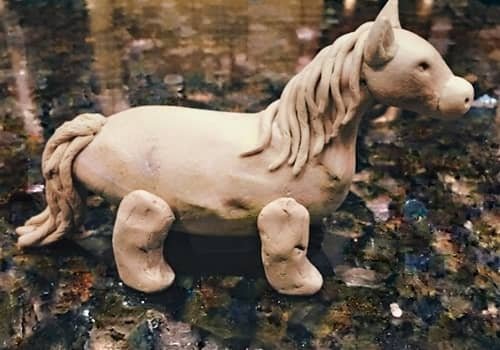
For the tail, roll three or four extremely thin clay strands.
Gather them together at one end.
Attach the gathered end to the rear of the horse.
Curve the strands downward and slightly outward.
You can use a toothpick to add a few texture lines.
Keep the tail relatively short.
A giant heavy tail can pull away from the body while the air dry clay is drying.
Press the attachment point firmly and blend the base.
Step 10: Add the Face Details
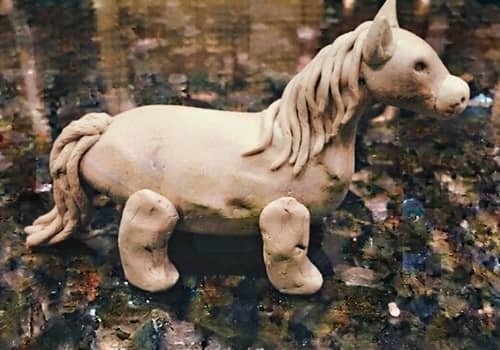
Let the sculpture sit for a little while before adding tiny details.
Use a toothpick to make two shallow eye sockets.
You can leave them as indentations or add tiny clay balls.
For a painted version, wait until the horse has completely dried.
I prefer simple eyes.
Small black dots with tiny white highlights are enough.
You can also add a couple of subtle lines around the muzzle.
Don’t overload the face.
Too much detail can actually make a small clay animal look messy.
Step 11: Let the Horse Dry Completely
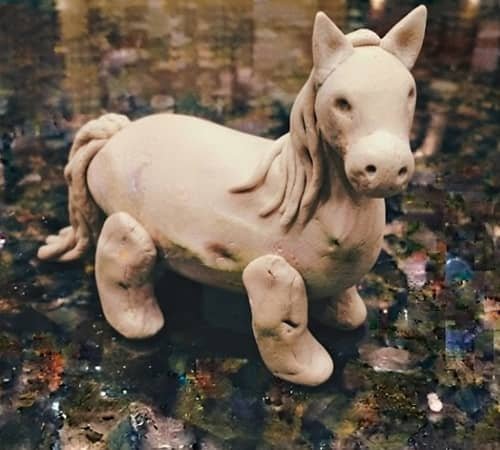
This part isn’t exciting.
It is still important.
Place your sculpture somewhere dry and leave it undisturbed according to the drying instructions for your particular air dry clay.
Thicker sculptures can take longer than thin ornaments.
Don’t paint the horse while the inside is still damp.
The outside might feel hard while the centre remains soft.
That trapped moisture can cause problems later.
Turn the sculpture carefully during drying if the clay manufacturer’s instructions recommend it.
Once completely dry, inspect the legs, neck and tail.
If you find a tiny crack, fill it with a small amount of softened clay or suitable air-dry-clay filler and allow it to dry again.
Step 12: Paint Your Horse
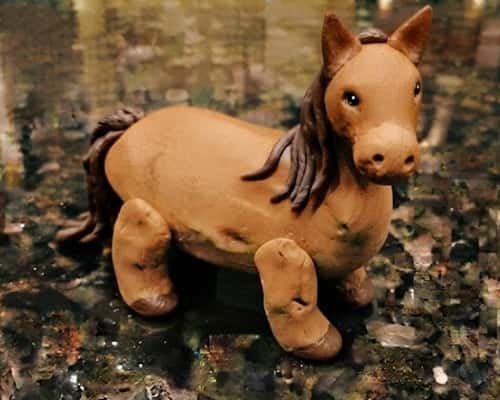
Now comes the fun part.
Start with a base coat.
Brown is an obvious choice, but don’t feel trapped by realism.
Try:
- Warm chestnut
- Cream
- Soft gray
- Black
- Tan
- Rust brown
- White with brown patches
Paint thin coats rather than one heavy coat.
Allow each layer to dry before adding another.
For the mane and tail, use a darker shade.
Paint the hooves slightly darker too.
Then add the eyes.
A tiny white dot inside each black eye makes them look surprisingly lively.
Finally, if you want extra durability, apply a suitable clear acrylic sealer after the paint has fully dried.
What If You Want to Make a Pinch Pot Horse?
A pinch pot Horse is a different construction technique.
Instead of sculpting a solid body, you hollow out and pinch the clay to form a vessel-like shape before adding the neck, head and legs.
It can be beautiful.
But for a first project, I recommend the solid sculpted approach above because it is easier to control and less likely to collapse while you’re learning.
The same basic principles apply to other clay Art projects, too: build the larger shapes first, attach smaller pieces securely, and save tiny details for last.
Final Thoughts
I think the best thing about this air dry clay Horse craft is that it teaches you something beyond making a cute animal.
You learn how weight, balance and attachment points affect a small sculpture.
The thick legs aren’t just there for looks; they help support the body.
The curved neck works because the connection is blended rather than simply stuck together.
Even the uneven mane has a purpose because handmade texture catches paint differently.
If you enjoy this project, try changing the proportions on your next Horse made of clay.
Make the head smaller, the neck taller, or the legs longer.
That’s when a basic clay craft starts becoming your own little piece of clay sculpture rather than another copy of something you’ve already seen online.





