A school locker can feel pretty plain, right? I like turning that little metal door into a tiny space that feels cheerful without making it look overloaded.
These air dry clay locker decor ideas are simple enough for beginners and fun enough for older kids too.
From tiny name plaques to smiley magnets, each project uses basic clay-shaping skills and a few inexpensive supplies.
The best part? Most of these air dry clay locker decor projects can be made at home before school starts, making them useful back to school crafts for kids and creative weekend projects.
Choose Your Air Dry Clay Type
Regular Air Dry Clay | Cornstarch Clay | Homemade Clay
Affiliate Disclaimer: Some of the links in this post may be affiliate links, which means I may earn a small commission if you choose to make a purchase through them – at no extra cost to you. I only share products that genuinely fit this project and can help make your ceramic mug clay craft process easier and smoother. Your support helps keep ideas like this coming.
1. Mini Nameplate Locker Sign
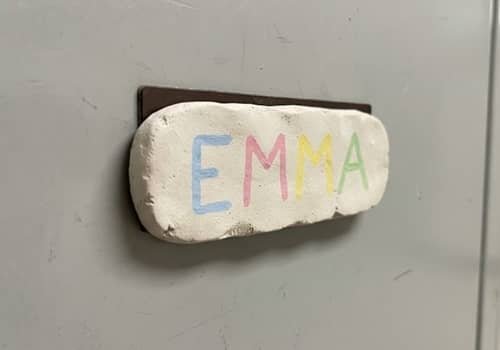
Want your locker to have a little personality without covering the whole door? Make a tiny clay nameplate.
- Knead a walnut-sized piece of clay until it becomes soft and flexible.
- Roll it to about 5 to 6 mm thick. Try not to make it paper-thin because the plaque can crack.
- Cut a rectangle, rounded rectangle, or arch shape.
- Smooth the edges with a slightly damp fingertip.
- Use a pencil to lightly write the name or initials while the clay is still soft.
- Add tiny stars, dots, hearts, or simple lines around the lettering.
- Leave the plaque flat and allow it to dry completely according to the clay package instructions.
- Paint the background and letters after it has hardened.
- Seal it once the paint is dry.
- Attach magnetic strip pieces to the back only after the clay is completely dry.
2. Smiley Face Locker Magnet
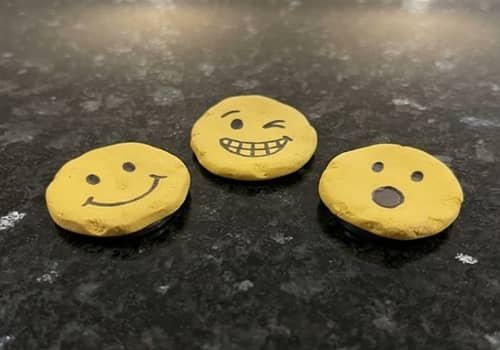
A tiny clay smiley is one of those clay crafts for kids that takes almost no complicated shaping.
Roll yellow air dry clay into a small ball. Flatten it gently between your palms until you have a thick round disc.
Don’t press it too much or it can become fragile.
Use the end of a pencil to make two shallow eye dots. Draw a curved smile with a toothpick.
Add tiny cheeks with two miniature clay balls if you want a softer look.
Let the face dry completely on a flat surface. Paint the details if needed, then seal it.
Attach a small magnetic disc to the back using a strong adhesive suitable for the clay and magnet.
Make three expressions: happy, sleepy, and surprised. Now your locker has its own tiny mood board.
3. Tiny Clay Rainbow Magnet
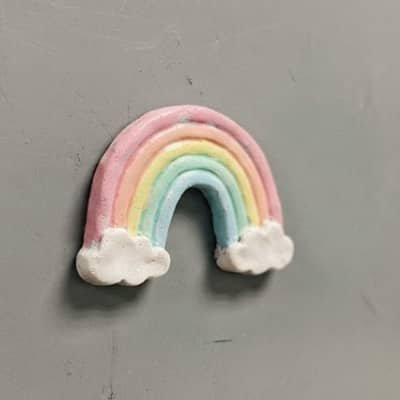
This one works beautifully as a small DIY school locker decor piece.
Roll several thin clay ropes in different colors. Keep them roughly the same thickness.
Arrange them into curved arches, starting with the largest arch and working inward.
Press the arches together gently from the back. Don’t squeeze the front, because you want the separate colors to remain visible.
Trim the ends evenly with a craft knife. Add two tiny white or blue clay clouds underneath.
Allow the rainbow to dry completely before painting or sealing. Attach a magnetic strip or small magnet to the back.
4. Locker Initial Charm
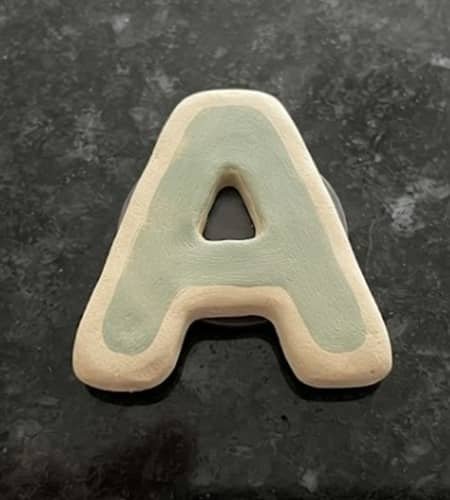
Skip the full name and make one oversized initial instead.
Flatten a piece of clay into a slab about 5 mm thick. Draw a large block letter with a pencil. Carefully cut around it using a craft knife.
Smooth every freshly cut edge with your fingertip.
Add tiny dots around the outside, or press a textured object lightly into the surface for a subtle pattern.
Dry it flat. Paint the letter in one bold color and add a second color around the border.
Because this piece is larger, use two or three small magnetic strips on the back instead of one. That helps keep it from sliding down the locker.
5. Mini Clay Pencil Magnet
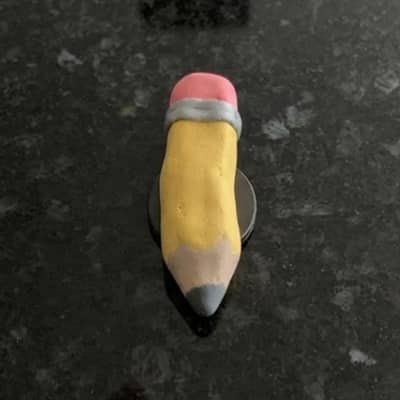
Here is a cute twist on traditional back to school crafts.
Roll a long, thin clay cylinder. Flatten it slightly and taper one end. Add a tiny separate clay piece at the opposite end for the eraser.
Use a toothpick to create a line between the pencil body and eraser. Make the pencil roughly 7 to 10 cm long so it doesn’t become too heavy.
After drying, paint the body yellow, the end pink, and the tip grey or black. Seal the finished piece and attach a narrow magnetic strip along the back.
Keep the pencil fairly flat. A chunky pencil may be cute, but it can become unnecessarily heavy on a locker.
6. Clay School Bus Magnet
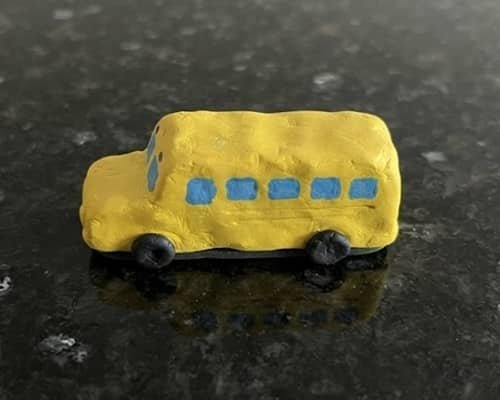
This is a fun option for younger children and works nicely as one of your kids craft activities.
Roll yellow clay flat and cut a small rounded rectangle. Press four tiny circles onto the surface for wheels.
Use a toothpick to draw windows and a simple front grille. Keep the details shallow so they don’t break while drying.
Once hardened, paint the bus yellow and the wheels black. Add tiny blue or grey windows.
For extra durability, use a magnetic strip across the back rather than a single tiny magnet.
7. Mini Locker Quote Tile
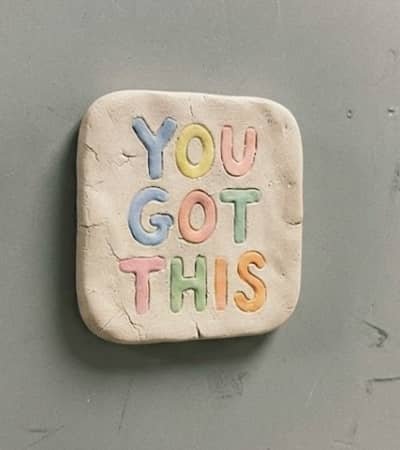
Pick a very short phrase such as “YOU GOT THIS”, “BE KIND”, or “HAVE FUN.”
Roll clay into a small square. Smooth the surface carefully. Lightly write the phrase with a pencil before the clay dries.
Don’t make the lettering too deep. Shallow lettering is easier to paint later and less likely to weaken the tile.
Dry it completely, paint the background, then fill the letters with a contrasting shade. A clear coat gives the little tile a finished appearance.
This also makes a nice homeschool project because children can experiment with lettering, spacing and color choices.
8. Clay Locker Star
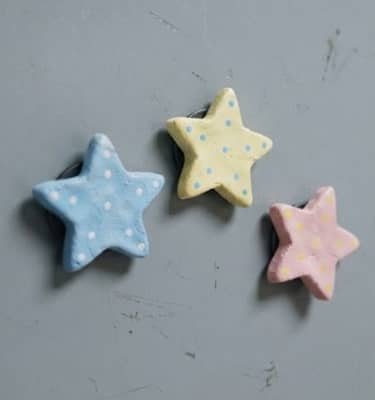
Make a star, but give it a slightly squishy handmade appearance rather than trying to create a perfect geometric shape.
Roll clay to around 5 mm thick. Draw a five-point star and cut it out. Smooth the edges carefully.
Before drying, press tiny dots around the border with the blunt end of a pencil. Paint it after drying, or leave parts of the natural clay visible for a handmade look.
Attach a magnetic strip across the back. Make different sizes if you want a tiny constellation effect.
9. Tiny Clay Apple
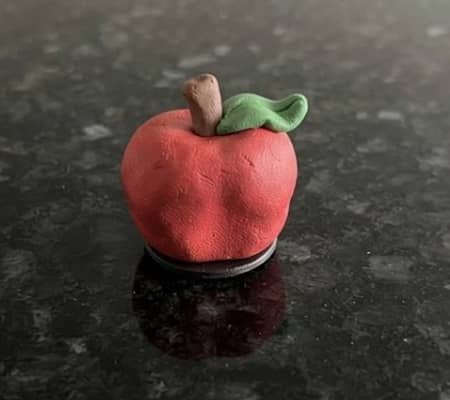
An apple is almost made for school-themed locker decor.
Shape red clay into a small rounded apple. Don’t aim for perfect symmetry. Press a shallow indentation at the top.
Make a tiny brown clay stem and a small green leaf. Attach both while the clay is still soft, but don’t make them too thin.
Let everything dry thoroughly. Paint the pieces if necessary and add a clear protective coat.
For a more playful result, make the apple slightly lopsided. Handmade doesn’t need to look factory-made.
10. Clay Cloud With Raindrops
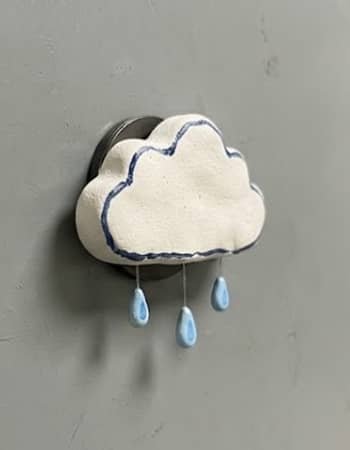
This is one of my favorite softer-looking air dry clay classroom projects.
Roll white or natural clay flat and cut a simple cloud shape. Add three tiny blue clay raindrops underneath.
Press the raindrops gently into the cloud while everything is still soft. Alternatively, make the pieces separately and glue them together after drying.
Keep the cloud broad and fairly thin. Thick clay pieces take longer to dry and can be more difficult to secure to a locker.
Paint the cloud white and the drops blue. Add the magnet after the complete piece has dried.
11. Mini Clay Locker Calendar Tile
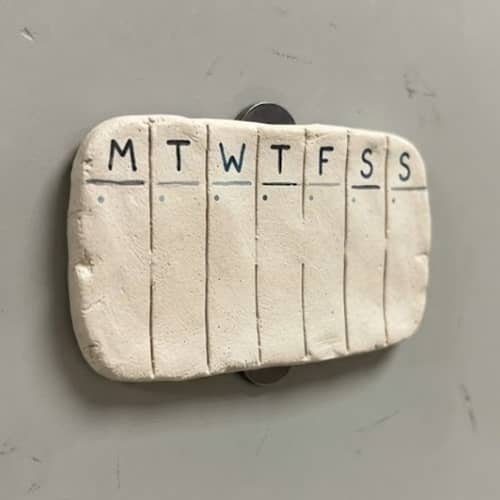
Turn your locker decoration into something useful.
Make a small square clay tile and divide it into seven shallow sections with a ruler or toothpick. You don’t need to create an actual permanent calendar.
Instead, paint seven tiny dots or short lines representing the school week.
Add a small removable paper number later using another tiny magnet.
Let the clay dry completely before painting. Avoid making the tile too thick because practical locker decor should stay lightweight.
This idea combines crafting with simple planning, which makes it a surprisingly useful addition to kids craft activities.
12. Tiny Clay Locker Planet
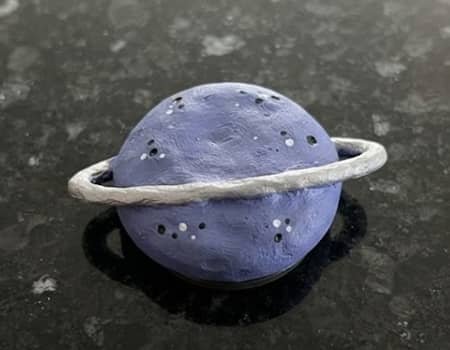
Want something less predictable? Make a tiny planet.
Roll a ball of air dry clay and flatten one side very slightly so it can sit securely against the locker.
Add a thin clay ring around it if you want a Saturn-inspired design.
Press the ring gently into place. Keep it thin, though, because a large raised ring can snap during handling.
Once dry, paint the planet blue, purple, orange or any color combination you like. Add a few tiny dots as craters.
Seal the surface and attach a magnetic strip to the flattened back.
This one turns simple air dry clay locker decor into a tiny piece of handmade space art.
Final Thoughts
The trick with air dry clay locker decor projects is not making them perfectly polished.
In fact, the small fingerprints, uneven edges and slightly wonky shapes are what make these pieces feel personal.
I would also keep locker decorations lightweight and use magnets that match the weight of the finished piece.
Before sticking anything inside a school locker, check the school’s decoration rules because some schools limit adhesives, magnets or objects that could scratch the surface.
Want to make these more meaningful? Let kids choose one color, symbol or word that represents their school year. Suddenly, a tiny clay magnet becomes a little handmade memory.





