Have you ever noticed how much fun kids have when they can squish, roll, press and shape clay with their own little fingers? That is exactly why I love this air dry clay octopus craft.
It is simple enough for beginners, but I have added a small twist to make the finished octopus look more playful and handmade rather than like a perfect store-bought figurine.
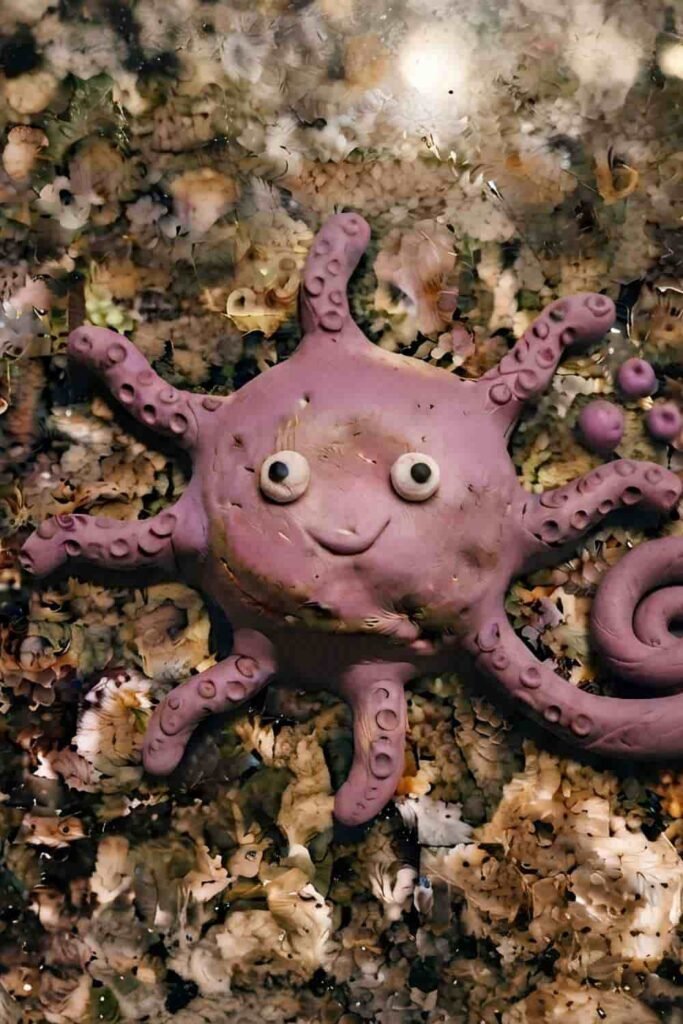
We will make a chunky octopus with eight slightly wavy arms, tiny suction-cup details and a friendly face.
No kiln is needed, and the air dry clay simply hardens as it dries. Ready to make a tiny sea animal?
Choose Your Air Dry Clay Type
Regular Air Dry Clay | Cornstarch Clay | Homemade Clay
Affiliate Disclaimer: Some of the links in this post may be affiliate links, which means I may earn a small commission if you choose to make a purchase through them – at no extra cost to you. I only share products that genuinely fit this project and can help make your ceramic mug clay craft process easier and smoother. Your support helps keep ideas like this coming.
What Makes This Air Dry Clay Octopus Craft Different?
Instead of making a perfectly symmetrical octopus, I like giving each arm a slightly different curve.
Kids don’t need to worry about making everything identical.
In fact, those little differences is what makes the finished craft charming.
My twist is the “wiggly-arm” design. The octopus sits low and wide, with eight rounded arms spreading around its body.
A few tiny pressed dots on the arms look like suction cups, while a cheerful face gives it personality.
It can become a small diy octopus decoration, pretend-play ocean character, classroom craft or part of a collection of handmade clay ocean animals.
Materials Needed To Make Air Dry Clay Octopus Craft
- Child-safe air dry clay
- Small amount of pink, purple, blue or any color you like
- Tiny pieces of black and white clay for the eyes
- A little washable craft paint, optional
- Blunt craft stick or straw for pressing details
- Smooth work surface
- Small cup of water for lightly smoothing fingertips, optional
- Paper or a clean tray for drying
Safety note: Choose an air dry clay that is specifically labeled suitable for children and follow the manufacturer’s age and handling instructions. Avoid sharp tools. A blunt craft stick or drinking straw works perfectly for this project.
Step 1: Soften the Air Dry Clay
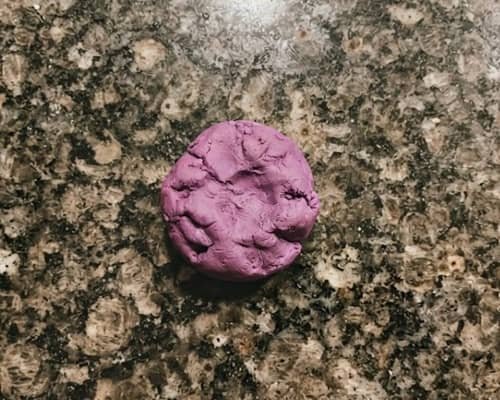
Start with a piece of air dry clay roughly the size of a small orange.
Don’t worry about getting the amount exact.
If you are making this with several children, giving everyone a similar-sized piece will simply make the finished octopuses more consistent.
Knead the clay gently between your palms for a minute or two.
Press it, fold it and roll it until it feels soft and flexible.
Why do this first? Soft clay is much easier for little fingers to shape, and it is less likely to develop rough cracks while you work.
If the clay feels sticky, don’t immediately add water. Let it sit exposed to the air for a minute and knead again.
Step 2: Make the Octopus Body
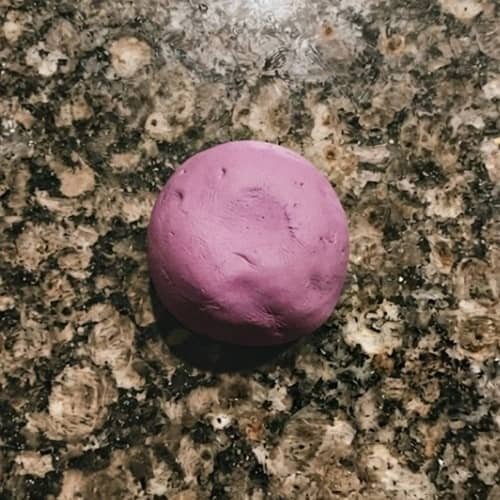
Roll the softened clay between your palms to create a smooth ball.
Now place it on the shiny granite and gently press the bottom with your palm.
You want a shape that looks a little like a rounded dome.
The top should remain plump while the bottom becomes flatter so the octopus can sit without wobbling.
Don’t flatten it too much.
A chunky body gives the finished diy clay octopus a much cuter appearance, especially once the arms are attached.
Turn the clay around as you work and check it from above.
If one side looks heavier, gently push the clay back into shape with your fingertips.
Step 3: Divide Clay for Eight Arms
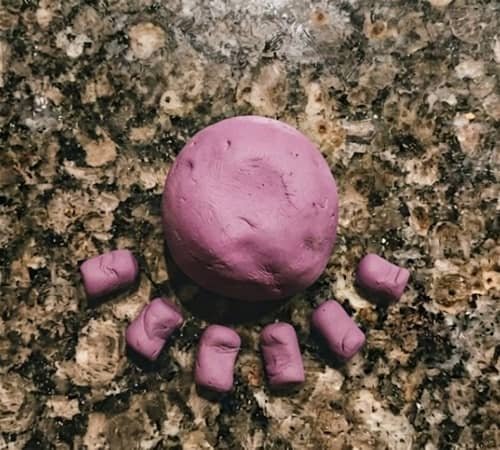
Take another piece of the same clay and divide it into eight small pieces.
Try to keep them roughly similar, but don’t stress about perfection.
Octopus arms can be different lengths, and that actually makes this air dry clay craft more interesting.
Roll each piece gently between your palms to form a short, thick cylinder.
Keep the ends rounded. We don’t want skinny, pointed tentacles because they can break more easily while the clay is drying.
Make the arms slightly shorter than you think you need. You can stretch them a little later when creating the curves.
Step 4: Shape the Wiggly Arms
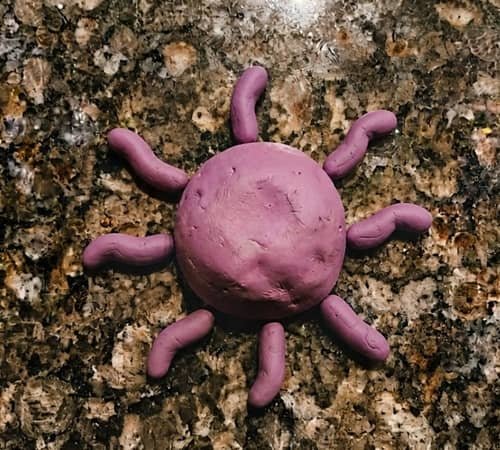
Here comes the fun part.
Take one clay cylinder and gently roll it under your fingers until it becomes a short tentacle.
Then curve it slightly.
Repeat this with all eight pieces, making every arm a little different.
One can curve left. Another can curl outward. A third can have a gentle wave.
Don’t make the curves too tight because very thin bends can crack as the clay dries.
Arrange the eight arms in a circle, leaving a small gap in the center where the body will sit.
Count them.
One, two, three… eight!
That little count also makes this a nice hands-on clay activity for younger children.
Step 5: Join the Eight Arms to the Body
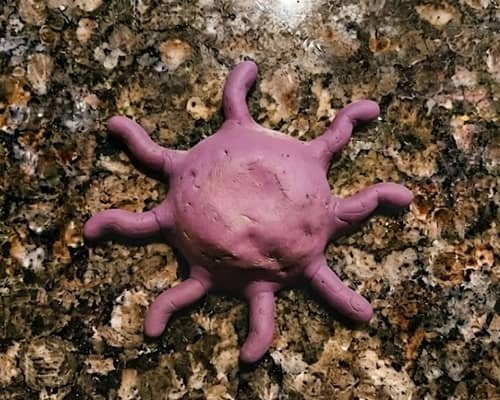
Place the rounded body in the center of the eight arms.
Gently press each arm against the lower edge of the body.
This part matters because simply placing clay pieces together may not create a strong bond.
Use your fingertip to blend the connection point between each arm and the body.
You don’t have to completely hide the joining area. A little handmade texture looks lovely.
Turn the octopus slowly as you work.
If an arm feels loose, press it gently into the body again.
Your octopus should now look like a tiny sea creature spreading itself across the table.
Step 6: Add Tiny Suction-Cup Details
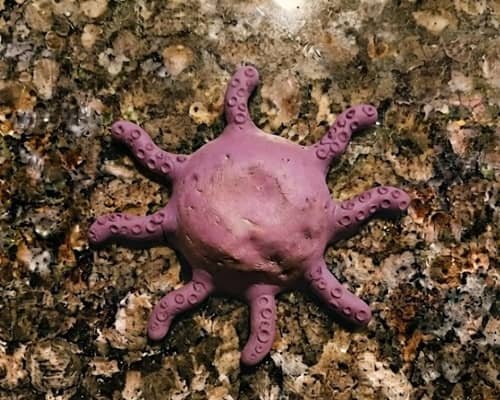
Want to give your octopus more personality?
Take a blunt craft stick, the rounded end of a straw, or simply use your fingertip.
Press tiny shallow dots along the inner part of each arm.
You don’t need dozens.
Three or four little impressions on each tentacle are enough to suggest suction cups without making the craft too busy.
I actually prefer slightly uneven dots. Perfect rows can make a kids’ craft look machine-made, and that isn’t the look we’re after.
Press gently rather than poking all the way through the clay.
Step 7: Give Your Octopus a Friendly Face
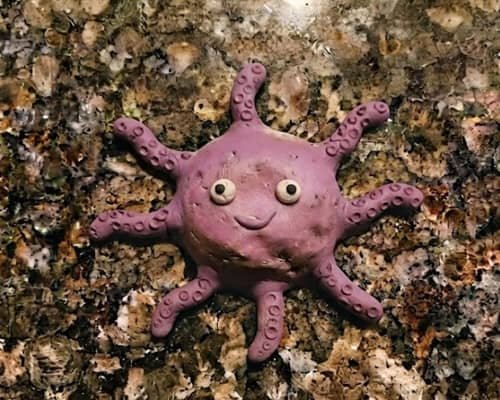
Now let’s make the face.
Roll two tiny pieces of white clay into small balls. Flatten them very slightly and place them near the upper front of the body.
Add two even smaller black clay pieces in the middle.
Press everything gently so the eyes stay attached.
For the mouth, you can use the rounded end of a blunt craft stick to make a tiny curved impression.
Or skip the mouth completely.
Sometimes those two little eyes are enough.
If you want to make the octopus extra playful, add tiny rosy cheeks using two microscopic pieces of pink clay.
Step 8: Add the Unique Little Twist
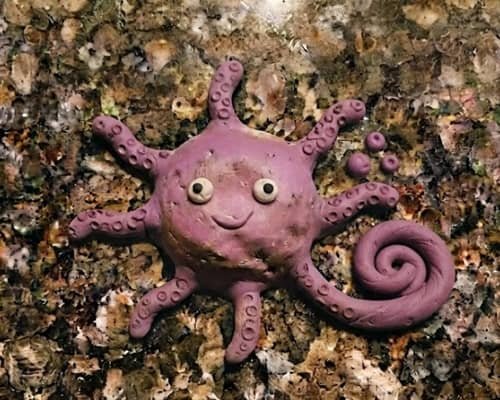
This is where I would let kids take over.
Choose one arm and give it a slightly exaggerated curl. Then make another arm point in the opposite direction.
You can also add a tiny raised clay heart, star or bubble beside the octopus.
My favorite version uses three tiny clay bubbles sitting beside one arm.
They make the octopus look like it is exploring underwater.
Keep these decorations small and press them firmly into the clay.
Remember, this is still a beginner-friendly diy clay project idea.
The more complicated we make it, the less cooperative it becomes for little hands.
Step 9: Let the Octopus Dry Completely
Don’t rush this part.
Place the finished octopus on a clean piece of paper or a drying-safe surface and leave it undisturbed according to the drying instructions on your clay package.
Air dry clay usually hardens as moisture leaves the material, but drying time varies depending on the clay brand, thickness, room temperature and humidity.
A chunky octopus can take longer than a thin project.
Check the underside only after the outside feels firm. If it still feels cool, soft or flexible, give it more time.
Never bake the project unless the specific clay manufacturer says it is designed for baking.
Step 10: Optional Painting and Finishing
Once the octopus is completely dry, you can leave it as it is or add a little color.
For kids, I prefer washable, child-appropriate craft paint. A light coat is usually enough.
You could paint the arms slightly darker than the body, add tiny spots, or give the suction cups a contrasting color.
Don’t soak the clay with paint.
If you want to preserve the craft, ask an adult to check whether the clay manufacturer recommends a particular sealer.
The octopus is best treated as a decorative object rather than a toy that goes into water.
And there you have it… a handmade air dry clay octopus craft that actually looks handmade.
Fun Ways to Use Your Clay Octopus
This little sea animal doesn’t have to sit on a shelf forever.
Here are a few ideas:
- Add it to an ocean-themed kids’ display.
- Make several octopuses in different colors.
- Create a collection of handmade clay ocean animals.
- Use it as part of an ocean sensory-play scene, keeping the dried clay pieces away from water.
- Turn several finished pieces into a mini underwater decoration.
- Make one octopus for each child and compare their different arm shapes.
- Use the activity to practice counting eight arms.
- Ask children to invent names and personalities for their octopuses.
You can even turn the project into a simple learning activity.
Ask kids why an octopus has eight arms, where octopuses live, and what those little suction cups help them do. Suddenly, a simple clay craft becomes a tiny ocean lesson.
Common Problems and Easy Fixes
The arms keep falling off: The clay may be too dry at the joining point. Press the arm firmly against the body and blend a little clay around the connection.
The clay is cracking: Avoid overworking it. Very thin tentacles also crack more easily, so keep the arms chunky.
The octopus keeps tipping over: Flatten the underside of the body slightly before attaching the arms.
The suction-cup dots disappeared: They were probably pressed too lightly. Wait until the shape is stable and make slightly deeper but still shallow impressions.
One arm looks completely different: Leave it! Honestly, that is part of the charm. You are making a handmade decoration, not manufacturing eight identical tentacles.
Final Thoughts
What I like most about this project isn’t really the octopus.
It is the way a simple lump of clay becomes something kids can shape, question and personalize.
The eight arms also give you a natural opportunity to introduce counting, symmetry, texture and basic ocean-animal facts without turning the activity into a lesson.
And here’s another useful trick: if you’re making several for a classroom or playdate, let every child choose a different arm pattern. The finished collection will look far more interesting because every diy clay octopus has its own little personality. Thats exactly what makes handmade crafts worth keeping.





