Have you ever noticed how a tiny clay animal can become a whole little character? That is exactly what I wanted to create with this air dry clay raccoon craft.
Instead of making a perfectly realistic raccoon, we are shaping a cute, slightly chunky woodland buddy that feels handmade and full of personality.
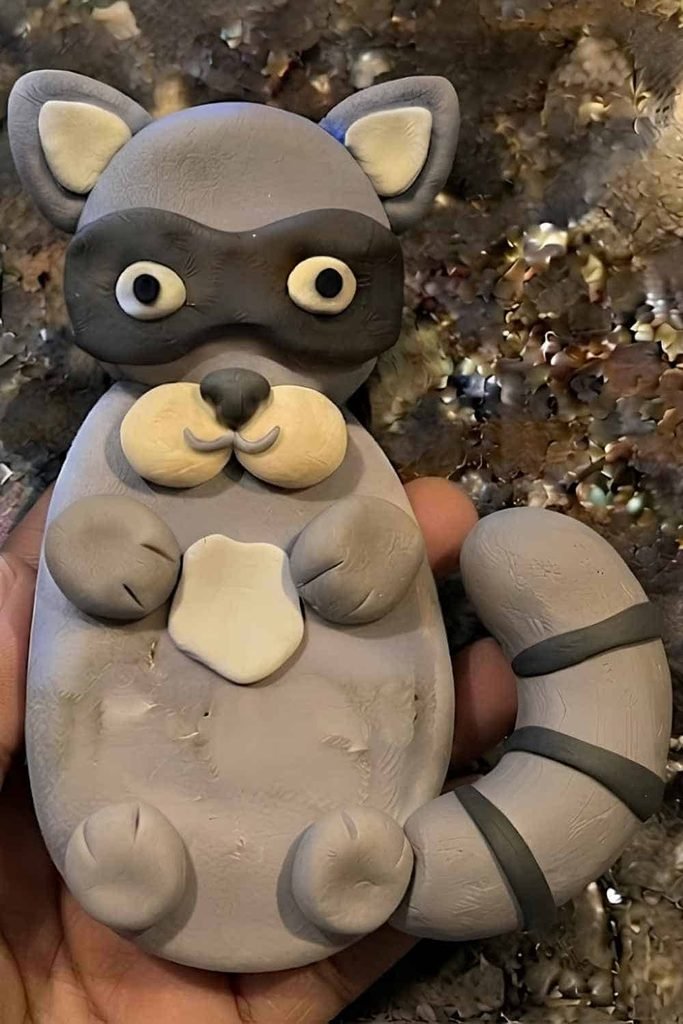
This clay craft is simple enough for little hands, but there are enough small details to keep older kids interested too.
We will use basic shapes, gentle pressing and easy layering to build the raccoon from scratch.
No fancy sculpting skills needed.
Ready to turn a few pieces of clay into a mischievous little forest friend?
What Makes This Air Dry Clay Raccoon Craft Different?
Most clay raccoon projects focus on copying the animal’s face. I wanted to try something a bit more lighthearted.
Our raccoon will have:
- A rounded, slightly oversized head
- A soft oval body
- A chunky striped tail curled beside the body
- Tiny rounded paws
- A simple black eye mask
- A little pointed nose
- Small ears with contrasting inner sections
- A slightly tilted head for extra personality
That tilted-head detail makes a surprising difference. It turns a basic clay animal craft into a character.
And because this is part of a Woodland Series, you can eventually make other woodland creatures using the same basic body-building method.
Choose Your Air Dry Clay Type
Regular Air Dry Clay | Cornstarch Clay | Homemade Clay
Affiliate Disclaimer: Some of the links in this post may be affiliate links, which means I may earn a small commission if you choose to make a purchase through them – at no extra cost to you. I only share products that genuinely fit this project and can help make your ceramic mug clay craft process easier and smoother. Your support helps keep ideas like this coming.
Supplies Needed To Make Air Dry Clay Raccoon Sculpture
For this air dry clay craft, keep the supplies very simple.
- Gray air dry clay
- Black air dry clay
- White or off-white air dry clay
- A tiny amount of pink or dark gray clay for the nose
- A child-safe plastic clay tool or blunt craft stick
- A smooth work surface
- Small rolling pin or clean smooth bottle
- A little water for smoothing fingers, if needed
Choose a non-toxic, kid-friendly air dry clay suitable for children’s crafts.
You don’t need an oven because the finished sculpture will harden naturally.
Avoid sharp sculpting tools. Little fingers can do most of the work here anyway.
Step 1: Make the Raccoon’s Body
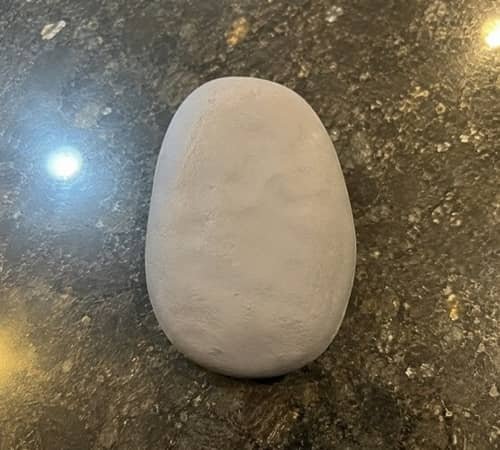
Start with a generous piece of gray clay.
Knead it between your fingers for a minute or two until it feels soft and workable.
Roll the clay between both palms to make a smooth ball.
Now gently roll that ball back and forth between your palms, applying slightly more pressure toward the middle.
You want to turn the ball into a short, plump oval.
Don’t make it too skinny. A chunky body gives the finished raccoon that cute woodland-toy appearance.
Place the oval on your work surface and gently flatten the bottom just enough so it can sit without rolling away.
Check the shape from the top. Does it still look like a soft oval rather than a cylinder?
If small cracks appear, lightly rub the surface with your fingertip. Too much water can make the clay sticky, so use very little if you need it.
Step 2: Shape the Head
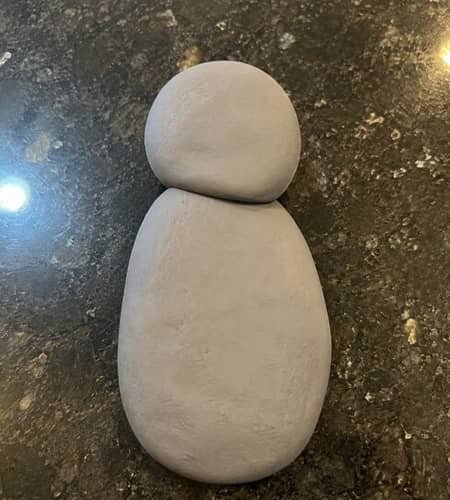
Take another piece of gray clay, slightly smaller than the body.
Roll it into a ball first.
Now gently pinch and press the lower portion so the head becomes slightly wider toward the cheeks. Don’t try to make a perfect sphere.
A raccoon’s face looks much cuter when the cheeks are a little full.
Tilt the head very slightly to one side. This is our little character detail.
Place the head against the top of the body and press gently where they meet.
You want the two pieces to touch firmly, but don’t squash the head into the body.
If the clay is soft enough, lightly blend the joining area with your fingertip.
This helps the head stay attached after drying.
Now we have a recognizable little animal shape already!
Step 3: Add the Raccoon’s Ears
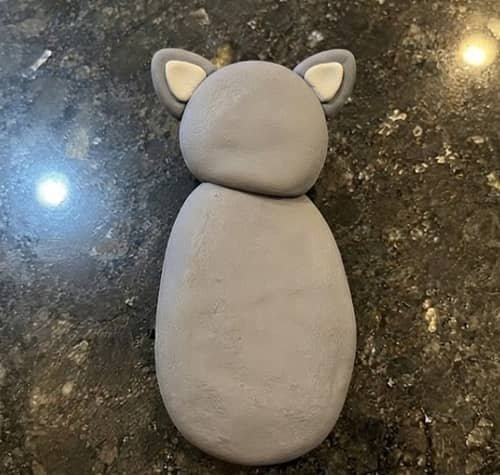
For the ears, pinch off two tiny pieces of gray clay.
Roll each one into a small ball.
Flatten them slightly, then pinch the upper edge into a gentle point.
Don’t make sharp spikes. Rounded triangular ears are easier for kids to make and they look friendlier.
Put one ear on either side of the head’s crown.
Press the base gently against the head.
For the inner ear, make two tiny pieces from white or off-white clay. Flatten them into little triangles and press one onto each gray ear.
This layered approach is much easier than trying to paint the details later.
Step 4: Build the Famous Raccoon Mask
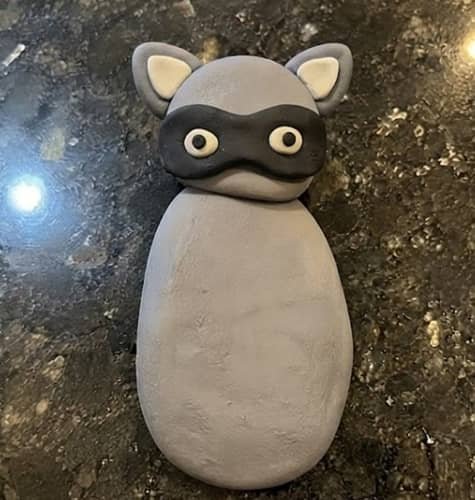
Now comes the part that makes the animal instantly recognizable.
Take black clay and divide it into two small pieces.
Flatten each piece into a tiny rounded oval.
Place them on the front of the head, one on either side of where the eyes will sit.
Join the two pieces across the center with a very thin strip of black clay.
You are basically creating a soft black band across the raccoon’s face.
Don’t make the mask perfectly symmetrical. A tiny difference between the two sides actually makes the sculpture feel more handmade.
Next, add two tiny white or off-white clay balls for the eyes.
Press them gently onto the black mask.
Then add two even tinier black dots on top for the pupils.
Tiny pieces can be tricky for younger children, so an adult can help prepare the little clay dots while the child does the pressing.
Step 5: Add the Nose and Muzzle
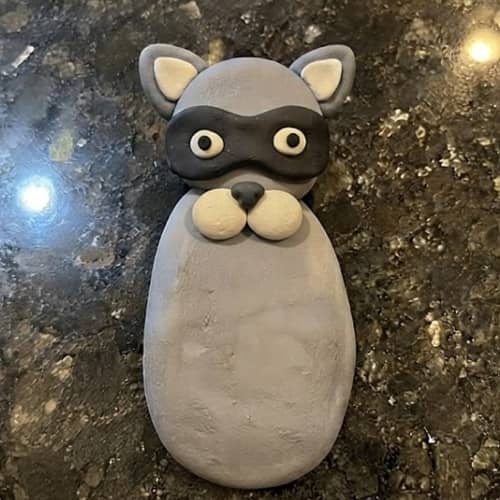
Make two tiny off-white clay balls.
Flatten them gently and place them side by side below the eyes.
These become the raccoon’s soft muzzle.
Now take a very small piece of black or dark gray clay and roll it into a tiny oval.
Place it in the center where the two muzzle pieces meet.
That’s the nose.
For a cute expression, press the nose slightly downward rather than making it perfectly centered and flat.
You can also use the blunt end of a child-safe clay tool to make two tiny nostril impressions, but this is completely optional.
The face should still look soft and simple.
Step 6: Make the Tiny Paws
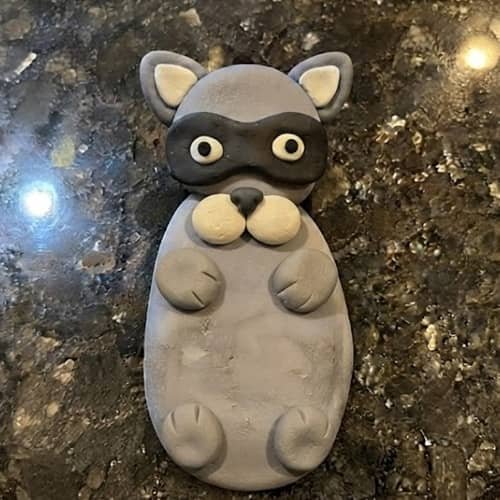
Take four very small pieces of gray clay.
Roll each one into a little ball, then gently flatten it into a rounded oval.
Two will become the front paws.
Attach them near the upper front portion of the body, just below the head.
The other two can be used as little feet near the bottom.
Don’t worry about making them identical. In fact, mine usually aren’t!
Press each piece firmly enough to attach it, but avoid flattening it completely.
For a little extra detail, use the blunt end of a child-safe tool to make two or three very shallow lines on each front paw.
These are simple clay activities, but kids often love this part because they can really see the character appearing.
Step 7: Create the Striped Raccoon Tail
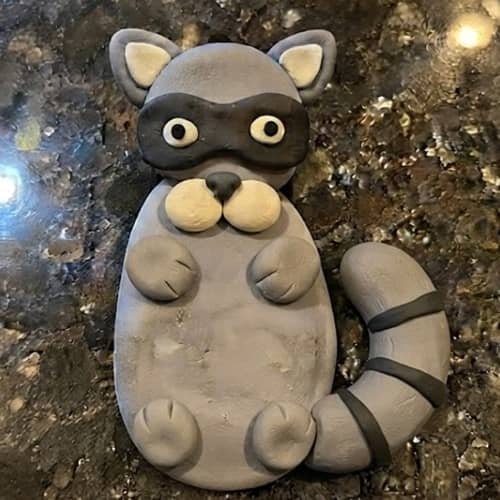
This is my favorite part.
Take a longer piece of gray clay and roll it gently between your palms to create a thick clay rope.
Keep one end slightly thicker than the other.
Now bend the rope into a relaxed curve beside the raccoon’s body.
Don’t make a perfect spiral. A loose curl looks much more natural and is easier for kids to form.
Next, make three or four thin strips of black clay.
Wrap or press these strips across different sections of the tail.
Alternate the spacing. The stripes don’t need to be mathematically even.
Attach the tail to the lower side of the body and press the connection gently.
If the tail keeps moving, let it rest against the granite while you work.
Step 8: Add Tiny Character Details
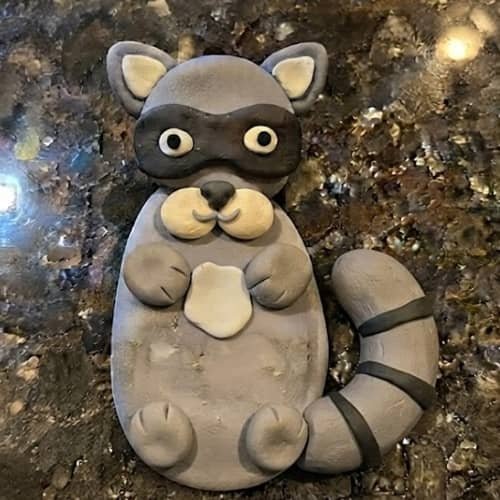
At this point, stop and look at your raccoon.
Does it look a little too serious?
Let’s fix that.
Use a thin clay tool or blunt stick to make a very shallow curved mouth beneath the nose.
You can also add two tiny gray cheek pieces if you want a fuller face.
For a woodland-series touch, make a tiny off-white clay patch on the chest.
Flatten a small piece into an oval and press it gently onto the upper body.
Keep the details minimal. Too many decorations can hide the lovely handmade shapes.
This is where your DIY clay raccoon becomes your own character.
Step 9: Smooth, Check and Let It Dry
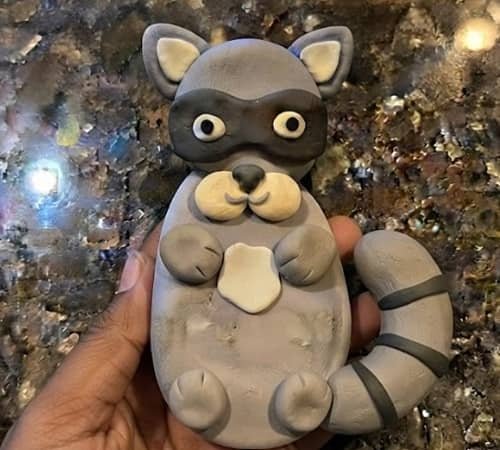
Now give your sculpture a final inspection.
Look for loose pieces first.
Gently press the ears, paws, nose and tail connection to make sure everything is secure.
If you see a small crack, smooth it with your fingertip.
Don’t keep handling the raccoon once you’re happy with it. Air dry clay needs time to lose its moisture and become firm.
Place it somewhere dry and undisturbed.
The exact drying time depends on the clay brand and how thick your raccoon is.
A small sculpture may take around 24 to 48 hours, while thicker areas can need longer.
Don’t rush this part.
If the outside feels dry but the thicker body still feels cool or soft, give it more time.
Once completely dry, your raccoon is ready for display.
A Few Beginner Tips
Keep pieces chunky: Very thin clay parts can become fragile after drying.
Don’t overwork the clay: Constantly reshaping the same piece can make it difficult to control.
Attach pieces while the clay is still workable: Gentle pressure is usually enough.
Don’t soak the clay with water: A barely damp fingertip is enough for smoothing minor cracks.
Let it dry completely: Patience is part of the craft.
Most importantly, don’t compare your finished raccoon with perfectly polished online sculptures. This is a kids craft, not a competition.
The slightly crooked ear might end up being the best part.
Final Thoughts
I think the real charm of this air dry clay raccoon craft is that it teaches kids something beyond simply making an animal.
They get to understand how complicated shapes can be built from very simple forms.
A ball becomes a head, a flattened piece becomes a mask, and a clay rope suddenly turns into a striped tail.
That kind of hands-on thinking is useful in lots of creative projects.
And because air dry clay doesn’t require baking, kids can concentrate on shaping and decorating instead of complicated equipment.
Let the little imperfections stay. A raccoon with one ear slightly higher than the other has much more personality, and that is what makes handmade clay crafts memorable.





