Making an air dry clay sheep craft is one of those projects that looks adorable without demanding expert sculpting skills.
That is exactly why I keep coming back to this little clay craft whenever I want something relaxing yet creative.
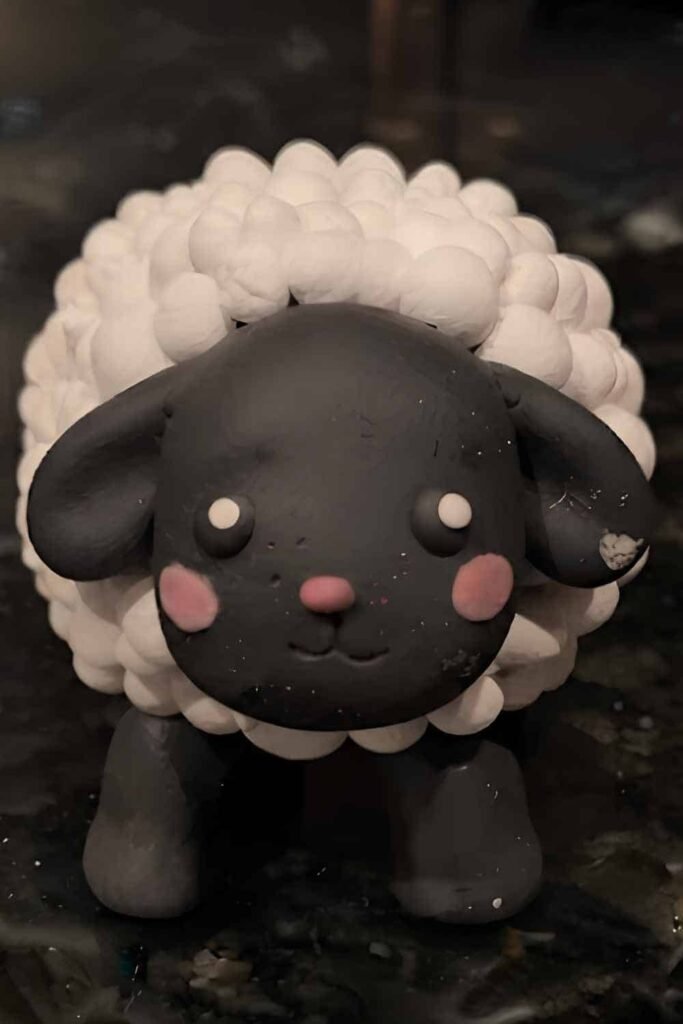
Ever noticed how simple round shapes can turn into surprisingly cute animals? This project proves it.
With only a few basic tools and some patience while the clay dries, you can create a fluffy sheep that’s perfect for decorating shelves, gifting, or adding to a collection of handmade air dry clay crafts.
Because each design builds organically upon the one before it, even novice crafters can confidently complete this project.
Choose Your Air Dry Clay Type
Standard Air Dry Clay | DAS Air Hardening Modeling Clay
Affiliate Disclaimer: Some of the links in this post may be affiliate links, which means I may earn a small commission if you choose to make a purchase through them – at no extra cost to you. I only share products that genuinely fit this project and can help make your ceramic mug clay craft process easier and smoother. Your support helps keep ideas like this coming.
Materials Needed To Make Air Dry Clay Sheep Craft
- White air dry clay
- Black air dry clay
- Pink air dry clay (optional for cheeks)
- Clay sculpting tool or butter knife
- Ball stylus or toothpick
- Rolling tool or acrylic roller
- Small paintbrush
- Water for smoothing
- Silicone mat or parchment paper
- Clear matte sealer (optional)
Also Read: Cotton Ball Sheep Craft (Farm Animal Craft Idea)
Step 1: Shape the Sheep’s Body
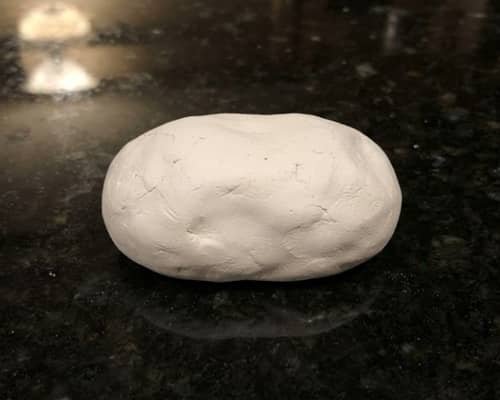
Start by rolling a large white clay ball about the size of a golf ball.
Now gently flatten the bottom just enough so it won’t wobble later.
The body should look slightly oval rather than perfectly round.
Don’t chase perfection because real handmade crafts have personality.
Next, use your fingertips to soften every crack with a tiny amount of water.
This part doesn’t need to be rushed. A smooth foundation makes everything else much easier.
Think of the body as a soft marshmallow sitting comfortably on the table.
Step 2: Create the Head
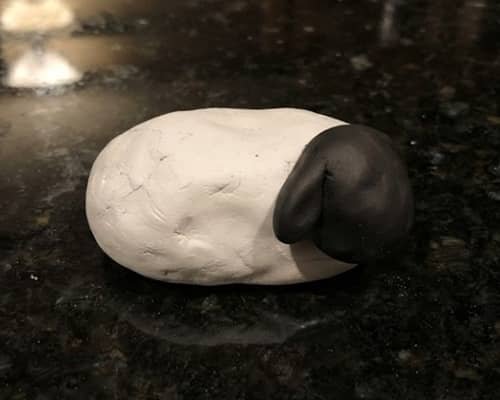
Roll a smaller black clay ball, roughly half the body’s size.
Gently press one side to make an oval face instead of a sphere.
Attach it to the front of the white body using a tiny drop of water and blend the connection carefully.
If the head tilts slightly upward, the sheep instantly feels more cheerful. Funny how one tiny adjustment changes everything, isn’t it?
Use your sculpting tool to lightly press where the neck joins the body so both pieces look connected naturally.
Step 3: Make Puffy Wool Texture
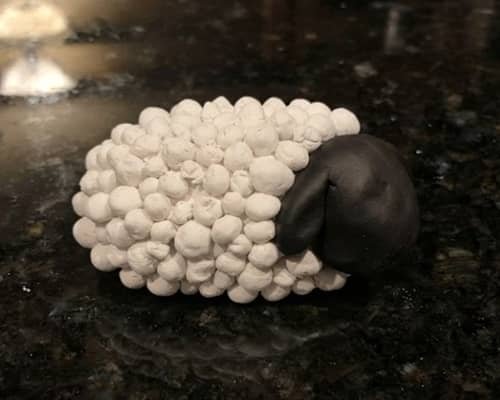
Now comes the fun part. Roll around twenty tiny white clay balls about the size of peas.
Press each one gently onto the body without flattening them completely.
Continue until almost the entire body looks fluffy. Leave the face uncovered.
Instead of placing them in perfect rows, stagger them naturally.
That uneven pattern actually looks more realistic.
I usually rotate the sheep every few minutes while working so I can spot empty spaces easier.
It makes the wool look fuller without adding extra clay.
Lightly tap each ball so it bonds firmly.
Step 4: Add the Legs and Ears
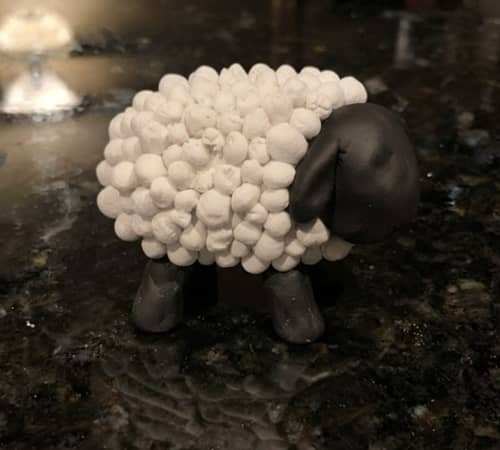
Roll four identical black cylinders for the legs.
Keep them short because oversized legs can make the sheep unstable.
Attach them underneath, spacing them evenly. If needed, flatten the feet slightly for balance.
Next, shape two tiny teardrops from black clay and press them gently onto each side of the head for floppy ears.
You can curve the tips downward a little. Suddenly, the sheep begins looking alive.
Use water sparingly while attaching small pieces.
Step 5: Add the Face
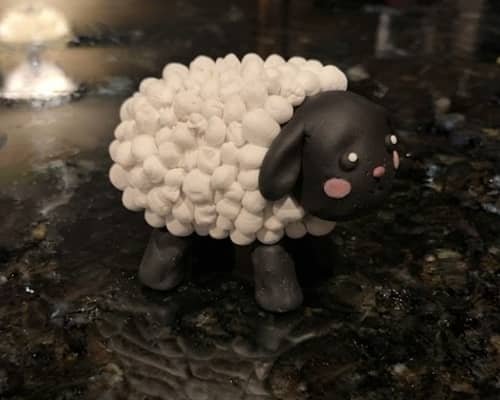
Roll two microscopic white balls and flatten them for the eyes.
Place even smaller black dots inside each one. A ball stylus helps here, but a toothpick works too.
For the nose, gently press a tiny upside-down Y shape into the face using a sculpting tool.
Add miniature pink circles for blush if you enjoy a soft kawaii look.
Small facial features matter far more than people realize. A one-millimeter adjustment can completely change the expression.
This is one of my favorite parts because every air dry clay sheep develops its own personality.
Step 6: Refine the Details
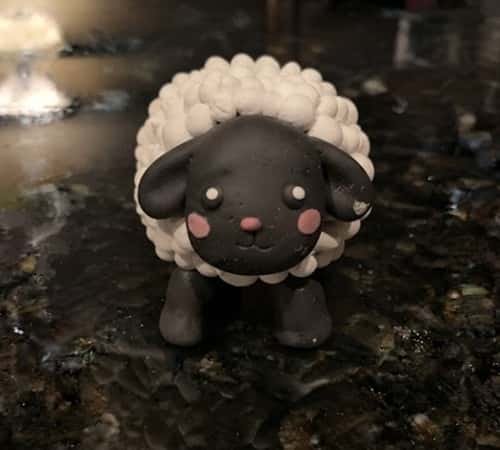
Take a close look from every angle. Smooth fingerprints with a damp brush and gently reshape anything that shifted while handling the sheep.
If the wool appears too flat, add a few extra tiny clay balls between existing ones. You can also press shallow curved lines into the ears for more depth.
This stage often gets skipped, but honestly it separates an average easy clay sheep from one that feels thoughtfully finished.
Leave the sculpture untouched for at least 24 to 48 hours depending on thickness.
Step 7: Seal and Display
Once completely dry, brush away dust using a soft paintbrush.
If you’d like extra durability, apply a thin coat of matte sealer.
Avoid thick glossy finishes because they can hide the soft wool texture.
Place your sheep on a wooden shelf, inside a shadow box, or alongside other modeling clay animals.
You could even create an entire little farm scene over time.
One sheep often turns into several before you even notice. They is strangely addictive to make.
Also Read: Paper Plate Sheep Craft (Fluffy Farm Animal Kids DIY Project)
Creative Ways to Use Your Air Dry Clay Sheep
This simple kids craft is surprisingly versatile once it’s finished.
- Decorate a nursery shelf with several different sheep sizes.
- Turn it into a seasonal spring display.
- Glue a magnet behind it for the refrigerator.
- Add it to a miniature clay farm collection.
- Use it as part of clay art for kids during classroom projects.
- Pair it with cows, pigs, and ducks for fun kids clay activities.
- Build an entire pasture using more easy clay creatures.
- Include it in handmade gifts or memory boxes.
- Combine it with other DIY project ideas to create a countryside-themed display.
Final Thoughts
What makes this project memorable isn’t just the finished sheep.
It’s how a handful of simple circles, ovals, and tiny details gradually become something full of character.
That shape-first approach is useful across countless air dry clay crafts, whether you’re making woodland animals, pets, or fantasy figures later on.
Once you understand how basic geometry creates believable forms, sculpting stops feeling intimidating and starts becoming playful.
Keep your first sheep even if it isn’t perfect because it becomes a reference for every future clay craft you create.
Sometimes the little imperfections are exactly what gives handmade art its charm and warmth.





