I’ve always liked crafts that turn ordinary household items into something people actually want to keep.
That’s exactly why bottle craft ideas never gets old.
A plain plastic bottle or an empty glass bottle can become a colorful decoration, a useful organizer, or even a fun weekend project for little hands.
And honestly, you don’t need expensive supplies either.
These beginner-friendly tutorials are broken into simple steps, so anyone can follow along without guessing.
Whether you’re searching for kids craft activities or creative things to do with glass bottles these ideas bring everyday recycling to life in surprisingly creative ways.
1. Floating Jellyfish Bottle Decoration
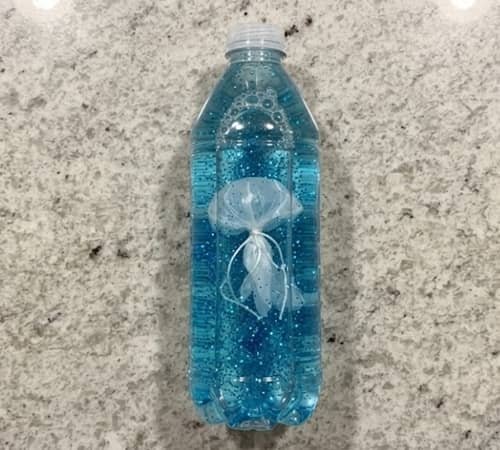
This craft transforms a clear plastic bottle into a floating underwater scene.
Kids usually can’t stop shaking it once it’s finished. It looks fancy, but the process is surprisingly forgiving.
Materials
- 1 clear plastic bottle with lid
- White plastic grocery bag
- Blue food coloring
- Water
- Clear tape
- String or fishing line
- Small blue glitter (optional)
- Scissors
- Funnel
Instructions
Step 1: Wash the bottle thoroughly
Remove every trace of the label using warm soapy water.
Sticky residue can be rubbed away with a little cooking oil before washing again. Let it dry completely.
Step 2: Make the jellyfish body
Cut the grocery bag into one large circle about 8 inches wide.
Place a small cotton ball in the center.
Gather the plastic around it and twist gently underneath. This becomes the jellyfish head.
Tie the twist tightly with fishing line.
Now cut the remaining hanging plastic into thin strips. Leave about one inch below the head untouched before making the tentacles.
The strips shouldn’t all be same width. Uneven tentacles actually looks better.
Step 3: Fill the bottle
Add water until the bottle is about 90% full.
Add one or two drops of blue food coloring and stir.
Sprinkle a pinch of glitter if you’d like extra sparkle.
Step 4: Add the jellyfish
Carefully place the jellyfish inside using tweezers if needed.
Adjust the water level until the jellyfish floats naturally.
Too much air will make it float strangely.
Step 5: Seal everything
Apply clear glue around the bottle threads before tightening the lid.
This helps prevent leaks if kids shake it often.
2. Color Block Bottle Flower Vase
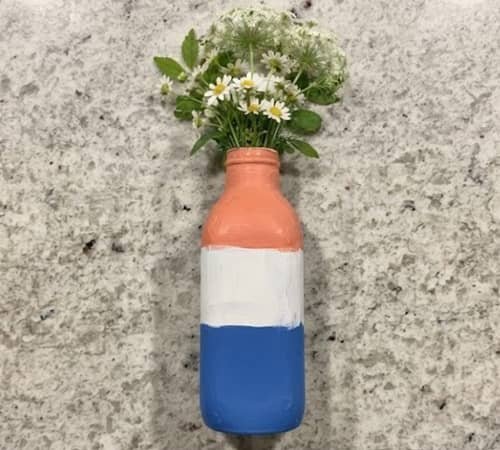
Sometimes simple bottle decorations end up looking the nicest.
This vase takes less than an hour, and nobody would guess it started as a juice bottle.
Materials
- Glass bottle
- Acrylic paint (3 colors)
- Painter’s tape
- Foam brush
- Matte sealer spray
- Fresh flowers or dried flowers
Instructions
Step 1: Clean the glass bottle
Peel off labels.
Wash using dish soap and warm water.
Dry it completely before painting.
Step 2: Plan the color blocks
Wrap painter’s tape around the bottle in different directions.
Try diagonal sections instead of horizontal stripes.
That tiny change makes it feel more modern.
Step 3: Paint carefully
Use a foam brush.
Apply thin coats instead of thick ones.
Wait about 20 minutes between coats.
Two coats usually covers everything nicely.
Step 4: Remove tape
Peel slowly before the final coat dries fully.
Sharp edges are easier to get this way.
Step 5: Protect the finish
Spray with matte sealer outdoors.
Allow it to cure overnight.
Then add flowers.
Artificial flowers work too if you don’t have fresh ones.
3. Bottle Rocket Launcher
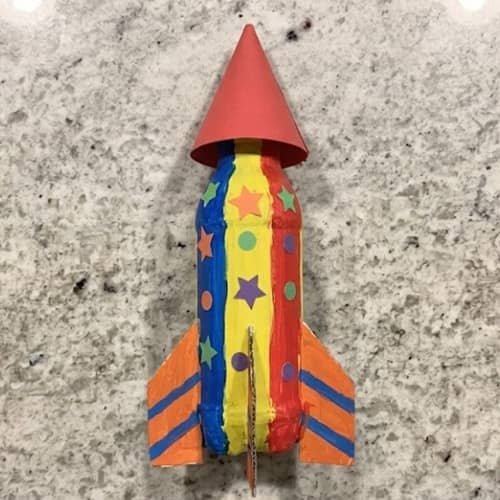
This is one of those kids craft activities that mixes science with crafting. The excitement begins before you even finish building it.
Materials
- Plastic bottle
- Cardboard
- Colored paper
- Glue
- Scissors
- Tape
- Markers
Instructions
Step 1: Prepare the bottle
Wash and dry it.
Remove every label.
Step 2: Make rocket fins
Cut four identical triangles from cardboard.
Cover them using colored paper.
Glue them evenly around the bottom of the bottle.
Measure first.
Crooked fins makes the rocket wobble.
Step 3: Create the nose cone
Roll cardstock into a cone.
Tape securely.
Glue onto the bottle bottom, since the bottle will stand upside down.
Step 4: Decorate
Draw windows.
Add flames.
Write a fun rocket name.
Mine usually end up having silly names somehow.
Step 5: Play
Kids can pretend launch missions around the house or backyard.
No batteries.
No complicated setup.
4. Mason Jar Style Fairy Lantern
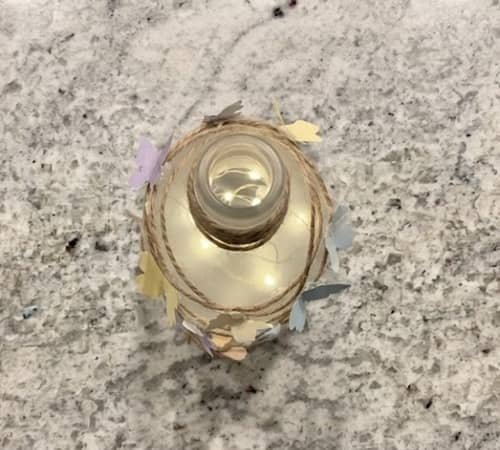
If you love mason jar craft projects but only have empty bottles, this is a fun substitute.
Materials
- Small glass bottle
- Battery fairy lights
- Frosted glass spray
- Twine
- Tiny paper butterflies
- Hot glue
Instructions
Step 1: Frost the bottle
Spray outside evenly.
Allow one hour to dry.
Don’t rush this part.
Seriously.
Step 2: Add butterflies
Glue tiny paper butterflies randomly.
Some should overlap slightly.
Natural arrangements always feels prettier.
Step 3: Wrap twine
Wind twine around the neck several times.
Tie a simple bow.
Step 4: Insert fairy lights
Place battery lights inside carefully.
Hide the battery pack behind the bottle when displaying.
5. Bottle Cap Rainbow Wind Spinner
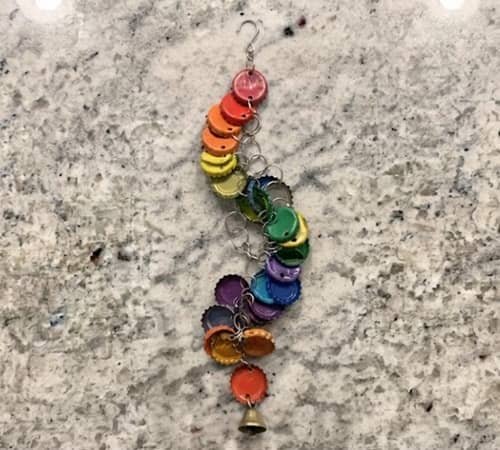
Looking for unusual DIY projects using bottles? Save those bottle caps too.
Materials
- Plastic bottle caps
- Fishing line
- Small drill
- Acrylic paint
- Metal ring
Instructions
Step 1: Paint caps
Use rainbow colors.
Allow them to dry completely.
Step 2: Drill holes
Adult supervision is needed here.
One hole near each edge works well.
Step 3: String together
Alternate colors.
Leave equal spacing.
That keeps everything balanced.
Step 4: Hang from the ring
Create several strands.
Tie securely.
The spinner catches even light breezes.
It don’t need strong wind to move much.
6. Woodland Animal Pencil Holder
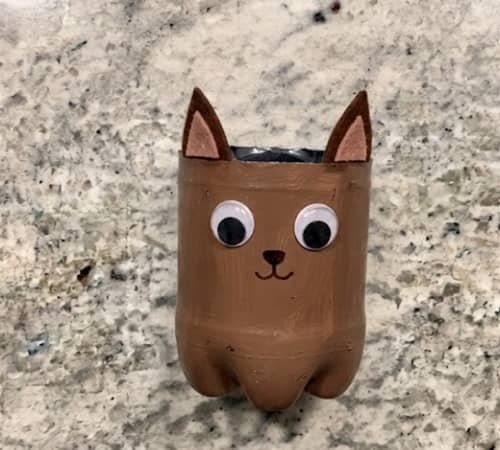
Among all plastic bottle crafts, this one actually becomes useful every single day.
Materials
- Plastic bottle
- Brown acrylic paint
- Colored craft foam
- Googly eyes
- Hot glue
- Black marker
- Scissors
Instructions
Step 1: Cut the bottle
Measure about halfway up.
Cut evenly using sharp scissors.
Parents should handle this step.
Step 2: Paint everything
Apply two coats of brown paint.
Allow drying between coats.
Patience matters here.
Painting wet layers never ends nicely.
Step 3: Make animal features
Cut ears from foam.
Create a fox, bear, raccoon or owl.
Glue them securely.
Step 4: Add details
Attach googly eyes.
Draw a nose.
Add little eyebrows.
Funny expressions makes each one unique.
Step 5: Fill it
Store pencils.
Markers.
Paint brushes.
Even small rulers fit inside.
Tip: Glue a small felt circle underneath to stop the holder from sliding across the desk.
7. Glass Bottle Herb Drying Rack
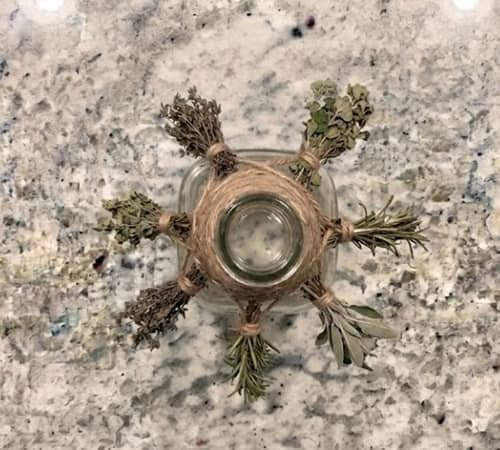
Fresh herbs deserve better than being forgotten in a kitchen drawer.
This project gives an empty glass bottle a second life while helping herbs dry evenly.
I started making one after trimming basil one summer, and it worked far better than I expected.
You don’t needs fancy woodworking skills either.
Materials
- 1 tall glass bottle
- Natural jute twine
- Small wooden beads (optional)
- Dried lavender or fresh herbs
- Scissors
- Hot glue
- Small craft tag (optional)
Instructions
Step 1: Prepare the bottle
Remove every label and wash the bottle thoroughly with warm soapy water.
Dry both the inside and outside completely.
Even a little moisture can slow the drying process.
Step 2: Wrap the neck
Start wrapping jute twine around the bottle neck.
Secure the starting end with a tiny dot of hot glue.
Continue wrapping until you have a thick collar about 2 inches wide.
Step 3: Create hanging loops
Cut six pieces of twine around 10 inches long.
Tie each one securely around the wrapped neck.
Space them evenly.
These become the herb hanging points.
Step 4: Decorate lightly
Slide a wooden bead onto each string if desired.
Tie a small knot underneath to keep the bead from slipping.
Attach a tiny craft tag for labeling herbs.
Step 5: Hang herbs
Bundle herbs using elastic bands.
Tie each bunch onto one loop.
Leave space between bundles so air can circulate properly.
8. Rainbow Bottle Sand Art
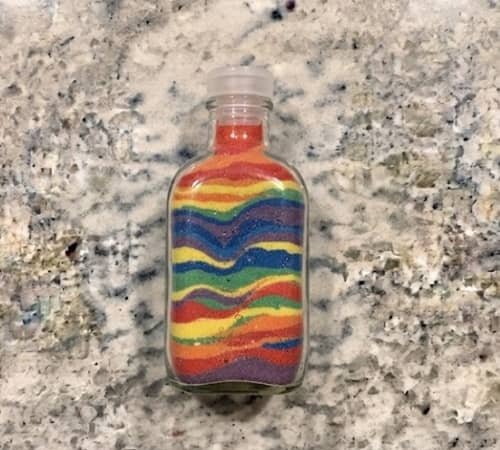
Some crafts are relaxing from the very first minute.
This colorful project is wonderful for rainy afternoons and doubles as cheerful bottle decorations once finished.
Materials
- Clear glass bottle
- Colored craft sand
- Funnel
- Wooden skewer
- Cork stopper
Instructions
Step 1: Clean the bottle
Wash and dry the bottle carefully.
Dust inside can make the layers look cloudy.
Step 2: Pour the first layer
Use a funnel.
Add one color about an inch deep.
Tap the bottle gently.
Don’t shake it.
Step 3: Continue layering
Alternate colors.
Some layers can be thick.
Others should stay thin.
Variation creates more interesting patterns.
Step 4: Create designs
Insert a wooden skewer carefully.
Drag it slowly through several layers.
Try gentle waves instead of straight lines.
No two bottles will ever look identical.
Step 5: Seal the top
Fill nearly to the rim.
Press the cork tightly into place.
A loose cork may allow the sand to shift over time.
Tip: Fine aquarium sand often creates sharper layers than playground sand because the grains are much more consistent.
9. Bottle Bird Feeder
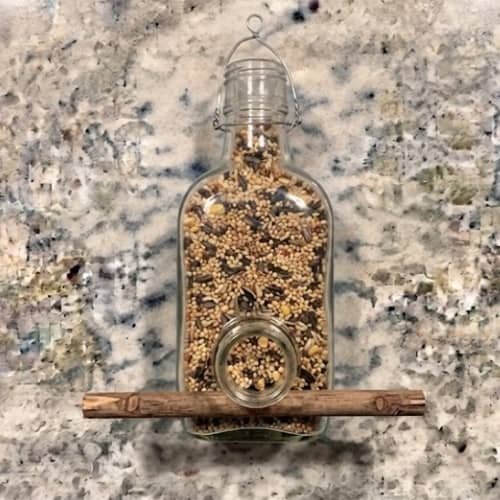
If you’re looking for things to do with glass bottles, this outdoor feeder adds movement to your garden almost immediately.
Watching birds discover it is half the fun.
Materials
- Glass bottle
- Small wooden spoon
- Wooden dowel
- Bird seed
- Strong wire
- Drill (adult use)
Instructions
Step 1: Prepare the bottle
Wash it well.
Allow it to dry completely.
Step 2: Drill feeding holes
Adults should carefully drill two holes opposite each other near the bottom.
Each hole should be just large enough for seeds to flow slowly.
Step 3: Add perches
Push a wooden dowel through the lower holes.
Birds need somewhere comfortable to stand.
Step 4: Create the hanger
Wrap strong wire around the neck.
Twist securely.
Leave enough wire to form a hanging loop.
Step 5: Fill with seed
Pour bird seed into the bottle.
Hang it from a sturdy tree branch.
You might waits a day or two before birds become comfortable visiting.
10. Plastic Bottle Monster Bowling Set
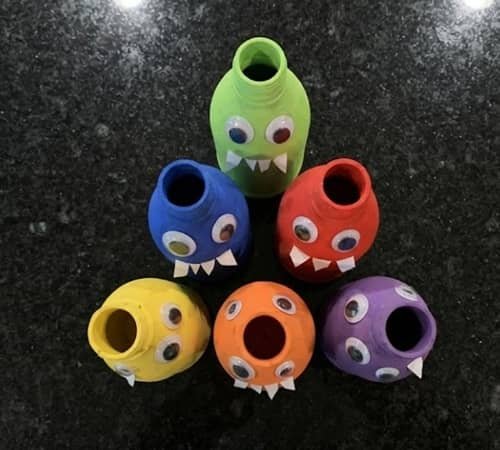
This is one of my favorite kids craft activities because children get to build the game and then immediately play with it. That’s a pretty good deal.
Materials
- Six identical plastic bottles
- Acrylic paint
- Googly eyes
- Colored paper
- Glue
- Small soft ball
Instructions
Step 1: Wash every bottle
Remove labels.
Dry them thoroughly.
Consistency makes the finished set look much nicer.
Step 2: Paint the monsters
Use different colors for each bottle.
Apply two thin coats.
Bright colors usually stand out better during play.
Step 3: Add funny faces
Glue on googly eyes.
Cut silly teeth from white paper.
Give every monster a different expression.
Some should look sleepy.
Others can look surprised.
Step 4: Let everything dry
Allow at least one hour before handling.
Wet glue fingerprints are frustrating.
Trust me.
Step 5: Set up the game
Arrange the bottles like bowling pins.
Roll a soft ball to knock them down.
Tip: Add a little rice inside each bottle before sealing. The extra weight keeps the pins standing more consistently.
11. Hanging Bottle Fairy Garden
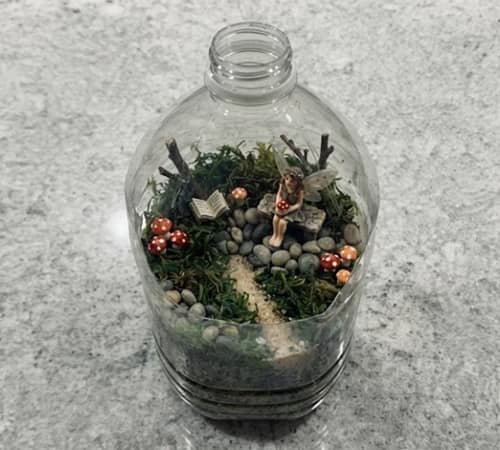
Tiny gardens somehow makes everyone smile.
This hanging version turns a recycled bottle into a miniature woodland scene that’s surprisingly relaxing to build.
Materials
- Large plastic bottle
- Craft moss
- Mini pebbles
- Small artificial mushrooms
- Tiny fairy figurine
- Twine
- Utility knife (adult use)
Instructions
Step 1: Cut an opening
Adults should cut a large window along one side of the bottle.
Smooth rough edges with fine sandpaper.
Step 2: Build the base
Add a thin layer of pebbles.
Cover them with craft moss.
Spread everything evenly.
Step 3: Decorate
Arrange mushrooms.
Place the fairy.
Add tiny stones to create a winding path.
Move pieces around until the scene feels balanced.
Step 4: Add hanging cords
Punch two small holes near the top.
Thread twine through both holes.
Tie secure knots.
Step 5: Display
Hang near a window or sheltered porch.
Avoid heavy rain if using paper decorations.
Final Thoughts
Recycled bottles are one of those materials that quietly teaches something bigger than crafting.
Every finished project shows that creativity often comes from limitations instead of expensive supplies.
A simple plastic bottle, an old mason jar craft, or a forgotten glass bottle can become part of imaginative kids craft sessions, thoughtful home decor, or practical storage with just a little patience.
Try changing colors, swapping materials, or combining techniques from different projects instead of copying them exactly.
That’s where the best bottle craft ideas usually begin… not with perfect instructions, but with one small experiment that unexpectedly turns into your own signature creation.





