Halloween decorations don’t have to be expensive or complicated.
Sometimes a few basic craft supplies and twenty minutes is all it takes to make something kids feel proud of.
This candy corn craft became one of my favorite seasonal projects because it mixes simple cutting, easy painting, and a little bit of texture without overwhelming younger children.
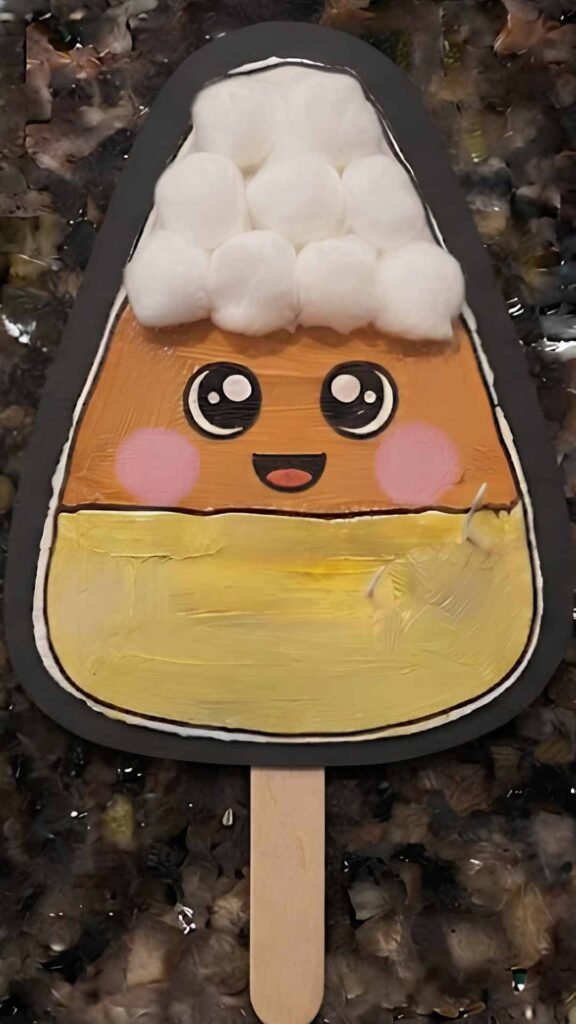
Whether you’re planning simple Halloween crafts for preschoolers, looking for candy corn crafts for kids, or putting together kindergarten Halloween party crafts, this beginner-friendly tutorial walks through every tiny detail so anyone can recreate it with confidence.
Why You’ll Love This Candy Corn Craft
There are hundreds of candy corn ideas online, so what makes this one different?
Instead of using only colored paper, this version combines painted cardstock, layered construction paper, and fluffy cotton accents to create gentle texture while still staying easy enough for young children.
The finished candy corn also has a cheerful little face, making it feel more like a keepsake than a decoration.
Even better? Most families already have every supply sitting inside a craft drawer.
Difficulty Level: Easy
Suitable For: Perfect for preschoolers, kindergarteners, elementary school kids, parents, teachers, homeschool activities, classroom art time, and even a cozy afternoon during the fall season.
Time Required: 25 to 35 minutes
Supplies Needed To Make Candy Corn Craft
- White cardstock (or thick white craft paper)
- Orange acrylic paint
- Yellow acrylic paint
- White acrylic paint (optional for touch-ups)
- Paintbrush (medium flat brush)
- Pencil
- Black marker
- Pink marker or blush crayon
- Cotton balls
- Craft glue
- Scissors
- Paper towel
- Small plate for paint
Step 1: Draw The Candy Corn Shape
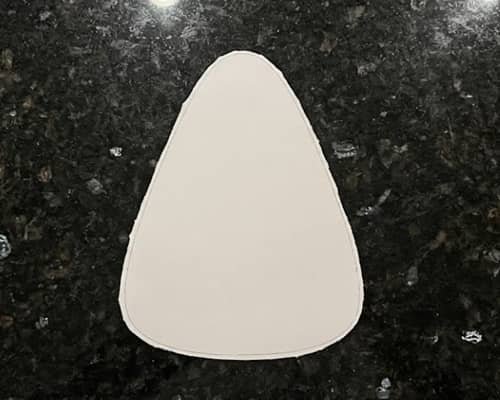
Take your cardstock and lightly sketch a large candy corn. Think of a rounded triangle instead of a sharp one.
The bottom should stay wide while the top gently curves into a soft point.
Don’t worry about making it perfectly symmetrical.
Real handmade crafts always have tiny imperfections, and honestly those little differences make each project feel special.
The candy corn should be roughly the size of your open hand. Bigger shapes are much easier for younger kids to paint.
Once you’re happy with the outline, cut it out carefully using scissors.
You might notice one side looks a little wider. That’s totally fine because hardly anyone notices after the paint goes on.
Step 2: Paint The Bottom Yellow Section
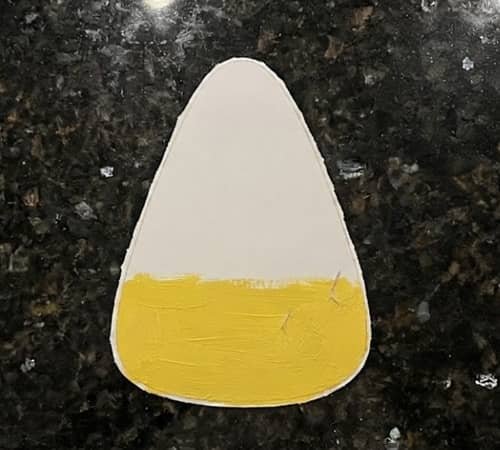
Lay the candy corn flat.
Imagine dividing it into three equal sections.
Paint the bottom third using yellow acrylic paint.
Use slow horizontal brush strokes instead of dabbing because smoother strokes leave fewer streaks.
Don’t overload your brush. It is easier adding another thin coat than trying to fix thick blobs later.
If paint sneaks outside the section, simply wipe the brush and gently pull the paint back before it dries.
Leave this section alone for five to seven minutes before moving upward.
Some kids gets impatient here, but waiting really helps keep the colors from mixing.
Step 3: Add The Bright Orange Middle
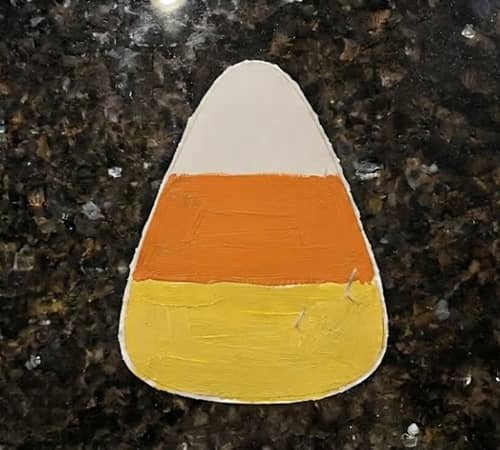
Now fill the center section with orange paint.
Leave a tiny white gap between yellow and orange while painting if you’re worried about bleeding.
Once both colors dry, you can carefully connect them with a second coat.
Use long brush strokes following the curve of the candy corn.
Already looks like candy, doesn’t it?
Don’t worry if you can still faintly see the pencil underneath because another coat usually hides everything once dry.
Set it aside again until the orange paint no longer feels tacky.
Step 4: Finish The White Top
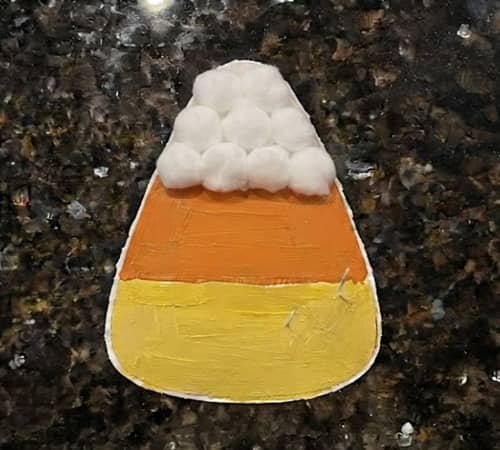
The top section stays white, but this is where texture makes all the difference.
Glue small pieces of stretched cotton balls across the top third instead of leaving it plain.
Pull each cotton ball apart gently until it becomes soft and fluffy before sticking it down.
Avoid making one giant cotton lump.
Layer several thin pieces instead. The fluffy top suddenly gives the candy corn much more personality.
Leave everything alone until the glue dries completely.
I wasn’t expecting such a simple trick to change the whole project, yet it really does.
Step 5: Give Your Candy Corn A Friendly Face
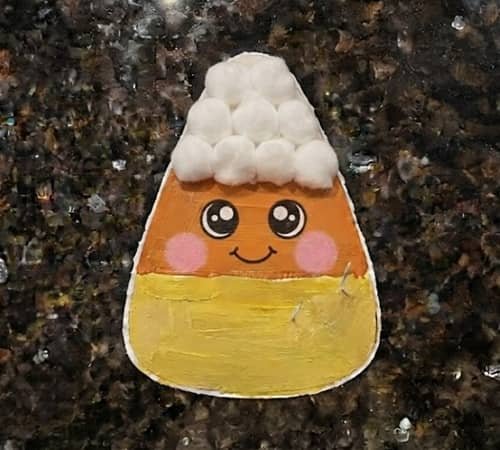
Now comes everyone’s favorite part.
Using a black marker, draw two round eyes roughly halfway inside the orange section.
Add tiny white highlights using white paint or a gel pen.
Below the eyes, draw a small smiling mouth.
Finish by adding pink cheeks with a marker, crayon, or pastel.
Suddenly your candy corn isn’t just decoration anymore.
It feels like a little Halloween character ready to join the celebration.
Funny how two tiny circles can change everything.
Step 6: Add Simple Finishing Details
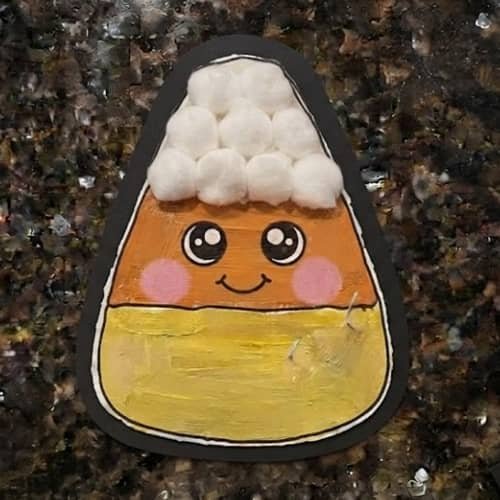
Want to make your candy corn craft stand out without making it harder?
Outline the entire candy corn using a black marker.
Keep the outline thin around the curves.
If you’d like, add tiny white dots around the orange section or little sparkle marks near the cheeks.
Don’t go overboard.
Sometimes less decoration actually makes the craft look cleaner.
You could also glue the finished candy corn onto black cardstock so the bright colors really pop during fall crafts, classroom bulletin boards, or thanksgiving displays.
This also turns it into an excellent easy kid friendly craft for seasonal wall decorations.
Step 7: Display Or Turn It Into Something Useful
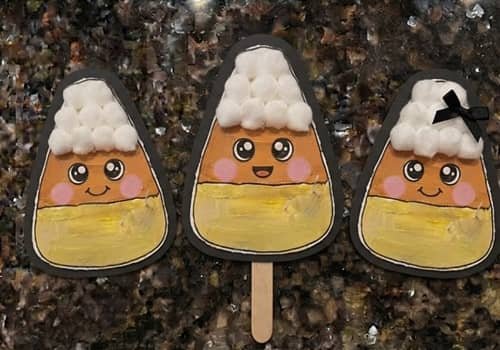
Your project is finished, but don’t stop there.
Punch a small hole through the top and thread ribbon through it for a hanging decoration.
Glue a popsicle stick behind it to create a puppet.
Stick magnets onto the back for the refrigerator.
Turn several into a festive banner.
Or glue multiple candy corns onto a larger poster board to create an entire classroom display celebrating the autumn craft season.
Teachers especially loves this idea because every child’s candy corn ends up looking slightly different while still matching the theme.
This project also fits beautifully into kids DIY project collections, family craft nights, and holiday activity stations.
Helpful Tips For The Best Results
- Use thick cardstock so the paint doesn’t wrinkle the paper.
- Let every painted section dry before adding the next color.
- Stretch cotton balls instead of using them whole.
- Younger children may find larger candy corn templates easier.
- Keep paper towels nearby for quick clean-up.
- Don’t chase perfection. Handmade charm is part of what makes these candy corn crafts for kids so memorable.
- Pair this activity with Halloween story time for extra fun.
- This also works wonderfully alongside preschool Halloween crafts and kindergarten Halloween party crafts.
Fun Ways To Personalize Your Candy Corn
Every child enjoys making their craft feel different.
Try adding:
- Googly eyes
- Glitter glue outlines
- Patterned scrapbook paper
- Tiny paper bow ties
- Mini witch hats
- Halloween stickers
- Pipe cleaner arms
- Small paper bats nearby
Each version still looks like the same candy corn, but every personality becomes completely unique.
Final Thoughts
The reason this candy corn craft keeps finding its way back into my fall activity list isn’t because it’s the fanciest project.
It’s because it quietly teaches skills children don’t even realize they’re practicing – paint control, patience, sequencing, and confidence after finishing something with their own hands.
That’s a pretty good trade for a handful of inexpensive supplies.
Even years later, kids often remember the projects they actually created more than the decorations adults bought.
And maybe that’s what makes homemade kids craft ideas worth repeating every fall season… they become little memories disguised as paper, paint, and cotton.





