Christmas crafts don’t always have to mean paper, glitter, and another Santa face. Sometimes a lump of clay is enough to create something that feels special.
These clay candle holders for Christmas are designed around simple shapes, playful textures, and decorations that little hands can actually manage.
And because we’re using LED tea lights, there is no flame involved.
Want something that can become a Christmas decoration too? You can.
These ideas work as clay activities, weekend crafts, classroom projects, or even little handmade gifts.
A few of them could even become selling crafts if older kids and adults work together on the finishing touches.
Before You Start… A Kid-Friendly Clay Setup
For all 12 projects, I recommend air-dry clay rather than polymer clay. There is no oven involved, which makes the activity much easier with children.
You will need:
- Air-dry clay
- LED tea lights (battery powered)
- Rolling pin or smooth bottle
- Plastic knife or clay tool
- Pencil
- Toothpick
- Small cookie cutters, if available
- A little water
- Acrylic paint
- Paintbrushes
- Optional clear water-based sealer
The most important thing is the light opening. Make sure the LED tea light fits comfortably inside the holder and can be removed easily.
Don’t make the clay enclosure too tight around the light. It should sit securely but not be trapped.
Choose Your Air Dry Clay Type
Regular Air Dry Clay | Cornstarch Clay | Homemade Clay
Affiliate Disclaimer: Some of the links in this post may be affiliate links, which means I may earn a small commission if you choose to make a purchase through them – at no extra cost to you. I only share products that genuinely fit this project and can help make your ceramic mug clay craft process easier and smoother. Your support helps keep ideas like this coming.
How Do These Clay Candle Holders Light Up?
Wondering how the candle actually lights up? These projects are designed for battery-powered LED tea lights, not real candles.
Simply place a small LED tea light inside the opening or cavity of the finished clay holder and switch it on.
The little LED creates a warm candle-like glow through the design without producing a flame or heat.
This makes the project much more suitable for kids, classrooms, and family craft sessions.
Just make sure the opening is wide enough to easily insert and remove the LED light, and never use a real flame inside these clay holders.
1. Christmas Tree Clay Candle Holder
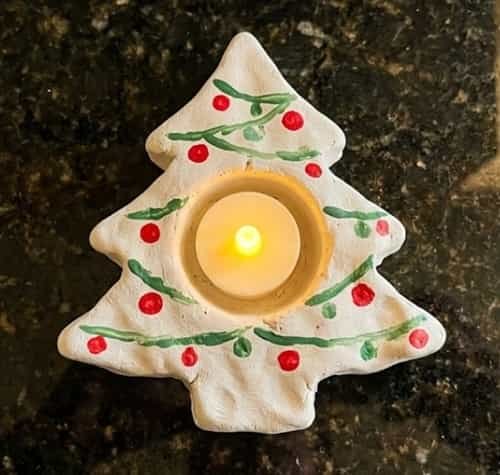
This one is almost too obvious, but the shape makes it wonderfully effective.
Roll the clay into a slab around 1 cm thick. Draw or cut a simple Christmas tree shape. Don’t make the branches razor-thin because they can snap while drying.
Place the tree flat on your work surface and gently press a round LED tea-light-sized opening into the lower center.
For a sturdier version, build a small circular clay base first and attach the tree to it.
Use a pencil to add tiny lines suggesting branches.
Now add little clay dots as ornaments. Press them gently into place rather than making them too raised.
Let everything dry completely before painting.
A little green, red, white and gold is enough. You don’t need twenty colors.
2. Snowman Clay Votive Holder
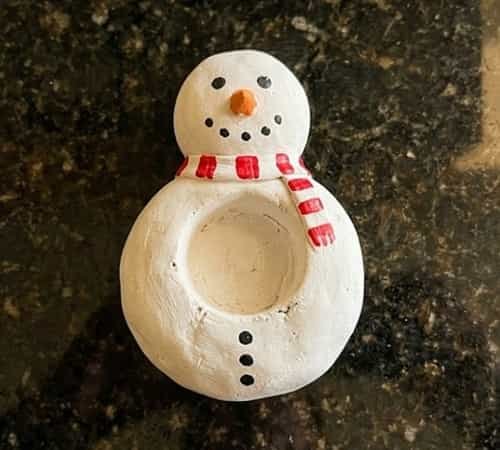
Why should snowmen only decorate the Christmas tree?
Make three flattened white clay balls and stack them to form a chunky snowman body.
Keep the shape slightly irregular. That actually makes it look more handmade.
For the light, create a shallow round cavity in the middle section before the clay becomes too dry.
Add a tiny orange clay carrot nose, two black eyes and a few buttons.
For the hat, flatten a small piece of black clay and place it on top.
If you want a cuter version, add a tiny clay scarf.
The snowman doesn’t need perfect proportions. In fact, a slightly wonky snowman looks better for a kids craft.
3. Gingerbread House Clay Candle Holder
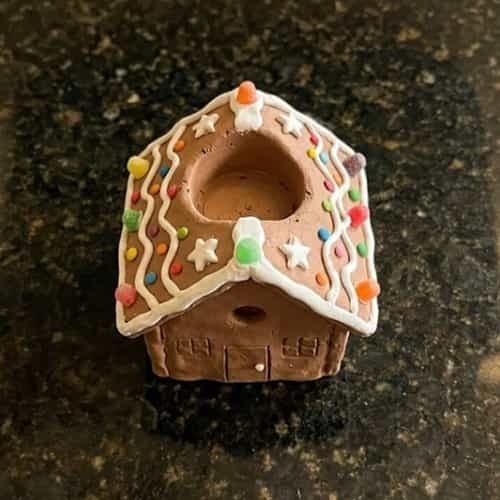
This is one of my favorite ideas because it turns a simple candle holder into a tiny Christmas scene.
Roll out brown clay and cut two house-shaped pieces. Add a small clay base underneath them.
Before joining the pieces, create a front opening large enough for an LED tea light to glow through.
Press white clay around the roof edges to imitate icing. Add tiny clay dots for candy decorations.
Use a pencil to make a door and window shapes.
Don’t completely close the back of the house. Leaving enough space makes it easier to insert and remove the LED light.
After drying, paint the details if needed.
This could make an adorable little Christmas village when several are placed together.
4. Santa Belly Clay Candle Holder
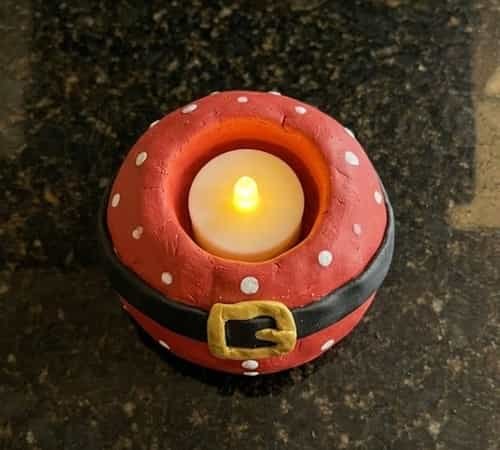
Forget the entire Santa figure. Just make the belly.
Create a thick rounded red clay cylinder or dome. Flatten the bottom so it sits securely.
Press a round cavity into the center for the LED tea light.
Add a black clay belt across the front and a small yellow clay buckle.
Two tiny white clay dots can suggest buttons.
Want to make it extra funny? Make the belly slightly oversized.
After drying, paint the details carefully and leave some of the clay texture visible instead of trying to make it perfectly smooth.
5. Christmas Star Clay Light Holder
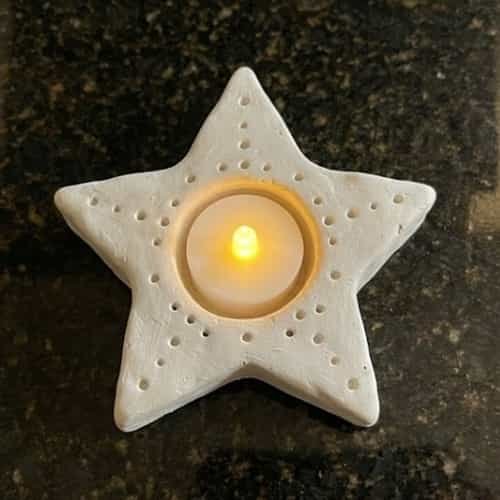
Stars are brilliant for beginners because the shape doesn’t need to be perfectly symmetrical.
Roll the clay flat and cut a chunky five-point star.
Make the star thick enough that the points don’t become fragile. Place an LED tea light over the center and gently mark its size.
Now press or cut a shallow circular cavity.
Add tiny dots around the edges using a pencil.
You could also make several little holes around the star so the LED light creates small glowing spots when switched on.
Let the clay dry completely before painting.
White, gold or icy blue would all work beautifully.
6. Reindeer Nose Clay Candle Holder
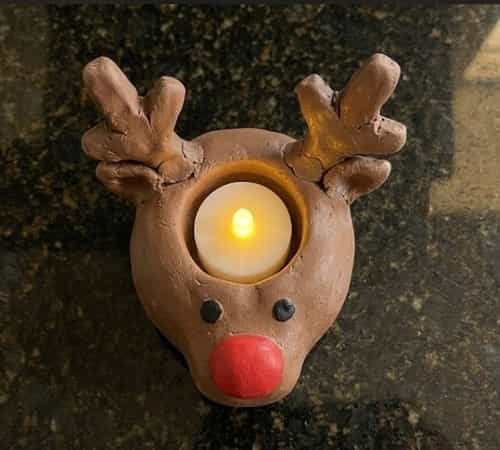
Here’s where we get a little silly.
Make a rounded brown clay holder with a flat bottom. Create a cavity in the middle for the LED tea light.
Add two small clay antlers at the top. Keep them thick and simple because thin antlers can break easily.
Then comes the fun part: a large red clay nose.
Add two small black eyes above it.
You could make Rudolph, or create a whole family of different-colored reindeer. Kids can give each one a different expression.
That makes this a fun group kids craft activity for christmas too.
7. Candy Cane Clay Candle Holder
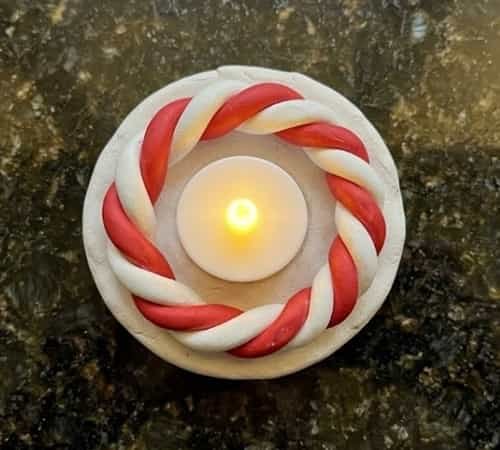
This one uses the classic red-and-white Christmas color combination.
Roll two long clay snakes, one red and one white.
Twist them together gently. Don’t over-twist or the stripes will disappear.
Shape the twisted clay into a wide circular ring.
Join the ends carefully and place it around a small flat clay base.
The center opening becomes the space for your LED tea light.
Smooth the joining point with a damp fingertip.
Let it dry slowly on a flat surface.
The result looks like a giant candy-cane ring wrapped around a little Christmas light.
8. Christmas Bauble Clay Holder
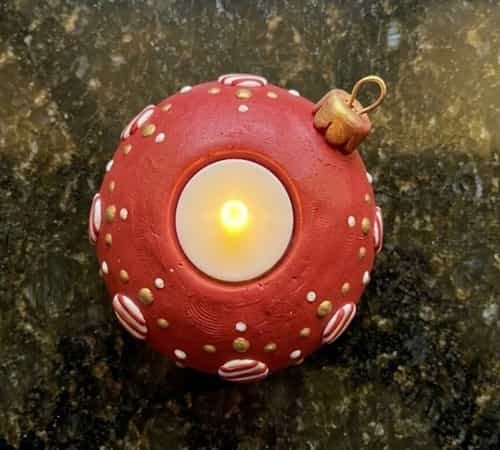
Think of this as a Christmas ornament that learned how to stand up.
Roll clay into a thick ball and flatten the bottom.
Create a circular opening near the upper front portion for the LED tea light.
Add raised clay stripes, stars or dots around the outside.
For a hanging-bauble look, attach a small clay cap and loop at the top.
You don’t actually need to hang it. The little loop is purely decorative.
Paint it red, green, gold or whatever Christmas colors your child likes.
The imperfect shape can make every bauble look completely different.
9. Christmas Pudding Clay Candle Holder
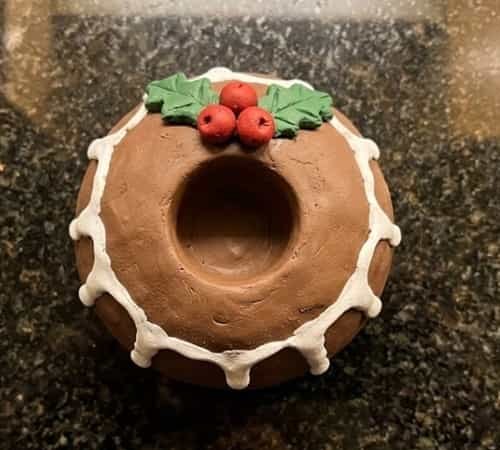
This one looks complicated but it’s actually very forgiving.
Shape a brown clay dome with a flat bottom.
Press a round opening into the top center for the LED tea light.
Roll tiny white clay pieces and flatten them slightly to create the pudding’s icing.
Add small red clay berries and green leaves.
Don’t worry about making the icing perfectly symmetrical. It should look like it has been spooned over the pudding.
For an extra handmade effect, leave a few fingerprints visible in the clay.
Honestly, those little imperfections are what makes handmade Christmas decor charming.
10. Christmas Bell Clay Candle Holder
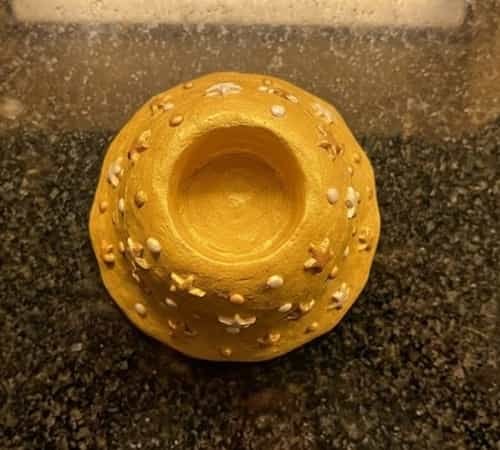
Make a thick clay bell shape by forming a rounded cone with an open bottom.
Flatten the bottom edge so the holder doesn’t wobble.
The LED tea light should sit inside the hollow portion rather than directly underneath a thick clay wall.
Add a small clay clapper at the bottom.
Then decorate the outside with tiny stars, dots or simple Christmas lines.
A little gold paint makes this one look surprisingly festive.
This is also a great introduction to basic clay sculpture for christmas, because kids learn how to build a three-dimensional form instead of simply flattening clay.
11. Mini Christmas Wreath Clay Holder
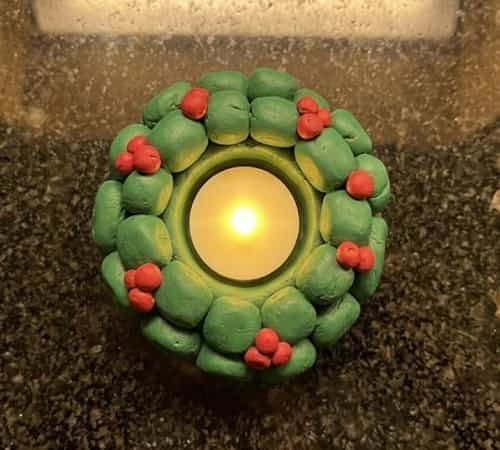
This is basically a wreath with a glowing center.
Roll several small green clay balls.
Arrange them into a circle around a small central opening. Press the pieces together gently so they become one wreath.
Add tiny red berries around the wreath.
For the base, place the wreath onto a thin round clay slab and press it gently into position.
The LED tea light sits in the center.
If you are making this with younger children, skip tiny loose pieces and use larger clay berries instead.
Safety first, always.
12. Christmas Village Clay Candle Holder
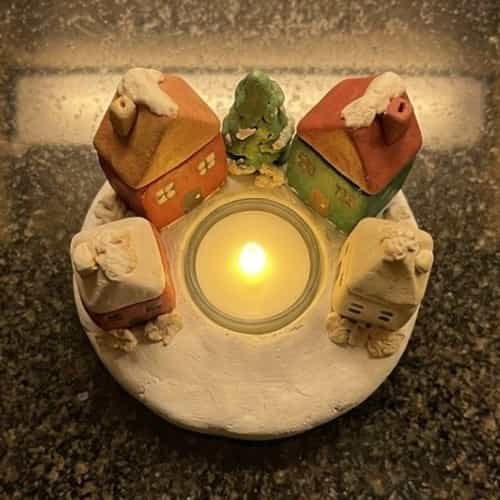
Let’s finish with something that feels like a tiny Christmas world.
Make three simple house shapes from air-dry clay.
They don’t need doors, windows and chimneys like miniature architecture. Simple rectangles with triangular roofs are enough.
Attach the houses around a larger clay base.
Leave openings between the houses so the LED tea-light glow can shine through.
Add tiny trees, snow piles and stars using small pieces of clay.
Keep everything chunky and firmly attached.
Once dry, paint the roofs white and the houses in soft Christmas colors.
This one takes longer, but it becomes more than a candle holder. It’s a little Christmas display.
Final Thoughts
The interesting thing about these clay candle holders for christmas is that the basic construction is almost identical, but changing the silhouette completely changes the personality of the finished piece.
That’s useful if you’re planning a Christmas craft session because one slab of clay can turn into several very different projects.
I’d also encourage kids to design their own shapes instead of copying every detail.
A Christmas tree with crooked branches or a snowman with enormous buttons can become their own little creation.
And if you’re making them with an intention of selling crafts, consider creating small themed collections instead of individual pieces.
A matching snowman, tree and gingerbread set can feel much more special than one random holder.





