A good clay diorama craft is basically a tiny world you can hold in your hands.
And honestly, that’s what makes these projects so much fun… you’re not just shaping clay, you’re deciding what happens inside a miniature scene.
A sleepy forest, a tiny bakery, a moonlit campsite… what would your little world look like? These kids craft activities are also a great way to practice simple sculpting, layering, texture-making, and storytelling without needing advanced clay skills.
Below are 12 original clay craft scenes designed for beginners, using simple shapes and ordinary tools wherever possible.
1. Tiny Mushroom Forest Diorama
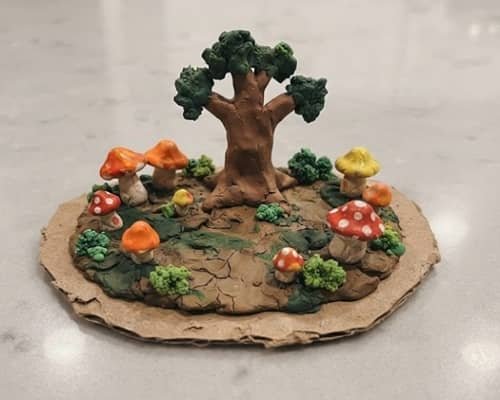
Imagine a little forest floor where oversized mushrooms are growing between tiny trees.
This one has a lovely storybook feel without requiring complicated sculpting.
You’ll need: air-dry clay, a small piece of sturdy cardboard, acrylic paints, white glue, a toothpick, and a blunt pencil or clay tool.
How to make it:
- Cut a small oval or rectangular piece of cardboard for your base. Something around 5 × 4 inches works nicely.
- Roll a piece of green or brown clay into a thin sheet and press it over the cardboard. Keep it roughly ¼ inch thick so it doesn’t become unnecessarily heavy.
- Smooth the edges downward around the cardboard. This gives your miniature ground a finished appearance.
- For the mushrooms, roll tiny balls of red, orange, cream, or brown clay.
- Flatten each ball slightly, then pinch or gently shape the top into a mushroom cap.
- Roll thin white or beige clay stems and attach them underneath the caps. A tiny dab of water can help air-dry clay pieces grip, although glue can be used after drying if they remain loose.
- Make the clay tree by rolling brown clay into a trunk and pressing several small branches against the top.
- Add a few flattened green blobs around the base. These become bushes, leaves, or ground plants.
- For texture, lightly press a toothpick into the ground to create little cracks, roots, and pebbly marks.
- Once completely dry, paint the ground earthy brown and green. Add tiny spots to the mushrooms.
Want it to feel more magical? Add several different mushroom sizes instead of making them identical.
2. Little Mountain Camping Scene
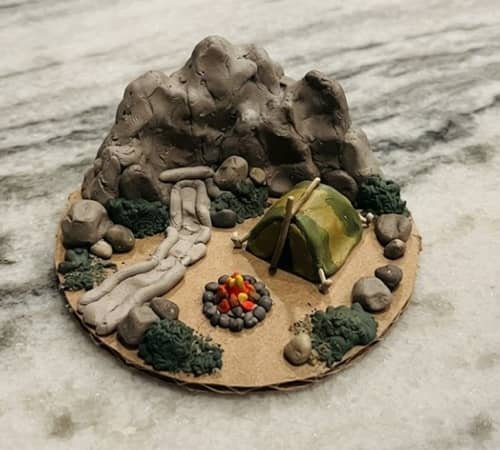
This is a fun way to explore how to make a mountain out of clay without trying to sculpt a perfectly realistic mountain.
How to make it:
Start with a thick piece of cardboard as your base. Cover it with brown or green clay and smooth it flat.
For the mountain, make one large ball of brown, grey, or terracotta clay.
Roll it between your palms, then pull one side upward with your fingers. Pinch the peak slightly so it becomes pointed.
Press the mountain firmly onto the rear half of your base. Blend its bottom edge into the ground using your thumb.
Now make two or three smaller hills beside it. Don’t make them perfectly symmetrical… little differences make the scene more believable.
For a tent, flatten two small triangles of clay and press their edges together along one side.
Prop them into an A-shape and place them near the mountain.
Add a tiny campfire using small brown sticks made from clay and three or four orange and yellow clay flames.
Finish with little stones around the fire and a winding clay path leading toward the mountain.
3. Tiny Cottagecore Clay Garden
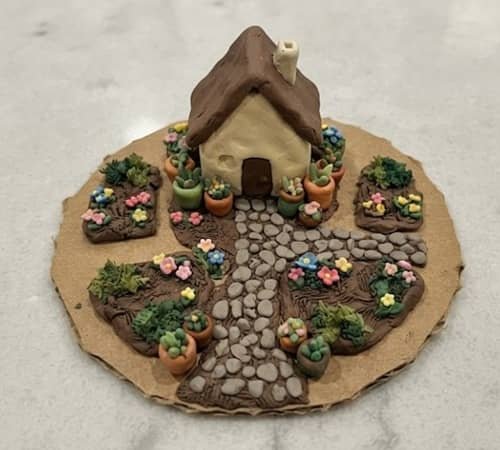
Here’s where cottagecore crafts meet miniature clay modeling.
The trick is not making the cottage complicated; the garden does most of the storytelling.
Create a flat green clay base first.
For the cottage, form a small rectangular block from cream or beige clay.
Add a triangular piece on top for the roof. Press a toothpick lightly across the roof to create simple tile lines.
Make a round door and two tiny square windows. Don’t worry if they’re slightly uneven. That actually works here.
Next, create flowers by rolling tiny balls and flattening them into petals. Place them beside the cottage.
Add a miniature pathway using small flattened pieces of tan clay. Arrange them from the door toward the front edge.
For the finishing detail, make a tiny clay watering can shape or little garden pot. Keep it simple… tiny details are surprisingly easy to overdo.
4. Underwater Coral Reef Box
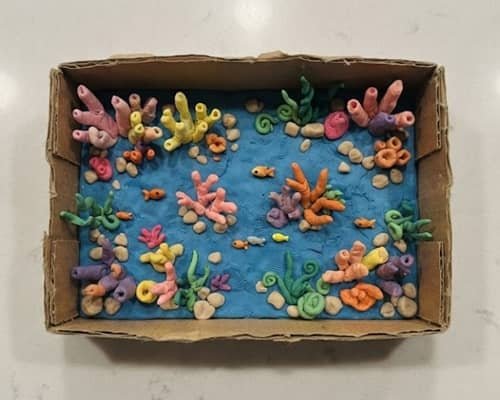
Turn a small shallow cardboard box into an underwater world.
Cover the inside bottom with blue clay. Press it flat, then make a few wavy lines with a toothpick to suggest water movement.
Create coral using thin clay snakes. Bend them into branching shapes and press the bottoms into the floor.
For seaweed, roll very thin green clay strips and curve them slightly before attaching them.
Now make three or four tiny fish. Flatten small colored clay balls into oval shapes, pinch one end into a tail, and use a toothpick to mark an eye.
Add tiny beige clay pebbles across the bottom.
The important bit? Keep the coral behind the fish and seaweed toward the front. Even a miniature scene needs some visual depth.
5. Autumn Pumpkin Patch
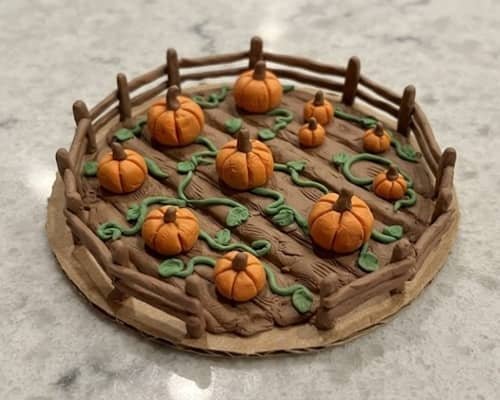
A miniature pumpkin patch can become surprisingly detailed with very basic clay shapes.
Press green clay over your base. Add a few brown strips for soil rows.
For pumpkins, roll orange clay into small balls. Flatten them just slightly and use a blunt tool or toothpick to press several vertical grooves around each pumpkin.
Make tiny green stems and press them into the tops.
For vines, roll extremely thin green clay ropes and curve them across the soil.
Add a tiny fence using thin brown clay strips. Lay two horizontal strips across several vertical posts.
If you’re making this with children, let them choose wildly different pumpkin shapes. Perfect pumpkins aren’t necessary.
6. Tiny Beach Day Diorama
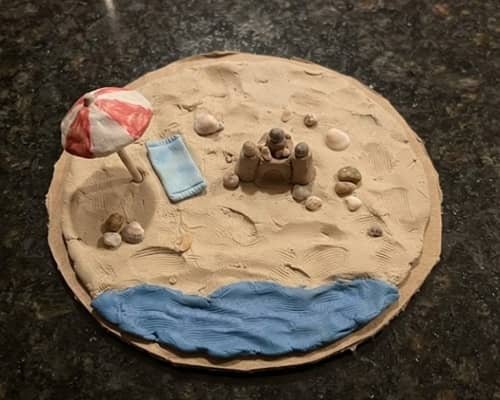
For the sand, use beige or light tan clay and press it into the base.
Create a blue strip along one side for the ocean. Blend the meeting point slightly so the shoreline looks natural.
Make a tiny beach umbrella from a flattened clay circle. Cut shallow lines from the center outward, then add a thin clay pole underneath.
For a beach towel, flatten a tiny rectangle of brightly colored clay.
Add a miniature sandcastle by stacking several tiny clay blocks and placing a small cone on top.
You can even make little seashells by pressing small cream clay balls with the end of a pencil.
7. Enchanted Fairy Garden
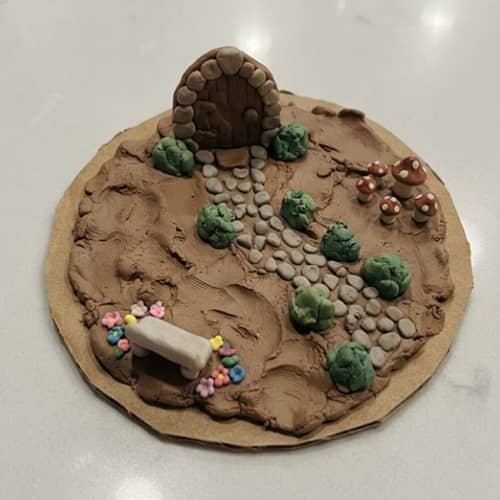
This scene is perfect for fairy garden crafts, but you don’t actually need a fairy figure.
Build a green clay ground first, then add a tiny circular doorway made from brown clay.
Create a little mushroom cluster beside it using simple caps and stems.
For a miniature stone path, flatten tiny grey clay balls and arrange them in a curved line.
Make bushes by rolling green clay into irregular balls and pressing tiny texture marks into them.
That’s an easy answer to how to make a bush out of clay… it doesn’t need to look botanically perfect.
Add a tiny bench from brown clay strips and a few flowers around the doorway.
Keep the scene slightly mysterious by leaving some empty ground.
8. Clay Desert Road Trip
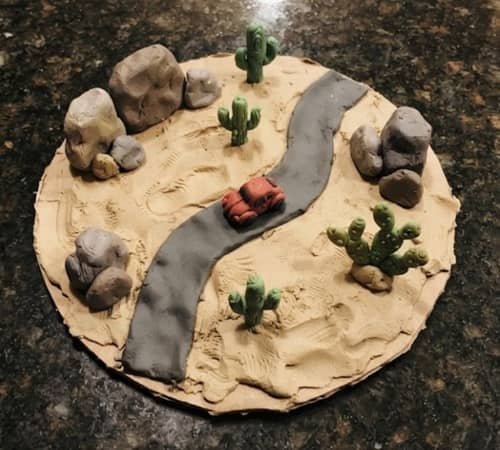
Make a warm desert scene with a sandy beige clay base.
Shape three chunky clay rock formations and place them toward the back.
For taller formations, stack clay pieces and blend their seams with your fingers.
Create a simple cactus by rolling a thick green clay cylinder and adding two small curved arms.
For the road, flatten dark brown or grey clay into a narrow winding strip.
A tiny clay car can be made from a rounded rectangular body with four small wheels pressed onto its sides.
Don’t obsess over realism… the slightly wonky vehicle is part of the charm.
9. Rainy Day City Street
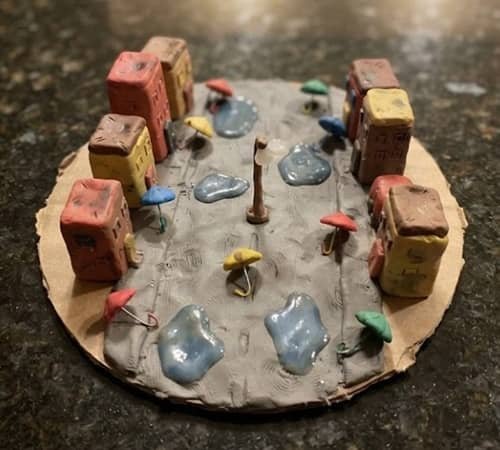
This one is all about layers.
Cover your base with grey clay. Make two thin darker strips for the road and sidewalk.
Build tiny buildings from rectangular clay blocks. Add doors and windows as very thin clay pieces pressed onto the fronts.
For puddles, flatten pieces of blue-grey clay until they are almost paper thin and place them along the street.
Make tiny umbrellas by flattening colored clay circles and attaching tiny stems.
A streetlight can be made from a thin black clay cylinder with a tiny flattened lamp at the top.
Add a few miniature plants outside the buildings for contrast.
10. Cozy Woodland Cabin
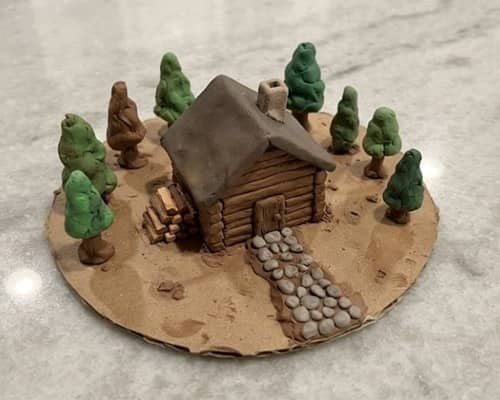
For a cozy clay forest scene, start with a brown-green ground layer.
Build the cabin using a small rectangular clay block. Press thin brown clay strips horizontally across the walls to imitate logs.
Make a dark triangular roof and press a tiny chimney onto one side.
For trees, roll brown clay trunks and attach irregular green pieces on top. Don’t make every tree the same height.
Add a tiny woodpile beside the cabin using several short clay cylinders.
A small path leading from the cabin gives the scene somewhere for the eye to travel.
11. Moon Base Mini Diorama
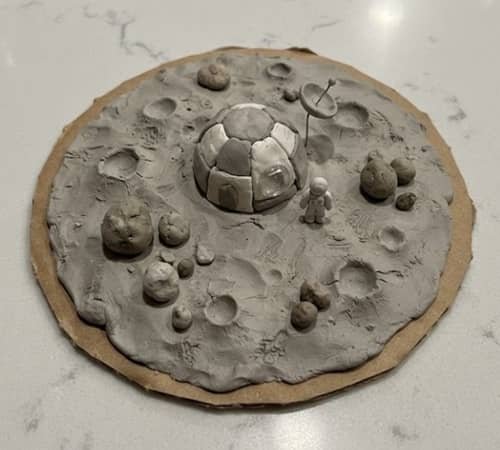
Want something completely different from flowers and forests?
Make a grey clay base and press random shallow craters into it using the rounded end of a pencil.
Build a tiny dome-shaped space station by forming a half-sphere of clay and flattening its bottom.
Add a small antenna from thin clay.
For the lunar rocks, make irregular grey balls and flatten them slightly.
A tiny astronaut can be simplified into three pieces: a round helmet, a small body, and two short legs. It doesn’t need facial details.
Paint a few areas darker after the clay dries to exaggerate the crater texture.
12. Tiny Woodland Bakery
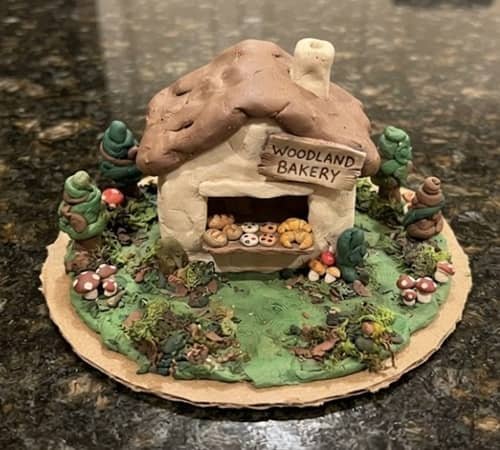
Finish with something wonderfully odd… for example, a bakery hidden inside the woods.
Create a green and brown forest floor first.
Build a tiny beige bakery from a rectangular clay block and add a darker triangular roof.
Make a little serving window and attach a tiny sign above it.
Now comes the fun part: miniature pastries.
Roll tiny clay balls into bread rolls, flatten some into cookies, and make miniature croissants from thin clay ropes curled into crescent shapes.
Place the baked goods on a tiny clay shelf outside the bakery.
Add mushrooms and a couple of small trees around the building so it feels tucked away rather than simply sitting on a green base.
Final Thoughts
The interesting thing about miniature clay scenes is that scale does most of the storytelling for you.
A tiny doorway beside an oversized mushroom instantly suggests a different world, even when every piece is made from the same lump of clay.
That’s why you don’t need advanced sculpting skills to make these scenes convincing.
Think in layers: background first, larger objects next, then tiny details in front.
Let some fingerprints remain too; they make handmade dioramas feel handmade.
And if a tree leans, a mushroom is lopsided, or your little cabin isn’t perfectly square, leave it.
Those imperfections can give a clay craft far more personality than a perfectly manufactured miniature ever could.





