A clay mushroom lamp is one of those DIY projects that can look charming without needing complicated sculpting skills.
I especially like mushroom-shaped lighting because the rounded cap, short stem, and soft glow naturally work together.
You can make one for a bedside table, living room shelf, reading corner, patio, or even a child’s room.
The fun part? Every little fingerprint, uneven edge and slightly imperfect paint mark can make the finished piece feel more handmade.
These ideas mix simple clay activities with practical lamp crafts, so you can create something decorative rather than just another clay sculpture sitting on a shelf.
NOTE: If you don’t want DIY and are looking for ready-made options, check out the ready-made clay mushroom lamps here.
Choose Your Air Dry Clay Type
Regular Air Dry Clay | Cornstarch Clay | Homemade Clay
Affiliate Disclaimer: Some of the links in this post may be affiliate links, which means I may earn a small commission if you choose to make a purchase through them – at no extra cost to you. I only share products that genuinely fit this project and can help make your ceramic mug clay craft process easier and smoother. Your support helps keep ideas like this coming.
1. Classic Toadstool Clay Mushroom Lamp
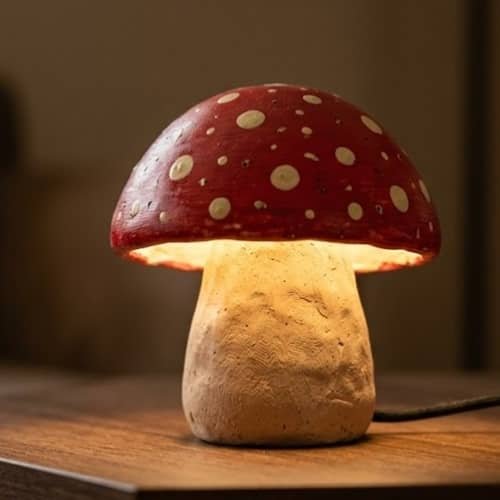
Let’s start with the shape that makes everyone instantly think “mushroom.”
For this version, make a rounded mushroom cap with a slightly flattened underside.
Use red, terracotta, mustard, or muted orange for the cap and add small cream-colored spots. Keep the stem chunky rather than perfectly straight.
That small change makes the lamp look more like a handmade woodland object.
How to make it:
- Roll air-dry clay into a thick ball for the cap.
- Gently press one side against your work surface until you have a dome.
- Turn it upside down and hollow the underside carefully. Leave enough clay around the edges so the cap remains strong.
- Roll another piece of clay into a short, thick stem.
- Slightly widen the bottom of the stem so it can support the cap.
- Attach the cap and stem using slip or a little water and score both surfaces first.
- Allow the clay to dry completely.
- Paint the cap and stem separately.
- Once dry, add a small battery-powered LED light beneath or inside the cap.
Don’t make the cap paper-thin. A sturdy cap is much easier to handle.
2. Speckled Forest Mushroom Lamp
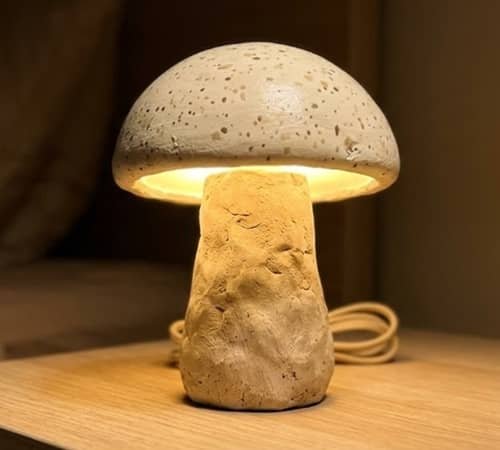
Want something quieter than the traditional red mushroom?
Try a cream, beige or muted brown cap covered with tiny irregular speckles. The stem can stay almost white or warm ivory.
This gives you a more grown-up homemade lamp that works beautifully with neutral interiors.
Make the cap using the same dome-and-hollow technique from Idea 1. Before painting, lightly sand only the roughest areas. Don’t over-smooth everything.
Those tiny imperfections are what make the piece feel handmade.
For the speckles, use a nearly dry brush and gently tap small dots across the cap. Vary the size. Perfectly identical dots can make it look factory-made.
3. Tiny Clay Mushroom Lamp for a Shelf
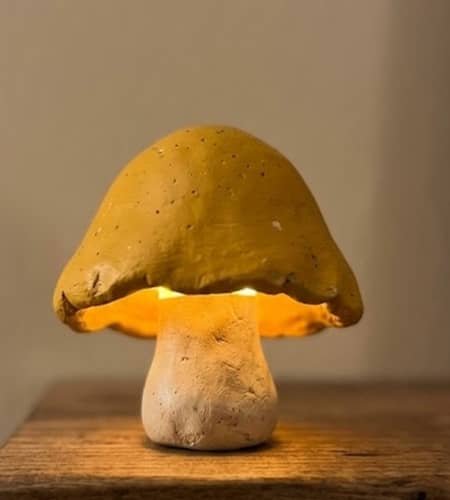
Small does not mean boring.
Make a miniature mushroom lamp that is only around 10 cm tall. This works especially well for shelves, mantels and small bedside corners.
Use less clay and create a proportionally oversized cap. The exaggerated cap gives the tiny lamp personality.
For the lighting, don’t try to squeeze a bulky electrical bulb inside. A tiny battery-operated LED puck or miniature LED module is much easier for a beginner.
Build a small removable opening underneath so you can reach the light later.
This could even become one of your DIY clay gifts because it is inexpensive and doesn’t require a huge amount of material.
4. Mushroom Lamp With a Wavy Cap
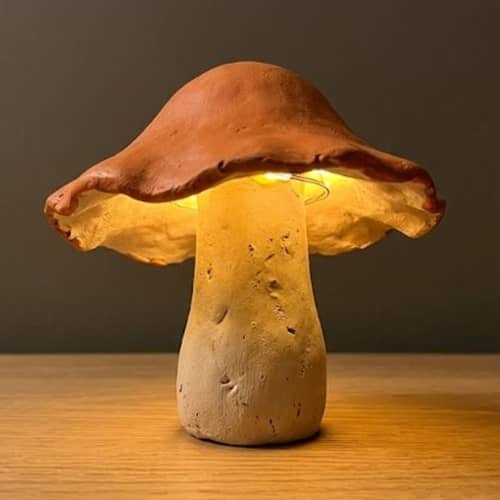
Here’s where you can move away from the predictable mushroom silhouette.
Instead of making a perfectly round cap, gently pinch the outer edge into four or five soft waves. The result looks like a woodland mushroom that has grown naturally.
Roll your clay dome first. Then, while it is still workable, gently pinch sections of the rim between your fingers. Don’t make every wave equal. Some should be wider and some narrower.
That unevenness is actually the charm.
Add muted green, rust, cream or dusty orange paint. A darker color underneath the cap can also create a lovely shadow when the LED is switched on.
5. Moonlit Mushroom Clay Lamp
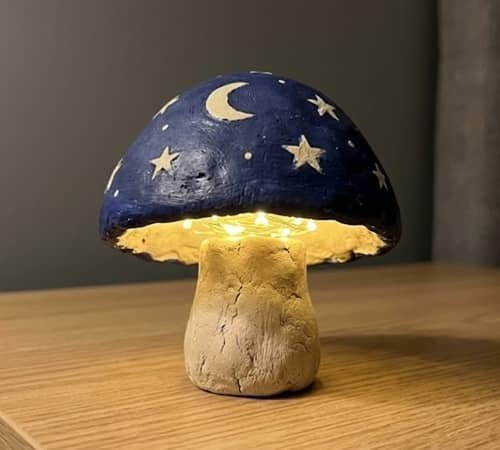
Now let’s make the mushroom feel slightly magical.
Paint the cap in deep navy, charcoal blue or dusty indigo. Add a few tiny hand-painted stars and a crescent moon. Keep the decorations sparse.
To make the stars look less artificial, use a thin wooden skewer to gently press tiny points into the clay before it dries. After painting, highlight those marks with pale yellow paint.
This is a nice crossover between a clay mushroom lamp and a small celestial sculpture.
Keep the LED warm rather than bright white. Warm light makes the darker cap look much softer.
6. Mushroom Lamp With Cutout Windows
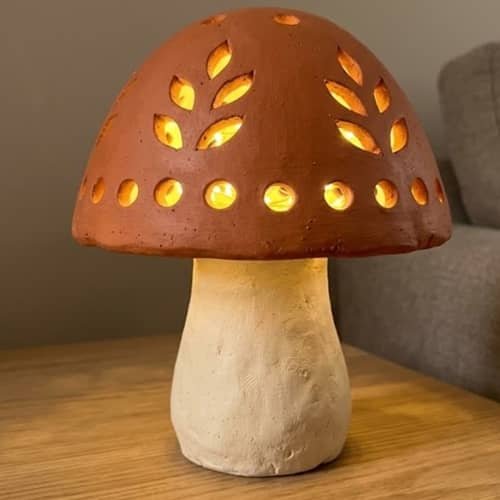
This one needs a little more patience, but it can look spectacular.
Create a thick mushroom cap and mark small circles, arches or leaf-shaped openings across the surface.
Use a small clay tool, straw or miniature cookie cutter to remove the sections while the clay is still firm but not completely dry.
Don’t put holes too close together. Leave enough clay between them so the cap doesn’t become fragile.
Once the lamp is illuminated, those openings become tiny glowing windows.
It’s a simple idea, but it can turn an ordinary diy clay craft into a functional decorative piece.
7. Pastel Mushroom Night Lamp
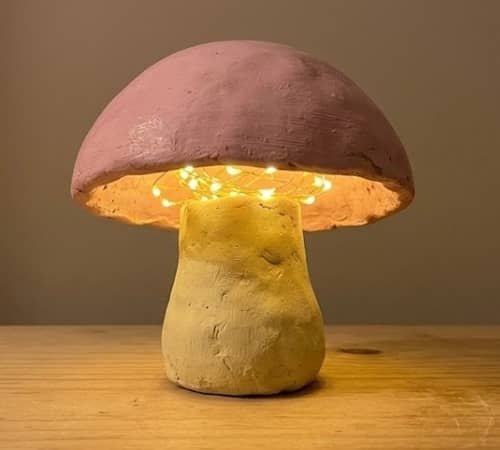
Not every mushroom lamp needs earthy colors.
Try dusty pink, pale blue, butter yellow or soft lavender. Keep the colors slightly muted instead of using extremely bright children’s paint.
For a softer shape, make the cap slightly wider than usual and the stem shorter. This creates a cute low-profile night lamp.
It would work particularly well in a child’s bedroom, but I would use a cool-to-touch, low-voltage battery LED rather than a hot bulb.
Safety comes first, especially around children.
8. Forest Floor Mushroom Trio Lamp
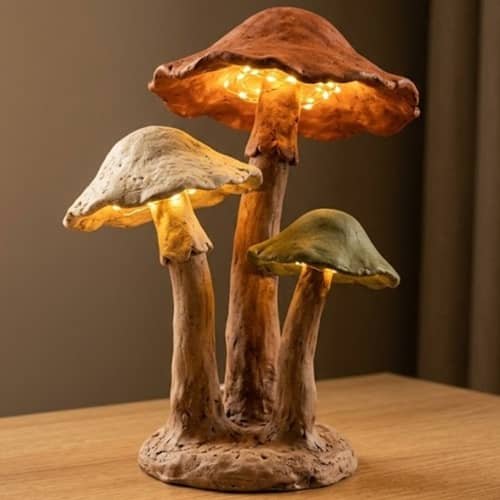
Why stop at one mushroom?
Make three connected mushroom forms at different heights. Think of them as three little mushrooms growing together.
Build each stem separately. Keep the largest stem at the back and the smaller ones toward the front. Join them with a clay base rather than simply sticking the stems together.
For the lighting, use one concealed LED source underneath the shared cap area. Test the placement before permanently attaching the pieces.
The finished sculpture can become a playful centerpiece while still functioning as a lamp craft.
9. Rustic Mushroom Lamp With a Stone-Like Base
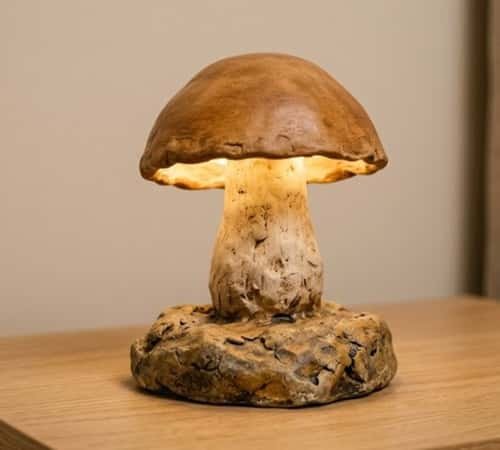
This version focuses on the base.
Make the mushroom cap and stem fairly simple, then create a broad irregular base underneath.
Press small pieces of crumpled foil or a rough texture tool against the base before it dries to create a stone-like surface.
Paint the base charcoal grey, warm brown or muted stone beige.
The result feels closer to a small woodland sculpture than a conventional lamp.
Could this become a selling crafts idea? Absolutely. Small functional decor pieces are easier to package and display than large sculptures.
10. Flower-Capped Mushroom Lamp
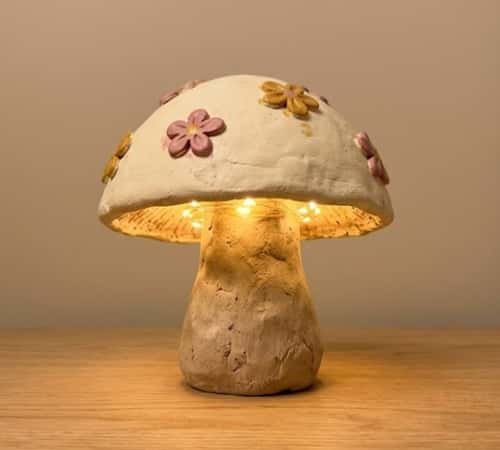
Let’s mix two forms that normally aren’t paired.
Create a mushroom cap, but instead of dots, press tiny five-petal flower shapes around the upper surface.
You can make the flowers slightly raised or simply impress their outlines into the clay.
Use a soft cream cap with muted pink or yellow flowers. Keep the stem natural beige.
This gives the piece a cottage-garden personality without turning it into a complicated floral sculpture.
It can also fit nicely beside other creative DIY lamps if you eventually build a collection.
11. Patio Mushroom Lantern-Lamp Hybrid
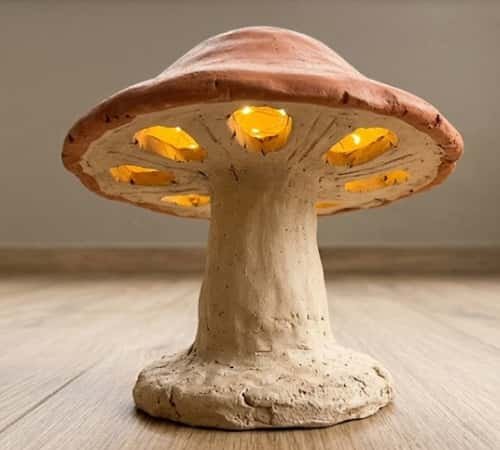
Here’s an unusual clay lamp idea for an outdoor-inspired space.
Make a mushroom cap with several large openings underneath.
Instead of using a candle, use a battery-powered outdoor-rated LED puck. The light can sit underneath the cap while the stem remains solid.
I would keep this piece under a covered patio rather than exposing air-dry clay to rain or constant moisture.
Seal the clay thoroughly with a suitable exterior sealer, but remember that sealing does not magically make ordinary air-dry clay permanently waterproof.
The earthy mushroom shape works surprisingly well with patio decor.
12. Storybook Fairy Mushroom Lamp
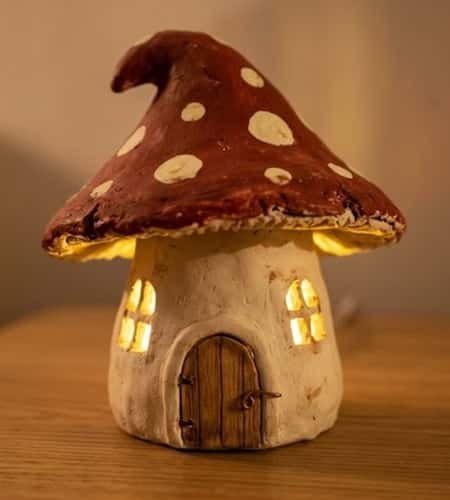
This is the one I would make when I want something genuinely different.
Shape the cap like a slightly crooked woodland mushroom and add a tiny arched door to the stem.
Above the door, press two or three miniature window shapes into the clay.
Don’t make the house details too perfect. A crooked door and uneven windows actually make it feel more like a handmade fairy house.
For the lighting, place the LED inside the hollow base so the glow comes through the tiny windows and underneath the mushroom cap.
Now your clay sculpture has a purpose beyond decoration.
It becomes a little glowing storybook scene.
Final Thoughts
The best part about making a clay mushroom lamp is that you don’t need perfect sculpting skills. In fact, chasing perfect symmetry can remove some of the charm.
A slightly crooked stem, uneven cap or tiny fingerprint can tell people that it was actually made by hand.
If you plan to sell crafts, functionality can also make your clay sculpture more interesting because customers aren’t just buying something to look at. They are buying a little piece of usable decor.
And don’t limit yourself to mushroom forms either.
The same techniques can lead into unusual clay lamp designs, DIY table lamp projects, clay night lights and even more experimental handmade lighting pieces.
Just keep the electrical component safe, removable and appropriate for the clay and intended setting.





