There is something special about a small handmade lantern when the room gets quiet and the little flame starts glowing through the clay.
These clay tealight lantern crafts are made for exactly that feeling. No complicated pottery wheel, no advanced sculpting skills.
Just simple clay shapes, careful cutouts, texture and a little patience.
I especially like these for beginners because even tiny imperfections can make a handmade lantern feel more authentic.
You can make them for your own home, turn them into DIY gifts, or explore selling crafts at local markets and online.
Ready to make something that actually looks handmade? Let’s get into it.
NOTE: If you don’t want DIY and are looking for ready-made options, check out the ready-made clay Tealight Lanterns here.
Choose Your Air Dry Clay Type
Regular Air Dry Clay | Cornstarch Clay | Homemade Clay
Affiliate Disclaimer: Some of the links in this post may be affiliate links, which means I may earn a small commission if you choose to make a purchase through them – at no extra cost to you. I only share products that genuinely fit this project and can help make your ceramic mug clay craft process easier and smoother. Your support helps keep ideas like this coming.
1. Pebble Arch Tealight Lantern
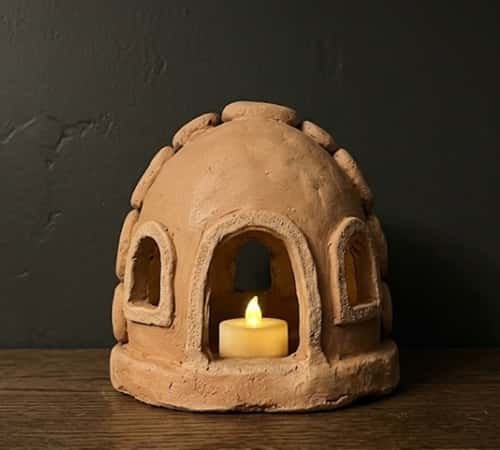
This one looks simple. That is the charm.
Roll air-dry clay into a thick ball and flatten it slightly until you have a chunky pebble-like form.
The finished lantern should be around 4 to 5 inches tall. Try not to make the walls paper-thin because they need enough strength to hold their shape.
Press the bottom gently against your work surface so it sits flat.
Now use a small round cutter or bottle cap to mark the opening where the tealight will sit.
Don’t cut all the way through here. Instead, create a shallow recessed platform.
For the front, cut three or four small arched windows. A craft knife works, but beginners can first draw the arches with a pencil or wooden skewer.
Add a slightly raised clay border around each arch. It gives the lantern a miniature architectural look.
Let it dry completely before painting. A warm beige, dusty terracotta or muted cream works beautifully.
Selling twist: Make three sizes and sell them as a coordinated lantern trio.
2. Tiny Window Cottage Lantern
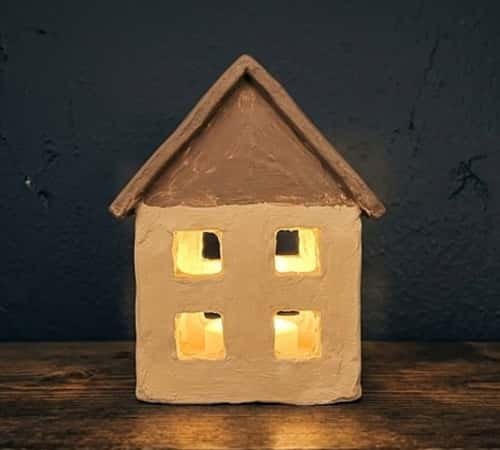
Want something with more personality?
Build a simple rectangular clay house instead of making a complicated sculpture.
Roll a slab using a slab roller, or flatten clay evenly between two wooden guides.
Cut four wall panels and one simple triangular roof.
Join the panels using score-and-slip. Press the seams together carefully, then smooth them with a damp fingertip.
Before the clay dries, cut tiny square windows into the front and side walls.
Make each window slightly different. Perfect symmetry can actually make handmade pieces feel less handmade.
Add a tiny chimney if you like.
Leave the back mostly closed, but create a small opening large enough to insert the tealight.
Once dry, paint the cottage warm white with a muted brown roof.
It becomes a miniature glowing house when the light is switched on.
Selling twist: Personalize the cottage with a tiny initial or house number.
3. Leaf-Pierced Clay Lantern
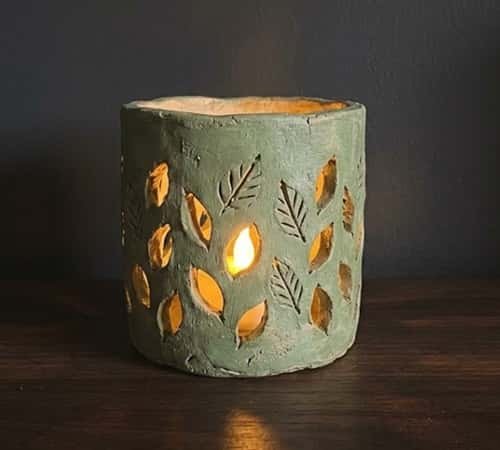
Nature-inspired pieces tend to work beautifully as handmade lanterns because the light creates interesting shadows.
Start with a short cylinder made from an evenly rolled clay slab. Join the edges and smooth the seam.
Keep the base thicker than the walls.
Now draw small leaf shapes across the front. Don’t make them too close together.
The clay between openings needs to remain strong.
Use a pointed texture tool or wooden skewer to pierce the leaf shapes.
For a more interesting effect, make a few leaves solid and carve only their veins. Those little carving designs catch the light nicely.
Paint the lantern a soft sage green, muted cream or earthy brown.
The glow will travel through the leaf openings and onto the nearby surface.
4. Ribbed Clay Tealight Lantern
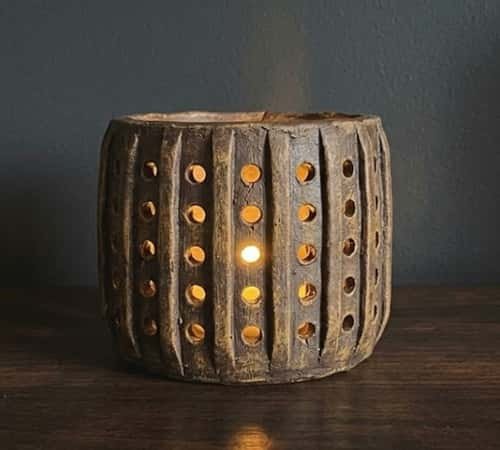
Here is a very beginner-friendly option.
Make a simple cylinder first. Then attach thin clay strips vertically around the outside.
These raised strips create a ribbed texture without requiring complicated sculpture.
Press each strip gently into the body.
Don’t make them perfectly identical. A little variation gives it character.
Between the ribs, punch small circular holes using different-sized clay tools.
Leave enough solid clay around every hole.
After drying, paint the lantern in a single earthy shade.
I like dark clay brown for this design because the warm light looks richer against it.
Want a more premium appearance? Add a very thin lighter dry-brushed layer over the raised ribs.
That tiny contrast makes the texture pop.
5. Crescent Cutout Lantern
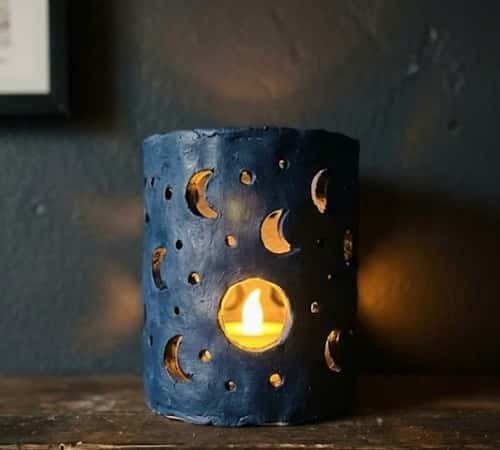
This design uses a very basic clay cylinder but changes the mood completely.
Create the cylinder and flatten the bottom.
Mark crescent shapes across the front using a small paper template.
Cut through the clay carefully.
Add a few tiny dots around the crescents. These don’t need to be perfectly aligned.
That imperfect arrangement actually makes the finished piece feel handmade.
Once dry, paint the outside deep midnight blue.
A tiny amount of lighter blue around the edges gives it a slightly aged appearance.
Place an LED tealight inside and watch the crescent shapes glow.
This is one of my favourite diy lanterns for a quiet bedroom corner.
Selling twist: Make a matching moon-themed pair in different heights.
6. Scalloped Edge Tealight Lantern
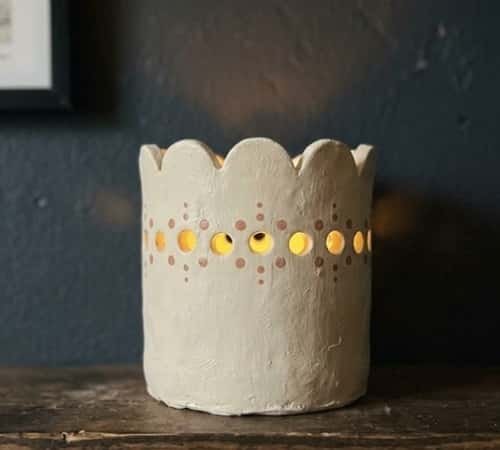
This one looks decorative without being difficult.
Form a short cylindrical lantern from a slab.
Before joining it, cut a repeated scalloped pattern along the upper edge.
Keep the scallops fairly large because tiny shapes can crack while drying.
Pierce small dots underneath the scallops.
Now gently curve the slab into a cylinder and join the seam.
Support the shape from inside while smoothing the outside.
Once dry, paint it creamy white with small terracotta-colored dots around the openings.
The combination feels playful but still grown-up.
It could work especially well as a diy clay gift.
7. Diamond Cut Clay Lantern
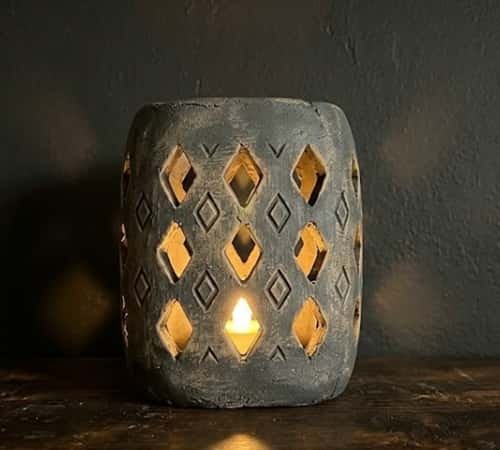
Geometry can make very basic clay work look surprisingly sophisticated.
Build a simple rectangular or slightly rounded lantern body.
Draw a repeating diamond pattern with a pencil while the clay is leather-hard.
Cut every alternate diamond completely through.
On the remaining diamonds, use a pointed tool to add shallow lines.
Now you have both open and textured sections.
These little differences are what create attractive shadows when the lantern lights are glowing.
Paint the entire piece charcoal grey, then lightly brush a warm stone color over the raised sections.
Do not overwork it.
The rougher areas will catch the paint naturally.
Selling twist: This could become a higher-priced design because the pattern looks more intricate than it actually is.
8. Textured Rope Lantern
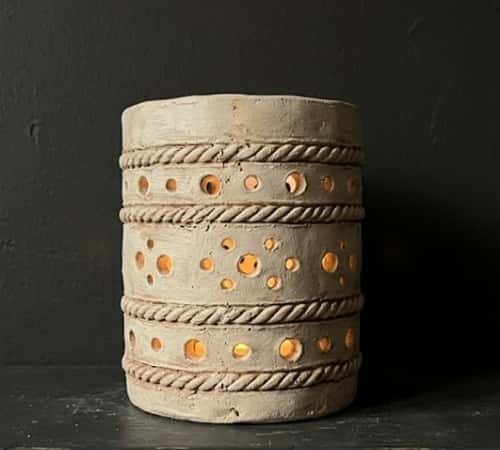
Texture tools can do most of the visual work here.
Make a simple cylindrical lantern and allow it to firm up slightly.
Take a piece of braided cord, lace or textured material and press it gently into the clay.
Lift it carefully.
Repeat around the body.
You now have a raised-looking surface without having to sculpt every detail yourself.
Add several small round openings between the textured bands.
When dry, paint the lantern dusty cream or pale terracotta.
The texture will catch the warm light beautifully.
This is a fun addition to your clay activities because beginners can experiment with household textures.
9. Tiny Starburst Lantern
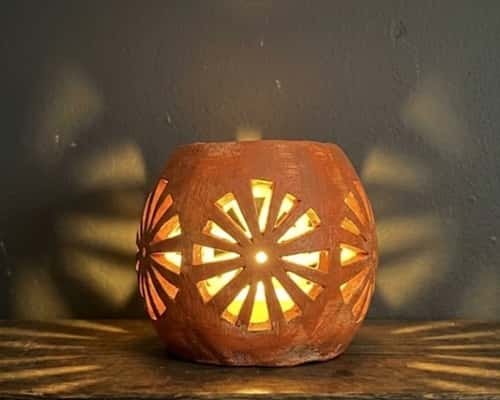
A starburst pattern gives a stronger glow than plain holes.
Create a small round or oval lantern body.
Draw short rays radiating from several central points.
Use a craft knife to cut narrow wedge-shaped openings.
Keep the wedges short and reasonably thick.
If the clay starts bending while cutting, stop and let it firm up.
Once dry, paint the outside a warm muted mustard or rusty orange.
When the tealight is inside, the openings create little beams around the lantern.
That flickering effect is the real attraction.
Selling Tip: Make a small batch in sunset-inspired colors and sell them as a set of three.
10. Dimpled Rain Lantern
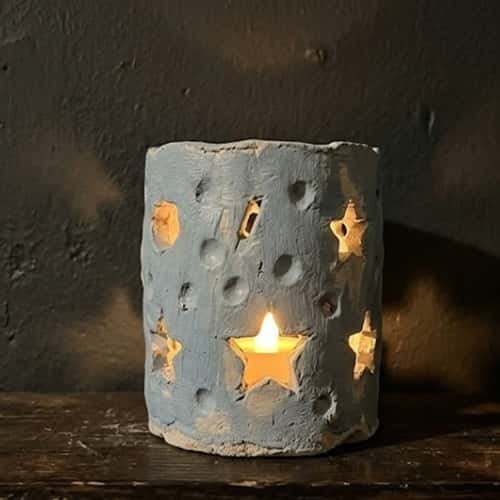
This is probably the easiest design in the collection.
Make a small cylindrical lantern.
Use the rounded end of a wooden tool to press shallow dimples across the clay.
Some dimples can be deep. Others can be barely visible.
Then pierce a few of them completely through.
The result looks like little drops of rain.
You don’t need complicated carved designs here.
After drying, use a soft blue-grey paint and leave some areas slightly uneven.
The handmade quality is the selling point.
11. Terracotta Window Lantern
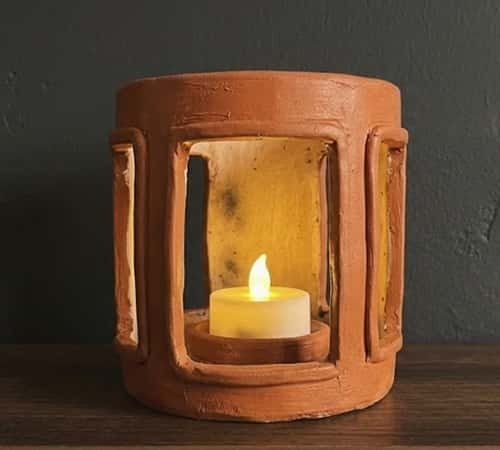
Sometimes the most sellable piece is also the simplest.
Make a squat clay cylinder from a slab.
Cut four tall rectangular windows around the body.
Add a slightly raised clay frame around each opening.
Don’t make the frame too thick.
The goal is a tiny architectural lantern rather than a miniature house.
Leave the clay in its natural terracotta family or paint it burnt orange.
Once the surface has dried, lightly sand only the sharpest edges.
Place an LED tealight inside.
Now the light shines through four warm windows.
It feels old-fashioned, earthy and very handmade.
12. Double-Wall Pattern Lantern
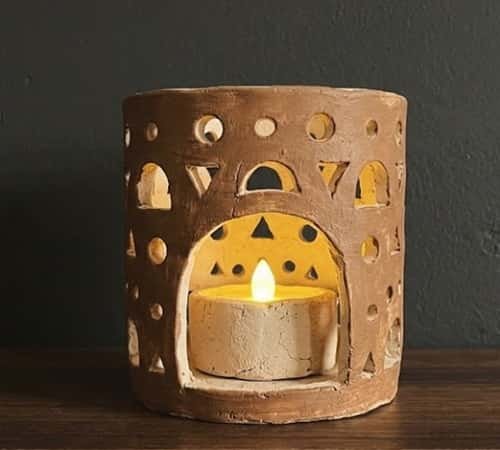
This final idea is for the beginner who wants their piece to look a little more special.
Make a basic inner cylindrical lantern first.
Then create a second thin clay sheet.
Cut an irregular pattern of small circles, arches and tiny triangles into this outer sheet.
Wrap it around the first cylinder without completely sealing the top.
The small gap between the two layers creates depth.
Let everything dry slowly.
Once hardened, paint the outer layer a slightly darker color than the inner body.
When the LED tealight glows, the pattern appears to float.
It has more of a clay sculpture feel, but the construction is still quite manageable.
Selling twist: This is a good candidate for a premium handmade collection because the double-layer construction gives it a distinctive appearance.
A Few Practical Tips Before Selling These
If you’re making these for selling clay art, don’t rush the drying stage.
Air-dry clay can feel hard on the outside while moisture is still trapped inside. Thick lanterns need even more time.
Also, use LED tealights, especially when selling to families.
A real flame can heat the clay and nearby surfaces, while LED lights give you that same flickering light effect with far less risk.
And to get your masterpiece in front of a hungry audience, I would say learn to use pinterest.
Because things like clay stuff sell easily on pinterest.
Final Thoughts
The interesting thing about clay tealight lantern crafts is that their value doesn’t always come from complicated clay work.
A simple cylinder with thoughtfully placed openings can look more intentional than an overworked sculpture.
Think about the shadows, not just the shape. Think about where the light escapes.
Think about how someone will actually use it in their home.
Those details can turn a basic beginner project into attractive clay lantern decor.
If you’re exploring selling craft ideas, consistency is useful too.
Make one recognizable collection, photograph it properly, then offer variations in pattern, color and size.
Suddenly, one easy technique can become several handmade products.





