There is something ridiculously satisfying about turning a soft lump of clay into a character everyone recognizes.
This clay totoro craft is one of those projects that looks complicated at first, but it really isn’t.
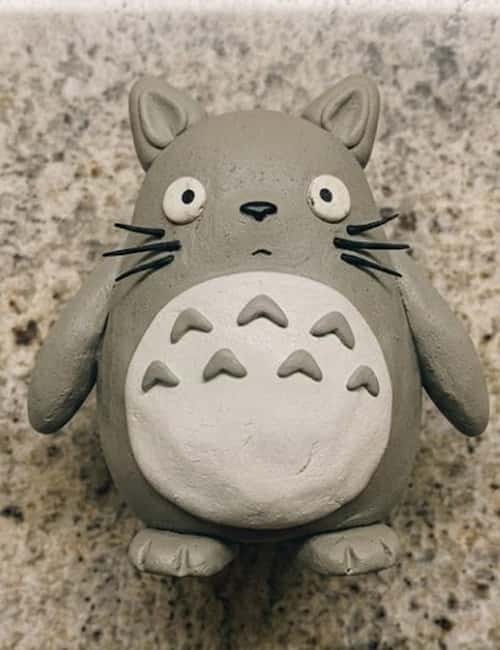
The trick is breaking the character into very simple shapes instead of trying to sculpt everything at once.
Kids can roll, flatten, pinch and press the clay with their fingers while building their own little Totoro.
I also like adding one tiny twist: instead of making a perfectly smooth character, let the fingerprints and small imperfections stay visible.
It makes the finished piece feel handmade, playful and much more like a real kids craft.
What Makes This Clay Totoro Craft Different?
Most Totoro clay projects aim for a perfectly polished miniature.
I’m going in the opposite direction.
The goal here is a soft, slightly chunky Totoro with visible handmade texture.
Think cute easy clay art rather than a museum sculpture. That makes it perfect for younger children because they don’t need precise sculpting skills.
You can use air-dry clay in gray, white and black. If you don’t have those exact colors, you can mix whatever shades you already have.
Choose Your Air Dry Clay Type
Regular Air Dry Clay | Cornstarch Clay | Homemade Clay
Affiliate Disclaimer: Some of the links in this post may be affiliate links, which means I may earn a small commission if you choose to make a purchase through them – at no extra cost to you. I only share products that genuinely fit this project and can help make your ceramic mug clay craft process easier and smoother. Your support helps keep ideas like this coming.
For this kids craft, you’ll need:
- Gray air-dry clay
- White or cream clay
- Small amount of black clay
- Tiny amount of pink clay
- A blunt clay tool or popsicle stick
- Rolling pin or smooth bottle
- Small cup of water for lightly smoothing fingers
- Clean shiny granite or another smooth work surface
No sharp tools are needed.
And honestly, don’t worry if your Totoro looks a little wonky. That is part of the charm.
Step 1: Build the Main Totoro Body
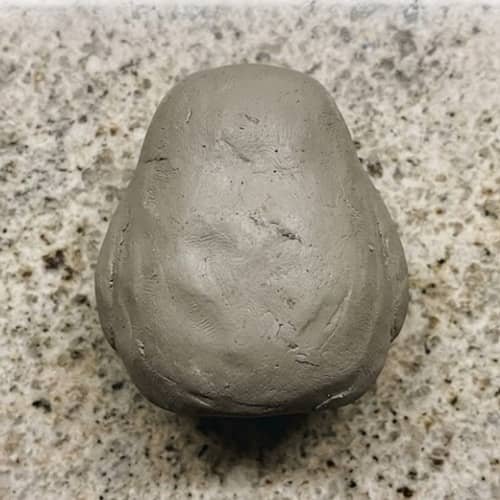
Start with a fairly large piece of gray clay. For a child-sized project, a piece roughly the size of a small orange works nicely.
Warm the clay between your palms for a minute or two. This makes it softer and easier to shape.
Now roll it gently into a ball.
Don’t try to make it perfectly round.
Place the ball on the work surface and slowly press the lower portion outward with your palms.
You want to create a shape that is wide at the bottom and slightly narrower toward the top.
Keep turning the clay as you work.
Use your fingertips to gently squeeze the sides inward near the upper third. The result should resemble a rounded pear or a plump little teardrop.
Totoro has a big, rounded body, so don’t make this too thin.
Next, gently flatten the bottom so your character can eventually stand upright.
Step 2: Give Totoro His Big Ears
Now comes one of my favorite parts.
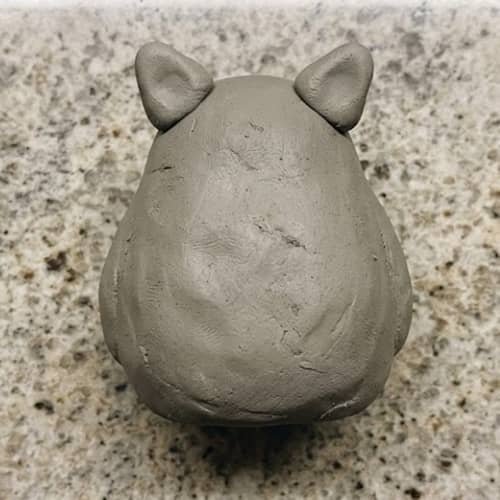
Take two small pieces of gray clay that are roughly the same size.
Roll each piece between your fingers into a short oval.
Then pinch the top of each oval gently between your fingers to create a rounded triangular shape.
Don’t make sharp points. Totoro’s ears are pointed, but they still have a soft, friendly appearance.
Place the ears on the top of the body.
Before pressing them permanently, move them around a little. Try them closer together. Then slightly farther apart.
Which position looks cutest?
Once you’re happy, press the bottom portion of each ear gently against the body.
Blend the edges with your fingertip so the ears look attached rather than stuck on.
Leave the upper part raised.
Step 3: Add the White Belly
Totoro’s pale belly is what instantly makes the character recognizable.
Take a piece of white or cream clay.
Roll it into a ball first.
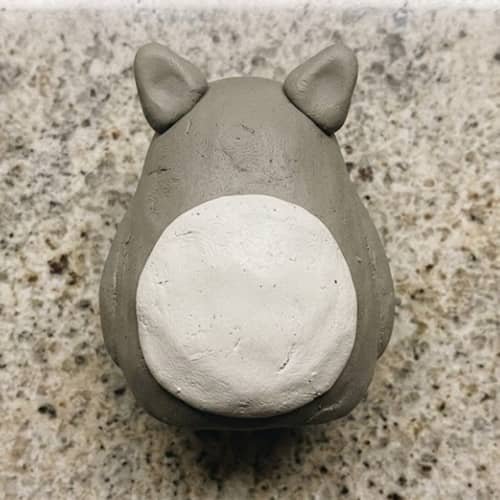
Now flatten it between your fingers until you have a thick oval.
Keep it fairly thick. If you flatten it too much, it can become difficult to attach.
Place the oval against the front of the gray body.
Since we’re working from a top-down photograph, imagine the front of Totoro facing the bottom edge of your work area.
Press the belly gently into the body.
Don’t flatten it completely. A little raised edge gives the character more dimension.
Run your fingertip around the perimeter to soften any harsh gaps.
The white belly should cover the middle and lower front portion, but it shouldn’t reach all the way to the head.
That small gray area above it will become the face.
Step 4: Make the Face
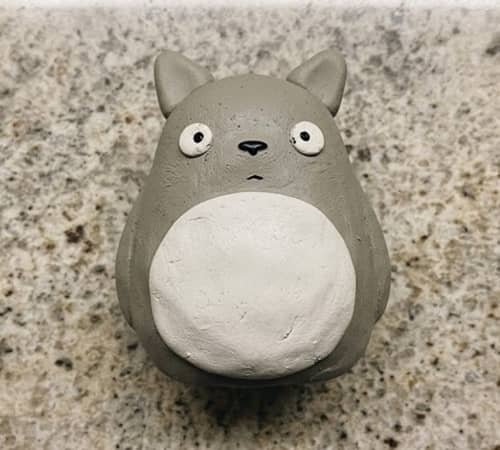
Now we bring Totoro to life.
Take two tiny pieces of white clay.
Roll them into small balls and flatten them slightly.
These will become the eyes.
Place them near the upper middle of the gray face, leaving enough room between them for the nose.
Press them gently into place.
Next, use two extremely tiny pieces of black clay for the pupils.
This is where patience helps.
Roll each tiny piece between your fingertips and press one onto the center of each white eye.
Don’t worry if they’re not perfectly identical. In fact, perfectly matching pupils can make a handmade character look strangely manufactured.
For the nose, use a tiny black clay triangle or small flattened oval.
Place it between and slightly below the eyes.
Finally, use a blunt clay tool or popsicle stick to make a tiny horizontal mouth line underneath.
Very light pressure is enough.
Step 5: Add the Little Arms
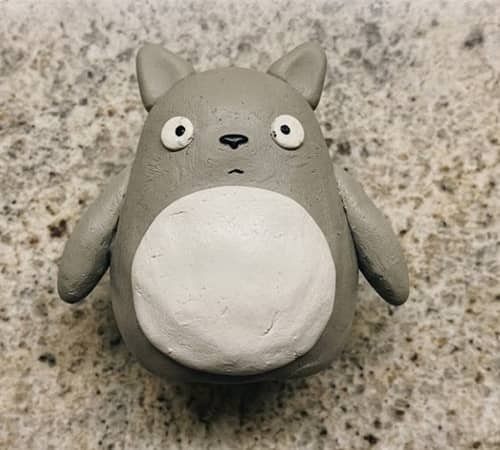
Totoro’s arms can be surprisingly simple.
Take two small pieces of gray clay.
Roll each one into a short sausage shape.
Make one end slightly thicker than the other.
Now gently flatten each arm with your fingertip.
Attach the arms to the sides of Totoro’s body.
Angle them slightly downward.
Press only the upper section firmly into the body. Keep the lower portion visible.
You can curve the arms forward a tiny bit.
This creates a much more interesting pose than simply sticking two straight pieces onto the sides.
And yes, one arm might be slightly bigger than the other. Nobody will care.
Step 6: Shape the Feet
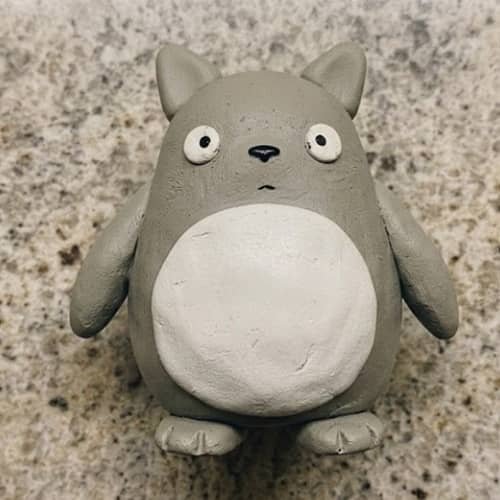
For the feet, use two slightly larger pieces of gray clay than you used for the arms.
Roll them into little flattened ovals.
Press one side of each oval slightly flatter.
Place them underneath the body.
The feet should extend just enough from the lower edge to make Totoro look like he is standing.
Press the upper part into the body.
Don’t completely hide the feet.
A tiny visible separation makes them easier to recognize.
At this stage, your Totoro should already look like Totoro even without the whiskers and belly markings.
That’s a good sign.
Step 7: Create Totoro’s Belly Markings
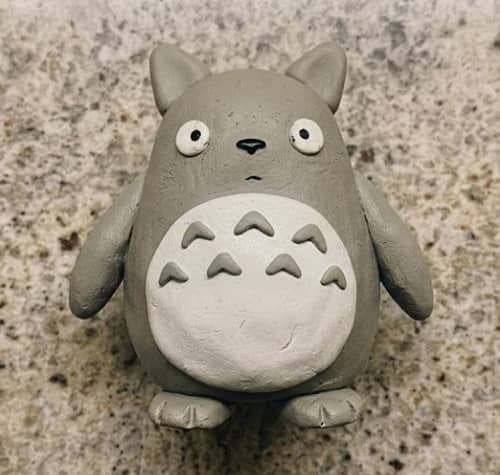
This is where the project gets extra cute.
Take a very small amount of gray or slightly darker gray clay.
Roll it into several tiny balls.
Flatten each one.
Now turn them into little curved or triangular leaf-like shapes.
Totoro’s belly markings don’t have to be identical. In fact, making them slightly different gives the finished piece more character.
Arrange the pieces across the upper portion of the white belly.
Start with three shapes near the middle.
Then add a couple underneath.
You can create a loose fan-like pattern rather than trying to reproduce every detail perfectly.
Press each marking gently into the white clay.
Use the blunt end of a clay tool to sharpen one edge if needed.
This little pattern is one of those diy clay projects details that makes a basic figure suddenly look much more finished.
Step 8: Add Whiskers and Final Details
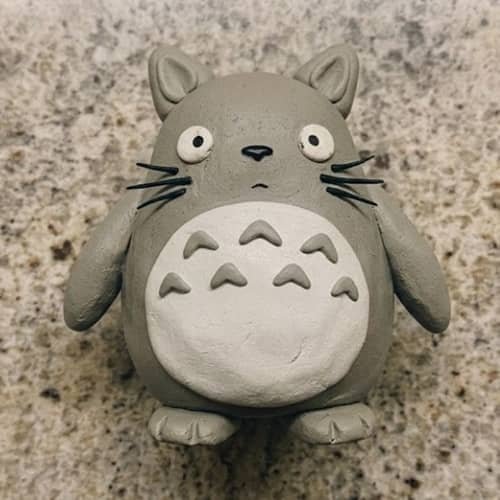
We’re almost there.
For the whiskers, avoid using wire or anything sharp for a kids craft.
Instead, roll tiny pieces of black clay into very thin short strands.
Flatten them slightly.
Place three tiny pieces on each side of the face.
They don’t need to be perfectly straight.
You can also add two tiny gray or pink clay pieces inside the ears if you want a softer color contrast.
Now take a careful look at your sculpture.
Are the eyes sitting evenly?
Does one ear need moving?
Is the belly too high?
This is your chance to fix those things.
Use a fingertip lightly dampened with water to smooth only the areas that look excessively rough. Don’t overwork the surface.
Those tiny fingerprints are what make this project feel handmade.
Let the finished sculpture dry according to the instructions on your clay package.
Tips for Making This Clay Totoro Craft Easier
Keep the clay soft: If it starts cracking while you’re shaping it, warm it gently between your hands.
Build large shapes first: Don’t start with the eyes. The body controls everything else.
Don’t chase symmetry: Kids often try to make both ears exactly the same, but handmade figures look better when they’re not too perfect.
Use very little water: Too much water can make the surface sticky or muddy.
Attach pieces properly: Press the joining areas together instead of simply placing one piece against another.
Let it dry undisturbed: Moving the figure too early can flatten the feet or shift the face.
Work slowly around the face: Tiny pieces can easily stick to fingers. A slightly damp fingertip can help with placement.
This approach also makes the project a good introduction to easy clay sculpture ideas because children learn several basic sculpting skills without realizing they’re practicing them.
Final Thoughts
The interesting thing about a project like this isn’t really the Totoro itself.
It’s the way children learn to think about a three-dimensional object as a collection of simple forms.
A ball becomes a body. Two tiny triangles become ears. Flattened ovals become feet.
Suddenly, those shapes work together and a character appears.
That’s a useful foundation for almost any future clay craft.
Once kids understand that trick, they can start inventing their own creatures instead of only copying finished examples.
And that is where cute easy clay art gets really exciting. The next figure doesn’t need to be Totoro at all. It could be something they imagined themselves.





