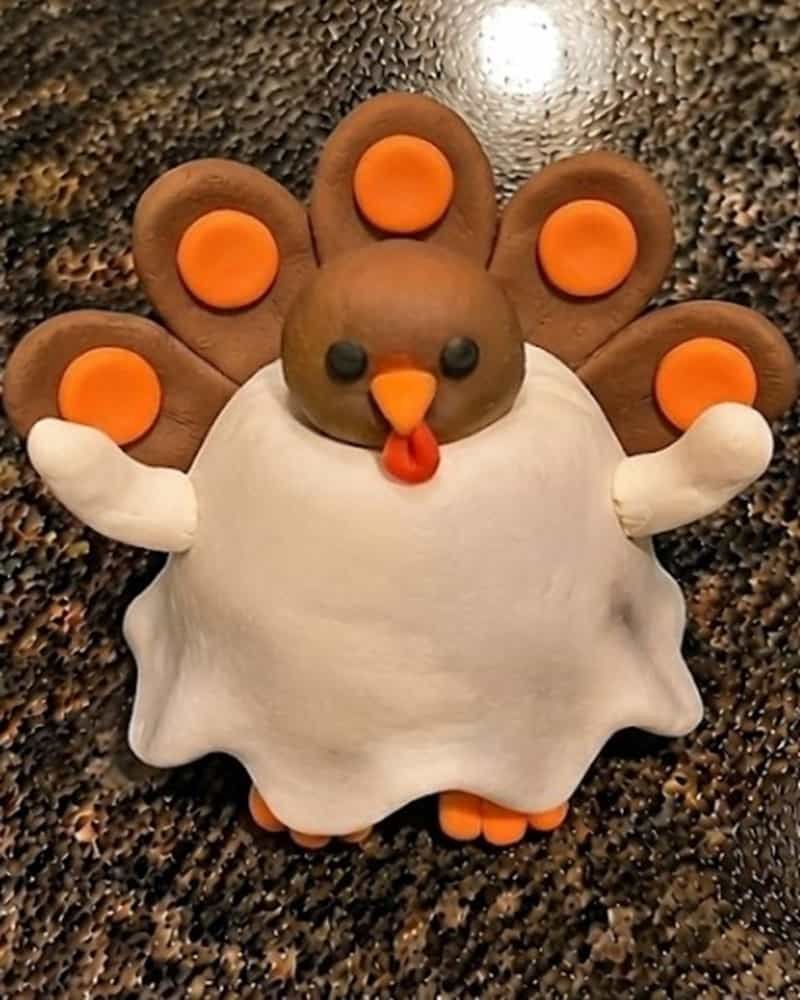
Have you ever wondered what a turkey would look like if it decided to disappear into a ghost costume? This clay turkey disguised as a ghost gives that silly idea a fun clay makeover.
Instead of simply covering a turkey shape with white clay, we will build a soft, rounded turkey body and transform it into a floating ghost with a wavy bottom, tiny wings, and a friendly spooky face.
It is an easy air dry foam clay craft for little hands because there is no baking, heating, cutting, or complicated equipment involved. Ready for a ghost turkey that looks a little goofy? Let’s make one!
What Makes This Ghost Turkey Disguise Different?
My favorite part of this project is the way the turkey slowly disappears into the ghost costume.
The finished sculpture should still have a rounded turkey-like body, but most of the brown clay will be hidden beneath white foam clay.
A few little bumps at the back hint at the turkey underneath, while the wavy bottom makes the character look like it is floating.
This makes it more than a basic clay animal craft.
It becomes a small diy clay sculpture with a story behind it.
Materials Needed To Make Ghost Turkey Disguise Clay Craft
Keep the material list simple. That makes this a much better kids craft for a classroom, rainy afternoon, or a quick activity at home.
- White air dry foam clay
- Small amount of brown air dry foam clay
- Small amounts of orange, black and optional purple foam clay
- A smooth work surface
- A small piece of parchment paper or a clean plastic sheet for working
- Clean hands
You do not need glue, wire, toothpicks, scissors, or a clay knife.
That is intentional.
For younger children, an adult can help with shaping the smaller facial pieces, but the actual sculpting can be done with fingers.
Step 1: Make the Turkey’s Rounded Body
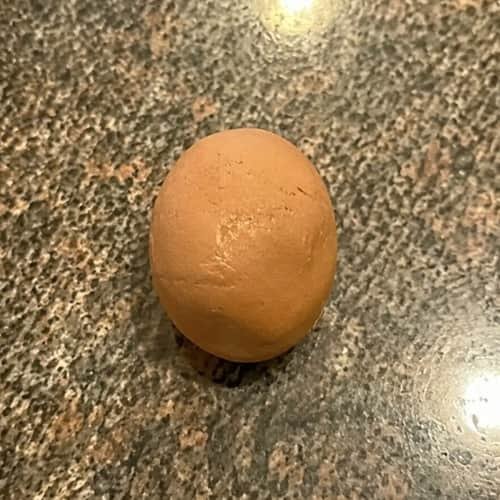
Start with a medium-sized piece of brown air dry foam clay.
Roll it gently between your palms until you have a smooth ball.
Don’t make it perfectly round.
A slightly squashed oval works better because a turkey normally has a fuller body.
Place the ball on your work surface and gently press the bottom so it can sit without rolling away.
Now lightly squeeze the upper portion so the body becomes a little narrower near the top.
The shape should look something like a small egg with a slightly wider bottom.
Why start with brown clay if the turkey is going to become a ghost?
Because this tiny brown layer gives the finished character its turkey identity, even though most of it will later disappear beneath the ghost costume.
Step 2: Give the Turkey Tiny Feet
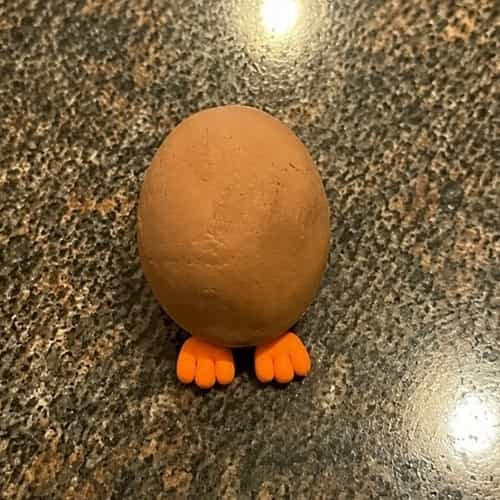
Take two very small pieces of orange foam clay.
Roll each piece into a short little sausage.
Flatten one end slightly, then use your fingertip to create two tiny toe-like bumps. They don’t need to be perfect.
In fact, slightly uneven feet make the craft feel much more handmade.
Place the feet underneath the brown body.
Press them gently into the clay rather than simply placing them on top. This helps the pieces connect better.
Keep the feet small because our ghost costume will eventually cover most of them.
At this stage, does it already look like a tiny turkey?
It should!
Step 3: Add a Tiny Turkey Head
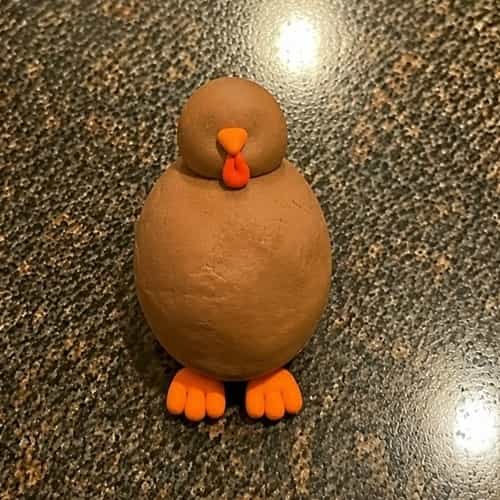
Take another small piece of brown foam clay and roll it into a smaller ball.
Place it on top of the body.
Press it gently into the upper front portion of the body so the head and body become one connected sculpture.
Don’t make the head too large.
A smaller head will leave plenty of space for the ghost costume to come over the body later.
For the beak, use a tiny piece of orange clay. Shape it into a small triangle with your fingers and press it onto the front of the head.
Add an even tinier orange or red clay piece below the beak if you want a little turkey wattle.
This part can be skipped for very young children.
Step 4: Cover the Turkey With the Ghost Costume
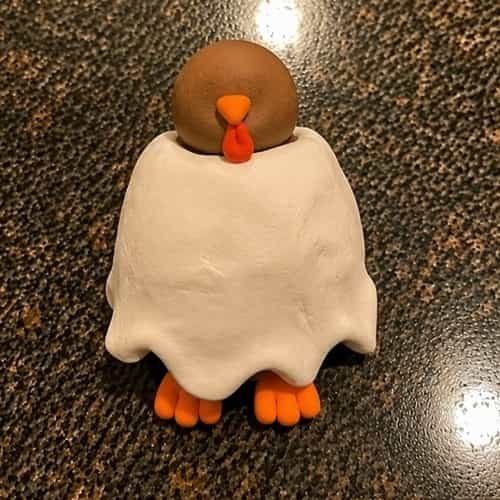
Now comes the fun part.
Take a generous piece of white air dry foam clay and gently flatten it between your fingers.
You are not trying to make a perfectly flat sheet.
Keep it slightly thick.
Carefully drape this white clay over the brown turkey body. Start near the back and bring it toward the front, leaving the head visible for now.
Gently press the white clay around the sides of the body.
Do not squeeze too hard.
We want the white clay to keep a soft, flowing appearance.
At the bottom, pinch the white clay into three or four uneven waves. These become the ghost’s floating hem.
Make the waves different sizes. A perfectly symmetrical hem can make it look manufactured, while uneven waves give it that cute handmade ghost appearance.
Leave the tiny orange feet visible underneath.
That little detail tells everyone there is still a turkey hiding inside the costume.
Note: If you want a more shortcut approach, then skip step 1 i.e. to make the turkey body. Instead, prepare the head, the beak and the wattle and directly make the ghost body as the turkey body is hidden anyways.
Step 5: Shape the Ghost’s Floating Body
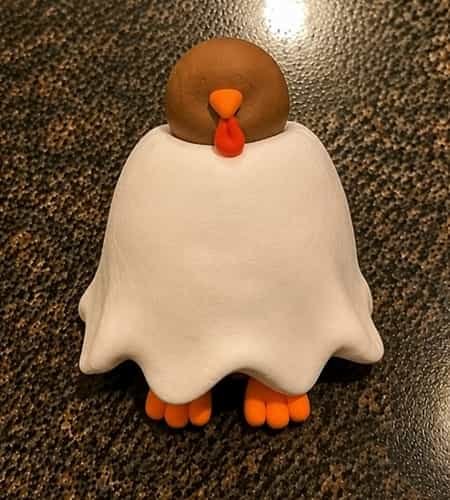
Use your fingertips to smooth the white clay around the sides.
Don’t flatten everything.
Leave some gentle bumps around the body so it feels soft and slightly puffy.
Now look at the bottom edge.
If one wave looks too long, pinch it upward slightly. If another looks too flat, gently pull it down with your fingertip.
This is where I like to add a tiny twist.
Make the center of the ghost hem slightly higher than the two side sections. This gives the impression that the ghost is floating rather than standing.
The body doesn’t need to look perfect.
Actually, the little imperfections are what makes this diy clay turkey feel like something a child genuinely made.
Step 6: Make Tiny Ghost Arms
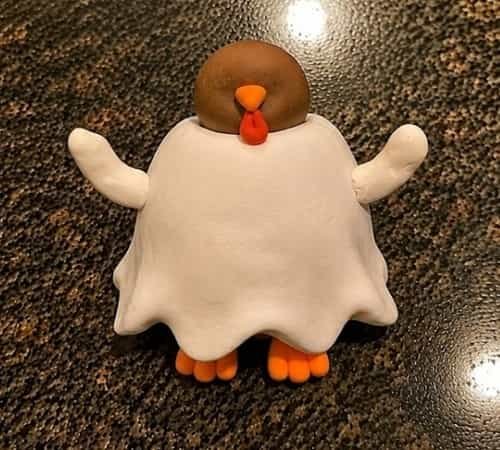
Take two tiny pieces of white foam clay.
Roll each into a very short, thin sausage.
Flatten them slightly.
Attach one to each side of the ghost body, around the middle section.
Angle the arms upward just a little.
Don’t make them long. Small arms suit the chunky body and are much easier for kids to attach.
Press the clay firmly enough to connect it, but avoid squeezing the entire ghost.
If the arms become uneven, that’s completely fine.
One can point slightly higher than the other.
Mine usually end up a little wonky too, and honestly, that is part of the charm.
Step 7: Give the Ghost a Friendly Spooky Face
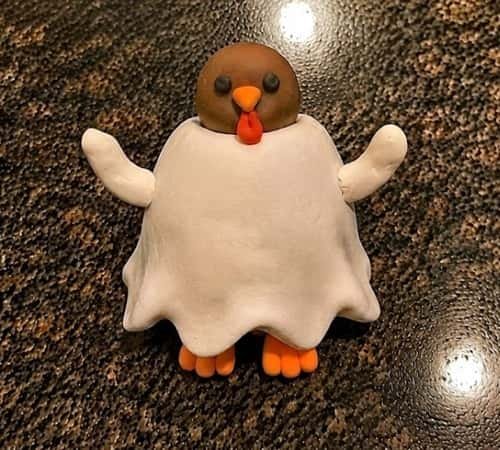
Now we can make the character come alive.
Take two tiny pieces of black foam clay and roll them into small balls.
Flatten them gently.
Place them on the brown head as the ghost turkey’s eyes.
Keep them fairly close together for a cute expression.
For the mouth, roll a tiny piece of black clay into a short oval. Flatten it and place it underneath the beak.
You can make the mouth slightly open.
This creates a funny “boo!” expression without making the character scary.
If your child wants a sillier face, make one eye slightly smaller than the other.
Kids often love this part because suddenly the little lump of clay becomes a character.
Note: In this case I have left as it is since, it looks alright and I don’t want to spoil the face.
Step 8: Add the Hidden Turkey Clue
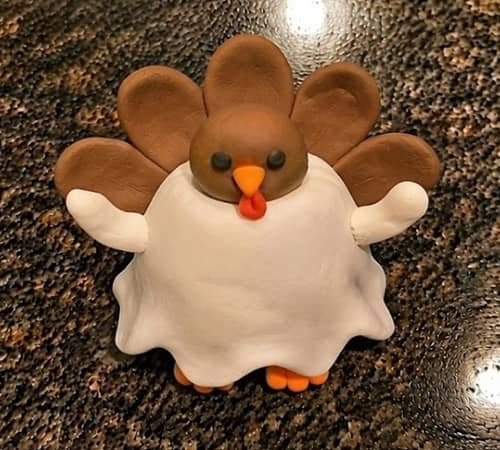
Here is the detail that makes this version stand out.
Take three very small pieces of brown foam clay.
Flatten them into tiny rounded bumps.
Attach them along the upper back edge of the white ghost costume, behind the head.
These little brown bumps should peek out from behind the ghost.
They act like a secret clue.
At first glance, you see a ghost.
Look closer and you realize, “Wait… that’s a turkey!”
You can also add two or three tiny orange feather-like shapes if you want the turkey identity to be more obvious.
Don’t overload it.
The whole joke works because the turkey is mostly hidden.
Alternatively, you can place the turkey like a feather behind, like I did in this case.
Step 9: Let the Clay Dry Naturally After Decorating the feathers (Decoration Optional)
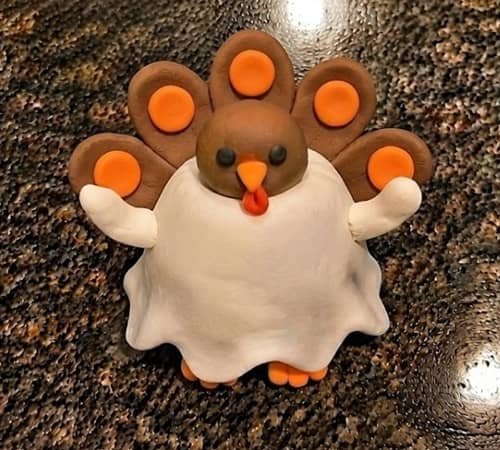
Your clay Turkey disguised as a ghost is now ready for drying.
Place it somewhere clean where it will not be bumped or squeezed.
Air dry foam clay normally needs time to firm up, but drying time varies depending on the brand, thickness, room temperature, and humidity.
Don’t rush it.
There is no need to bake this project or use a hair dryer.
That is one reason I really like air dry foam clay for children’s clay activities.
Check the manufacturer’s drying instructions for the particular clay you are using. Once it feels firm throughout, it can be handled gently.
Avoid putting a heavy object on top while it dries because the soft ghost body can lose its shape.
Tips for Better Results
Use less clay for the details: Tiny eyes and feet usually look cuter than oversized ones.
Don’t overwork the white clay: Too much smoothing can remove the soft handmade texture.
Attach pieces while the clay is still workable: Press them together gently so they bond as the clay dries.
Keep the ghost costume thick enough: A very thin layer can tear while you are shaping the wavy hem.
Don’t chase perfection: A crooked arm or uneven wave can make the finished turkey ghost more charming.
Most importantly, let kids make design decisions themselves.
If they want three eyes, a giant mouth, or a purple ghost body, let them experiment.
The goal of a clay craft is not to produce identical little sculptures.
It is to give kids a simple way to turn an idea into something they can actually hold.
Final Thoughts
I think the cleverest part of this clay Turkey disguised as a ghost craft is the hidden-turkey idea.
Instead of decorating a normal turkey with a few ghost details, we actually build a turkey and then let the ghost costume swallow most of its shape.
That makes the finished piece more interesting to look at because children can explain the disguise rather than simply showing a finished sculpture.
It also introduces a useful clay lesson: layering can completely change the identity of a basic form.
Once kids understand that, they can use the same idea for other air dry foam clay craft projects.. turning one simple animal shape into a completely different character.





