Have you ever looked at a plain turkey craft and thought, “How can I make this one actually stand out?” I wanted to give the classic Thanksgiving turkey disguise idea a completely different personality, so I turned mine into a tiny fireman using air dry foam clay.
This Disguise a Turkey as a fireman using air dry foam clay project is colorful, simple, and perfect for Fall, November, classroom activities, or a fun afternoon at home.
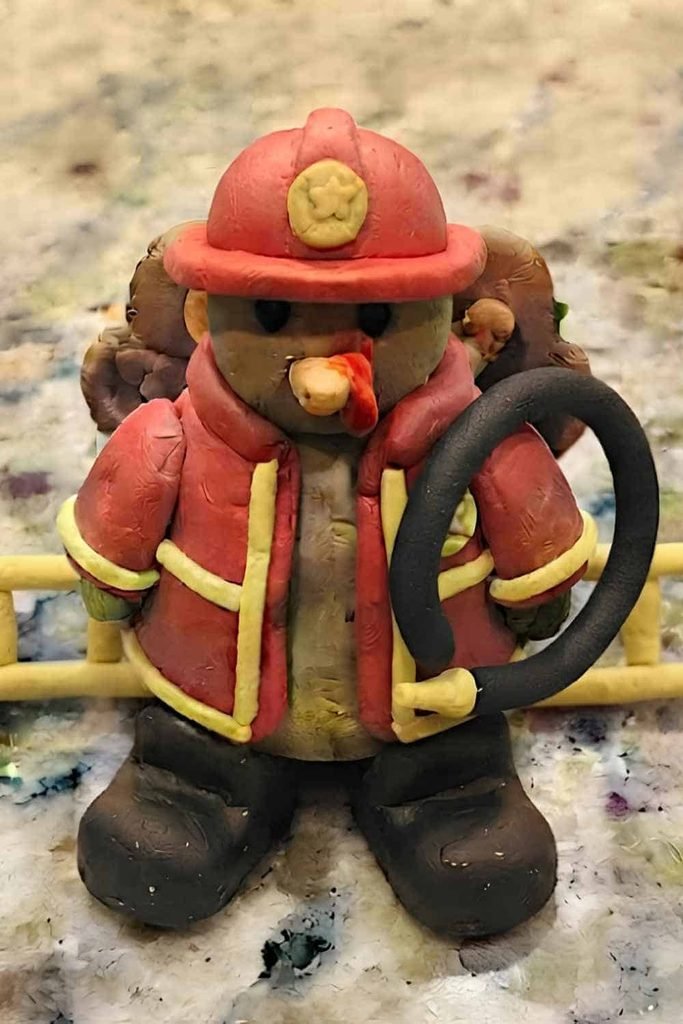
Instead of making a complicated firefighter costume, we will build the outfit directly onto a front-facing turkey using basic clay shapes.
No special sculpting skills needed here. Kids, parents, teachers, and students can all make it together.
Why Make a Clay Fireman Turkey?
This isn’t just another turkey in disguise.
The fun twist is that the turkey becomes a tiny member of a fire crew, complete with a red helmet, protective jacket, badge, boots, and a little firefighter-style hose detail.
The finished piece looks like a miniature handmade sculpture rather than a flat school project.
I also prefer air dry foam clay for this project because it is lightweight, soft, easy to mold, and doesn’t require baking.
That makes it especially convenient for children who enjoy creative play and simple DIY clay projects.
And here’s the clever part: the firefighter uniform also acts as the turkey’s camouflage.
Materials Needed To Make Clay Firemen Disguised Turkey
You don’t need a huge craft supply box for this one.
- Brown air dry foam clay
- Red air dry foam clay
- Yellow or golden foam clay
- Black foam clay
- White foam clay
- Orange foam clay
- A small piece of cardboard or thick paper for optional support
- Clean work surface
- Small rolling pin or smooth bottle
- Child-safe plastic clay tool, optional
- Small amount of water for smoothing fingers, if needed
I recommend using foam clay rather than regular modeling clay for young children because it is lightweight and easy to handle.
Air-dry clay can work too, although the texture and drying time will vary by brand.
Salt dough is another option for older kids, but it requires a different preparation method, so I would keep this particular project focused on ready-to-use air dry foam clay.
Important: Skip sharp tools, wires, toothpicks, hot glue, and anything that could poke little fingers. The entire disguise can be made from soft clay shapes.
Choose Your Air Dry Clay Type
Air Dry Foam Clay | Cornstarch Clay | Homemade Clay
Affiliate Disclaimer: Some of the links in this post may be affiliate links, which means I may earn a small commission if you choose to make a purchase through them – at no extra cost to you. I only share products that genuinely fit this project and can help make your ceramic mug clay craft process easier and smoother. Your support helps keep ideas like this coming.
Step 1: Build the Turkey Body
Start with the main character.
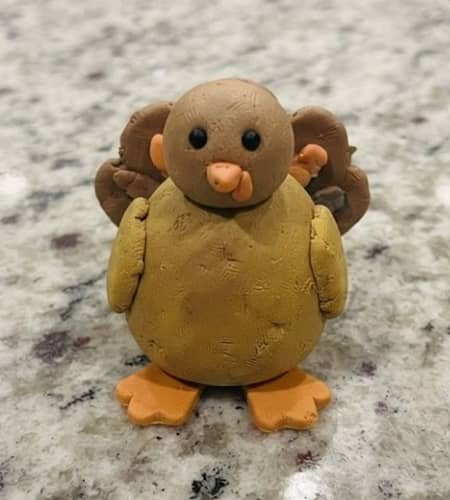
Take a generous piece of brown air dry foam clay and roll it between your palms until you have a smooth oval.
Just make sure that the clay turkey can sit securely.
Keep the front rounded because this will become the turkey’s chest and belly.
Now add a smaller brown clay ball for the head.
Press it gently onto the top of the body and blend the joining area with your fingers.
Don’t worry about making the connection perfectly smooth. A handmade finish actually makes the sculpture more charming.
Next, make two tiny black clay balls for the eyes and two small orange pieces for the feet.
Press everything gently into position.
Step 2: Give the Turkey Its Firefighter Face
Now our turkey needs a little personality.
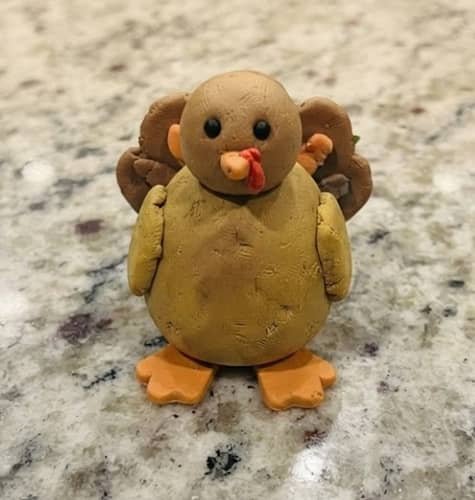
Roll a tiny orange piece into a short cone and flatten the wide end slightly. This becomes the beak.
Place it between the eyes and press gently.
For the turkey’s wattle, take a tiny piece of red foam clay and flatten it into a small teardrop shape. Place it just below the beak.
Keep these features small. If the beak becomes too large, the turkey starts looking more like a cartoon bird than a firefighter.
I like keeping the face simple because the red helmet and jacket will become the main attraction later.
The little turkey is already starting to look cute.
Step 3: Create the Firefighter Jacket
This is where the disguise really starts happening.
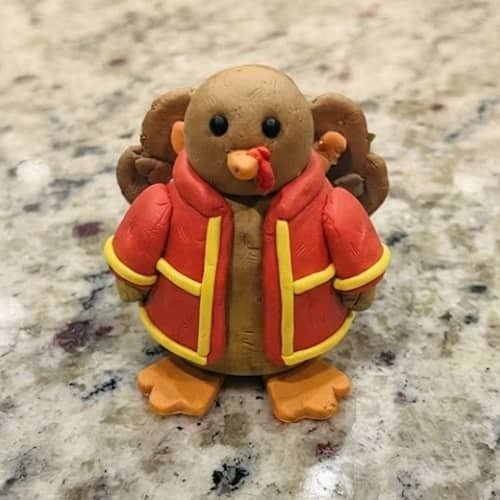
Take red air dry foam clay and flatten it into a thick oval using your fingers or a small smooth rolling tool.
The piece should be wide enough to cover most of the turkey’s chest but should not cover the face.
Place the red clay over the front of the brown body.
Press the edges gently against the turkey so the jacket follows the rounded shape of the body.
Don’t completely flatten the red piece. Leaving a little thickness gives the costume a raised, handmade look.
Then make two smaller red pieces and attach them along the sides as short firefighter sleeves.
Our fireman turkey wears his jacket pretty proudly.
For the jacket trim, roll two very thin strips of yellow foam clay and place one down each side of the red jacket.
Add another short yellow strip across the lower chest.
Step 4: Make the Firefighter Badge
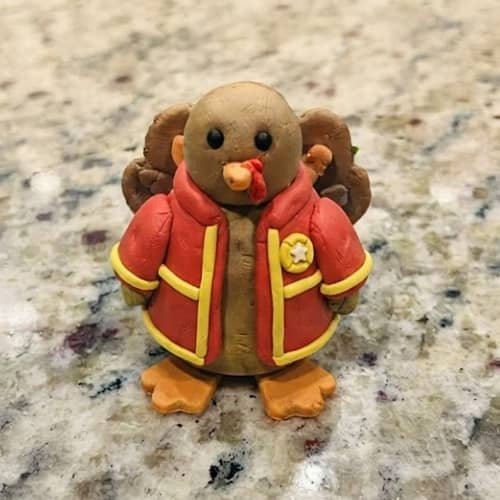
A tiny badge can make a surprisingly big difference.
Take a small piece of yellow foam clay and roll it into a ball. Flatten it between your fingers until it becomes a tiny disk.
Place it in the middle of the red jacket.
Now take an even smaller piece of white clay and flatten it into a tiny star-like shape.
Don’t worry if it isn’t a perfect star. Handmade is the whole point here.
Press it gently onto the yellow badge.
If you want an easier version for younger children, simply use a small yellow circle without the star.
This gives the turkey a clear firefighter identity without requiring complicated sculpting.
Step 5: Sculpt the Firefighter Helmet
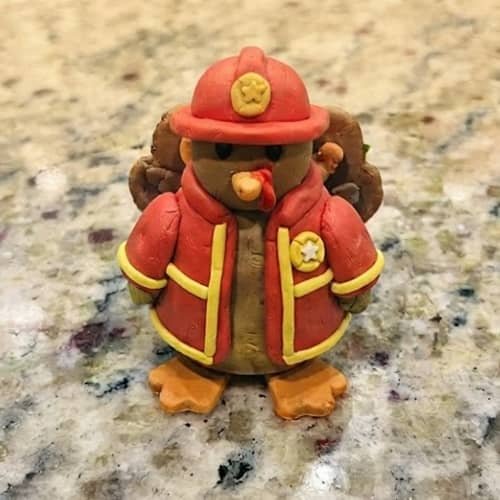
Now comes my favorite part.
Take a good-sized piece of red foam clay and roll it into a ball.
Flatten the bottom slightly, then shape the top into a rounded dome.
You want something that resembles a firefighter helmet, not a red ball.
Make the front brim by flattening a thin red strip and attaching it across the lower front of the helmet.
Add a small yellow badge to the front.
Then gently place the helmet over the turkey’s head.
Don’t press too hard because we want the eyes, beak, and wattle to remain visible.
If the helmet feels loose, gently curve its bottom around the head instead of adding glue.
The helmet should look slightly oversized, which makes the turkey more playful.
Step 6: Add the Firefighter Boots (Optional)
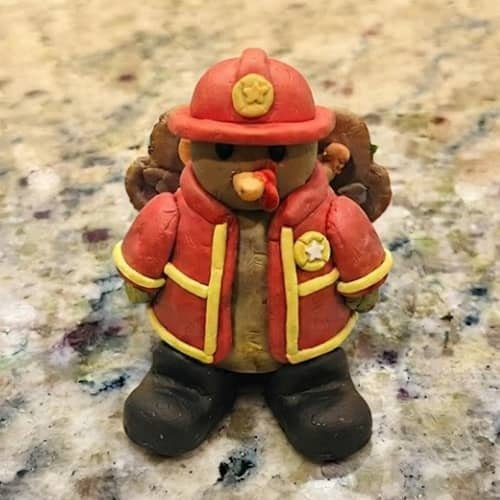
Our tiny firefighter needs boots.
Take black foam clay and make two small flattened oval shapes.
Place one underneath each orange turkey foot.
Gently press the orange feet onto the black clay.
This creates simple firefighter boots without needing complicated shapes.
You can also add a thin yellow strip around the top of each boot if your child’s fingers can manage the tiny pieces.
Keep them chunky rather than thin. Small clay parts are much easier for children to handle when they have enough thickness.
Now the disguise is becoming much more convincing.
Step 7: Add a Tiny Fire Hose
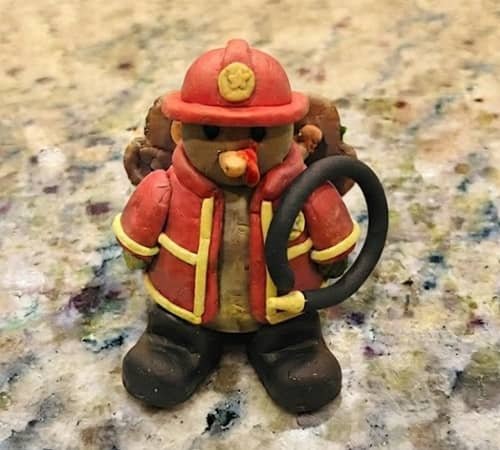
Here’s my little twist.
Instead of giving the turkey a giant accessory, make a tiny curled fire hose using black foam clay.
Roll a very thin clay snake between your fingers.
Don’t make it too thin. A slightly thicker strand is easier for kids to shape.
Curve it into a loose C-shape and attach one end near the side of the firefighter jacket.
For the nozzle, use a tiny yellow clay cylinder and attach it to the free end.
You can leave the hose hanging naturally across the lower side of the turkey.
This one detail makes the character instantly read as a fireman.
Step 8: Add a Simple Firefighter Ladder Detail
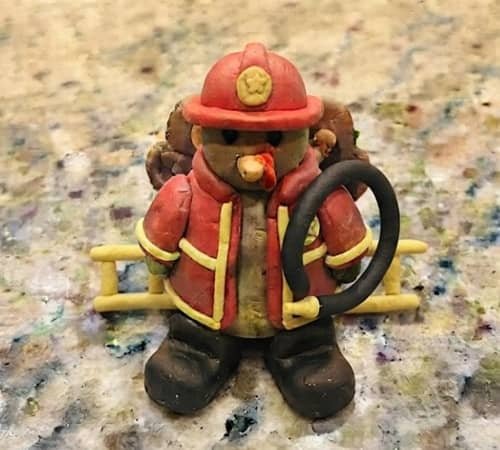
I wanted one more unusual detail without making the craft difficult.
Roll two short, thin pieces of yellow foam clay.
Place them vertically along the lower sides of the turkey, leaving space between them.
Then add two or three tiny horizontal yellow pieces between them.
You now have a miniature ladder-like detail behind the firefighter turkey.
Don’t make it too large. The turkey should remain the star of the project.
If this feels too fiddly for younger children, skip it completely.
The helmet, jacket, badge, boots, and hose already make the disguise recognizable.
Step 9: Make the Final Details Pop
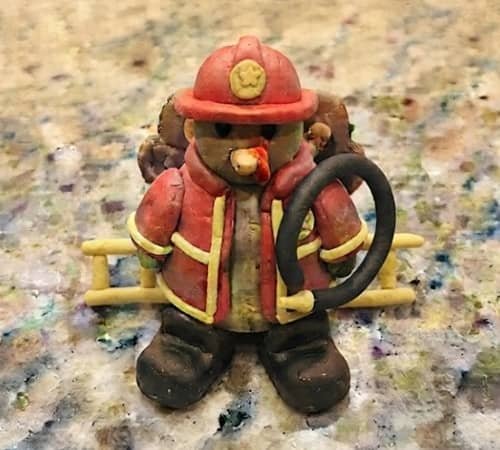
Take a moment to inspect the sculpture from the front.
Are the eyes still visible?
Is the badge centered?
Does the helmet sit securely?
If any edges look rough, gently smooth them with a fingertip.
You don’t need perfection. In fact, a few uneven edges make this air dry foam clay craft look genuinely handmade.
You can add two tiny white strips to the jacket if you want reflective firefighter markings.
Keep them short and symmetrical enough that the jacket still looks balanced.
Finally, leave the sculpture somewhere clean and undisturbed according to the drying instructions on your foam clay package.
Final Thoughts
What makes this clay Turkey disguised as a fireman craft more interesting is that the disguise isn’t just stuck onto the turkey.
The firefighter identity is built from simple shapes that children can understand and recreate… an oval body, a domed helmet, flattened jacket pieces, tiny boots, and a curved hose.
That is a useful sculpting lesson in itself. Kids learn that complicated-looking objects can be broken into basic forms.
For me, that’s one of the best things about clay crafting. You don’t need perfect hands or fancy supplies.
You just need to look at an object, simplify it, and start molding.





