New Year decorating doesn’t always need glitter, balloons and shiny store-bought signs.
I love using clay because it lets me make something that feels a little more personal and imperfect.
These clay wall decor for new year ideas are designed around simple shapes, hand-painted details and textures that actually look handmade.
You can use air dry clay for most of them, so there’s no kiln involved.
Some work beautifully as a small festival display, while others can become shelf decor or handmade gifts.
And if you enjoy making things to sell, several of these clay crafts could easily become small selling crafts too.
Choose Your Air Dry Clay Type
Regular Air Dry Clay | Cornstarch Clay | Homemade Clay
Affiliate Disclaimer: Some of the links in this post may be affiliate links, which means I may earn a small commission if you choose to make a purchase through them – at no extra cost to you. I only share products that genuinely fit this project and can help make your ceramic mug clay craft process easier and smoother. Your support helps keep ideas like this coming.
1. Midnight Clock Clay Wall Plaque
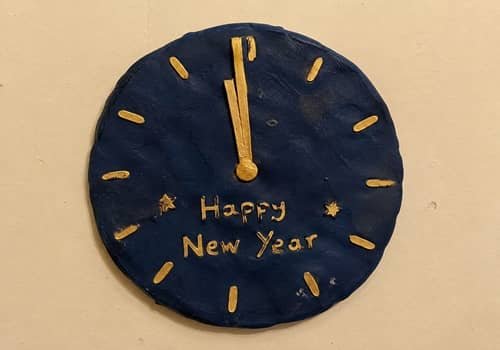
What better symbol for New Year than a clock almost reaching midnight?
Roll air dry clay to roughly 5 mm thick.
A bottle, glass or small bowl works well as a template for cutting a round plaque.
Smooth the edges with a damp fingertip, but don’t obsess over making the circle perfect. A tiny handmade wobble actually gives it character.
Once the plaque firms up slightly, press twelve tiny dots around the edge for the hour marks. You can make them with the blunt end of a paintbrush.
Now create two thin clay strips for the hands. Set them at 11:59 or 12:00. I prefer 11:59 because it creates that little “almost there!” moment.
Let everything dry completely before painting. Use black, charcoal or deep navy for the clock and add muted gold details for the numbers and hands.
For hanging, glue a small picture-hanging loop onto the back once the clay is fully dry.
2. “Hello 2027” Layered Clay Number Plaque
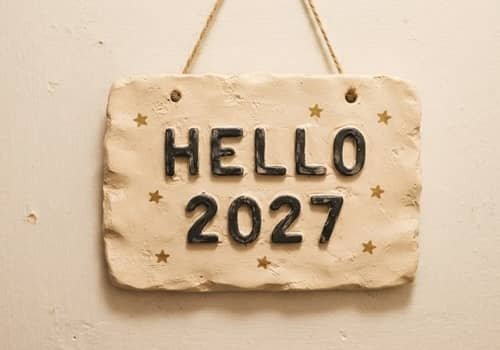
This one can become the statement piece.
Start with a rectangular or slightly arched clay slab. Don’t make it paper-thin. Around 6 mm gives you enough strength to handle the plaque comfortably.
Cut out the numbers for the upcoming year separately. If you’re making this for a different year, simply change the digits.
For a dimensional look, let the base plaque dry until firm, then attach the clay numbers using a little slip or strong clay adhesive. Press gently around each number so it sits securely.
Paint the background an off-white, dusty beige or dark charcoal. Then paint the raised numbers in a contrasting shade.
Add three or four tiny stars around the lettering. Keep them uneven. Too perfect and it starts looking factory-made.
This is also one of the easier diy clay sculpture projects to adapt into a personalized gift.
3. Clay Firework Burst Wall Medallion
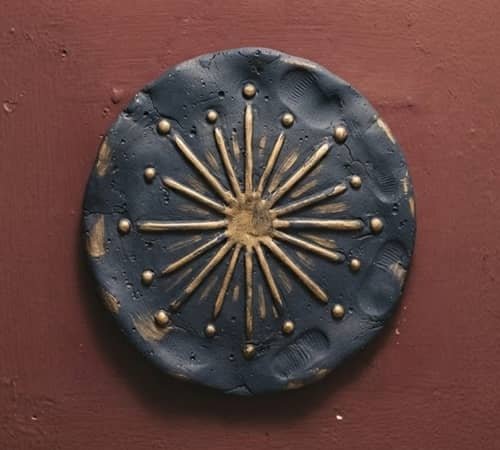
Instead of painting fireworks onto a flat sign, make them physically raised.
Create a small circular clay base. While it is still soft, roll very thin clay ropes and arrange them around the center like a burst.
Add small clay balls between some of the rays. These become your “spark” shapes.
Once dry, paint the entire piece dark blue or black. Then dry-brush metallic gold or silver over the raised fireworks.
Here’s the trick: don’t cover every bit of the dark base.
The contrast between the rough dark clay and lightly brushed metallic details makes the design much more interesting.
This would look great as one of several small clay wall crafts arranged together.
4. Tiny Clay Confetti Wall Tile
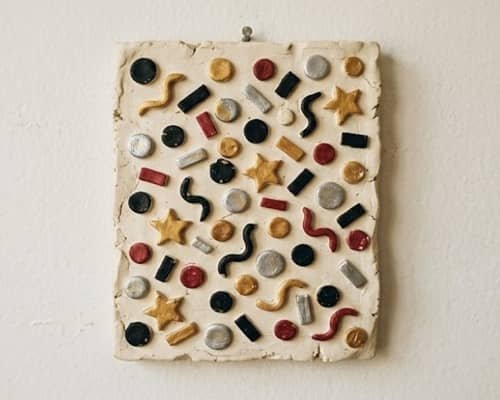
Want something playful without making the wall look like a party store exploded?
Make a rectangular clay tile and keep the base simple.
Press tiny flattened clay pieces onto the surface in different shapes—circles, rectangles, stars and tiny curved strips. Leave a little space between them.
After drying, paint the background cream or pale gray. Paint each confetti piece a different New Year-inspired shade such as black, gold, muted red, ivory and silver.
For extra dimension, leave some pieces raised while pressing others almost flat.
This is a surprisingly nice kids craft too, provided an adult handles the hanging hardware.
5. Crescent Moon New Year Wall Hanging
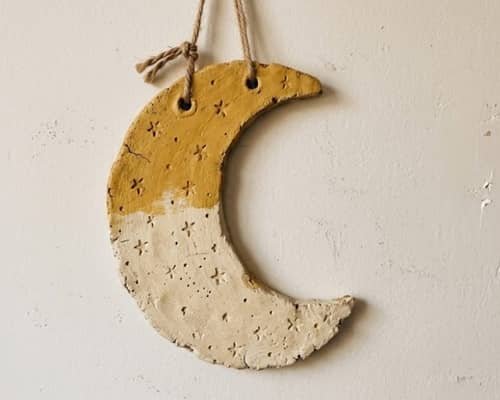
A crescent moon gives this project a completely different mood.
Sketch a crescent shape on paper first. Place the template over rolled clay and carefully cut around it.
Use a straw or small clay tool to create several tiny star holes or shallow star impressions.
After drying, paint the moon a warm mustard, cream, dusty gold or midnight blue. Add tiny dots around the stars rather than trying to make every mark identical.
Make two small holes near the top while the clay is still soft. Once completely dry, thread a simple cord through them.
The result feels festive without shouting “New Year.”
6. Clay Champagne Bubble Wall Art
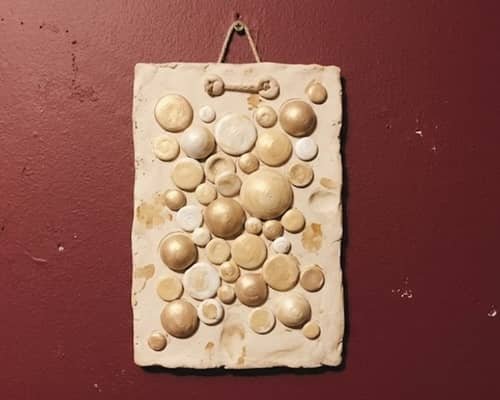
No bottle required.
Create a simple vertical clay plaque with a large raised circle or arch near the center. Around it, attach different-sized tiny clay circles to represent rising bubbles.
Paint the base a soft champagne beige. Paint some bubbles gold, leave a few natural clay-colored and add a handful of white ones.
The varying bubble sizes are what makes it work.
Don’t make them perfectly spaced either. Real bubbles aren’t arranged like a spreadsheet.
This is one of those new year clay crafts that can also be adapted into a personalized housewarming or celebration piece.
7. “Midnight Wishes” Clay Envelope Plaque
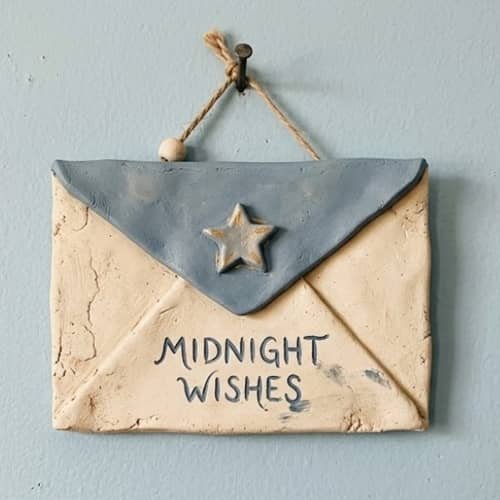
This one has a little storytelling built into it.
Make a small envelope-shaped clay plaque. Score the triangular flap with a blunt tool rather than cutting all the way through.
Add a tiny raised star, moon or heart on the flap.
Once dry, paint the envelope an earthy cream or dusty blue. Then add the words MIDNIGHT WISHES using a fine brush.
If handwriting isn’t your thing, keep the lettering minimal. Even three small stars can replace the words.
Attach a hanging loop on the back and let the uneven brush lettering remain visible.
That handmade look is exactly what makes this work.
8. Clay New Year Star Cluster
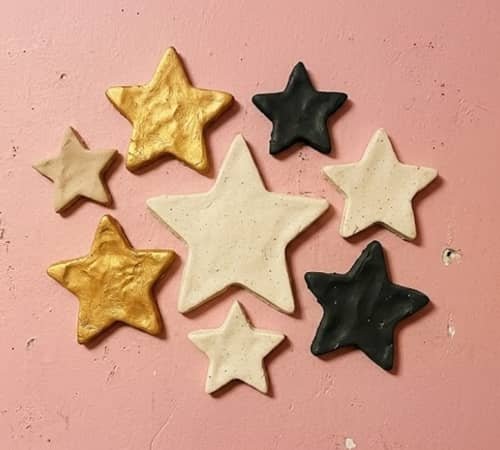
Rather than making one huge star, make a cluster of five or seven different stars.
Roll clay evenly and cut stars using paper templates. Make some stars large and others small.
Before drying, press different textures into them. Try fabric, lace, a toothbrush or a textured leaf.
Paint the stars in related shades rather than making every piece identical. A cream, gold, charcoal and muted beige combination can look surprisingly sophisticated.
Glue the finished stars directly onto a backing plaque or hang them individually as a small wall cluster.
This is also an easy project to batch-produce if you’re interested in selling crafts.
9. Clay Ribbon Burst Wall Sculpture
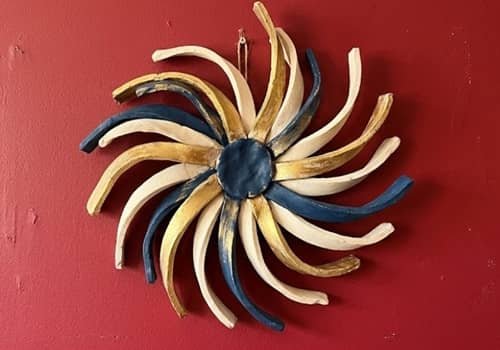
Now let’s make something a little more sculptural.
Roll several thin clay ropes. Curve each one gently into a loose wave or ribbon shape.
Arrange them so they appear to burst outward from one point. Let them dry separately if you’re worried about the shapes collapsing.
Once dry, paint the pieces in two or three colors. Attach them to a small circular clay center.
You get a dimensional wall sculpture without needing complicated sculpting skills.
The trick is keeping the curves thick enough. Super-thin clay ribbons can snap after drying.
10. Clay Sunburst “New Beginnings” Plaque
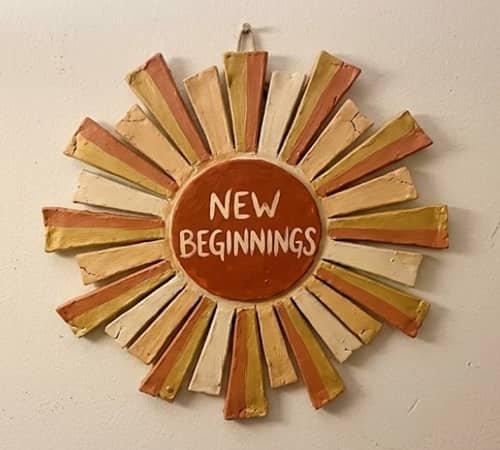
A sunburst is perfect for the idea of starting fresh.
Cut a small round clay center. Around it, attach uneven triangular rays.
Don’t make every ray the same length. Seriously. That little irregularity makes the finished piece feel handmade.
Paint the center a warm cream and the rays in alternating muted gold and terracotta.
For a stronger New Year connection, add a tiny hand-painted phrase such as NEW BEGINNINGS across the center.
Let the plaque dry completely before attaching the wall hook.
11. Clay Calendar Page Wall Decor
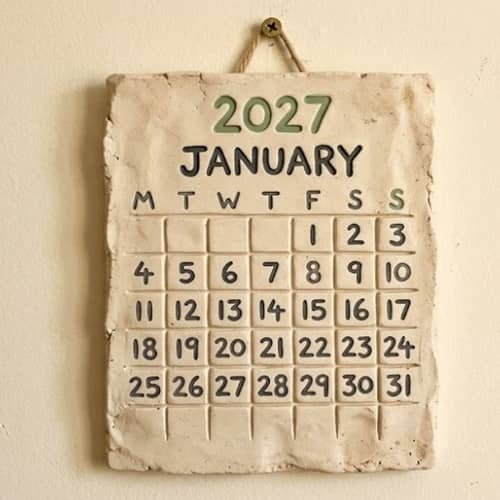
This is a fun one if you want your New Year decor to have a little purpose.
Create a flat rectangular clay plaque resembling a calendar page.
Instead of sculpting every date, use shallow lines and tiny clay dots to suggest a calendar grid. Add the new year’s number prominently at the top.
You can even make a small raised clay tab that says “JAN.”
Keep the design simple because tiny calendar details can become messy once painted.
For a more rustic look, use an off-white base with charcoal numbers and one muted accent color.
It works as wall decor but can also sit as shelf decor after adding a small stand.
12. “Leave It Behind” Clay Doorway Wall Plaque
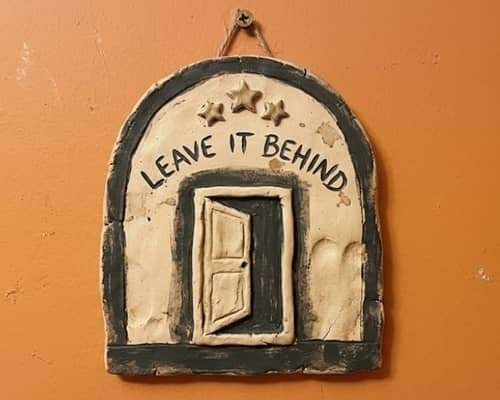
I wanted the last idea to feel different from the usual countdown signs.
Make a simple arched clay plaque. In the center, sculpt or press a tiny open doorway shape.
Above it, add the words “LEAVE IT BEHIND”.
Below the doorway, add three tiny stars or a simple rising sun.
The symbolism is simple: the old year stays behind the door and you’re stepping into something new.
Paint the doorway dark and the surrounding plaque warm cream. Add just a touch of gold around the stars.
This could make a lovely handmade gift too, especially when paired with a handwritten New Year note.
Final Thoughts
The interesting thing about clay wall decor for new year is that you don’t need complicated sculpting to make it look special. Texture does a lot of the work.
A slightly uneven edge, visible finger mark or brushstroke can actually make a handmade piece feel more believable.
If you’re making these as clay craft projects to sell, I’d also avoid producing every piece perfectly identical.
Small variations can become part of the handmade character.
You can also turn one design into several sizes, colors and personalized versions.
That gives you a tiny product collection instead of just one craft. And honestly, that’s where simple clay activities can start becoming much more interesting.





