If your kids love slightly silly Halloween characters, this air dry clay zombie craft is a fun one to make.
I wanted to recreate the same goofy, wide-eyed zombie look from the paper plate reference, but give it a handmade clay finish.
Think bright green face, chunky white eyes, pink zombie hair, stitched scars and that funny open mouth. The best part? You don’t need complicated sculpting skills.
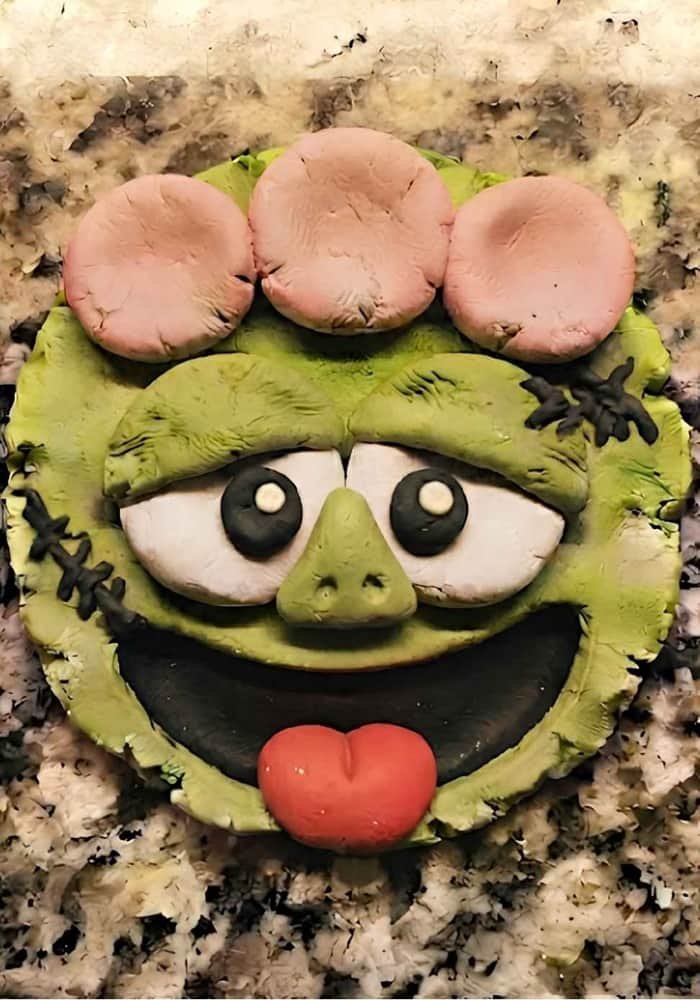
This is a flat clay zombie craft, so little hands can roll, press, cut and decorate their way through it.
It works beautifully as one of those clay activities for the month of October, especially when you want something different from the usual paper Halloween crafts.
What Makes This Clay Zombie Craft Different?
Instead of building a three-dimensional zombie head, we’re making a flat clay plaque that closely follows the shape and expression of the reference image.
That makes it easier for kids.
It also means the finished piece can be displayed on a shelf, used as October classroom décor, or simply photographed as a cute zombie Halloween craft.
The little twist I am adding is a slightly uneven handmade texture around the green face. Don’t try to make it perfectly smooth.
A few bumps actually make the zombie look more homemade and much closer to the charm of a child’s craft.
Materials Needed To Make Clay Zombie
- Green air dry clay
- White air dry clay
- Black air dry clay
- Red air dry clay
- Pink air dry clay
- A small amount of dark green or light green clay, optional
- Rolling pin or smooth cylindrical bottle
- Blunt plastic craft knife
- Toothpick or blunt modeling stick
- Small cup or round lid for checking the shape
- Smooth work surface
- Baking parchment or a non-stick craft mat
- Ruler, optional
- Acrylic paint, optional for tiny details after drying
- White glue, only if you need to reinforce a dried decoration
Safety note: Use children’s air dry clay and blunt plastic tools. There is no need for sharp blades, hot glue, ovens or other hazardous equipment. Younger children can do the rolling and pressing while an adult helps with any detailed cutting.
How To Make This Air Dry Clay Zombie Craft
Step 1: Prepare the Green Zombie Face
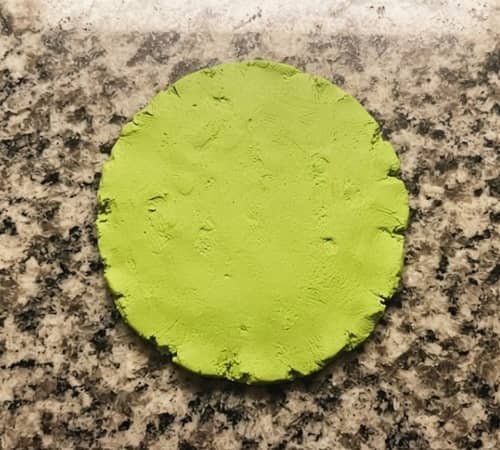
Start with a generous piece of green air dry clay.
Knead it gently between your palms for a minute or two. You are not trying to make it warm.
The goal is simply to soften the clay and remove any very dry pieces.
Roll it into a ball.
Now place the ball on your work surface and flatten it slowly with your palm. Once it becomes a thick disc, use your rolling pin to create a more even round shape.
Aim for roughly 6 to 7 inches across and about 5 to 7 mm thick.
Don’t make the face paper-thin. It can become fragile as it dries.
You also don’t need a perfect circle. In fact, a slightly wonky edge makes this air dry clay craft look much more like the original handmade paper plate zombie.
Use your fingers to gently push the edges into a rounded plate-like shape.
Step 2: Add the Zombie’s Pink Hair
Now comes one of my favorite parts.
Take a small amount of pink clay and roll it into a thin sausage.
Flatten it slightly with your fingers.
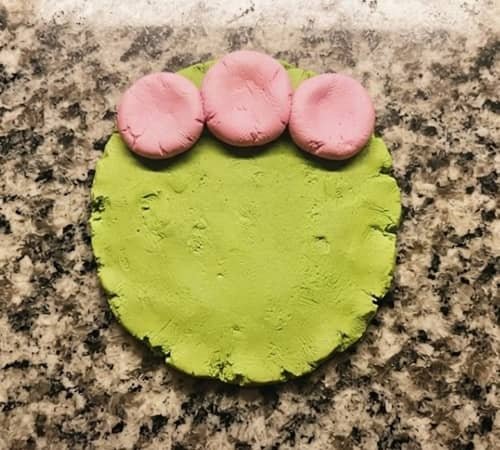
Cut or pinch it into three rounded hair sections.
They don’t need to match perfectly. The reference has a funny pink shape peeking above the green head, so we’re keeping that same basic silhouette.
Place the three pink pieces along the top edge of the green face.
Gently press them down so they attach to the clay underneath.
Do not press too hard.
You want the pink hair to remain visibly raised from the green face.
If the clay is very dry and isn’t sticking, lightly roughen the contact areas with a blunt modeling stick and press the pieces together again.
Step 3: Make the Huge Zombie Eyes
The eyes are what really sell this character.
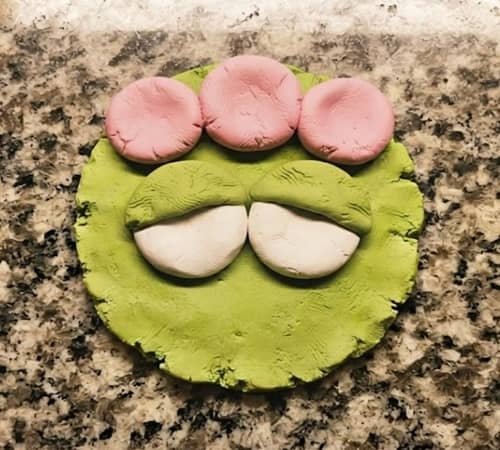
Take two similar pieces of white clay.
Roll each into a ball and flatten them into slightly oval shapes.
Place them side by side on the upper-middle section of the green face.
Keep them fairly large.
The reference has big white eyes that almost touch each other, so don’t make tiny cartoon eyes here.
Now take green clay and make two curved pieces for the heavy zombie eyelids. Flatten each piece and gently shape it into a curved arch.
Place one green arch above each white eye.
The eyelids should partially overlap the top section of the white eyes.
Press them very gently into place.
That slightly sleepy, confused expression is important. Why make a zombie look scary when you can make one look completely bewildered?
Step 4: Add Black Pupils and Tiny Eye Details
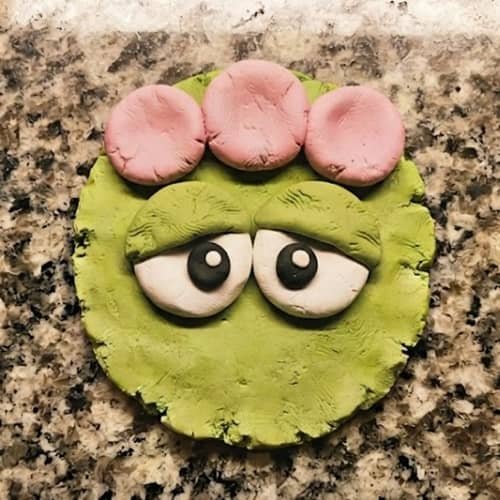
Take a very small amount of black clay.
Make two tiny balls.
Flatten each one slightly and place them inside the white eyes.
Don’t put the pupils perfectly in the middle.
For this particular zombie expression, I prefer positioning them a little unevenly. One can look slightly sideways while the other faces more forward.
Now add two tiny white clay dots on the black pupils.
These little highlights make the eyes feel much more alive.
You can also use the blunt end of a modeling stick to gently define a tiny lower-eye indentation if you want more expression.
Keep it simple, though. Too many details will change the clean look of the original.
Step 5: Sculpt the Open Zombie Mouth
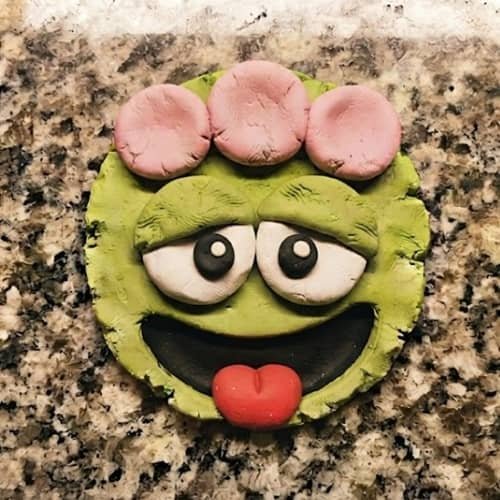
Now let’s make that wonderfully ridiculous mouth.
Take a piece of black air dry clay and flatten it.
Shape it into a wide, slightly curved opening.
It should resemble a large open mouth rather than a simple black circle.
Place it underneath the eyes, leaving enough green space between the eyes and mouth.
Press the black clay gently onto the green face.
Next, take some red clay.
Roll it into a small oval and flatten it slightly.
Place the red piece along the lower portion of the black mouth.
This becomes the zombie’s tongue.
You can push the upper edge of the red clay slightly upward in the center. That gives the tongue a more natural shape.
The mouth should look open, surprised and slightly silly.
That expression is the secret sauce of this whole clay zombie craft.
Step 6: Add the Zombie Nose
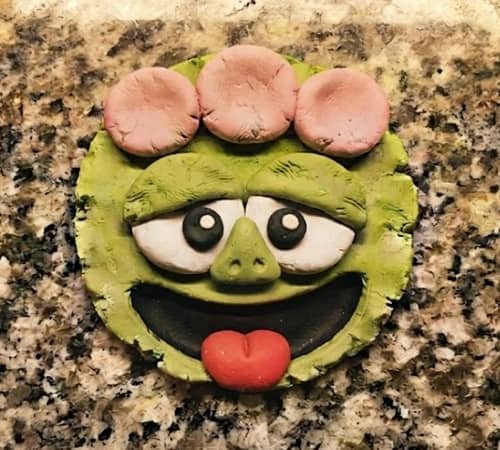
The nose is tiny, but I wouldn’t skip it.
Take a very small piece of green clay in a slightly darker shade if you have it.
If you don’t, use the same green clay and simply shape it into a tiny triangular nose.
Place it between the eyes and mouth.
Press it down gently.
Now use a blunt toothpick or modeling stick to make two tiny nostril marks.
Don’t push all the way through the face.
Just make shallow little indentations.
This tiny detail makes the expression feel surprisingly complete.
And because we’re working with flat clay, every little raised or pressed detail counts.
Step 7: Create the Stitched Zombie Scars
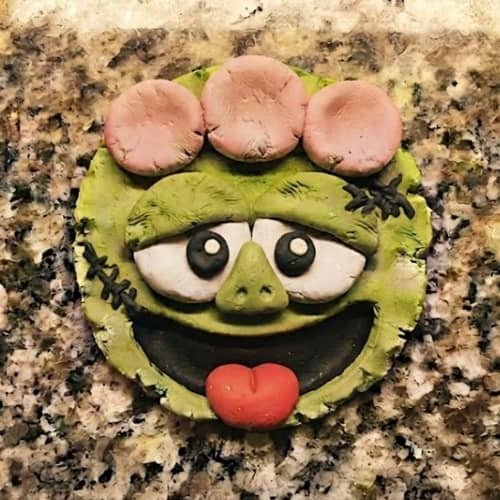
This is where the character starts looking properly zombie-like.
Take a very thin piece of black clay and roll it into a narrow strand.
You can also use tiny flattened black clay strips.
Create a short diagonal line on the left cheek.
Then add several tiny crosswise black marks over it.
These are the zombie stitches.
Make another small stitched line near the upper-right side of the face.
They don’t need to be perfectly straight.
Actually, they shouldn’t be.
The reference has rough, hand-drawn-looking stitches, so keeping them slightly irregular works beautifully for this DIY clay sculpture.
Use a blunt modeling stick to lightly press the stitches into place if they are not sticking securely.
Letting Your Air Dry Clay Zombie Dry Properly
This part sounds boring, but it matters.
Place the zombie somewhere flat and undisturbed.
Don’t put it directly under a heater, fan or strong heat source just to make it dry faster. Rapid drying can encourage cracking.
I like letting clay projects dry naturally in a room with normal airflow.
If the back feels soft after the front has hardened, leave it longer.
Once completely dry, you can leave the natural clay finish as it is.
Or, if your child wants to experiment, add tiny acrylic-painted details such as darker nostrils or slightly deeper stitch marks.
For a kids’ october craft for kids, I actually prefer leaving some of those little handmade imperfections visible.
It makes the zombie feel like something your child really made rather than a factory-perfect decoration.
Final Thoughts
What I like most about this project is that it teaches a useful clay skill without feeling like a formal clay lesson.
The zombie is basically a collection of simple shapes: a flattened disc, small ovals, curved strips and tiny details.
That means children can learn how different shapes can be combined to create an expression.
The slightly imperfect surface is also a bonus, not a problem.
With air dry clay, controlling thickness and allowing the piece to dry slowly are often more important than achieving a perfectly smooth finish. So let those little fingerprints stay.
They are part of what makes this zombie clay craft feel handmade, personal and genuinely kid-made.





