What if a turkey could sneak onto a little farm and pretend to be a cow? That is exactly what makes this Cow Turkey disguise craft using air dry foam clay so much fun.
Instead of simply sticking paper ears and spots onto a turkey, we are building a tiny handmade farm animal disguise with soft, lightweight foam clay.
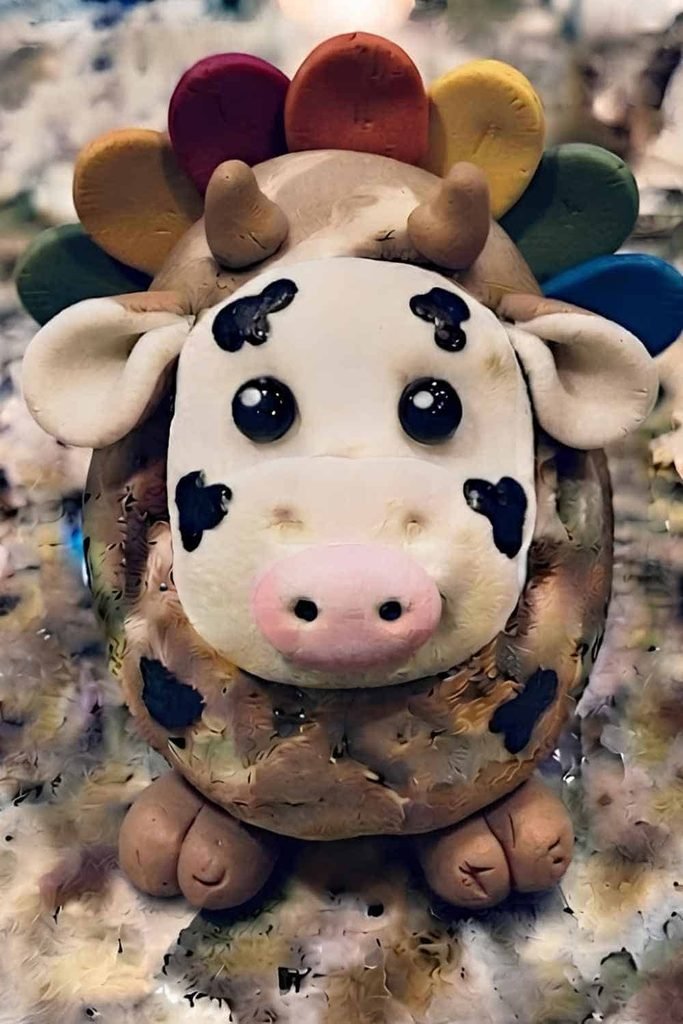
The finished piece has a front-facing cow face, rounded muzzle, floppy ears, little horns and a hidden turkey body underneath.
It is a great Fall, Thanksgiving or November classroom activity for kids, children, parents and teachers who want something more hands-on than a regular disguise a turkey worksheet.
Why Make a Cow Turkey Disguise Craft With Foam Clay?
I like this project because children get to work with shape, texture and proportion instead of only decorating a flat template.
The clever part is the disguise itself.
A turkey is being transformed into a cow without completely losing the idea of the turkey underneath. The tail can remain tucked behind the body while the front becomes a recognizable farm animal.
That makes this more than a simple clay craft. It becomes a tiny sculpture and a storytelling activity at the same time.
Ask kids this: If your turkey wanted to live on a farm, could it convince everyone that it was a cow?
For younger children, parents or teachers can prepare the basic shapes first.
Older students can make nearly the entire DIY clay project themselves using soft, lightweight air dry foam clay.
Materials Needed To Make Cow Turkey Disguise Craft
Keep the material list simple.
- Child-safe air dry foam clay
- Small amount of white foam clay
- Black foam clay
- Pink foam clay
- Brown or beige foam clay
- Yellow foam clay
- A clean, smooth work surface
- Small piece of parchment or craft paper for temporary shaping
- Optional child-safe plastic clay shaping tool
Choose non-toxic, age-appropriate air dry foam clay intended for children’s crafting.
No wire, toothpicks, hot glue, blades or sharp sculpting tools are needed for this version.
If you already have modeling clay, salt dough or regular air-dry clay, those can inspire similar projects, but foam clay works especially nicely here because it is light and easy for little fingers to mold.
Step 1: Shape the Hidden Turkey Body
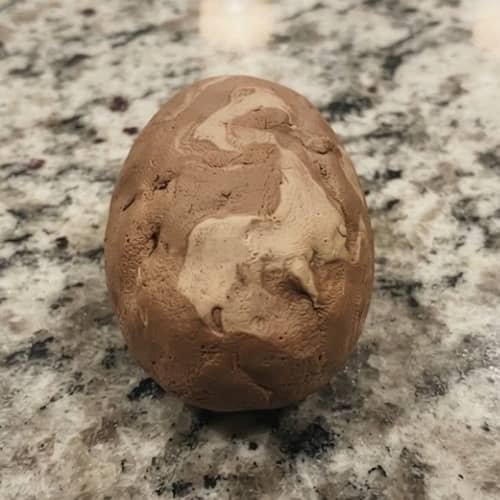
Start with a medium-sized piece of brown or beige air dry foam clay.
Roll it gently between your palms until you have a smooth oval. Don’t make it perfectly symmetrical.
A tiny bit of unevenness actually makes the handmade sculpture feel more like a child’s real craft project.
Flatten the front very slightly.
Now gently press the bottom against your work surface so the body can sit without rolling away.
Do not make the body too thin. The cow face and muzzle will be attached to this area later, so we need enough clay underneath to support them.
At this stage, it should look like a simple rounded turkey body rather than a cow.
That is intentional.
Step 2: Add the Cow’s White Face
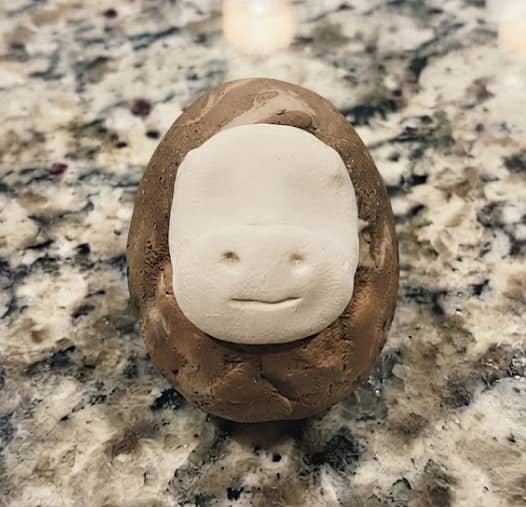
Take white foam clay and make a slightly flattened oval for the cow’s face.
The face should be wider than it is tall.
Press it gently onto the upper-front portion of the brown body.
Blend the edges very lightly with your fingertips so it looks attached instead of glued on.
Don’t completely flatten it into the body. Leaving a little raised surface gives the cow face a cute dimensional appearance.
Now check the direction.
The cow must be front facing, so the white face should sit directly toward you when you look at the craft from above.
This is where the turkey starts losing its disguise!
Step 3: Make the Cow Muzzle
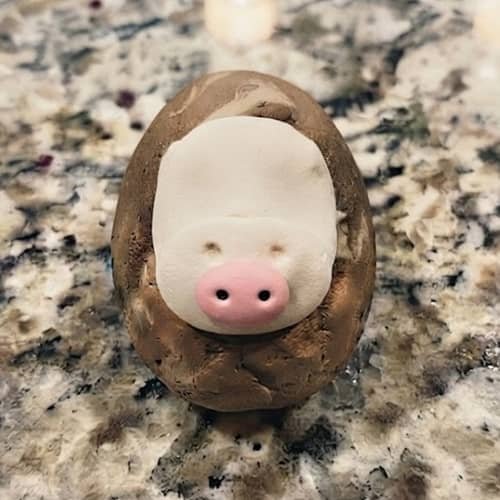
For the muzzle, use a small piece of pink foam clay.
Roll it into a little oval and flatten it slightly.
Place it in the lower-middle section of the white cow face.
Press only enough to secure it.
Now add two tiny black foam clay dots for the nostrils.
Keep them fairly close together. Huge nostrils can make the cow look more like a cartoon pig, and we don’t want our turkey to accidentally change disguises again.
The muzzle should remain raised from the face.
That little 3D bump makes a surprisingly big difference.
Step 4: Give the Cow Its Eyes
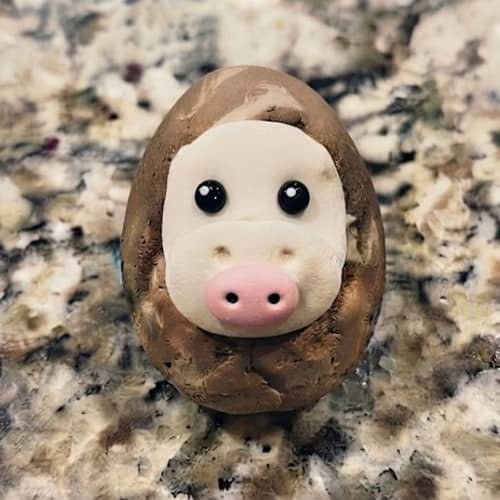
Use two tiny black balls of foam clay.
Place one eye on each side of the upper face.
Try to keep them roughly level, but don’t worry if one is a tiny bit higher. Handmade crafts don’t need factory-perfect symmetry.
For a softer expression, add two tiny white dots on the black eyes.
The eyes should be small compared with the muzzle.
Then gently press around each eye with your fingertip to make sure it stays attached.
Kids often press too hard here, so remind them… soft touch, little pressure.
Step 5: Add Cow Ears and Tiny Horns
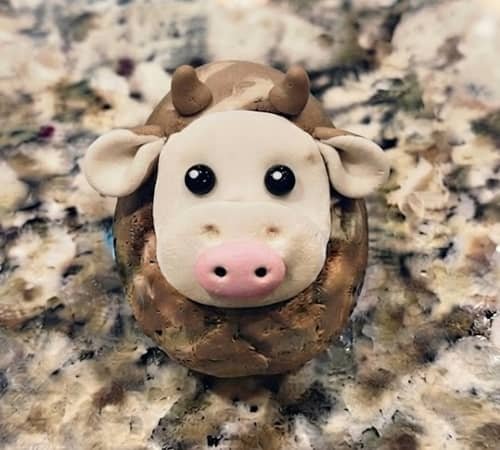
Now we get to the fun cow details.
For the ears, take two small pieces of beige, brown or white foam clay.
Flatten each into a short leaf-like shape.
Pinch one end slightly.
Attach one ear to each side of the cow face.
For the horns, make two tiny beige or brown cones.
They don’t need to be sharp. Keep the tips rounded because this is a kid-friendly clay activity.
Place the horns above the eyes, leaving enough space between the horns and ears.
Now the animal should instantly read as a cow.
And yes, the turkey is getting a very convincing disguise.
Step 6: Add the Cow’s Black Spots
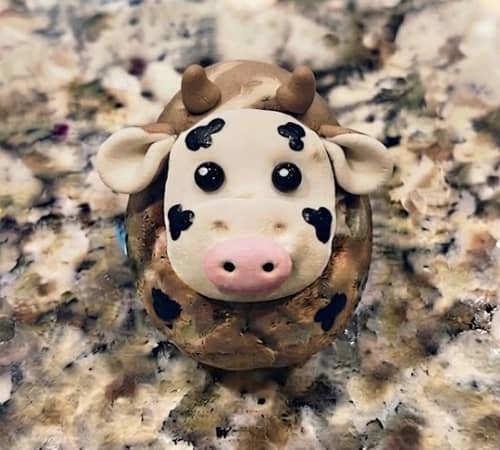
A cow without spots can still be a cow, but a few irregular spots make the disguise much stronger.
Take tiny pieces of black foam clay.
Flatten each piece with your fingertip.
Make different shapes. One can be round. Another can be slightly oval. A third can be an odd little blob.
Place them around the white face and upper brown body.
Don’t cover everything.
Leave plenty of white showing because the face needs to remain easy to recognize.
I prefer uneven spots because perfectly matching spots makes the project look too manufactured.
The spots should look like a child made them, and that is the charm.
Step 7: Hide the Turkey Tail Behind the Cow
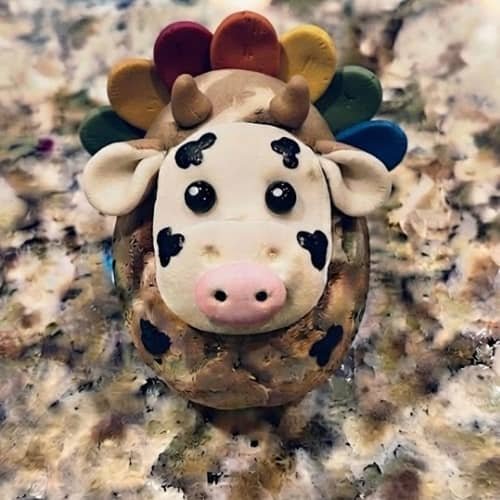
Here comes the disguise trick.
Take several small pieces of colored foam clay and flatten them into rounded feather shapes.
Use different colors if you have them.
Arrange these pieces behind the upper sides of the brown body so they peek out slightly like a tiny turkey tail.
Do not place the feathers over the cow face.
The tail should look partly hidden behind the cow disguise.
This small detail tells the story: underneath all those cow features, there is still a turkey.
That makes the craft much more interesting for a Thanksgiving school project.
Step 8: Add Tiny Cow Feet
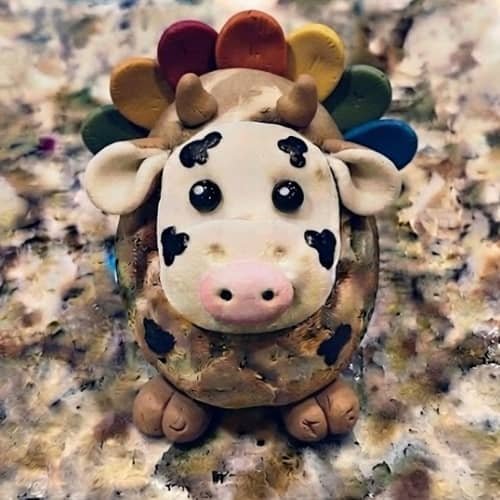
For the final structural detail, use four tiny pieces of brown or beige foam clay.
Roll them into short rounded cylinders.
Attach two toward the front-bottom and two toward the back-bottom of the body.
Keep them chunky rather than thin.
If your clay turkey is small, you can also use only two visible feet. This is easier for younger children and keeps the sculpture stable.
Press the feet firmly but gently into the body.
Let the entire sculpture air dry according to the clay manufacturer’s instructions.
Do not move it around repeatedly while it is drying.
Tips for Making the Craft Easier
Keep the pieces chunky: Tiny clay parts are harder for young children to handle.
Don’t overwork the foam clay: Too much squeezing can make the shapes lose their definition.
Build from large shapes to small details: The body comes first, then the face, then the tiny features.
Check the face direction after every major step: Our goal is a clearly front-facing cow.
Let the clay dry completely: Moving the sculpture before it sets can flatten the muzzle, eyes or feet.
Use child-safe materials: Skip sharp tools, wire, hot glue and other unnecessary equipment.
Most importantly, don’t correct every imperfect spot or crooked ear. Those little quirks are what make a kids’ handmade project feel authentic.
Final Thoughts
The most interesting part of this clay Cow Turkey disguise craft for kids isn’t actually the cow. It is the visual joke underneath it.
The child has taken a recognizable turkey and slowly changed its identity using simple sculpting decisions.
That teaches shape recognition, layering, balance and creative problem-solving without feeling like a lesson.
I also love that foam clay lets kids experiment with three-dimensional details without needing complicated equipment.
When November rolls around, this could become more than another Thanksgiving activity.
Make several disguised animals and ask children to explain which parts reveal the original turkey.
Suddenly, a small clay project becomes storytelling, art and creative play all in one.





