What if your Thanksgiving turkey decided it absolutely did not want to look like a turkey anymore? That is the fun idea behind this disguise a Turkey as a Dinosaur clay craft.
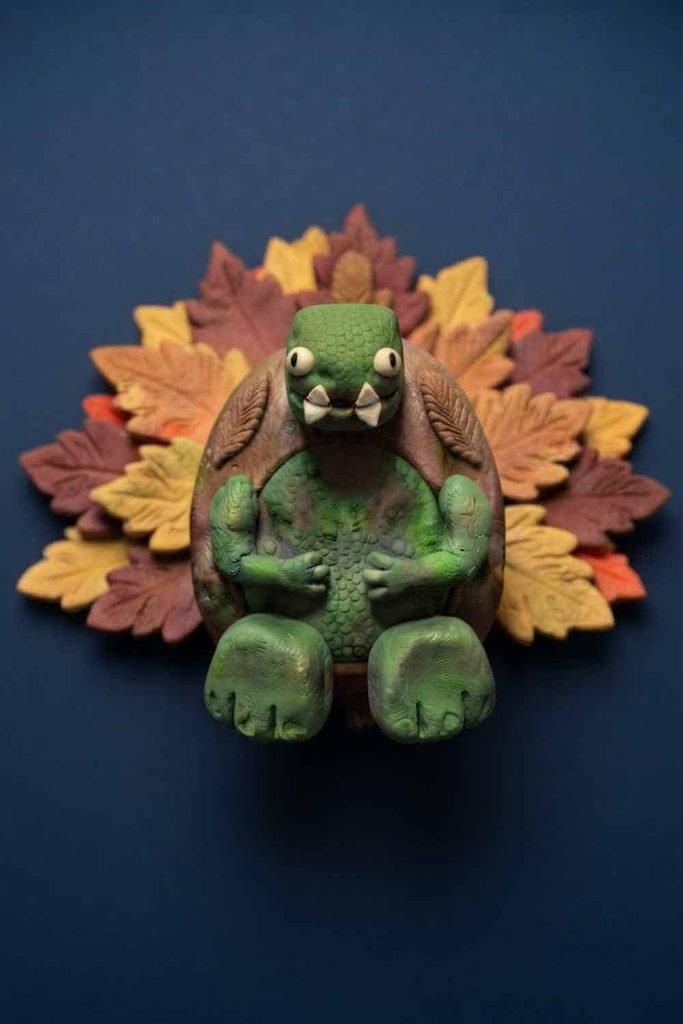
Instead of simply covering the turkey with green clay, we are turning it into a chunky little T-Rex character with a dinosaur head, tiny arms, chunky feet, textured scales and a row of colorful back spikes.
I especially like using air dry foam clay because it is lightweight, soft and easy for little fingers to press, roll and shape.
It makes this air dry foam clay craft feel more like creative play than a complicated sculpture.
What Makes This Clay Dinosaur Turkey Different?
Most disguise-a-turkey projects simply put a dinosaur costume over the bird. I wanted to push the idea a little further.
Our turkey becomes a tiny T-Rex pretending to be a dinosaur while still keeping a few recognizable turkey features underneath.
The rounded turkey body becomes the dinosaur’s torso, while the original feather area is transformed into a dramatic dinosaur back ridge.
That little detail gives the project its own personality.
It also creates a fun conversation with kids: Can you still find the turkey hiding inside the dinosaur?
Choose Your Air Dry Clay Type
Air Dry Foam Clay | Cornstarch Clay | Homemade Clay
Affiliate Disclaimer: Some of the links in this post may be affiliate links, which means I may earn a small commission if you choose to make a purchase through them – at no extra cost to you. I only share products that genuinely fit this project and can help make your ceramic mug clay craft process easier and smoother. Your support helps keep ideas like this coming.
Materials Needed To Make Disguise a Turkey as a Dinosaur
For this kid-friendly air dry foam clay craft, gather:
- Brown air dry foam clay
- Green air dry foam clay
- Cream or white foam clay
- Black foam clay
- Orange or yellow foam clay
- Red or orange foam clay for the Autumn leaf
- A smooth work surface
- A small amount of water for smoothing fingers if needed
You don’t need sculpting knives, wire, toothpicks or sharp tools.
That is intentional.
This is meant to be a cooperative clay activity where children can do most of the molding, rolling and pressing themselves.
If you already have modeling clay or another soft air-dry clay, you can experiment with it too, although the texture and drying behavior may be different.
Instructions To Make Disguise a Turkey as a Dinosaur
Step 1: Shape the Turkey Body
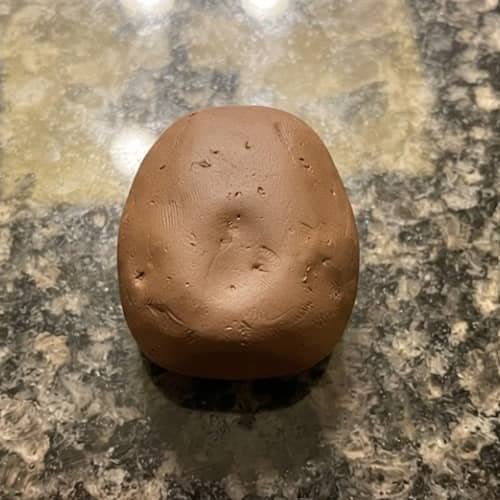
Start with a fairly large piece of brown air dry foam clay.
Roll it gently between your palms until you have a smooth ball.
Now place it on the table and press it down slightly.
Shape it into a rounded, squat oval.
Think of a small plump turkey body rather than a dinosaur. The bottom should be relatively flat so the craft does not wobble.
Don’t worry if your oval isn’t perfectly symmetrical.
Actually, don’t make it too perfect.
A few fingerprints and slightly uneven edges make this handmade sculpture look much more believable as a children’s project.
For now, leave the body completely plain.
Step 2: Add the Dinosaur Belly
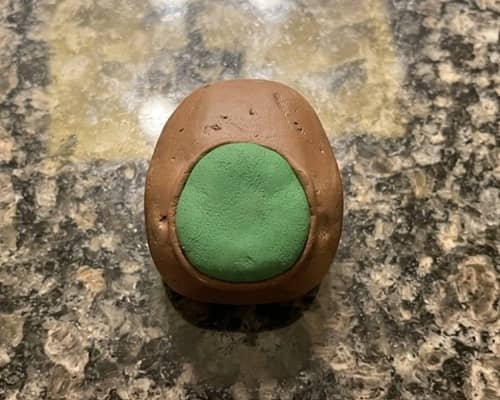
Take a smaller piece of green foam clay.
Roll it into a ball first, then flatten it between your fingers.
Shape it into a rounded oval that is slightly narrower than the brown turkey body.
Place it directly on the front of the brown body.
Press it gently into position.
Use your fingertip to soften the outer edge where the green meets the brown clay.
Don’t cover the entire turkey.
Leave a visible brown border around the green section.
That brown edge is useful because it reminds us that this is still a turkey being disguised.
Step 3: Create the T-Rex Head
Now we get to the fun part.
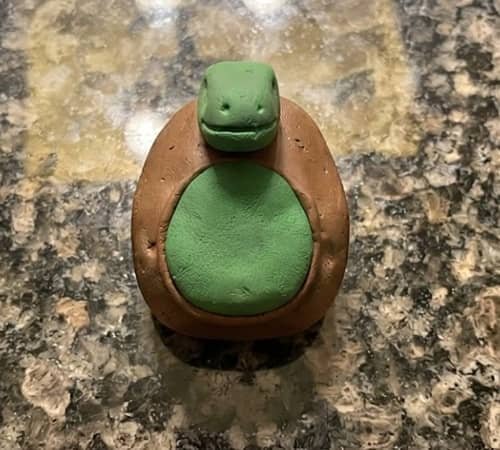
Take another piece of green foam clay, slightly smaller than the belly piece.
Roll it into a ball.
Then gently pinch and pull one side forward to create a chunky dinosaur snout.
You don’t need a complicated dinosaur head shape.
A rounded head with a wide front works beautifully for this craft.
Flatten the bottom slightly and press the head onto the upper portion of the green belly.
Position it so the head overlaps the top edge of the brown body.
Press gently around the connection.
The head should feel like it belongs to the body rather than sitting loosely on top.
Step 4: Make the T-Rex Face
Let’s give our dinosaur some personality.
Take two tiny pieces of cream or white foam clay.
Roll them into small balls and press them slightly flat.
Place them near the upper part of the green head.
Now add two even smaller black clay balls on top.
These become the pupils.
Try placing the pupils slightly toward the middle.
Suddenly the turkey starts looking like a little creature staring straight at you.
Want a sillier dinosaur?
Make the eyes slightly uneven.
Kids usually love that.
Step 5: Give the Dinosaur a Huge Mouth
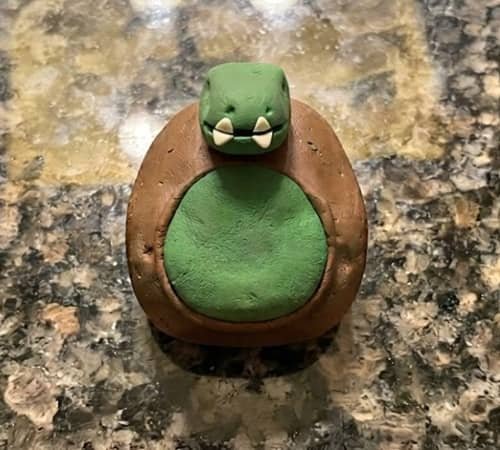
A T-Rex needs a mouth.
Take a tiny strip of black foam clay.
Flatten it into a thin curved shape.
Place it across the front of the green snout.
Press lightly so it sticks.
Don’t make the mouth perfectly straight. A slightly curved mouth gives the dinosaur more expression.
Now take several tiny pieces of white or cream clay.
Roll them into little balls and pinch them into short triangular teeth.
Place three or four along the top of the mouth.
You don’t need lots of teeth.
A few chunky ones are much easier for children to handle.
And they still make it look like a T-Rex.
Step 6: Add Tiny T-Rex Arms
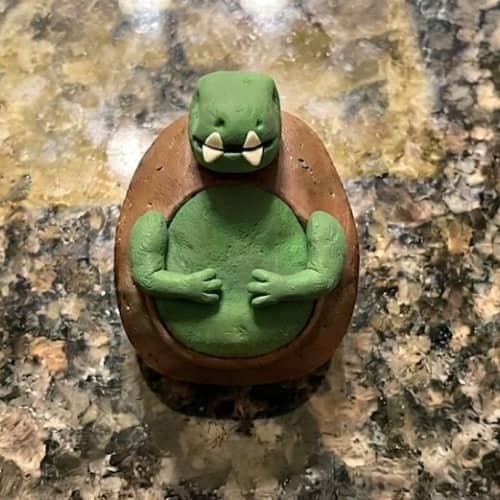
Now make two tiny arms.
Take two small pieces of green foam clay.
Roll each one between your fingers into a short thin cylinder.
Flatten one end slightly.
Attach the arms to either side of the green belly.
Bend them inward toward the mouth.
T-Rex arms are famously tiny, so don’t worry if yours look almost comically small.
That actually makes the character more recognizable.
One arm can be slightly higher than the other. Perfect symmetry isn’t necessary here.
Step 7: Make Two Chunky Dinosaur Feet
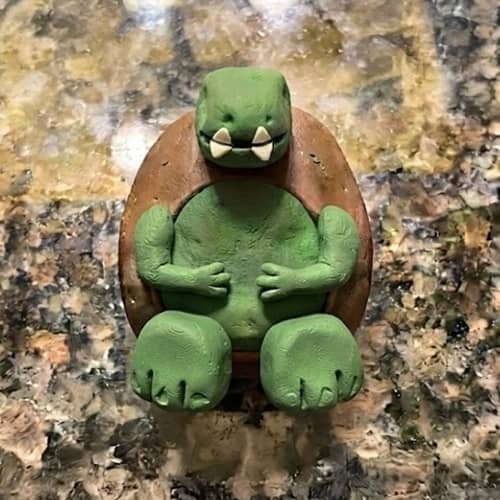
For the feet, use orange or green foam clay.
Take two small pieces and roll them into short rounded cylinders.
Flatten the bottoms.
Attach one beneath each side of the green belly.
Then use your fingertip to press two or three tiny toe marks into the front of each foot.
Keep the toes rounded.
There is no reason to make sharp claws for this children’s project.
The chunky feet also give the dinosaur a little more visual weight, making the character look like it is standing rather than floating on the turkey.
Step 8: Make the Autumn Leaf Backdrop
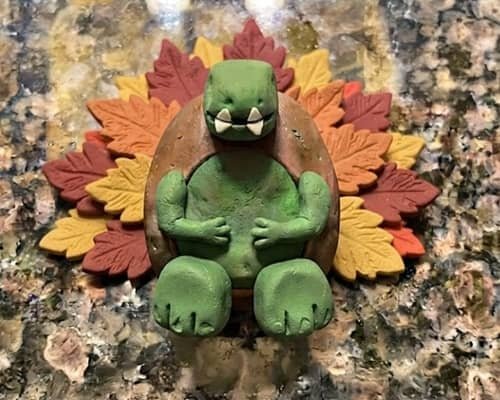
Now let’s solve the backside without sculpting a dinosaur backside.
Take red, orange and yellow foam clay.
Roll each color into a small ball and flatten them.
Arrange the colors together and gently press them into one flat leaf shape.
Use your fingertip to create a few simple lines radiating from the center.
It doesn’t have to look like a botanical illustration.
The leaf is simply a colorful Fall backdrop.
Place it behind the turkey so the brown body sits in front of it.
Now the craft suddenly has a little Thanksgiving scene.
Step 9: Add the Hidden Turkey Clue
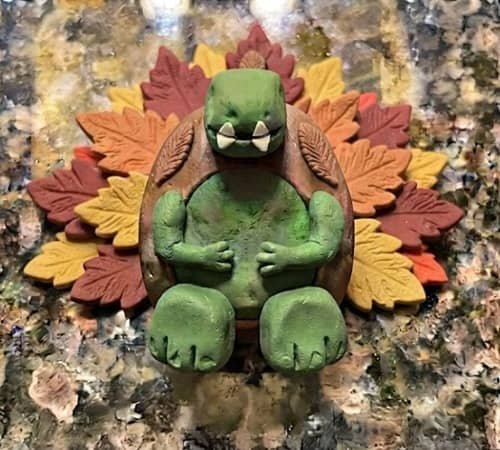
We still need to make the disguise obvious.
Take two or three very small pieces of brown foam clay.
Flatten them into tiny feather shapes.
Place them along the visible brown edge beside the dinosaur belly.
Don’t cover the dinosaur.
These little feather shapes are the clue.
The viewer should be able to look at the craft and think, “Wait…that’s a turkey dressed as a dinosaur!”
That little reveal is what makes this more interesting than simply making a dinosaur from clay.
Step 10: Add Simple Dinosaur Texture
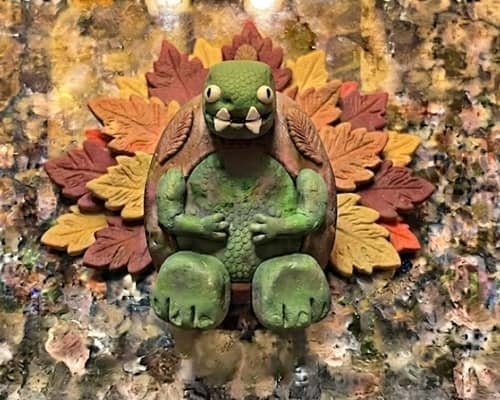
For the final detail, press a few tiny dots into the green belly and head.
You can also add two or three short curved lines near the sides.
These become simple dinosaur skin markings.
Don’t cover the entire surface.
Too much texture can make a beginner project look messy.
A few marks are enough.
Finally, gently check that the eyes, teeth, arms and feet are firmly attached.
Leave the project to dry according to the manufacturer’s instructions for your particular air-dry clay.
Don’t rush the drying stage.
Final Thoughts
I love crafts where the finished object tells a little story, and this one does exactly that.
The turkey hasn’t really disappeared, it has simply found a ridiculous disguise.
Keeping the back flat also makes the project much more practical for classrooms, craft tables and photography.
Children can concentrate on the parts they actually enjoy… eyes, teeth, tiny arms, colors and funny expressions… without wrestling with a complicated sculpture.
For November and Thanksgiving, I think that storytelling angle makes this disguise a Turkey as a Dinosaur clay craft especially useful.
It becomes a small exercise in creative thinking too: take something familiar, change a few features, and suddenly it becomes something completely different.





