What if your turkey decided to hide as a tiger this Thanksgiving? This disguise a Turkey as a tiger using air dry foam clay project turns the classic turkey disguise idea into a cute little handmade sculpture that kids can actually build with their fingers.
I took inspiration from the paper tiger version, but gave the clay craft a softer, more playful shape, chunky paws, oversized eyes, a little tongue, and raised tiger stripes.
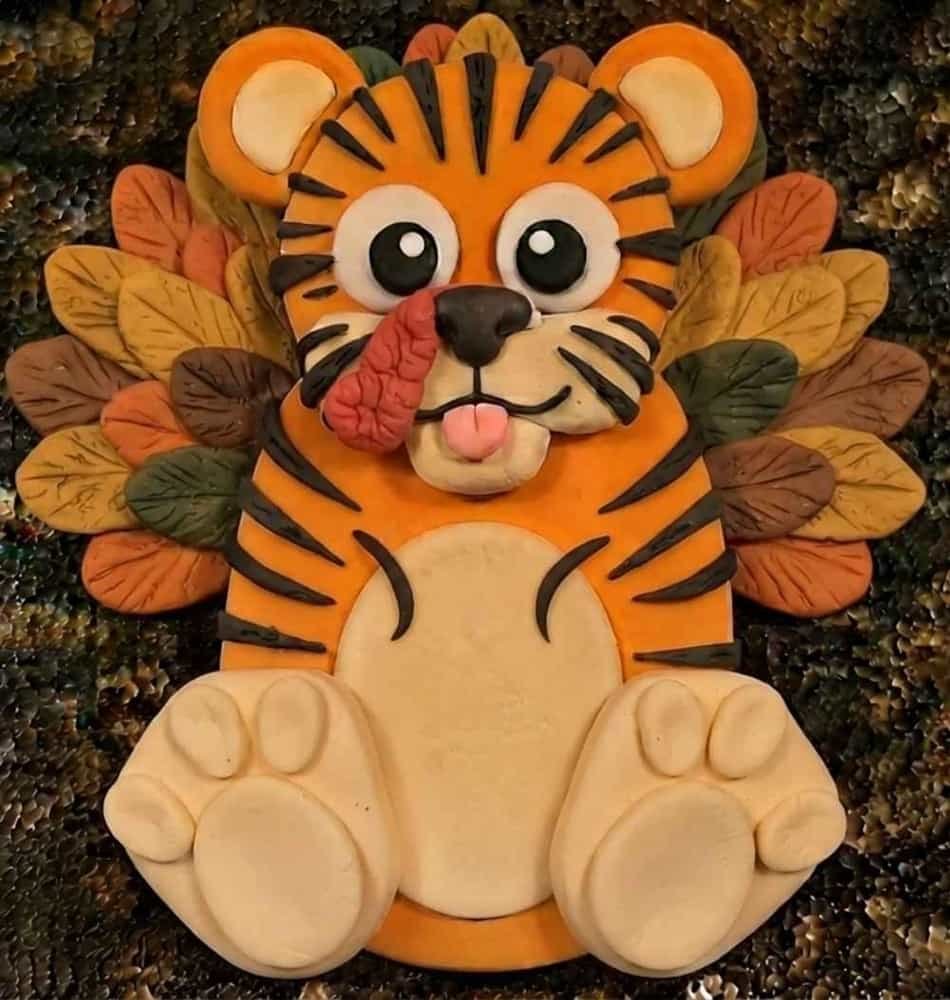
It makes a fun clay tiger turkey disguise craft for kids and works especially well as a November classroom project, Fall activity, or holiday craft at home.
The best part? This disguise a turkey tiger clay craft uses simple shapes, so beginners don’t need fancy sculpting skills.
What Makes This Clay Tiger Turkey Craft Different?
Instead of simply covering a turkey cutout with orange clay, I would build the character as a front-facing clay sculpture.
That small change makes it feel more like a real piece of clay art.
The turkey remains the hidden character underneath the disguise.
Its rounded body becomes the tiger’s belly, while the little feet peek out as oversized cream-colored tiger paws.
The eyes are deliberately big and friendly, and the black tiger stripes are slightly raised instead of painted flat.
And why stop there?
I also like giving the tiger a floppy pink tongue sticking out from one side of the muzzle.
It gives the finished sculpture a bit of personality without making the project difficult.
Choose Your Air Dry Clay Type
Air Dry Foam Clay | Cornstarch Clay | Homemade Clay
Affiliate Disclaimer: Some of the links in this post may be affiliate links, which means I may earn a small commission if you choose to make a purchase through them – at no extra cost to you. I only share products that genuinely fit this project and can help make your ceramic mug clay craft process easier and smoother. Your support helps keep ideas like this coming.
Materials Needed To Make Disguise A Turkey Tiger Clay Craft
You don’t need a huge craft box for this project.
- Orange air dry foam clay
- White or cream air dry foam clay
- Black air dry foam clay
- Pink air dry foam clay
- Small amount of dark brown or black clay for details
- Smooth work surface
- Toothpick or blunt clay modeling tool, used gently by an adult if needed
- Small rolling pin or clean smooth bottle
- Optional: tiny amount of white clay for highlights
Safety note: Choose child-safe, non-toxic air dry foam clay and follow the manufacturer’s age recommendations. No cutting, heating, baking, or sharp sculpting tools are needed.
Step-by-Step Instructions To Make Disguise A Turkey Tiger Clay Craft
Step 1: Build the Main Turkey-Tiger Body
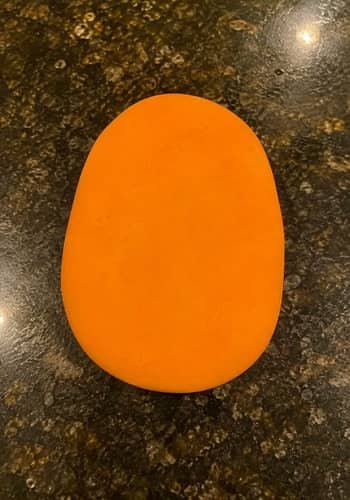
Start with a generous piece of orange air dry foam clay. Knead it gently between your fingers until it becomes soft and easy to shape.
Roll it into a thick oval.
Now flatten it slightly with your palm. You want a body that is wider around the middle and a little narrower toward the top.
Don’t make it completely flat because we want this to look like a small standing sculpture.
Use your fingers to round the edges.
The shape should roughly resemble a plump upside-down egg. Keep the front surface fairly smooth because the face will sit here later.
This is the foundation for your disguise a turkey tiger clay craft, so take your time with this part.
Step 2: Add the Cream Belly
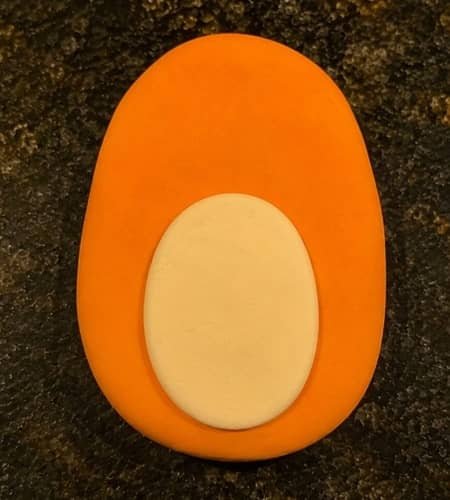
Take a smaller piece of cream or white foam clay.
Roll it into a ball first, then gently flatten it into a thick oval.
Place this oval vertically in the center of the orange body.
Press it down just enough for it to stick, but don’t squash it completely into the orange clay.
This becomes the tiger’s belly while cleverly hiding the turkey underneath.
Keep the belly slightly narrower at the top and wider through the middle. That shape matches the friendly look of the reference craft.
Step 3: Shape the Tiger Head
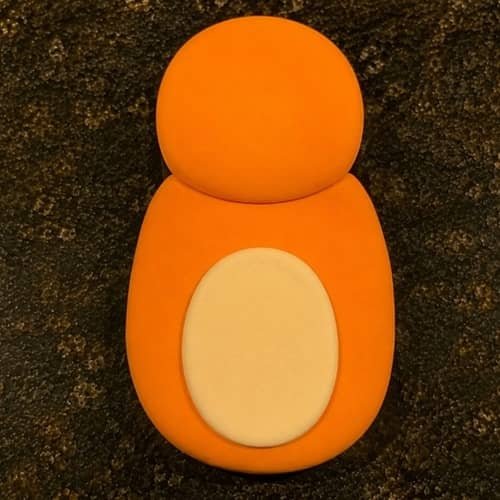
For the head, use another large piece of orange foam clay.
Roll it into a ball, then gently press it into a rounded oval. Make it slightly wider than the body.
Place the head over the upper part of the body and press gently where the two pieces meet.
You can smooth the connection with your fingertip.
Don’t worry if the join isn’t perfect. A little handmade texture actually makes this air dry foam clay craft look more charming.
The head should now overlap the body slightly, creating the same broad cartoon-like silhouette as the paper tiger.
Step 4: Make the Round Tiger Ears
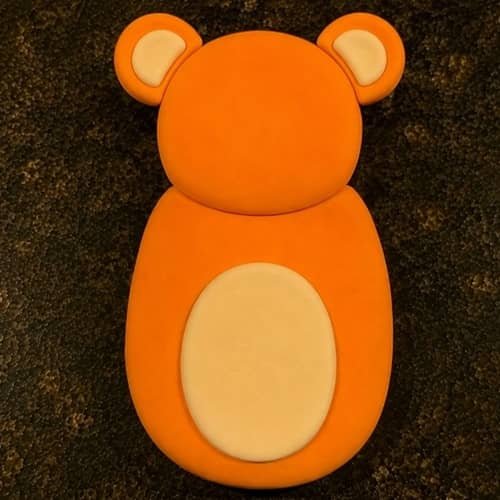
Take two small pieces of orange clay.
Roll each into a ball and flatten them slightly.
Attach one to each upper corner of the head. Shape the outer edges into rounded ears.
Now make two smaller cream or white pieces. Flatten them into little rounded inner-ear shapes and place one inside each orange ear.
Press very gently around the edges.
These ears are important because they instantly push the disguise toward tiger territory. The turkey is getting harder to spot!
Step 5: Create the Big White Eyes
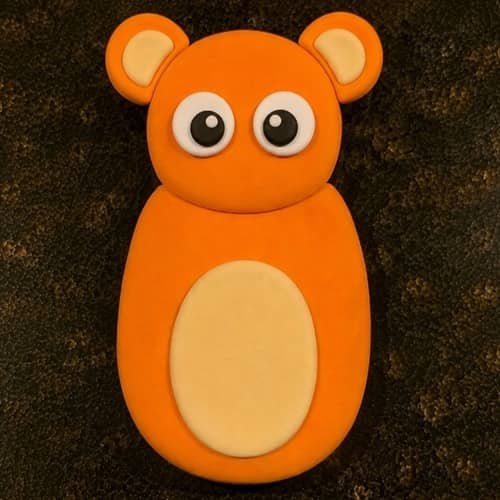
Now comes my favorite part.
Take two equal pieces of white foam clay and roll them into balls. Flatten each one into a rounded disk.
Place them side by side on the upper-middle portion of the orange face.
Leave a small gap between them.
Next, make two smaller black balls and flatten them. Put one black pupil in the center of each white eye.
For a cute expression, add two tiny white clay dots inside the black pupils.
Look at the face from above. Are the eyes sitting at roughly the same height? If not, gently adjust them before the clay begins drying.
Step 6: Build the Tiger Muzzle
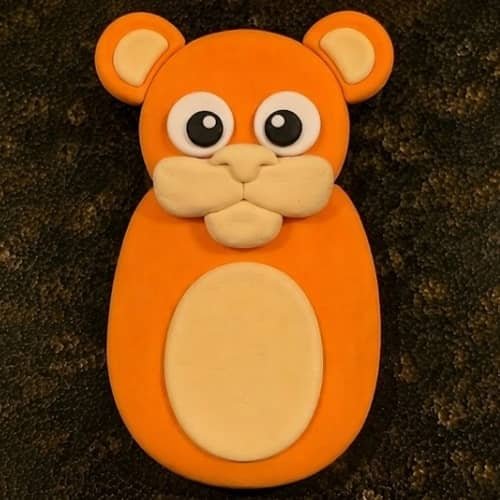
Take a small amount of cream clay.
Shape it into a wide horizontal oval and place it underneath the eyes.
Then add a smaller cream oval or rounded shape beneath it to create the lower muzzle area.
This gives the tiger the same pale face-and-mouth area seen in the paper inspiration, but with a slightly raised clay effect.
Keep the muzzle fairly chunky. Foam clay works especially well here because the raised shapes create natural shadows.
Step 7: Add the Nose, Mouth and Tongue
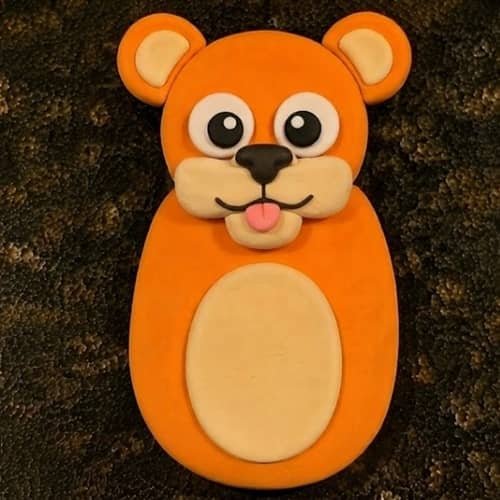
Use black clay to make a small rounded triangle or flattened oval for the tiger’s nose.
Place it at the center of the cream muzzle.
For the mouth, roll an extremely thin piece of black clay and create a short vertical line beneath the nose. Add two tiny curved lines extending outward.
Now grab pink clay.
Roll it into a small sausage shape, flatten it slightly and place it toward one side of the mouth so it hangs downward like a playful tongue.
This tiny detail changes the whole expression.
Step 8: Give Your Turkey Tiger Its Stripes
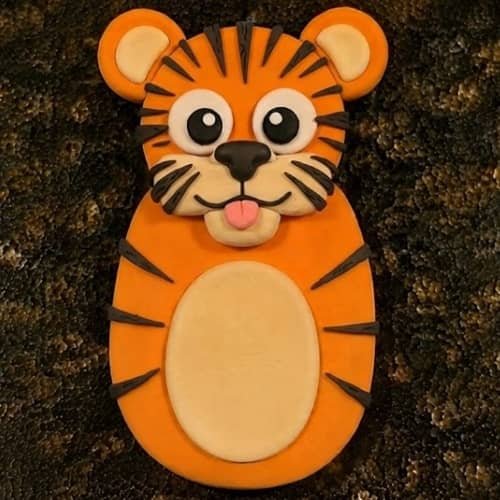
This is where the disguise really starts working.
Take tiny pieces of black foam clay and roll each between your fingers into short, thin strips.
Flatten them slightly.
Place several stripes along both sides of the face. They should point inward toward the eyes and cheeks, similar to the paper tiger reference.
Add a few stripes across the forehead too.
Then place several on the outer sides of the body.
Don’t make every stripe identical. Real handmade crafts look better when the pieces are slightly different.
Keep the central face mostly clear so the eyes remain the star.
Step 9: Shape the Big Tiger Paws
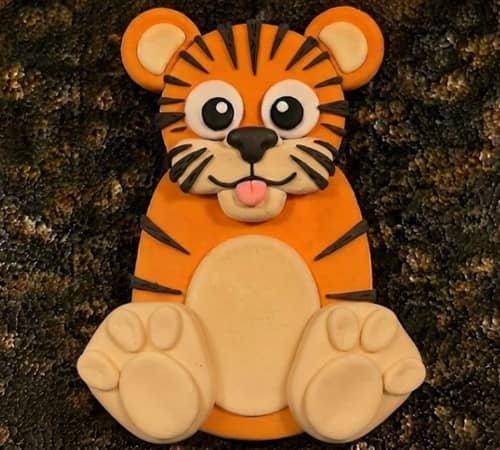
Use cream clay again.
Make two larger balls.
Flatten each into a rounded paw shape. Add three small rounded toes to the front edge of each paw using tiny pieces of cream clay.
Attach one paw to each lower side of the orange body.
They should overlap the bottom edge slightly.
These oversized paws are one of my favorite twists because they make the turkey’s original feet feel like part of the tiger disguise rather than something that has simply been covered.
Step 10: Add Small Body Details
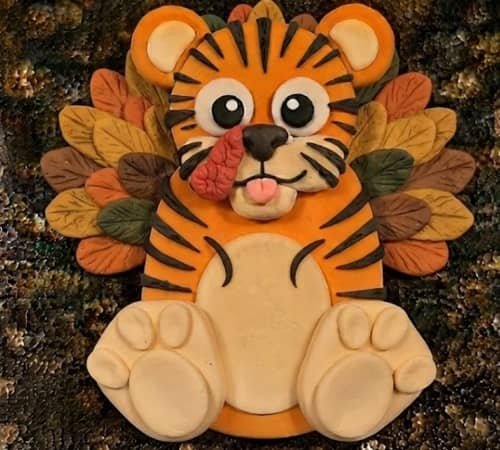
Want to make your tiger feel a little more alive?
Add a few curved black stripes along the lower body, add the Snood and tail as well (option though).
You can also create tiny curved lines near the sides of the belly to suggest the turkey’s hidden wings underneath the disguise.
I wouldn’t add too much, though. The clean orange-and-cream areas are what keep the character looking like the original tiger reference.
Finally, gently press down any pieces that feel loose.
Easy Tips for Kids, Parents and Teachers
Keep the shapes chunky
Small fingers handle chunky foam clay much easier than extremely thin pieces.
Make the eyes first if symmetry is difficult
The eyes control the expression. If they look balanced, the rest of the face usually falls into place.
Don’t overwork the foam clay
Too much kneading can make a simple project feel frustrating. Shape, attach and move on.
Use the stripes to hide imperfections
One stripe isn’t straight? That’s okay. Add another nearby. Tiger stripes don’t need to look perfectly measured.
Turn it into a school project
Teachers can have children create different animal disguises from the same basic turkey body.
Tigers, pandas, lions, frogs and even woodland animals could become a whole classroom display.
For a November activity, this also makes a fun alternative to the usual paper-based disguise a turkey assignment.
Final Thoughts
A good turkey disguise project isn’t really about making the most complicated animal.
It is about taking one familiar shape and making children think, “How can I turn this into something completely different?” That is why I like this tiger version.
The orange body, cream belly and big paws still hint at the original turkey, while the stripes and oversized tiger face create the camouflage.
During Fall or Thanksgiving, you can even ask kids to explain which parts of their sculpture represent the hidden turkey.
Suddenly, the disguise a turkey tiger clay craft becomes more than a holiday craft… it becomes a small lesson in creative problem-solving, shape building and visual storytelling.





