There is something special about making your own Diwali diya instead of picking up a dozen identical ones from a store.
This Diwali clay Diya craft takes that idea a little further.
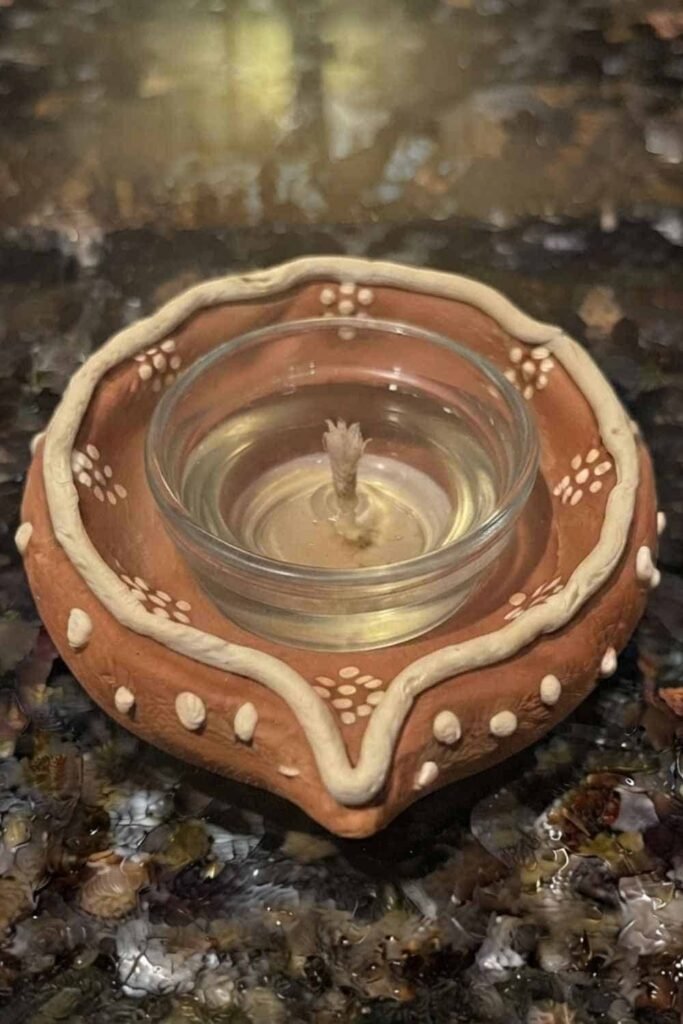
I wanted a diya that looked handmade, slightly imperfect and traditional, but could also hold a real flame without asking the air dry clay to do something it simply isn’t designed to do.
The trick is surprisingly simple: use air dry clay for the decorative diya shell and place a small metal or heat-resistant glass oil cup inside it. So, want to make a diya that is pretty and practical?
Choose Your Air Dry Clay Type
Regular Air Dry Clay | Cornstarch Clay | Homemade Clay
Affiliate Disclaimer: Some of the links in this post may be affiliate links, which means I may earn a small commission if you choose to make a purchase through them – at no extra cost to you. I only share products that genuinely fit this project and can help make your ceramic mug clay craft process easier and smoother. Your support helps keep ideas like this coming.
Why I Wouldn’t Pour Oil Directly Into Air-Dry Clay
Before getting our hands messy, there is one important thing to understand.
Standard air-dry clay is porous. Once you pour cooking oil or diya oil directly into a clay diya made from it, the oil can slowly seep into the clay. The material can also soften or become stained.
That means an air dry clay oil lamp needs a little modification if you want to use a real flame.
My solution is to make the clay into an outer decorative shell and create a removable cavity for a small metal diya cup or heat-resistant glass container.
The insert holds the oil and wick. The clay never comes into direct contact with the oil.
This is what turns an ordinary clay craft into a more useful functional clay diya project.
And one important safety note: no homemade oil diya should be left burning unattended or while everyone is asleep.
If you want an overnight glow, use a battery-operated LED tealight instead.
A real flame can burn for several hours depending on the oil, wick and reservoir size, but “all night” should never mean leaving a flame unsupervised.
Materials Needed To Make Air Dry Clay Diwali Diya
For one medium-sized diya, gather:
- Air-dry clay
- Small metal diya cup or heat-resistant glass oil cup
- Cotton diya wick
- Diya oil or suitable lamp oil
- Acrylic paint
- Small paintbrush
- Rolling pin or smooth bottle
- Craft knife or clay tool
- Toothpick
- Small bowl of water
- Baking parchment or a smooth work surface
- Pencil
- Optional: tiny decorative beads or clay dots
I prefer a smooth white or terracotta-colored air-dry clay because the details show up nicely after painting.
Crayola Air-Dry Clay and similar school or craft clays can work well for this kind of decorative project, provided the finished piece is allowed to dry completely.
Choose Your Ideal Air Dry Clay Type
Crayola Air Dry Clay | Home Made Clay
Affiliate Disclaimer: Some of the links in this post may be affiliate links, which means I may earn a small commission if you choose to make a purchase through them – at no extra cost to you. I only share products that genuinely fit this project and can help make your ceramic mug clay craft process easier and smoother. Your support helps keep ideas like this coming.
Step 1: Condition the Air-Dry Clay
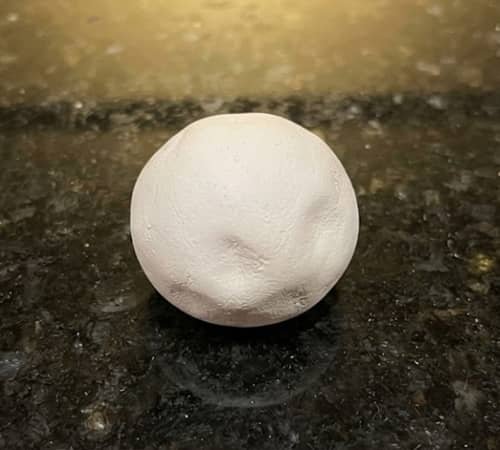
Take a piece of air-dry clay roughly the size of a small orange.
Don’t start shaping it immediately.
Knead it between your palms for two or three minutes.
Press it, fold it and roll it gently until the clay feels soft and flexible. If it has tiny cracks, keep conditioning it rather than adding lots of water.
Too much water can make the surface sticky and difficult to handle.
Once the clay feels smooth, roll it into a ball.
I like keeping a little extra clay aside because the first attempt sometimes becomes thinner than expected.
Step 2: Flatten the Diya Base
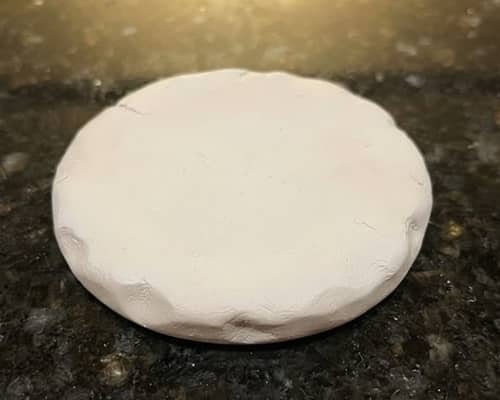
Place the clay ball on the granite or parchment.
Flatten it gently with your palm first.
Now use a rolling pin or smooth bottle to make a round slab about 8 to 10 mm thick.
Don’t make the base paper-thin. A slightly chunky base gives the finished diya better stability.
Cut or shape the slab into a rough circle around 10 to 12 cm wide.
It doesn’t need to look factory-perfect. In fact, those tiny variations are what make handmade Diwali crafts charming.
Step 3: Build the Diya Walls
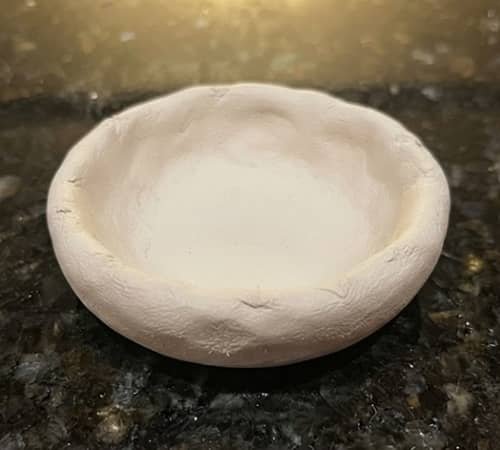
Now comes the fun part.
Place your thumbs near the middle of the clay circle and slowly press downward while leaving a thick rim around the outside.
Rotate the clay as you work.
Keep the outer edge around 1 to 1.5 cm thick. Then gently pinch the rim upward to create the traditional diya bowl shape.
Don’t make the walls extremely tall. A shallow bowl looks more like a traditional oil lamp and gives the finished piece a stable footprint.
Use your fingers to smooth obvious cracks.
If the clay starts sticking to your fingers, let it rest for a minute rather than adding lots of water.
Step 4: Create the Signature Diya Point
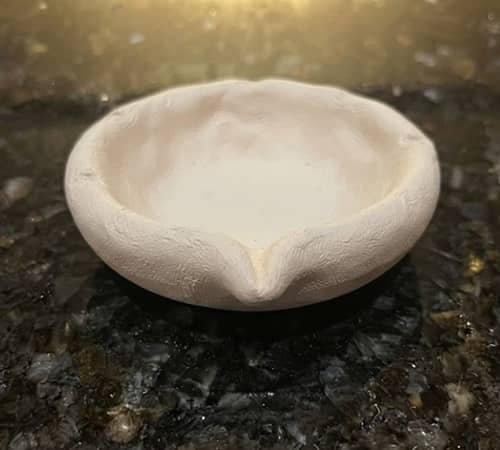
Traditional diyas often have a pointed opening where the wick sits.
Let’s exaggerate that feature slightly.
Choose one side of the rim and gently pull the clay outward with your thumb and index finger. Pinch it into a soft triangular point.
Don’t make it sharp like a knife.
The point should be wide enough to support the wick while still looking rounded and handmade.
Now smooth the transition between the point and the rest of the rim with a damp fingertip.
This little detail makes the shape instantly recognizable as a Diwali diya.
Step 5: Make the Hidden Insert Cavity
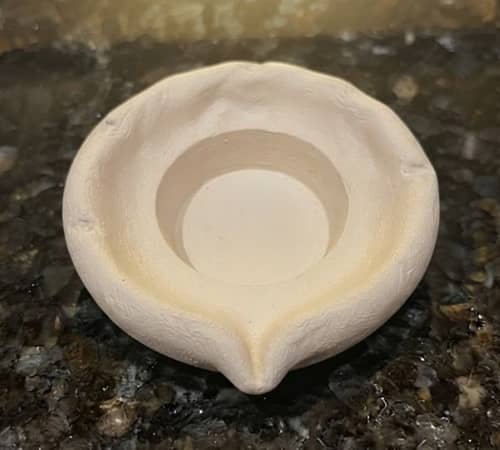
This is the step that makes this clay diya using air dry clay different.
Before the clay dries, place your small metal diya cup or heat-resistant glass oil container into the center.
Press it down gently.
Don’t push it all the way through the base.
You want the container to sit securely inside the clay shell, with enough clay underneath it to keep the diya sturdy.
Remove the cup carefully.
You should now have a neat central cavity matching the shape of your insert.
Test it once more.
The cup should sit firmly without wobbling.
If it is loose, gently thicken the inner walls with a little leftover clay.
This method is much better than trying to waterproof air-dry clay with paint or varnish and then pouring oil into it.
Step 6: Add Simple Handmade Decorations
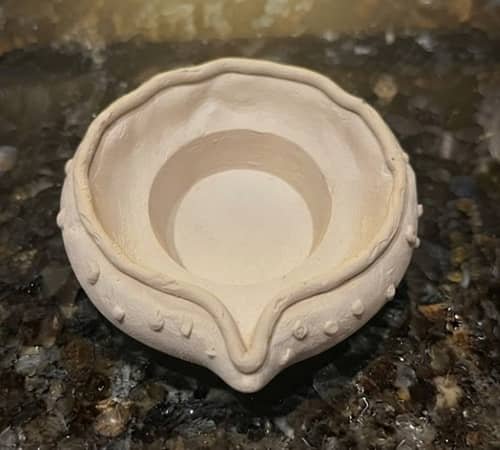
You can leave the surface plain, but I like adding a few raised clay details.
Roll tiny pieces of leftover clay into little balls.
Flatten some into dots.
Make a few thin ropes and press them around the outer rim.
You could also use a toothpick to create tiny lines radiating away from the center.
Keep the decoration shallow.
Heavy decorations can crack while the clay dries, and a busy design can hide the lovely handmade shape.
This is also a great point to involve children. Air dry clay crafts for kids work especially well here because the decorating stage is simple and tactile.
Step 7: Let the Diya Dry Completely
Don’t rush this part.
Place the diya somewhere dry and allow it to air-dry according to the clay manufacturer’s instructions.
Depending on thickness, humidity and the clay brand, this can take roughly 24 to 72 hours.
Turn it gently once the underside has hardened enough to handle.
The diya should feel completely firm before painting or using it.
If you see a small crack, don’t panic.
Fill tiny surface cracks with a little fresh air-dry clay and allow that area to dry again.
A completely dry diya is important because trapped moisture can cause problems when heat is introduced nearby.
Step 8: Paint Your Diwali Clay Diya
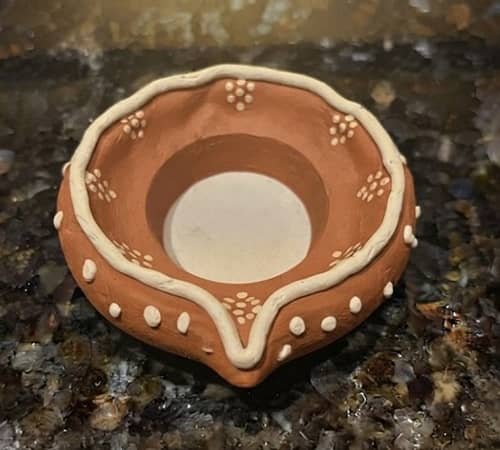
Now you can bring the color in.
For a traditional look, try terracotta, deep red, mustard yellow or warm orange.
For something more modern, I love a combination of white with small gold details.
Paint one thin coat first.
Let it dry.
Then add another coat if necessary.
Don’t paint the inside cavity where the metal or glass insert will sit if the insert will be exposed to heat.
Keep decorative paint away from the area immediately surrounding the flame.
You can also add tiny dots, paisley-inspired marks or simple rangoli patterns around the outside.
That gives the piece a little clay art character without making it look mass-produced.
Step 9: Add the Metal or Glass Insert
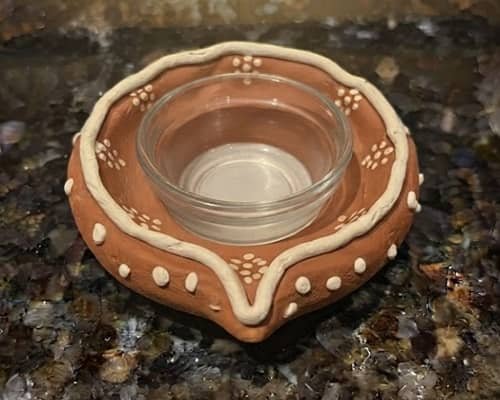
Wait until the paint is completely dry.
Now place your small metal diya cup or heat-resistant glass oil container into the central cavity.
It should sit flat and stable.
This insert is the working part of your air dry clay diya for Diwali.
The clay is the decorative body.
The insert contains the oil.
That separation is important because standard air-dry clay is not naturally waterproof or designed to directly contain lamp oil.
If the insert wobbles, don’t use the diya with a flame. Adjust the clay shell or use a better-fitting insert.
Step 10: Add the Wick and Oil
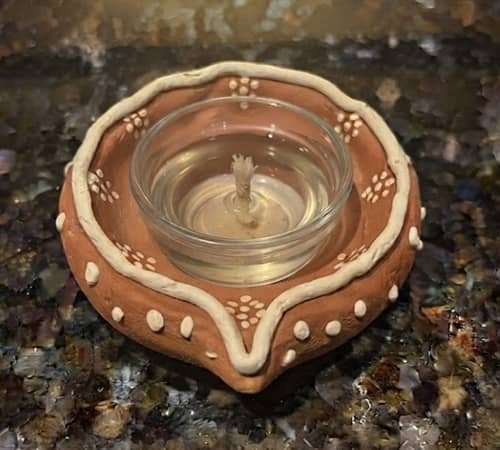
Place a cotton wick inside the metal or glass insert.
For a longer burn, use an appropriate lamp wick and a reservoir that is large enough for the intended supervised burn time.
Don’t overfill it.
The wick should be soaked according to the oil manufacturer’s instructions, with only a manageable portion exposed above the oil.
Before lighting, check that the clay diya sits on a stable, heat-safe surface and that nothing flammable is nearby.
Here’s the important part: never leave the real-flame diya burning unattended or overnight while sleeping.
For an overnight Diwali display, swap the real wick and oil for a small battery-operated LED tealight.
You get the long-lasting glow without the open-flame risk.
A Few Mistakes I Would Avoid
Making the clay too thin: A thin base can crack or become unstable.
Pouring oil directly into the clay: Don’t do it. The clay is porous.
Using ordinary glass: Only use a container specifically suitable for the intended heat. When in doubt, choose a small metal diya cup.
Painting around the flame: Keep decorative finishes away from areas that can become hot.
Lighting a damp diya: Give the clay enough time to dry completely.
Trying to make it burn all night unattended: This isn’t worth the risk. For overnight decoration, use an LED tealight.
Final Thoughts
The interesting part of this Diwali clay Diya isn’t really the clay shape.
It is the little engineering trick hidden inside it.
Air-dry clay is fantastic for handmade decoration, but it doesn’t magically become waterproof or heatproof because we call something a diya.
By separating the decorative shell from the oil reservoir, we can keep the handmade look while giving the lamp a much more sensible functional design.
That also opens up plenty of possibilities for easy homemade Diwali decor without a kiln.
I’d make several shells in different shapes, keep the inserts removable, and reuse them every Diwali.
The clay stays decorative, while the working lamp component does the job it was actually designed to do.





