There is something oddly satisfying about turning a lump of air dry clay into something that glows on your table at night.
That’s exactly why I keep coming back to this air dry clay lantern craft.
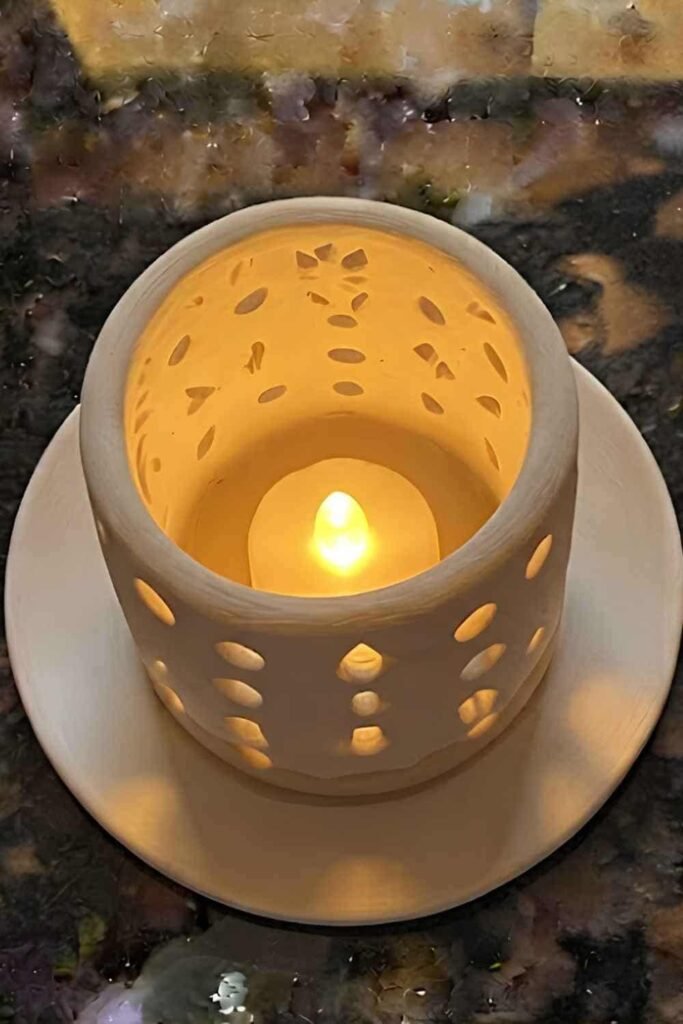
It feels creative without being complicated, and you don’t need expensive tools or a kiln.
If you’ve been searching for an air dry clay project that’s practical, decorative, and surprisingly relaxing, this one checks every box.
Even if you’ve never touched clay before, don’t worry.
I’ll walk you through every little detail, including the tiny mistakes beginners usually make, so your lantern comes out beautiful on the very first try.
Why This Air Dry Clay Lantern Is Different
Most tutorials stop after showing a simple cylinder with random holes punched into it.
That works…but it also looks like every other lantern online.
Instead, we’re going to create a softly rounded lantern with gently carved texture, balanced light openings, and subtle handcrafted imperfections that make it feel like a boutique home décor piece rather than something mass-produced.
Think somewhere between rustic pottery and modern Scandinavian decor.
If you’ve looked at ceramic lamp ideas, you’ll notice they often rely on simple shapes paired with interesting textures.
We’re borrowing that same design philosophy while using air dry clay instead of fired ceramic.
This also doubles as a wonderful DIY project for older kids, teens, or adults looking to experiment with handmade home décor.
Important: This lantern is designed for battery-operated LED tealights only. Air dry clay should never be used with real candles because prolonged heat may damage the clay.
Supplies Needed To Make Air Dry Clay Lantern
- 2 to 2.5 lbs air dry clay
- Acrylic rolling pin or smooth bottle
- Craft knife
- Clay needle tool
- Small bowl of water
- Soft paintbrush
- Sponge
- Plastic wrap
- Wooden ruler
- Sandpaper (220 and 400 grit)
- Toothpick
- Circle cutters (optional)
- LED tealight
- Acrylic paint (optional)
- Matte varnish or sealer
Before You Begin
Don’t rush into shaping the lantern.
Seriously.
Clay remembers every fingerprint, dent, and uneven edge you leave behind.
Spending an extra five minutes smoothing the surface now can save half an hour of fixing later.
It sound funny, but patience becomes your best crafting tool here.
Work on a clean table covered with parchment paper or a silicone mat so the clay doesn’t stick.
Step 1: Roll the Clay and Prepare the Main Panel
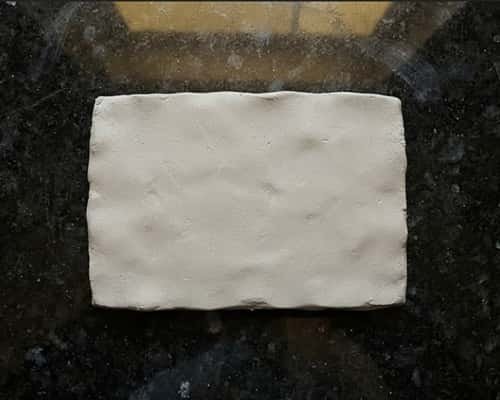
Cut off a generous piece of air dry clay and knead it for about five minutes.
This removes tiny air pockets while making the clay softer and easier to roll.
Roll the clay into a slab about ¼ inch (6 mm) thick.
Try to keep the thickness consistent from edge to edge because thinner spots dry faster and may crack later.
Instead of aiming for a perfect rectangle immediately, roll a larger slab first.
Then trim the edges using a ruler and craft knife. This gives you much cleaner sides.
Your rectangle should measure approximately:
- 11 inches long
- 6½ inches tall
Run your fingertips across the surface.
Feel any bumps?
Smooth them gently with a barely damp sponge. Don’t soak the clay because excess moisture weakens it.
Now lightly mark the centerline using a toothpick without cutting deeply.
This simple guideline makes every decoration much easier to align later.
Step 2: Create the Decorative Light Pattern
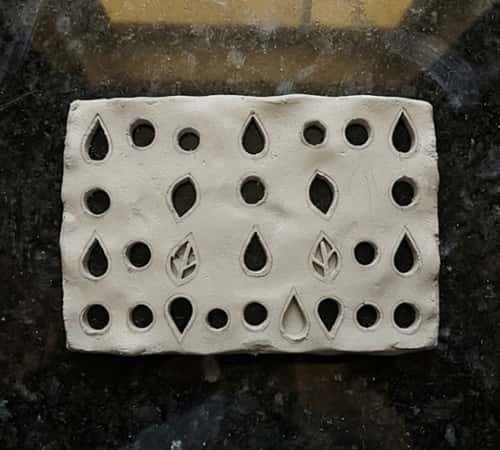
This is where the lantern starts getting personality.
Rather than randomly poking holes everywhere, sketch your design first using a toothpick.
Try combining:
- small circles
- tiny teardrops
- narrow vertical slots
- little stars
- leaf-shaped cutouts
Leave at least ¾ inch around every opening.
Why?
Because too many holes placed too close together weaken the structure.
Use a clay needle or small cutter to remove each shape slowly.
Don’t twist the cutter aggressively.
Lift it straight up.
Once every opening is complete, gently smooth the edges using a damp paintbrush.
If one opening becomes uneven, don’t panic.
Handmade pieces are suppose to have little character.
That’s honestly what makes them charming.
Step 3: Add Texture Before Shaping
Flat lanterns can feel a little lifeless.
Texture changes everything.
Using the back of a wooden spoon, gently press shallow curved impressions across the clay.
You can also wrap lace around a rolling pin and lightly roll over selected areas.
Keep the texture subtle.
The light cutouts should still remain the main attraction.
Now soften every sharp corner with damp fingers.
Flip the slab over and repeat a quick smoothing pass.
It don’t need to be perfect.
Tiny irregularities create shadows once the lantern is illuminated, making the finished piece look much richer.
Step 4: Form the Lantern Body
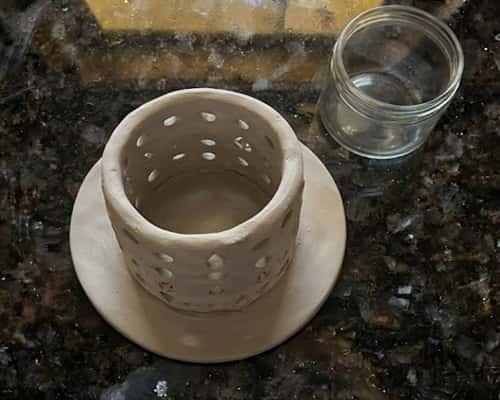
Here’s where everything finally starts looking like a lantern.
Stand the clay rectangle upright.
Slowly wrap it around a round container or glass jar that measures roughly 3½ inches across.
Don’t force it.
Allow the clay to naturally curve.
Join the two short ends together using the score-and-slip method.
Scratch both joining edges with a needle tool.
Brush on a little water.
Press them together firmly.
Blend the seam with your fingertip until it almost disappears.
Now cut a circular clay base slightly larger than the lantern opening.
Score both surfaces again before attaching.
Smooth the inside seam using a damp finger or silicone tool.
Place the lantern on a flat board.
Check whether it wobbles.
If it does, gently tap the base until it sits flat.
Many people searching for how to make ceramic lamps use a similar construction technique before firing.
The only difference here is we’re adapting the process into an approachable air dry clay project that requires no kiln.
Step 5: Add the Handle Openings and Dry Slowly
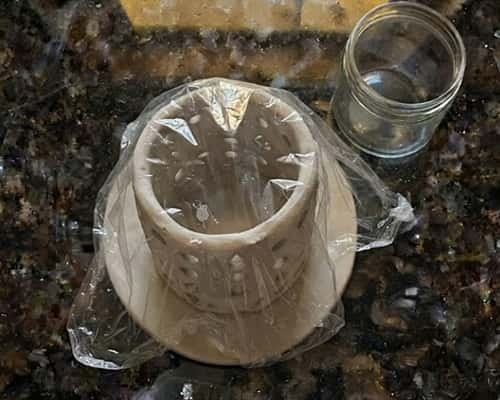
Before drying, make two tiny holes opposite each other near the top.
These holes allow you to thread decorative twine or thin wire later if you’d like a hanging lantern.
You can absolutely leave them out if you prefer a tabletop design.
Cover the lantern loosely with plastic wrap.
Now comes the hardest part.
Waiting.
Leave it covered for the first 24 hours.
After that, remove the plastic and allow it to dry slowly for another 2–4 days.
Rotate the lantern every day so moisture leaves evenly.
Fast drying causes cracks far more often than people realize.
Clay likes slow progress.
Honestly, so do beautiful crafts.
Step 6: Sand, Paint and Seal
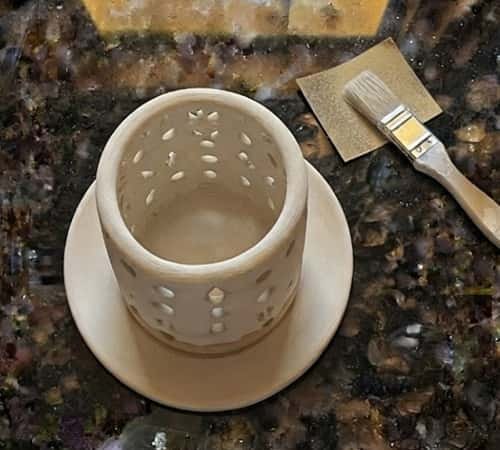
Once fully dry, lightly sand every rough edge.
Start with 220 grit.
Finish using 400 grit.
You’ll immediately notice how much smoother everything feels.
Dust the lantern thoroughly before painting.
If you love natural pottery, simply seal it with matte varnish.
Otherwise try soft earthy colors like:
- warm white
- sandstone
- sage green
- charcoal
- muted terracotta
Dry-brushing a slightly lighter shade across the raised texture makes every carved detail pop beautifully.
Some crafters even create an air dry clay lamp appearance by using layered mineral-style paints that mimic aged ceramic finishes.
Finish everything with two thin coats of matte sealer.
Don’t skip this.
It protects your hard work from everyday moisture.
Step 7: Style Your Finished Lantern
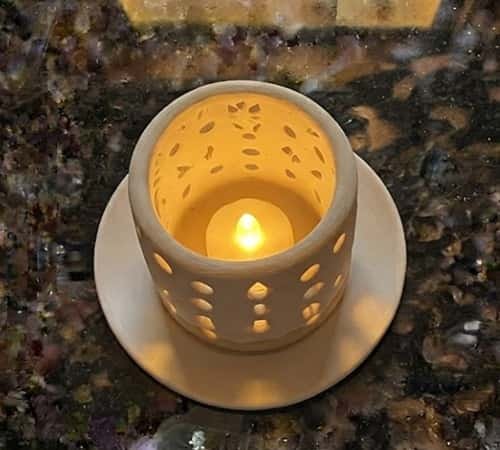
Place a battery-powered LED tealight inside.
Switch off the room lights.
Watch the tiny openings project soft patterns onto nearby walls.
It never gets old.
Pair two or three lanterns in different heights for a cozy display on shelves, coffee tables or entryway consoles.
Add dried eucalyptus, woven placemats or neutral pottery nearby for an elevated look.
Want another twist?
Create matching mini lanterns using leftover clay so the collection feels intentional instead of random.
These little finishing touches transform simple DIY clay lanterns into décor pieces that look thoughtful, personal and wonderfully handmade.
Helpful Beginner Tips
- If cracks appear while drying, fill them immediately with soft clay mixed with a little water.
- Never dry the lantern beside a heater or in direct sunlight.
- Keep walls around ¼ inch thick for better strength.
- Test the LED tealight before sealing the bottom permanently.
- Wipe tools frequently to prevent dried clay from dragging across the surface.
- Save leftover clay in airtight plastic bags for future air dry clay creations.
Final Thoughts
Making an air dry clay lantern craft isn’t just about ending up with another decoration sitting on a shelf.
It quietly teaches patience, planning, and how small details completely change the finished result.
That’s something I notice every single time I work with clay.
Once you understand thickness, drying speed, and balanced cutout placement, you’ll naturally start adapting those same techniques into other projects like decorative bowls, planters, or even an air dry clay lamp base.
Skills travel farther than individual projects do, and that’s exactly why this simple lantern is such a rewarding place to begin your handmade journey.





