Christmas lanterns can instantly make a corner feel warmer, but what if the lantern itself became the decoration? That’s the idea behind these diy air dry clay lantern ideas for christmas. Instead of buying a plain lantern and adding a few ornaments, we’re shaping simple clay pieces into tiny festive light holders that kids can actually help make.
I especially like projects where the finished piece still shows little fingerprints and uneven edges. It feels handmade, not factory-perfect.
Ready to get messy with clay? These clay lanterns for christmas use beginner-friendly techniques, simple shapes, and battery-powered lights so the whole family can join in without dealing with flames or complicated tools.
Important: For children, use only LED tea lights or small battery-powered LED lights. Never place a real candle or open flame inside a clay lantern made for kids.
Things Needed To Make Air Dry Clay Lanterns For Christmas
Most of these projects use the same basic supplies, so you don’t need to buy a mountain of craft materials.
- Air-dry clay
- Child-safe rolling pin or smooth bottle
- Plastic knife or clay tool
- Drinking straw
- Pencil
- Small cookie cutters, if available
- Water in a small bowl
- Parchment paper
- Acrylic or washable craft paint
- Child-safe paintbrushes
- Battery-powered LED tea lights
- Clear craft glue for older children, with adult supervision
- Dark shiny granite or another smooth work surface
A quick clay tip
Keep unused clay wrapped in an airtight bag while you’re working. Air-dry clay starts losing moisture surprisingly quickly.
And don’t make the walls paper-thin. A thickness of around 5 mm gives beginners enough strength to handle the pieces without them breaking easily.
Choose Your Air Dry Clay Type
Regular Air Dry Clay | Cornstarch Clay | Homemade Clay
Affiliate Disclaimer: Some of the links in this post may be affiliate links, which means I may earn a small commission if you choose to make a purchase through them – at no extra cost to you. I only share products that genuinely fit this project and can help make your ceramic mug clay craft process easier and smoother. Your support helps keep ideas like this coming.
1. Christmas Star Window Clay Lantern
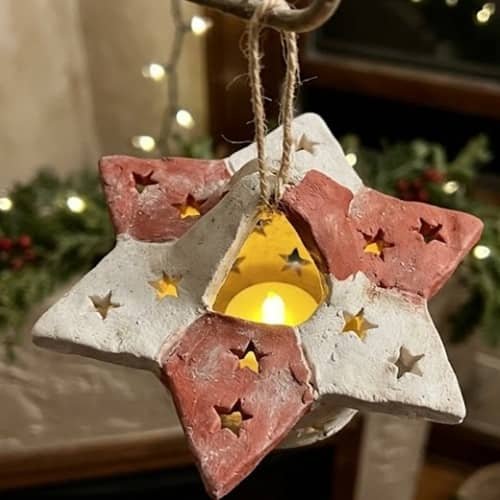
This one is almost like making a tiny glowing Christmas house.
Start by rolling air-dry clay into a slab about 6 mm thick.
Cut four rectangular wall pieces and two slightly larger pieces for the base and roof. You can keep the structure simple rather than trying to make a perfect miniature building.
Before the clay dries, cut small stars into the front and side walls using a star-shaped cutter. No cutter? Draw tiny stars with a pencil and carefully remove the clay from inside them using a plastic tool.
Let the pieces become firm but not completely rock hard. Lightly score the joining edges, add a tiny amount of water, and press them together.
Once the lantern is assembled, leave an opening underneath or at the back so you can place an LED light inside.
Paint it creamy white with tiny red or green stars. Or leave the clay mostly natural and paint only the star edges.
Why kids will like it: The stars are easy to stamp and the uneven little windows actually make the finished glow more charming.
2. Mini Christmas Tree Clay Lantern
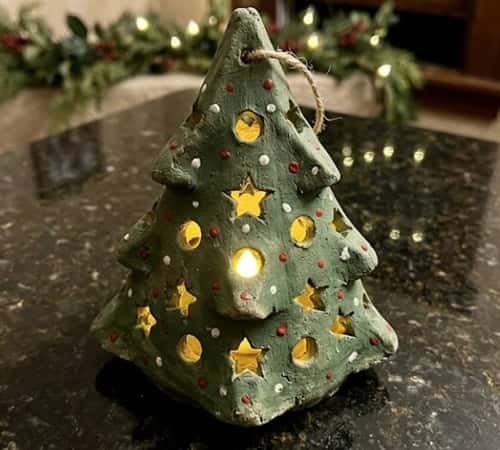
Why decorate the lantern with a Christmas tree when the lantern itself can become one?
Roll a thick sheet of air-dry clay and cut two matching Christmas-tree silhouettes.
Make the trees roughly 1 cm thick around the edges but keep the center slightly thinner.
Cut small circles, stars and tiny diamond-shaped holes through both tree panels. These become the glowing windows.
Create a narrow rectangular strip of clay for the sides. Score and dampen the edges before attaching it around one tree panel. Attach the second tree panel on top.
Leave the bottom open.
Once dry, paint the tree deep green. Add tiny dots of red, yellow and white to mimic ornaments. Put an LED tea light inside and watch those little holes glow.
It looks simple but surprisingly festive.
3. Snowflake Cutout Clay Lantern
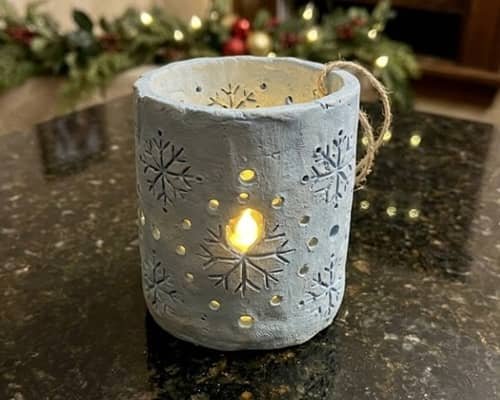
For this version, skip the complicated architecture.
Make a simple cylindrical lantern from a rolled clay slab.
Wrap the slab around a small smooth container to help you get the shape, then carefully remove the container.
Join the clay edges by scoring them and brushing on a little water.
Now comes the fun part.
Use a drinking straw to punch tiny circular holes around the lantern. Between the holes, use a pencil or clay tool to draw simple snowflake lines.
Don’t worry about perfect symmetry. Handmade snowflakes look better when they’re a little wonky.
Let the lantern dry completely before painting it pale blue or snowy white.
Place an LED light inside and the punched holes create a soft dotted glow.
4. Gingerbread House Clay Lantern
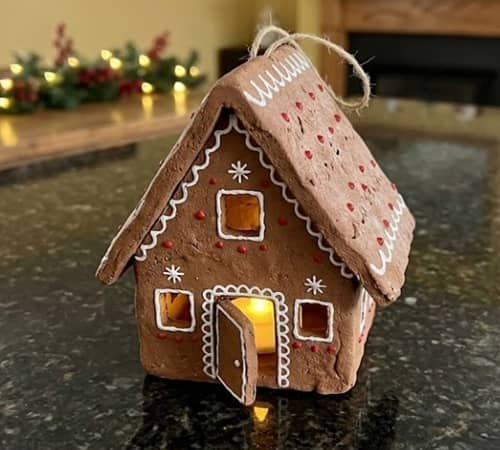
This is basically a tiny gingerbread house without actually using food.
Shape four small walls from brown air-dry clay. Add a simple triangular roof on top.
Cut tiny windows and a door into the front panel.
For the roof, press small circles or lines into the clay to imitate icing. You can paint these details white once the clay dries.
Add tiny red dots around the doorway for berries.
Because this is a clay craft, you can make the gingerbread house deliberately imperfect. A crooked roof almost makes it cuter.
For a kid-friendly Christmas decoration, place a small battery LED inside instead of a candle.
5. Santa Belt Clay Lantern
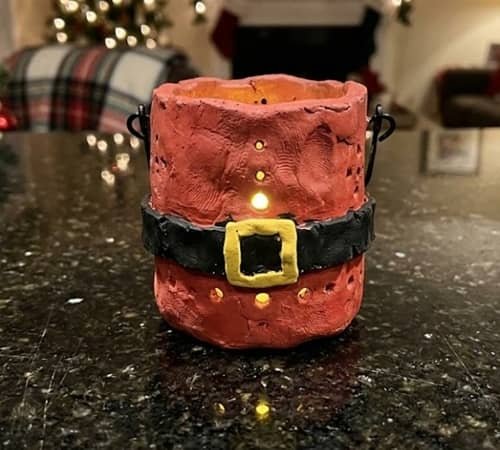
This design uses a very simple lantern shape and lets the decoration do the work.
Make a small rectangular or cylindrical lantern from air-dry clay.
Keep the surface plain.
Once dry, paint the lantern red. Add a thick black band around the middle. Paint a small yellow square buckle over the band.
For extra detail, punch a few tiny stars or circles above and below the belt before the clay dries.
The result looks instantly Christmasy without requiring advanced sculpting.
And honestly, this is one of those Christmas decor for lanterns ideas that kids can personalize easily.
6. Reindeer Face Clay Lantern
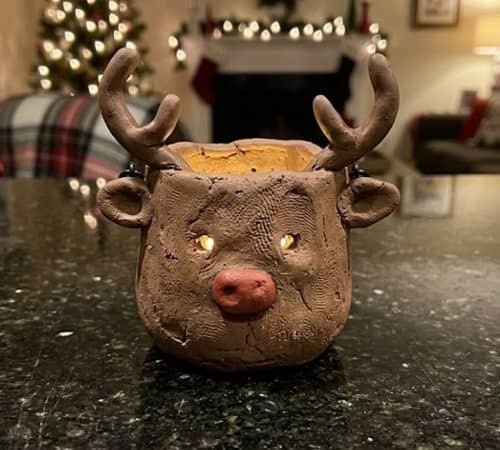
A basic round lantern becomes a cute reindeer with just a few added pieces.
Create a small rounded lantern body from clay.
Make two tiny antlers separately. You can form them as simple branches rather than trying to sculpt detailed antlers.
Attach them near the top while the clay is still soft.
Add two small clay ears, a raised nose and tiny eye openings.
After drying, paint the lantern brown and the nose red.
If you want Rudolph vibes without copying a commercial character design, make the facial features your own. Kids can choose funny expressions too.
7. Christmas Village Clay Lantern
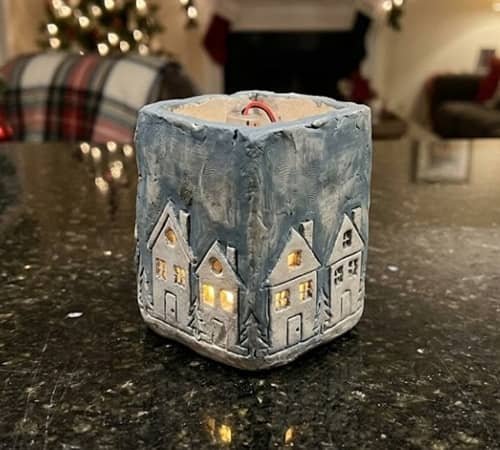
This is a fun one if several kids are making lanterns together.
Create a simple rectangular lantern body.
Instead of making one large picture, carve a tiny Christmas village around the outside.
Draw little houses with triangular roofs. Add tiny windows, doors, trees and snow lines.
Don’t carve all the way through.
For a few selected windows, carefully remove the clay completely. These become the glowing parts.
Paint the village after the lantern dries. White snow against muted blue or grey clay works beautifully.
This turns a basic lantern into a tiny winter scene.
8. Candy Cane Stripe Clay Lantern
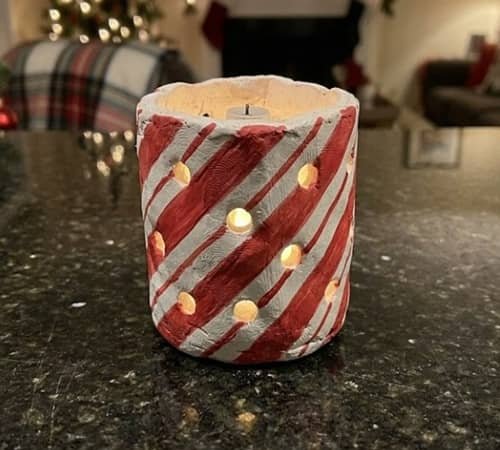
No complicated sculpting here.
Make a simple cylindrical or rectangular clay lantern.
Before it dries, carve shallow diagonal lines around the surface.
Once completely dry, paint alternating red and white stripes following those lines.
Punch a few tiny circles between the stripes so the light can escape.
If you’re making this with younger kids, let them paint the stripes. They don’t have to be perfectly straight.
Actually, those uneven stripes make the lantern feel handmade.
This is also an inexpensive idea for selling crafts at a school Christmas fair because the basic shape is quick to repeat.
9. Christmas Bell Clay Lantern

Make two shallow bell-shaped clay panels.
You can use a simple bell outline as your guide, then cut matching shapes from air-dry clay.
Join the pieces with a narrow strip of clay around the sides.
Add a small clay loop at the top.
Punch tiny stars along the lower edge.
Once dry, paint it gold, cream or muted red.
If the clay isn’t strong enough to support a hanging loop, don’t force it. Simply place the finished bell lantern on a shelf and call it tabletop decor.
Safety first, always.
10. Christmas Stocking Clay Lantern

Turn the classic Christmas stocking into a glowing clay decoration.
Draw a stocking shape on paper first. Use it as your template.
Roll air-dry clay and cut two matching stocking shapes.
Remove small circles and stars from both panels.
Create a narrow clay strip for the sides and attach everything using the score-and-slip method.
After drying, paint the stocking red with a white cuff.
You could even add a tiny green clay holly shape.
The light shining through the cutouts gives it a completely different look from an ordinary stocking decoration.
11. Snowman Clay Lantern
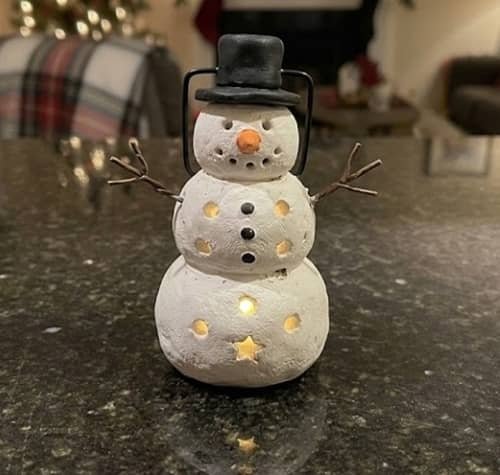
This is probably one of the easiest designs for younger children.
Make three clay balls in different sizes.
Flatten them slightly and stack them to form a snowman-shaped lantern.
Press small holes through the body using a straw.
Add a tiny clay carrot nose and simple clay buttons.
You can leave the clay white instead of painting it.
Once everything is dry, place an LED light behind or inside the structure, depending on how you’ve built it.
For younger kids, I prefer making it as a tabletop lantern rather than trying to hang it.
12. Christmas Moon & Star Clay Lantern
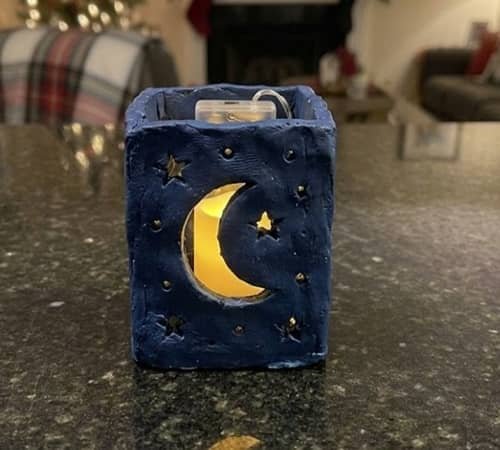
Let’s finish with something a little different.
Roll air-dry clay into a thick rectangular slab.
Cut a large crescent moon opening into the center.
Around it, punch tiny stars and dots.
Build the lantern sides using narrow clay strips, leaving the top and bottom open.
Once dry, paint the exterior deep midnight blue.
Add tiny white or pale-gold painted stars around the moon.
When the LED light goes inside, the moon becomes the main glowing feature.
It feels more like a tiny piece of night-sky decor than a traditional Christmas lantern.
Thinking About Selling These Clay Lanterns?
If you’re making these clay lanterns for christmas to sell, give the finished pieces a little extra attention before putting a price tag on them.
Make sure the clay is completely dry and properly waterproofed, especially if buyers may use the lanterns in places where they could come in contact with moisture.
You can follow this clay waterproofing guide to learn how to protect your finished clay projects.
Then comes the harder part – getting people to actually see your work.
You can photograph your lanterns and use Pinterest to bring interested people to your shop, blog, or craft page.
My Pinterest Blueprint Course can help with this by teaching you how to find the right Pinterest keywords, create content around what people are already searching for, and build an audience that can eventually become customers.
The craft gets made first. But getting it in front of the right people is what can turn a hobby into a small selling-craft business.
Final Thoughts
What makes these clay lantern ideas for christmas interesting isn’t really the light. It’s the way a simple piece of clay can become a tiny Christmas scene.
A few punched holes can become snowflakes. A crooked triangle can become a Christmas tree. Even fingerprints become part of the story.
That’s something mass-produced Christmas decoration with lanterns can’t quite reproduce.
If you’re making these with children, I’d resist fixing every imperfect edge.
Let them experiment. And if you’re selling crafts, photograph those handmade details clearly because they help buyers understand that each piece was actually made by hand.
A small LED inside can turn even the simplest clay sculpture for Christmas into something surprisingly warm and memorable.





