I love holiday crafts that look a little handmade rather than perfectly manufactured, and this air dry clay nutcracker craft fits that mood beautifully.
The idea is simple… we build a chunky little nutcracker character from air dry clay, give him a tall hat, moustache, boots and a wide wooden-toy style base.
But there is a small twist…. his front has a shallow slot for holding a tiny holiday name card, turning this into more than just another Christmas decoration.
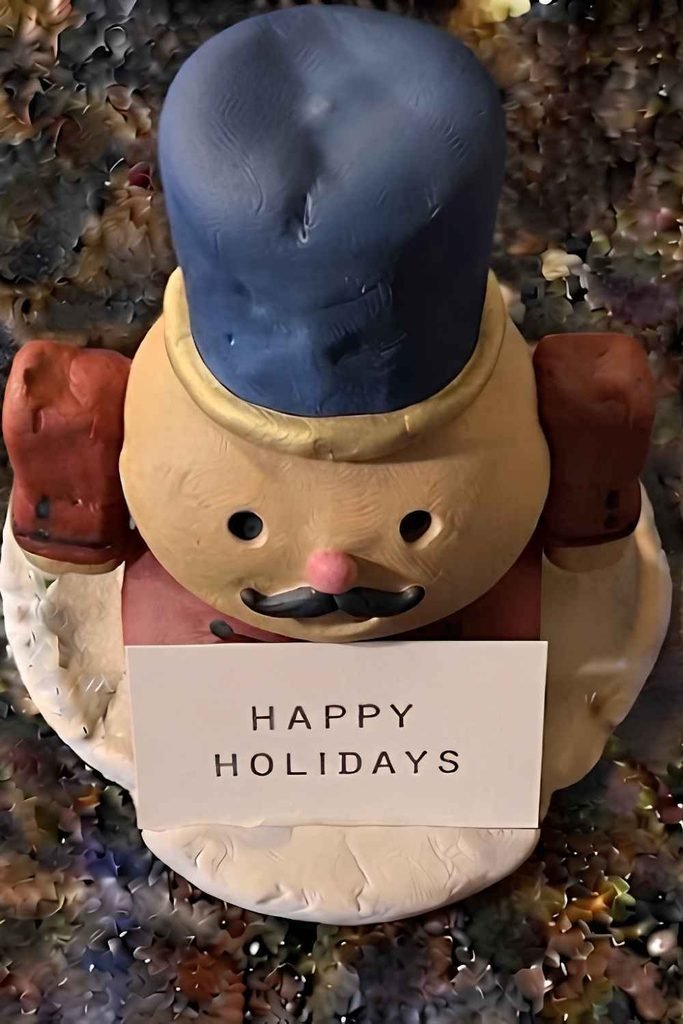
Grab some air dry clay, let the kids pinch, roll and press away, and lets make a nutcracker that feels like it came straight from a homemade Christmas craft table.
What Makes This Clay Nutcracker Craft Different?
Most clay nutcracker projects try to copy the very detailed soldiers you see in Christmas stores.
I wouldn’t.
For kids, I prefer simple geometric shapes that can be assembled without tiny complicated pieces.
Our nutcracker will have a slightly oversized head, a tall hat, a rectangular body, chunky boots and a broad base.
The deliberately imperfect edges are part of the charm.
And that little card-holding slot? It makes this a functional clay craft too.
You can use the finished piece as a Christmas table marker, tiny note holder, bookshelf decoration or even a cute holiday gift.
Choose Your Air Dry Clay Type
Regular Air Dry Clay | Cornstarch Clay | Homemade Clay
Affiliate Disclaimer: Some of the links in this post may be affiliate links, which means I may earn a small commission if you choose to make a purchase through them – at no extra cost to you. I only share products that genuinely fit this project and can help make your ceramic mug clay craft process easier and smoother. Your support helps keep ideas like this coming.
Materials Needed To Make Clay Nutcracker Craft
- Air dry clay
- Small amount of cardboard or thick paper for a temporary work surface
- Child-safe washable paint or water-based acrylic paint
- Small soft paintbrushes
- A cup of water for lightly smoothing fingers
- Paper towel
- Pencil or blunt craft stick for simple impressions
- Small piece of paper for the finished card holder
- Clear water-based sealer, optional and best handled by an adult
Kid-safety note: Choose a non-toxic, child-friendly air dry clay and paints. Skip sharp blades, wire, hot glue and other pointy tools. Younger children can do the rolling, pinching and pressing while an adult helps with painting or sealing.
How To Make an Air Dry Clay Nutcracker Craft
Step 1: Make the Wooden-Toy Style Base
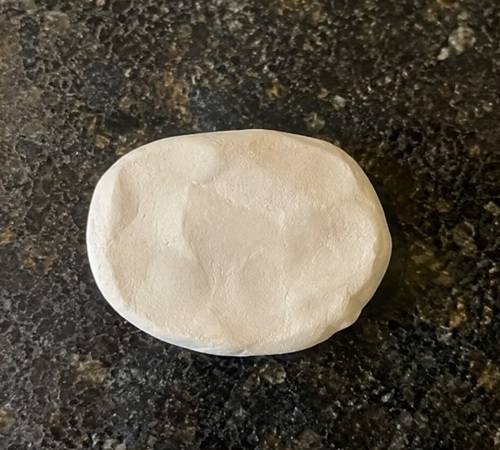
Start with a generous ball of air dry clay, roughly the size of a small lime.
Roll it between your palms.
Now press it gently against your work surface until you have a thick, rounded rectangle or squat oval.
Aim for about 1 to 1½ inches tall, depending on how large you want your nutcracker to be.
Don’t make the base paper-thin. A heavier base helps the finished figure stand upright.
Use your fingers to flatten the bottom as much as possible. Then gently smooth the top and sides.
This is where I intentionally leave a few tiny finger marks. They make the final piece look handmade instead of factory produced.
Step 2: Build the Nutcracker’s Body
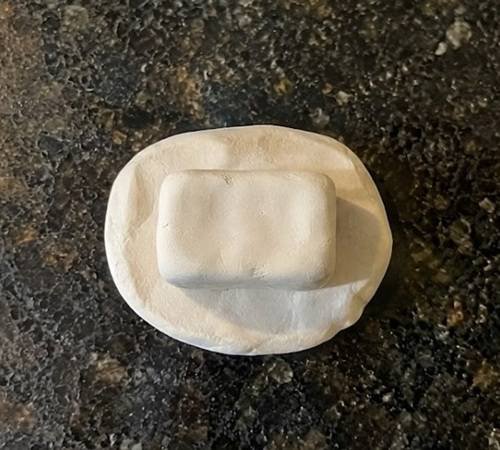
Take another piece of clay, slightly smaller than the amount used for the base.
Roll it into a short thick cylinder.
Stand the cylinder upright and gently flatten four sides with your fingers until it resembles a chunky little rectangle.
Don’t worry about perfect corners. A nutcracker made by children should have some personality.
Place the body temporarily on the base to check its proportions. It should sit comfortably without tipping over.
If it looks too tall, squish it down slightly. If it looks too skinny, add more clay around the sides.
Once you’re happy, attach the body to the base by pressing the bottom gently into the clay underneath.
Step 3: Add the Head
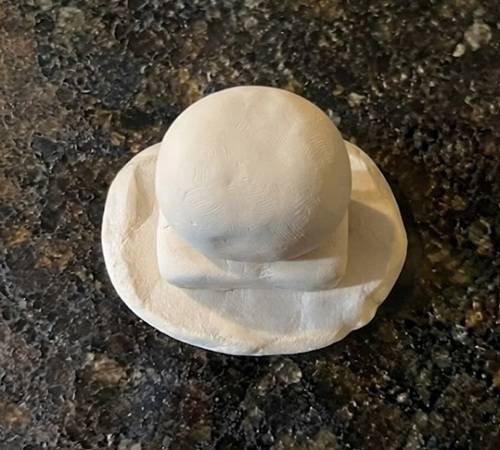
Make a clay ball for the head.
Keep it slightly wider than the body because we’re going for that cute wooden nutcracker look.
Press the ball gently against the top of the body. Use your fingers to blend the connection where the two pieces meet.
You don’t need to completely flatten the seam.
Actually, I think a little seam looks better.
Make sure the head is sitting straight before moving on. If it leans too far forward, the finished nutcracker may look like he’s falling asleep during Christmas dinner.
Step 4: Give Him a Tall Nutcracker Hat
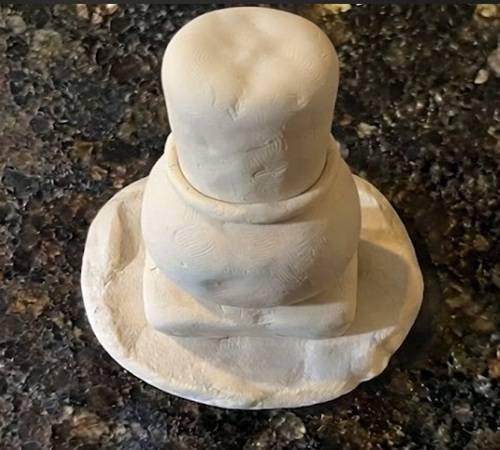
This is where the character really starts appearing.
Take another piece of clay and roll it into a thick cylinder.
Pinch the top gently so it becomes slightly narrower than the bottom.
Then flatten the bottom edge a little.
Place the hat directly on the head and press lightly so it sticks.
For a more playful look, make the hat slightly oversized.
A tiny character with a big hat looks much more like a homemade Christmas nutcracker.
Add a thin clay band around the lower part of the hat by rolling a very narrow clay rope and wrapping it around.
Press the ends together gently.
Step 5: Add the Arms and Chunky Boots
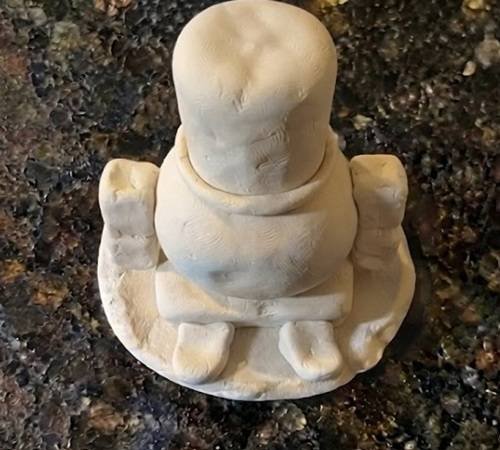
Roll two equal pieces of clay into short sausage shapes.
These become the arms.
Flatten one end of each arm slightly and press them onto the sides of the body.
Keep the arms fairly thick. Thin clay pieces can dry faster and are more likely to snap.
For the boots, make two small clay logs.
Flatten their bottoms and place them side by side on the front of the base.
Press the body gently against them so the pieces connect.
Now your nutcracker should already stand on his own.
Step 6: Create the Face Without Tiny Pieces
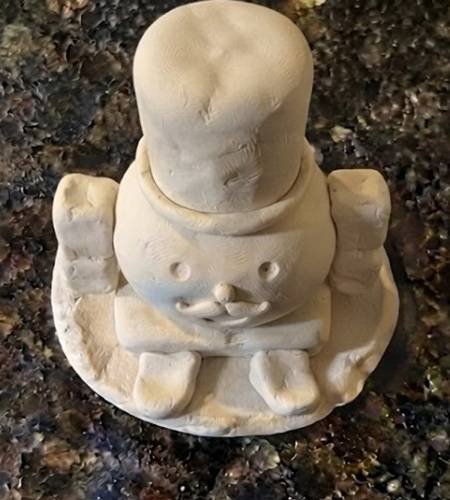
Let’s keep the face simple.
Instead of attaching lots of tiny clay decorations, use a pencil or blunt-ended craft stick to gently press two small eye marks into the clay.
Then make a tiny curved mouth.
For the famous nutcracker moustache, roll two very thin but short clay ropes and place them underneath the nose area.
If those pieces feel too fiddly for younger kids, simply press a moustache shape into the clay instead.
Add a tiny clay nose if you like.
Don’t make the face too detailed. The painted version will bring it to life later.
Step 7: Add the Little Card-Holding Slot
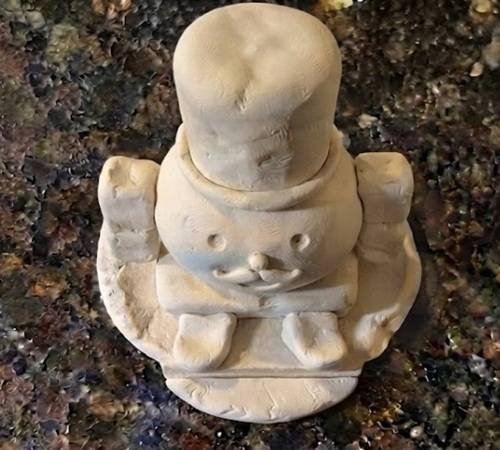
Here comes my favorite part.
On the front of the nutcracker’s base, gently press a narrow horizontal groove into the clay.
Keep it shallow.
You only need enough space for a small piece of cardstock to sit upright later. Don’t cut deeply into the base because that could weaken it.
Smooth around the groove with a slightly damp fingertip.
This tiny detail changes the project from a simple figurine into a useful holiday decoration.
Step 8: Let the Clay Dry Completely
Now comes the boring bit.
Leave your nutcracker somewhere clean and dry where it won’t get knocked over.
Air dry clay doesn’t harden because of heat. It hardens as moisture leaves the clay, so there is no need to bake it.
Depending on the thickness, drying can take around 24 to 72 hours.
Turn the piece gently after it has firmed up if the clay manufacturer’s instructions allow it. This can help moisture escape from the underside.
Don’t rush this stage.
If the center is still cool, soft or flexible, give it more time.
Step 9: Paint the Nutcracker
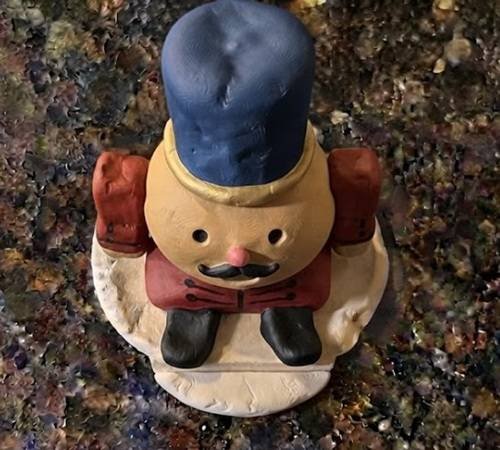
Once completely dry, paint the main body in a traditional nutcracker-inspired palette.
You could use red for the coat, blue or green for the hat, black for boots and moustache, and a warm tan or peach tone for the face.
But don’t feel locked into Christmas red.
Try navy and cream. Or green and gold. Even pink and purple can look surprisingly cute.
Paint thin coats rather than flooding the clay with one thick layer.
Allow each color to dry before adding the next one.
For the eyes and facial details, use very small amounts of paint and a fine soft brush. Kids can handle the larger color areas while an adult helps with tiny details.
Step 10: Add the Tiny Holiday Message
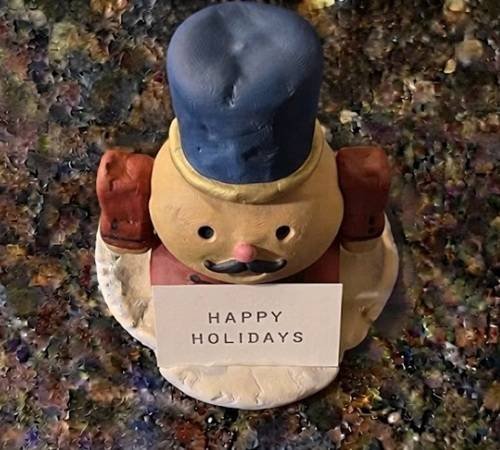
Cut or tear a tiny rectangle of cardstock.
Write something simple like “Merry Christmas,” “Welcome,” “Joy,” or a child’s name.
Slide the card gently into the groove.
There you go.
Your air dry clay nutcracker craft is now ready to sit on a Christmas table, shelf or desk.
For younger children, an adult can write the message while the child chooses the paper and helps decorate it with simple dots or stars.
Important Drying and Strength Tips
The biggest mistake beginners make with air dry clay is making decorative pieces too thin.
Keep arms, moustaches and other raised details reasonably chunky.
Also, don’t soak the clay with water. I only use a tiny amount on my fingertip when I need to smooth a rough edge.
If a small piece falls off after drying, don’t panic.
Lightly roughen the joining areas, add a small amount of suitable craft adhesive and let it cure according to the adhesive instructions.
And remember, this is a decorative nutcracker.
It is not designed to crack real nuts. That distinction matters, especially when children are involved.
Final Thoughts
What I like most about this project isn’t actually the finished nutcracker.
It is the way the construction teaches kids to think about simple shapes.
A ball becomes a head, a cylinder becomes a body, flattened pieces become boots and a tiny groove gives the sculpture a job to do.
That’s why I think this works so well among beginner clay activities.
There is no pressure to make every line perfect. In fact, the little bumps and fingerprints are what gives handmade clay its character.
If you’re wondering how to make a nutcracker out of clay, start chunky, keep the details simple, and let the child make some of the decisions. That usually creates the most memorable piece.





