There is something wonderfully cozy about turning a little animal sculpture into a soft glowing light.
This clay animal night lamp craft collection takes that idea further with simple silhouettes, tiny windows, pierced details and glowing openings that make each piece feel handmade rather than factory-perfect.
You can make these with air-dry clay, a small LED light and basic craft tools.
They also work beautifully as diy clay craft, kids’ room decor, handmade gifts or even small selling crafts.
Ready to make a little animal glow? These lamp crafts are beginner friendly, but they still look special enough to display.
NOTE: If you don’t want DIY and are looking for ready-made options, check out the ready-made Boho Clay Lamps here.
Choose Your Air Dry Clay Type
Regular Air Dry Clay | Cornstarch Clay | Homemade Clay
Affiliate Disclaimer: Some of the links in this post may be affiliate links, which means I may earn a small commission if you choose to make a purchase through them – at no extra cost to you. I only share products that genuinely fit this project and can help make your ceramic mug clay craft process easier and smoother. Your support helps keep ideas like this coming.
1. Sleeping Cat Clay Night Lamp
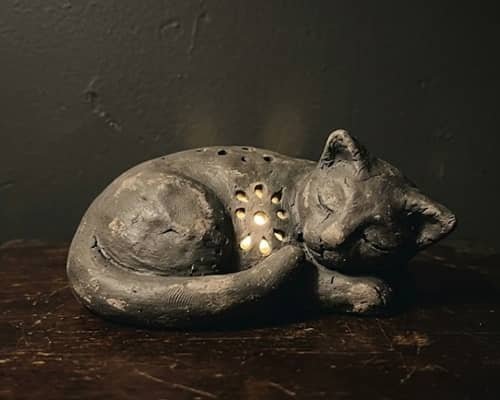
A sleeping cat makes an adorable bedside light, and the curved body gives you a naturally cozy shape.
How to make it:
Roll a thick piece of air-dry clay into an oval body.
Flatten the bottom slightly so it can stand. Add a rounded head, two triangular ears and a curled tail.
Keep the body fairly thick because you need enough clay around the hollow area.
Now carefully hollow the inside using a clay loop tool or spoon, leaving around 6–8 mm of clay around the walls.
Make three or four tiny openings on the belly using a straw or round clay tool. These become the glowing spots.
Let the sculpture firm up before adding details.
Paint the cat in charcoal, cream or warm brown, then add tiny painted eyes and whisker marks. Place a battery-operated LED puck or tea light behind the openings.
2. Little Elephant Glow Lamp
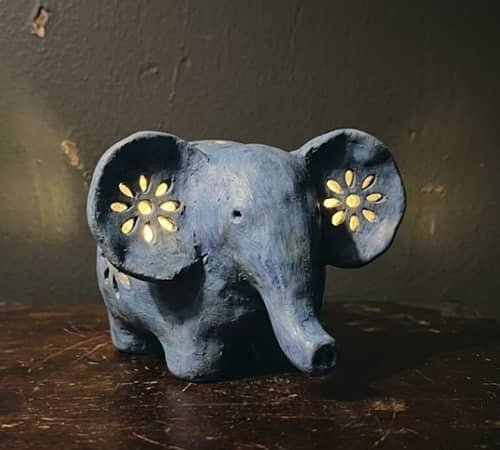
This elephant uses its large ears as the main visual feature. Cute, but not cartoonishly perfect.
How to make it:
Shape a rounded elephant body and four short legs.
Add a large head and gently curve a long trunk downward. Make two broad ears separately and attach them firmly.
Instead of hollowing the entire body, create a recessed opening at the back.
Carefully cut several small circles across the ears. Keep the holes small and evenly spaced.
Once dry, paint the elephant dusty blue, warm gray or muted terracotta. Sand only the sharpest edges. Place a small LED light behind the elephant so the ears glow like little windows.
The large ears makes this design especially effective in a dark room.
3. Fox-Shaped Clay Night Light
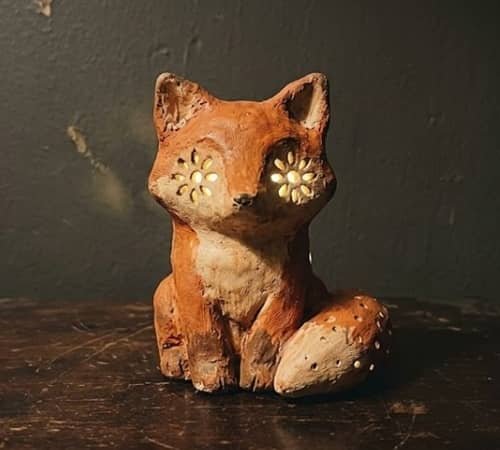
Want something with a little more personality? Try a sitting fox with glowing cheeks.
How to make it:
Build a simple sitting fox using an oval body, pointed head and two triangular ears. Add a large curled tail beside the body.
Hollow the torso from the back. On the front, pierce two small circular holes on the cheeks and three tiny holes along the tail.
Don’t make the holes too close to the edges.
Paint the fox rusty orange with a cream chest and dark ears. Add simple black facial details after the clay has completely dried.
Put the LED light behind the sculpture. The small cheek openings create a surprisingly charming glow.
4. Hedgehog Clay Lamp With Spiky Cutouts
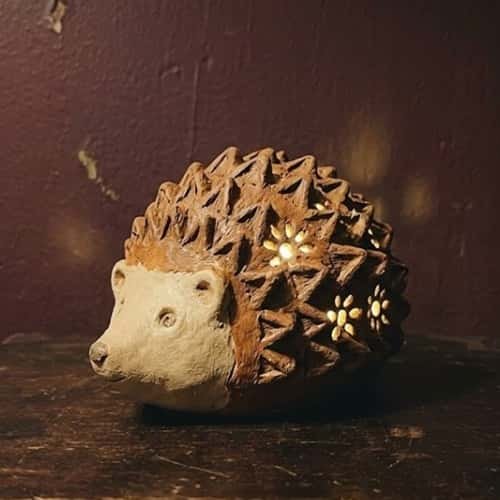
This one doubles as a small clay sculpture. The spines are what make it different.
How to make it:
Form a squat oval body and a pointed face. Instead of making individual clay spikes, use a pointed modeling tool to create rows of triangular impressions across the back.
Hollow the main body from underneath. Add several small holes between the textured rows. Make the nose and eyes from tiny clay balls.
Paint the face beige and the body warm brown. A darker wash pushed into the textured grooves makes the spikes easier to see.
Place a tiny LED underneath or behind the sculpture.
5. Penguin Igloo-Style Night Lamp
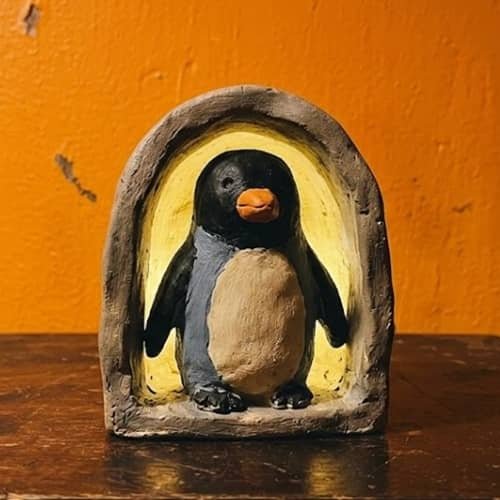
Here’s a fun twist: make the penguin look like it is standing inside a tiny glowing shell.
How to make it:
Create a rounded penguin body with a flat base. Make the front white and the sides dark gray or black.
Instead of piercing the penguin itself, create a slightly larger clay arch around its body. Leave the front partially open so the light can escape.
Paint the belly cream-white and add a tiny orange beak and feet. Put an LED light behind the penguin and arch.
This gives you a miniature illuminated scene without needing complicated sculpting.
6. Owl Clay Night Lamp With Feather Holes
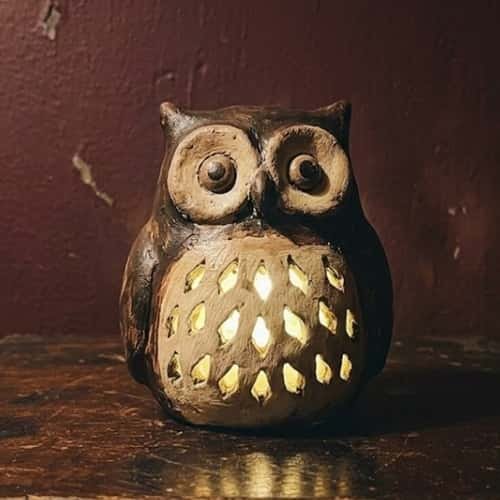
An owl is almost made for a pierced clay lamp.
How to make it:
Shape a chunky owl body and a slightly flattened head. Press a round tool around the eyes to create large eye rings.
Now use a small pointed tool to make repeated feather-shaped holes across the belly. Don’t overdo it. Around 12–15 openings is enough.
Let the sculpture dry slowly so the walls don’t crack. Paint it dark brown with cream facial markings. Add black painted pupils.
Place an LED tea light behind the owl. The feather holes cast tiny spots of light across the nearby wall.
7. Turtle Shell Glow Lamp
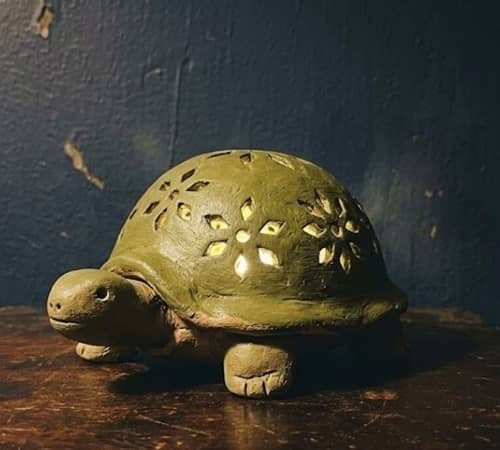
The turtle shell becomes the lampshade here.
How to make it:
Make a flattened dome for the shell. Keep it thick enough to hold its shape. Add a small head, four short legs and a tail.
Before the shell dries, create geometric openings following the natural shell sections.
A round cutter works well, but vary the shapes slightly for a handmade appearance.
Paint the shell olive green with darker section lines. Paint the head and legs a muted green.
Place the LED underneath the shell. The shell should glow while the turtle’s body stays mostly solid.
8. Bear Cub Clay Night Lamp
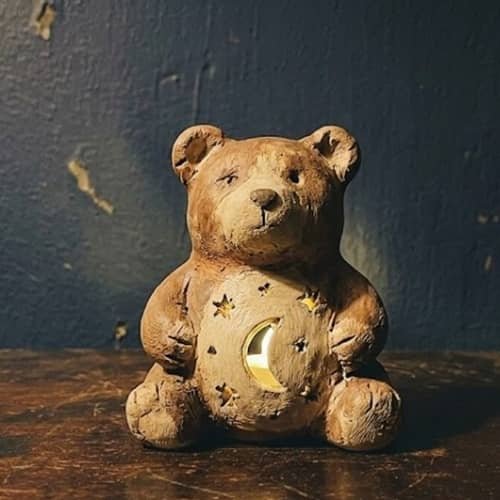
This is one of the easier easy clay projects because the shape can stay very simple.
How to make it:
Create a rounded bear body with a large head and two small ears. Hollow the torso from behind.
Instead of adding lots of holes, make one large crescent-shaped opening on the belly. Add two or three small stars around it.
Paint the bear warm brown with a lighter muzzle. Once dry, add a tiny painted nose and sleepy eyes.
The crescent becomes the main glowing feature when the LED is switched on.
9. Giraffe Clay Night Lamp
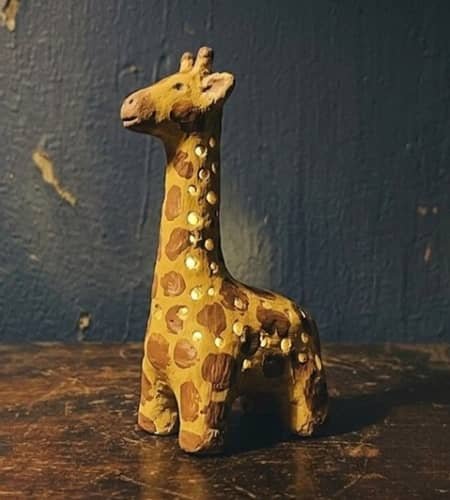
A giraffe gives you a taller silhouette without requiring complicated sculpting.
How to make it:
Build a simple upright giraffe with a rounded body, four legs, long neck and small head. Support the neck while the clay is drying.
Add small circular holes down the neck and body. Keep them staggered rather than perfectly aligned.
Paint the giraffe mustard yellow with irregular brown patches. Use a darker brown for the mane and tiny horns.
Place an LED behind the body. The long neck will create a lovely vertical silhouette.
10. Whale Clay Night Lamp
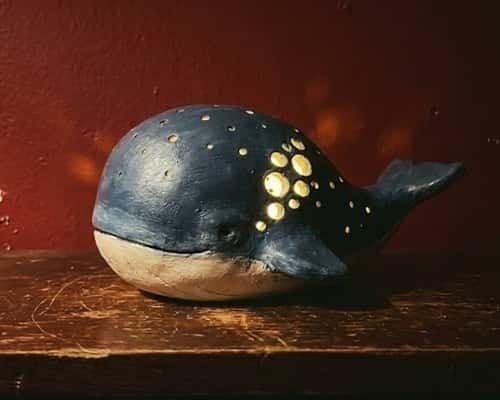
For a calmer look, turn a small whale into a soft ocean-inspired night light.
How to make it:
Shape a rounded whale body with a tapered tail. Add small fins separately.
Hollow the body from underneath and pierce several tiny circles along its side. Add a few larger holes near the top to imitate bubbles.
Paint it deep blue-gray with a lighter belly. A tiny amount of white dry brushing can highlight the rough clay texture.
Keep the facial details minimal. This is a night light, not a toy.
11. Bunny Moonlight Clay Lamp
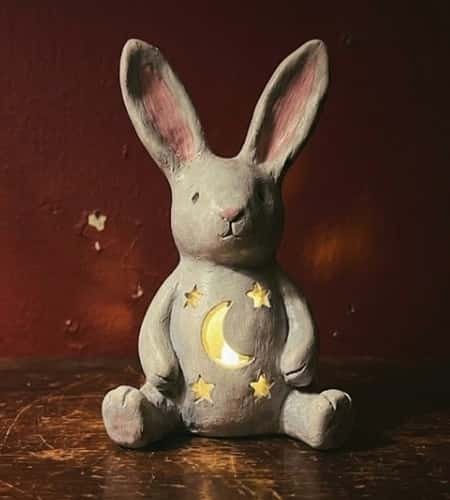
A bunny silhouette works beautifully for a child’s room without making the design too complicated.
How to make it:
Make a seated bunny with long ears and a rounded body. Hollow the torso from the back.
Cut a small moon shape into the belly. You can use a handmade paper template and trace around it before cutting the clay.
Add three tiny stars beside the moon. Paint the bunny off-white, dusty pink or pale gray.
Put an LED behind it and keep the light low rather than extremely bright.
This little design also makes a lovely diy clay gift.
12. Elephant Family Clay Wall Night Lamp
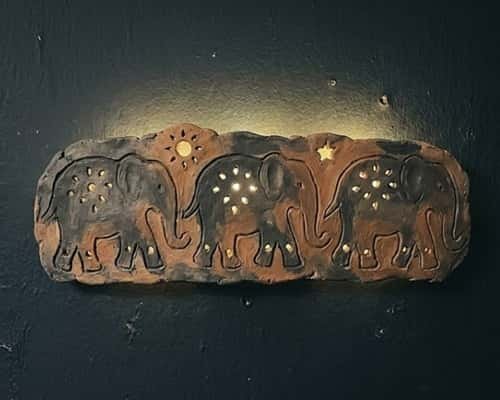
For the final idea, create a simple three-elephant silhouette that feels more like wall art.
How to make it:
Roll clay into a flat slab around 8–10 mm thick. Draw three connected elephant silhouettes using a paper template.
Cut around the outside carefully. Add tiny pierced circles inside each elephant. Keep the shapes connected so the finished piece stays strong.
Create a small recessed section behind the slab for an LED strip or flat battery-operated light. Don’t attach the clay directly to a hot bulb.
Paint the elephants in three shades of muted gray or terracotta. Let some of the clay texture remain visible.
Mount the finished piece safely so the light glows around the silhouettes.
Final Thoughts
The trick with an animal shape night lamp using clay is not making the animal perfectly.
In fact, small fingerprints, uneven edges and slightly irregular cutouts can make the finished piece feel much more handmade.
Focus instead on light control. Thin openings create brighter points, while thicker clay produces a softer glow.
Always use a cool LED source rather than a heat-producing bulb, especially for children’s rooms.
If you’re experimenting with diy clay lighting, test the light behind the sculpture before permanently closing the back.
And if one design turns out especially well, photograph it from several angles.
A good animal lamp can become decor, a handmade gift, or even one of your more interesting selling crafts.





