A good clay bookmark craft does not need fancy tools or perfect clay work.
In fact, I think the tiny fingerprints, uneven edges and slightly wonky shapes are what makes kids’ clay projects so charming.
These diy clay bookmarks are designed around simple shapes that children can actually make without getting frustrated.
Some use air dry clay, while others can be adapted for polymer clay.
Want something cute for a school project? Try the animal designs. Looking for a handmade gift? Go for the stars, flowers or rainbow.
And if your child enjoys making things to sell, several of these can easily become small selling crafts too.
Choose Your Air Dry Clay Type
Regular Air Dry Clay | Cornstarch Clay | Homemade Clay
Affiliate Disclaimer: Some of the links in this post may be affiliate links, which means I may earn a small commission if you choose to make a purchase through them – at no extra cost to you. I only share products that genuinely fit this project and can help make your ceramic mug clay craft process easier and smoother. Your support helps keep ideas like this coming.
1. Tiny Clay Mushroom Bookmark
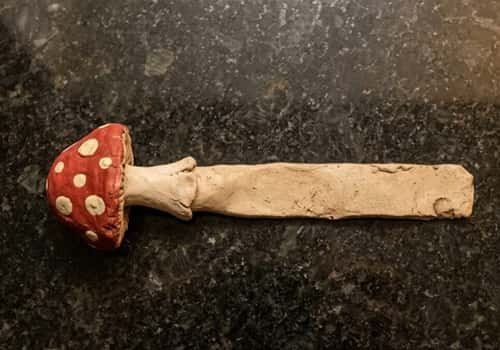
This one looks adorable even when the mushroom cap isn’t perfectly round. That is actually the point!
What you need
- Air dry clay
- Red, cream or any bright-colored clay
- Small amount of green clay
- Craft knife or clay tool
- Rolling pin or smooth bottle
- Acrylic paint if needed
- Thin bookmark cord or ribbon
How to make it
Start by rolling a small piece of air dry clay into a smooth ball.
Flatten it gently with your fingers. Don’t press too hard because you still want some thickness.
Take another small piece and make a short mushroom stem. Keep the bottom slightly wider so it can connect properly with the cap.
For the cap, shape a rounded dome with your fingers. Add tiny cream-colored dots by pressing very small clay balls onto the surface.
Now gently attach the cap to the stem. Blend the joining area with your fingertip so the two pieces don’t separate when dry.
For the bookmark section, roll a narrow strip of clay and flatten it.
Make it long enough to sit between the pages. Attach the mushroom to the top.
Leave it completely flat on a smooth surface while drying. Once hardened, paint tiny details if required.
2. Clay Rainbow Bookmark
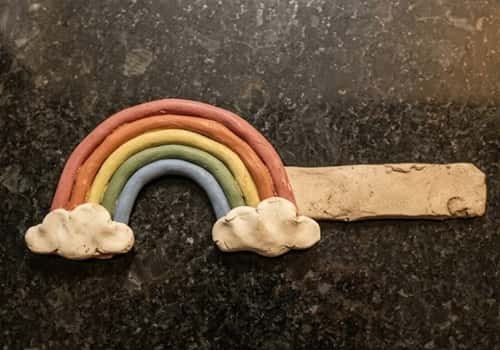
Rainbows are perfect for beginners because the design is basically several simple curved clay strips.
Roll thin ropes of different colored clay. Keep them roughly the same thickness. They don’t need to match perfectly.
Curve each strip into an arch. Arrange the colors one inside another, then gently press them together from the back.
Trim the bottom edges so the rainbow sits neatly. Add two small white or cream clouds at the ends.
For a stronger bookmark, make a thin rectangular clay strip and attach the rainbow decoration only at its top.
Let air dry clay harden naturally before painting or sealing.
This is one of those clay activities where children can choose their own colors, which makes every finished piece slightly different.
3. Little Clay Cat Bookmark
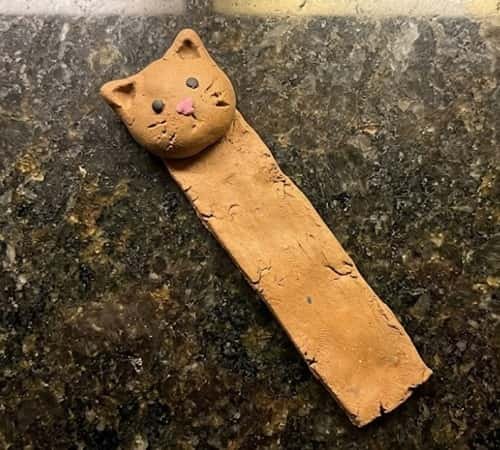
Who doesn’t want a tiny cat peeking out between the pages?
Flatten a piece of clay into a small rectangle. This becomes the bookmark base.
At the top, make a cat head using another piece of clay. Shape two tiny triangular ears by pinching the clay with your fingers.
Press two tiny dots for eyes. Add a small triangular nose and a few very thin clay lines for whiskers.
Don’t make the whiskers too thin if a child is making it because they can snap after drying.
Attach the head firmly to the bookmark base. Blend the connection from behind.
You can use orange, grey, white, black or even purple. A slightly uneven cat face often looks more handmade and fun.
4. Clay Flower Garden Bookmark
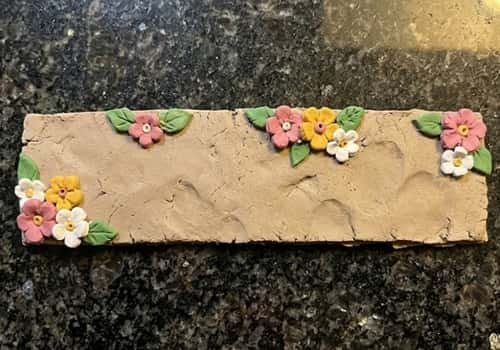
Make this one when you want a softer, more decorative bookmark craft.
Roll a thin green clay strip for the bookmark body. Flatten it gently.
For each flower, roll five or six tiny clay balls. Press each ball flat and arrange them around a tiny center.
You can make daisies, simple five-petal flowers or even completely imaginary flowers. Kids don’t need botanical accuracy here!
Attach the flowers along the upper part of the bookmark. Press them gently into the base so they bond.
Add tiny green leaves by flattening small pieces and pinching one end.
Allow everything to dry flat. If the bookmark curls while drying, place it between two sheets of parchment paper with a light flat object nearby, without crushing the design.
5. Clay Dinosaur Bookmark
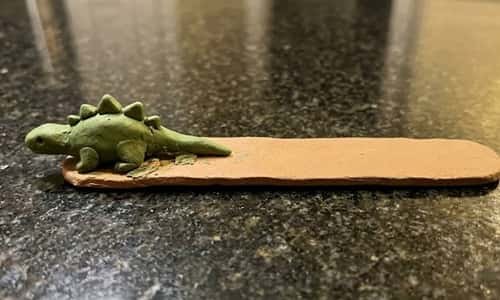
This is where the project gets really fun.
Make a flat bookmark strip first. Use green clay or any color your child likes.
Create a small dinosaur body using an oval shape. Add four tiny legs and a long tail.
The head can be made separately. Pinch two tiny points for the dinosaur’s horns or spikes.
Attach everything carefully. Use a clay tool to press shallow lines along the back.
For the eyes, use tiny black clay dots rather than paint. They are easier for children.
Keep the dinosaur slightly raised at the top instead of making the whole bookmark bulky.
This is a great diy clay craft for kids who love dinosaurs because they get to sculpt instead of simply decorating a flat shape.
6. Clay Planet Bookmark
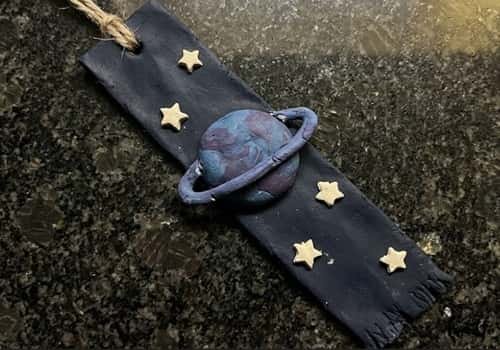
Turn the bookmark into a tiny solar-system inspired craft.
Start with a flat dark-blue or black clay bookmark strip.
Make one small round planet. After rolling it into a ball, gently flatten it.
For a Saturn-inspired planet, create a thin clay ring and carefully place it around the planet.
Add two or three tiny white dots for stars on the bookmark base. Don’t overcrowd it.
You can also make a little crescent moon at the top.
The best part? There is no need to make the planet perfectly spherical. A little unevenness gives it that handmade clay sculpture appearance.
7. Clay Strawberry Bookmark
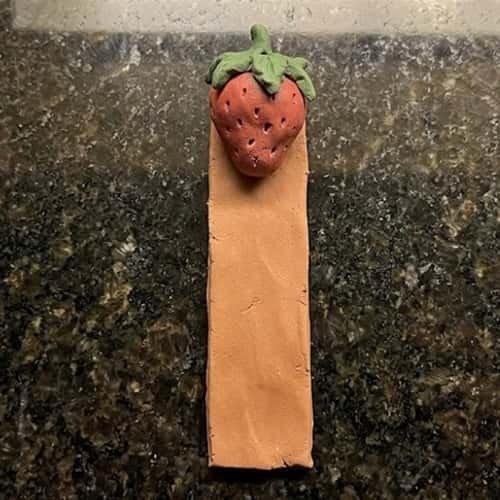
Make a strawberry using a small red clay oval. Pinch the bottom slightly so it has a strawberry shape.
Press tiny dots into the surface using the blunt end of a clay tool.
For the leafy top, flatten five tiny pieces of green clay and arrange them like a star.
Create a thin flat clay bookmark strip and attach the strawberry at the top.
For older children, a small amount of white paint can be used to highlight the seeds after the clay has dried.
This is also an easy design to turn into a matching set with cherries, lemons and tiny apples.
8. Cute Polymer Clay Bear Bookmark
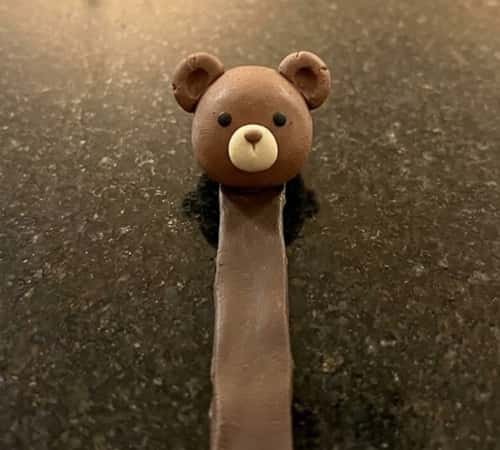
If you have polymer clay at home, this idea works beautifully as a polymer clay bookmark.
Make a small bear head from brown clay. Press two tiny round ears onto the top.
Add a lighter clay muzzle and two tiny black eyes.
For the bookmark base, use a thin strip of polymer clay. Keep it reasonably thin but not paper-thin.
Attach the bear head to the top.
Because polymer clay needs oven curing according to its manufacturer’s instructions, children should have an adult handle the oven and baking process.
This is one of those polymer clay bookmark ideas that can become a whole collection. Bears, pandas, foxes and bunnies all use basically the same construction.
9. Clay Moon and Stars Bookmark
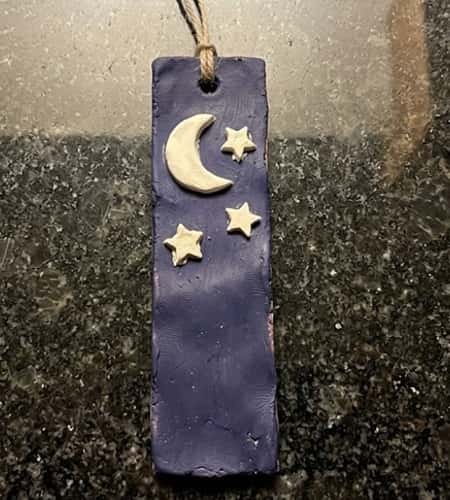
Roll a flat strip of navy, purple or black clay.
Cut or hand-shape a crescent moon. Add tiny stars using little clay balls flattened with your fingertip.
Press some stars deeper than others. This gives the surface a handmade variation instead of making everything look machine-made.
Attach the moon to the top of the bookmark.
You could even make one large moon and three tiny stars rather than filling the whole surface.
The simpler version actually looks more polished when finished.
10. Clay Ice Cream Bookmark
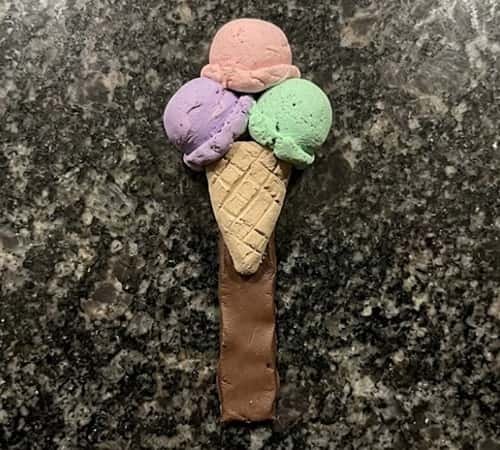
Make a tiny ice cream cone using beige clay. Roll a small triangle and flatten it.
Use a clay tool to press diagonal lines across it.
For the ice cream, make three small colorful clay balls. Flatten them slightly and stack them.
Add a tiny cherry on top if you want.
Attach the ice cream to a flat bookmark strip.
This is a particularly nice project for younger kids because the individual pieces are simple shapes.
It also works wonderfully for selling crafts at school fairs or small handmade markets when made in batches.
11. Clay Butterfly Bookmark
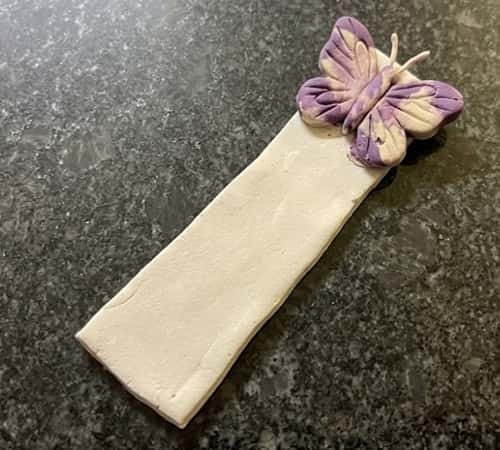
Make a thin clay bookmark base.
Create two large butterfly wings by flattening four small clay pieces. Join the upper and lower wings around a tiny clay body.
Use a toothpick or clay tool to add a few shallow lines to the wings.
Don’t make the wings extremely thin. They can break after drying.
Add two tiny antennae, but keep them short and thick enough to survive handling.
A simple color combination like purple and cream looks lovely, but kids can absolutely invent their own butterfly.
12. Clay Pizza Bookmark
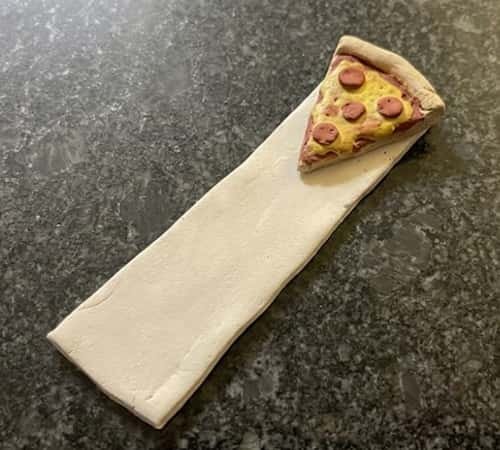
Yes, pizza can be a bookmark. Why not?
Make a small triangle from beige clay for the pizza base.
Add a thin red layer for sauce and a few tiny yellow clay pieces for cheese.
Top it with miniature pepperoni circles or vegetables.
Attach the finished pizza slice to a narrow flat bookmark strip.
The trick is keeping the toppings shallow. If they become too thick, the finished bookmark can become bulky and uncomfortable to use.
This could also become part of a fun food-themed polymer clay craft collection with donuts, cupcakes, watermelon and cookies.
13. Recycled Clay Button Bookmark
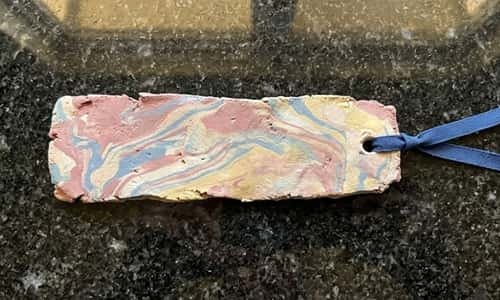
Here is the unusual one.
Instead of throwing away tiny leftover pieces of clay, combine them.
Press different scraps together without completely blending the colors. Flatten the mixture into a long bookmark strip.
Punch or press a small hole near the top while the clay is still soft.
After drying, thread a short piece of sturdy ribbon through the hole.
Add one small clay charm if you like.
This is a fun way to introduce kids to diy Recycled crafts and also teaches them that leftover materials can become something useful instead of automatically becoming waste.
If you’re making these for selling, keep the color combinations intentional.
Random scraps can sometimes create muddy colors, so combine colors that already look good together.
Final Thoughts
A handmade bookmark is a surprisingly good first clay project because it teaches several useful skills at once… rolling, flattening, joining, shaping, adding texture and working with small details. I also love that these projects can grow with the child.
A beginner can make a simple rainbow, while an older child can experiment with miniature food, animals or layered cute polymer clay designs.
If your child gets really interested, start making themed sets rather than individual pieces.
Three matching animal bookmarks or a tiny dessert collection can become thoughtful gifts, party favors or even simple selling crafts.
And honestly, those slightly imperfect fingerprints are what make handmade clay pieces feel like they were actually made by a child.





