I love crafts that look far more expensive than they actually are, and Christmas jewelry is perfect for this.
These clay christmas earrings have that little handmade charm while still looking polished enough for a holiday party, gift box, or even a small craft business.
The trick is not making complicated shapes. It is choosing good color combinations, keeping the shapes clean, and adding one tiny detail that makes each pair memorable.
I’ve put together 12 designs using polymer clay only, with beginner-friendly steps that kids can enjoy under adult supervision.
Ready to make some festive jewelry that doesn’t look like it came straight from a craft kit?
1. Tiny Christmas Tree Studs With Gold Dots
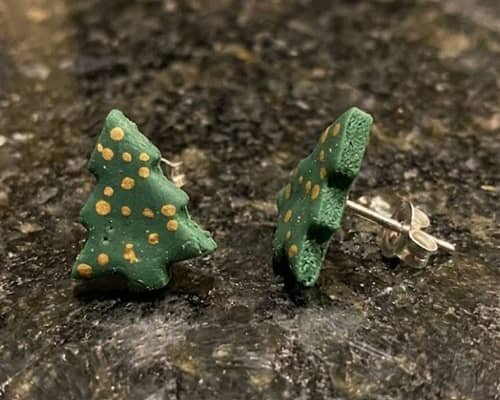
These little trees are deliberately simple. And honestly, that is what makes them look expensive.
What you need
- Green polymer clay
- A tiny amount of gold or metallic polymer clay
- Earring posts and backs
- Rolling surface
- Small Christmas-tree cutter or paper template
- Needle or clay tool
How to make them
- Condition a small piece of green polymer clay until it becomes soft and flexible.
- Roll it evenly, aiming for roughly 3–4 mm thickness.
- Cut two matching Christmas-tree shapes.
- Smooth the edges gently with your fingertip. Don’t overwork them or the shape can become lumpy.
- Roll tiny gold clay balls between your fingers.
- Press three or four gold dots onto each tree.
- Add a tiny hole near the top only if you want a hanging version. For studs, leave the shape solid.
- Bake according to the polymer clay manufacturer’s instructions.
- Once completely cool, attach the earring posts with suitable jewelry adhesive.
Kid-friendly twist: Let kids choose the number and placement of the gold ornaments. They don’t need to match perfectly.
2. Candy Cane Twist Earrings
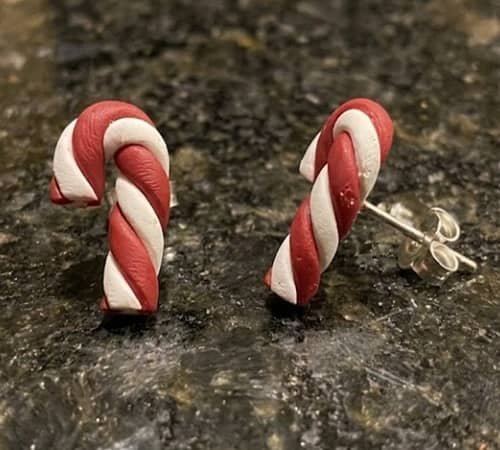
Instead of making flat candy canes, give these earrings a subtle twisted appearance.
How to make them
- Roll equal thin ropes of white and red polymer clay.
- Keep both ropes approximately the same thickness.
- Place them side by side.
- Gently twist them together without squeezing too hard.
- Roll the twisted clay very lightly once or twice to make the surface cohesive.
- Bend it into a classic candy-cane hook.
- Trim the lower ends neatly.
- Create a small hole near the top if making dangles.
- Bake as directed by your clay brand.
- Add jump rings and earring hooks after cooling.
The secret here is not twisting too aggressively. A loose spiral looks more handmade and gives the candy cane a dimensional appearance.
3. Christmas Pudding Earrings With Tiny Holly Leaves

Want something unusual? Skip the obvious snowflakes.
These miniature Christmas puddings make adorable clay earrings for Christmas, especially if you want something playful.
How to make them
- Roll two equal balls of brown polymer clay.
- Flatten each ball slightly so it resembles a miniature pudding.
- Add a small white piece of clay on top.
- Shape the white clay into an uneven dripping icing layer.
- Make two tiny green leaves from green clay.
- Add tiny red clay berries.
- Press the decorations gently into place.
- Make a small hole through the upper section.
- Bake according to the clay manufacturer’s instructions.
- Add jump rings and hooks after cooling.
Don’t make the icing perfectly symmetrical. A little drip over one side makes the earrings feel handmade rather than factory produced.
4. Minimalist Red Bow Earrings
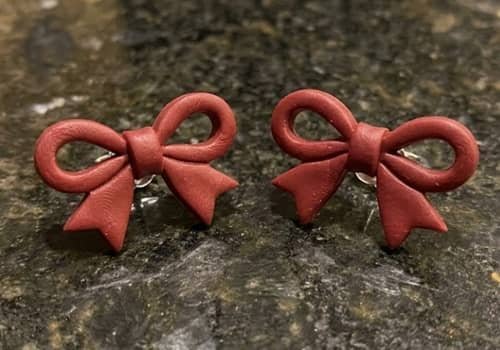
These are for anyone who likes Christmas jewelry without too much Christmas everywhere.
How to make them
- Roll red polymer clay to an even thickness.
- Cut two small rectangles.
- Pinch each rectangle slightly in the center.
- Shape the sides into bow loops.
- Add a tiny clay strip around the middle.
- Gently round the edges.
- Make a hole at the top of each bow.
- Bake according to the manufacturer’s instructions.
- Add a small gold jump ring and earring hook.
Use deep red instead of bright red if you want a richer boutique-jewelry appearance.
5. Snow Globe Polymer Clay Dangles
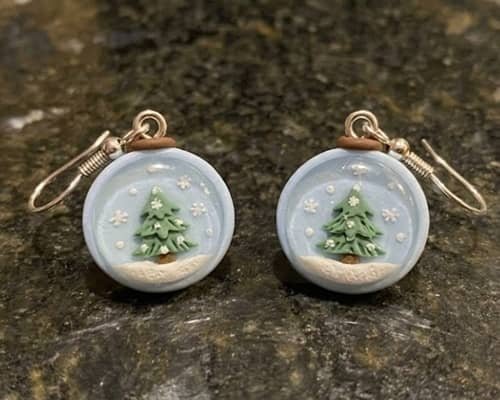
This design looks complicated, but it is mostly layering.
How to make them
- Roll two pieces of white or pale blue polymer clay.
- Cut matching rounded globe shapes.
- Add a tiny white snowman, tree or star onto each globe using very small pieces of clay.
- Add several tiny white dots for falling snow.
- Make a narrow darker strip for the globe base.
- Press all pieces gently together.
- Make a hole through the top.
- Bake according to your clay instructions.
- Attach jump rings and hooks after cooling.
Keep the decorations raised only slightly. Too much detail can make miniature earrings heavy and messy.
6. Gingerbread House Earrings
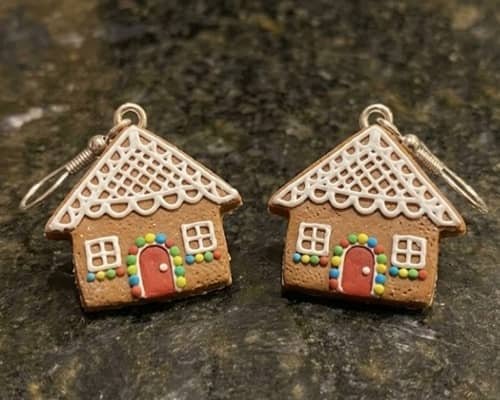
These might be my favorite for kids because there is plenty of room for tiny decorating decisions.
How to make them
- Roll brown polymer clay flat.
- Cut two small house shapes.
- Smooth the corners carefully.
- Add a thin white clay strip around the roof.
- Make a tiny red door.
- Add two small white windows.
- Place miniature red, green or white dots around the roof.
- Make the hanging holes.
- Bake following the manufacturer’s instructions.
- Let them cool completely before attaching the findings.
Make every house slightly different. Matching does not always mean identical.
7. Frosted Christmas Tree Earrings
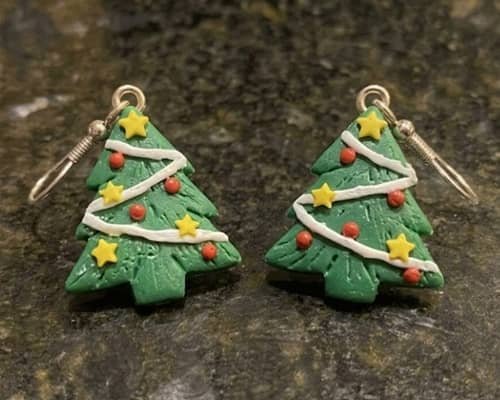
Here’s a simple way to make basic tree earrings look much more detailed.
How to make them
- Cut two green polymer clay Christmas trees.
- Smooth the edges without flattening the shape.
- Roll a very thin white clay rope.
- Lay it across the tree like loose frosting.
- Add three tiny red clay dots.
- Add a tiny yellow star at the top.
- Press everything gently so the pieces bond.
- Make the hanging hole.
- Bake according to the clay manufacturer’s instructions.
- Attach gold-toned hooks after cooling.
The white “frosting” should look irregular. Perfect zigzags can make the earrings look too manufactured.
8. Tiny Christmas Stocking Earrings
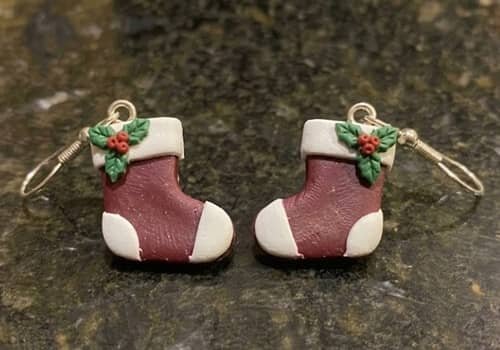
These are surprisingly easy and look adorable when kept small.
How to make them
- Roll red polymer clay flat.
- Cut two stocking shapes using a tiny template.
- Add a narrow white clay band along the top.
- Press the band gently into position.
- Add a tiny green holly leaf if desired.
- Add one red berry.
- Create the hanging hole near the top corner.
- Bake according to the polymer clay package directions.
- Cool completely.
- Add jump rings and earring hooks.
For a more premium look, use burgundy instead of bright red.
9. Polar Bear Face Earrings
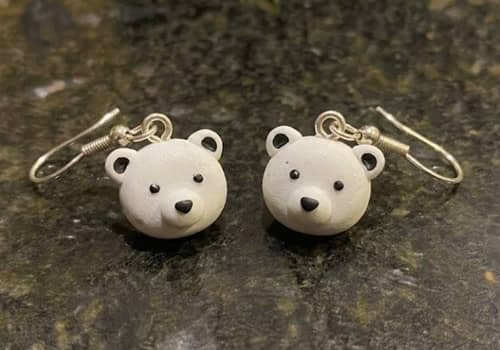
Who says Christmas earrings need Christmas symbols?
A tiny polar bear gives the collection a cute winter theme.
How to make them
- Roll two small balls of white polymer clay.
- Flatten them slightly into rounded faces.
- Add tiny black clay ears.
- Add two tiny black eyes.
- Add a small black nose.
- Use a thin clay tool to create a tiny mouth if wanted.
- Make the hanging hole at the top.
- Bake according to the manufacturer’s directions.
- Cool completely before adding the jewelry findings.
Keep the facial details simple. At this scale, less really is more.
10. Metallic-Looking Star Earrings
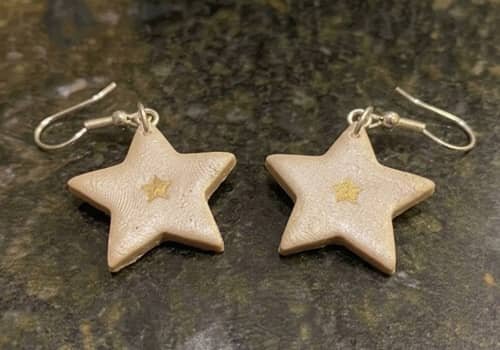
You don’t actually need metallic clay to get an expensive-looking result.
How to make them
- Roll cream, champagne or pale beige polymer clay.
- Cut two five-point stars.
- Smooth the edges carefully.
- Add a tiny central clay dot.
- Create a hole near one point.
- Bake following your clay manufacturer’s instructions.
- Once cool, add a very thin layer of suitable metallic acrylic paint if your chosen clay and finishing system allows it.
- Let the finish dry completely.
- Add jump rings and hooks.
The trick is restraint. One small metallic detail looks more sophisticated than covering the entire surface.
11. Christmas Sweater Pattern Earrings
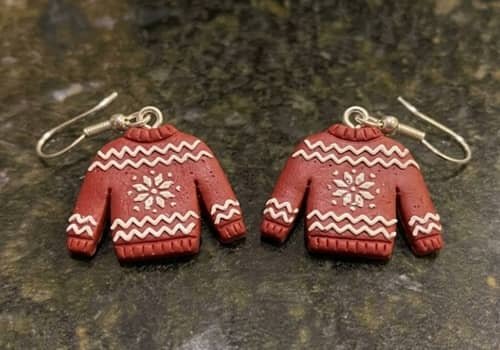
This is where your clay sculpture skills can have a little fun.
How to make them
- Roll two pieces of red polymer clay.
- Cut small rounded sweater-like rectangles.
- Smooth the corners.
- Roll tiny white clay ropes.
- Create a simple zigzag or snowflake pattern.
- Add a tiny white border near the bottom.
- Press the decorations gently onto the surface.
- Create a hole near the top.
- Bake according to the manufacturer’s instructions.
- Add jump rings and hooks after cooling.
Don’t try to recreate an entire sweater pattern. One bold motif photographs better and is easier for beginners.
12. Mismatched Christmas Tree + Present Earrings
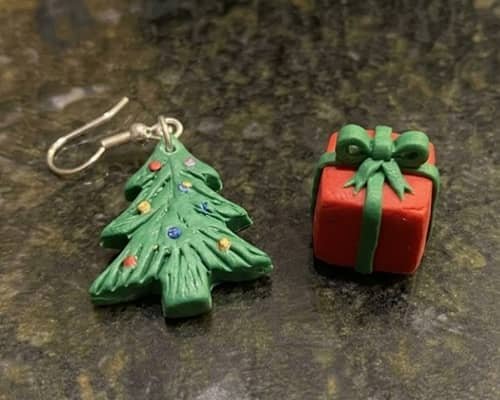
Want the pair to feel genuinely different?
Make each earring tell its own little Christmas story.
How to make them:
For the tree:
- Cut a small green tree from polymer clay.
- Add one tiny red ornament.
- Add a yellow star.
- Create a hanging hole.
For the present:
- Form a small red or green square.
- Flatten the sides.
- Add two thin contrasting clay strips crossing over the front.
- Add a tiny bow.
- Create a hanging hole.
Bake both pieces according to the polymer clay manufacturer’s instructions.
Once cool, attach matching jump rings and hooks.
This mismatched idea is especially fun for selling crafts, because shoppers often look for something a little different from the usual matching pair.
Final Thoughts
The interesting thing about polymer clay jewelry is that expensive-looking design rarely comes from complicated techniques.
It comes from proportion, color control and tiny details.
A simple Christmas tree with three carefully placed dots can look better than a heavily decorated piece covered in everything you have on the craft table.
I’d also make a few test pieces before producing a full batch, especially if you’re considering selling craft pieces.
Check their weight, strength, edges and how the findings sit.
Once you discover a shape that works, repeat the construction and change only the surface design.
That’s how a simple clay craft can slowly become your own recognizable Christmas collection.





