Christmas is the perfect excuse to turn plain pots into little pieces of festive decor.
I especially like clay pot painting ideas for christmas because they don’t require expensive supplies and can be adapted for adults or kids.
With a little paint, some patience, and a few air dry clay crafts techniques, an ordinary pot can become a Santa planter, Christmas tree centerpiece, or even a tiny winter village.
The best part? You don’t need perfect painting skills. Those tiny fingerprints and slightly uneven brush marks can actually make handmade clay pot crafts feel more charming.
Choose Your Air Dry Clay Type
Regular Air Dry Clay | Cornstarch Clay | Homemade Clay
Affiliate Disclaimer: Some of the links in this post may be affiliate links, which means I may earn a small commission if you choose to make a purchase through them – at no extra cost to you. I only share products that genuinely fit this project and can help make your ceramic mug clay craft process easier and smoother. Your support helps keep ideas like this coming.
1. Santa Belly Christmas Clay Pot
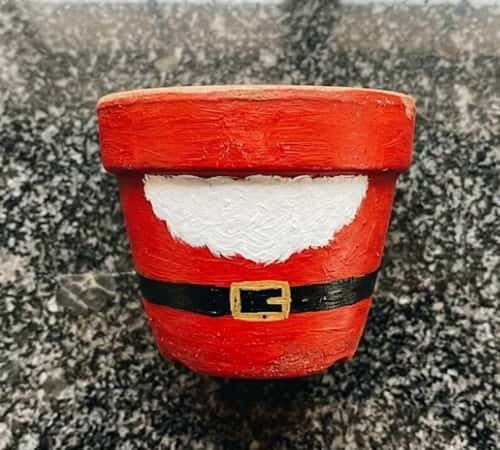
Forget painting Santa’s face for a moment. Turn the entire pot into his famous red belly!
This is one of the easiest clay pot painting ideas for christmas for beginners because most of the surface uses simple blocks of color.
What you’ll need
- Small terracotta or clay pot
- Red acrylic paint
- White acrylic paint
- Black acrylic paint
- Gold or yellow paint
- Fine paintbrush
- Medium flat brush
- Clear water-based sealer
How to make it
Start with a completely clean, dry pot. If your pot has a dusty surface, wipe it gently with a slightly damp cloth and allow it to dry.
Paint the entire outside of the pot red. Don’t worry if the first coat looks patchy. Terracotta absorbs paint quickly, so a second thin coat usually gives much better coverage.
Once dry, paint a broad white horizontal band around the middle. This becomes Santa’s fluffy shirt trim.
Now add a thick black band directly across the center of the white area. That’s Santa’s belt.
Paint a small gold or yellow rectangle over the belt for the buckle.
Want to make it extra cute? Add two tiny white dots above the belt to represent snow-covered buttons.
Keep the inside of the pot natural or paint only the upper rim. Finish with two thin coats of clear sealer once everything has dried.
Selling crafts idea: Make several in different sizes and sell them as Christmas planter sets.
2. Christmas Tree Pot With Raised Clay Ornaments
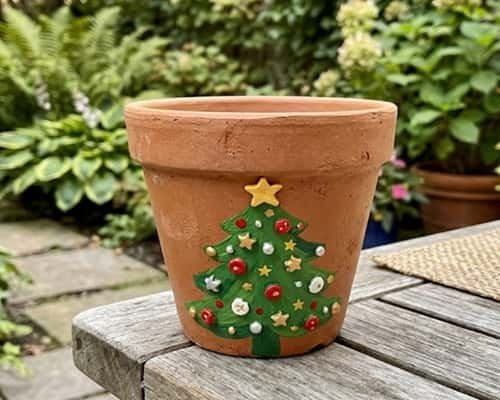
Here’s where a simple painting project becomes a tiny diy clay craft.
Paint the pot deep green first. Let it dry fully.
Using a pencil, lightly sketch a triangular Christmas tree shape across the front. Fill the tree with two shades of green so it has a slightly layered appearance.
Now take tiny pieces of air dry clay and roll them into miniature balls. Flatten a few between your fingers.
Glue the tiny clay balls onto the painted tree after the paint has dried.
Paint the ornaments red, gold, white and silver.
Add a tiny yellow star at the top.
The raised ornaments give this pot much more dimension than a completely flat painted design.
3. Nordic Snowflake Clay Pot
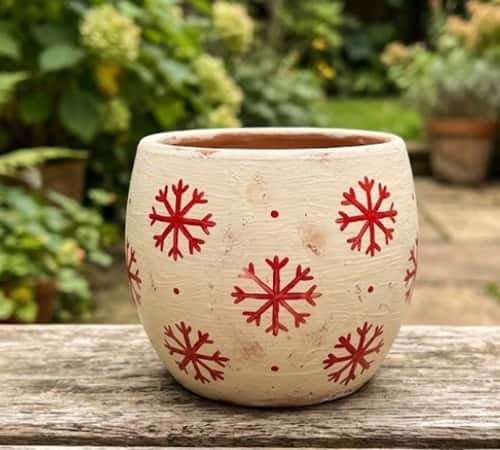
This one has a completely different mood.
Paint the pot a muted cream or warm white. Allow it to dry before adding the pattern.
Use a fine brush to create simple red snowflakes. Don’t try to make every snowflake identical. Handmade variation actually makes the design prettier.
Add tiny red dots between the snowflakes.
For a more Scandinavian look, paint a narrow red line around the upper rim.
This works particularly well with small clay pots used as table planters or candle containers.
4. Reindeer Face Christmas Pot
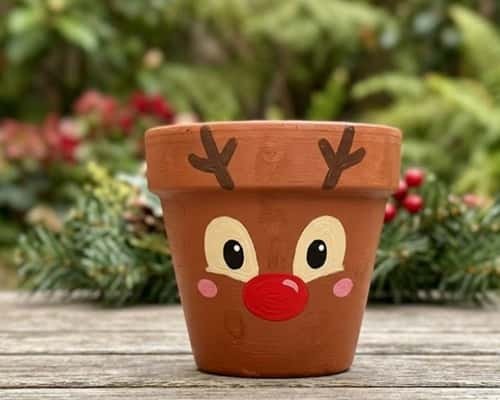
Who says a reindeer has to look complicated?
Paint the pot a warm brown.
Once dry, add two large cream-colored eyes. Paint smaller black pupils inside them.
A red circular nose instantly turns the design into Rudolph.
For antlers, you have two choices. Paint them directly onto the pot or make tiny antlers from air dry clay and glue them on after they harden.
Add two small pink circles for cheeks.
This is also a fun kids painting activity because children can decide how silly or serious their reindeer looks.
5. Christmas Gnome Pot
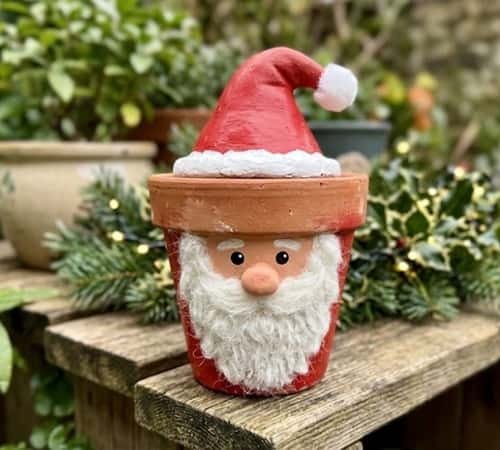
This is one of my favorites for a slightly quirky Christmas display.
Paint the upper section of the pot red.
Leave a small area underneath for the gnome’s beard.
Paint the beard white using short downward brush strokes rather than one solid block of paint. The texture looks much better this way.
Add two black eyes underneath the red hat.
Now make a tiny round air dry clay ball and paint it pink or peach. Glue it between the eyes and beard as the nose.
Finish the hat with a white painted rim.
The result looks almost like a tiny garden gnome hiding inside a flower pot.
6. Candy Cane Stripe Pot
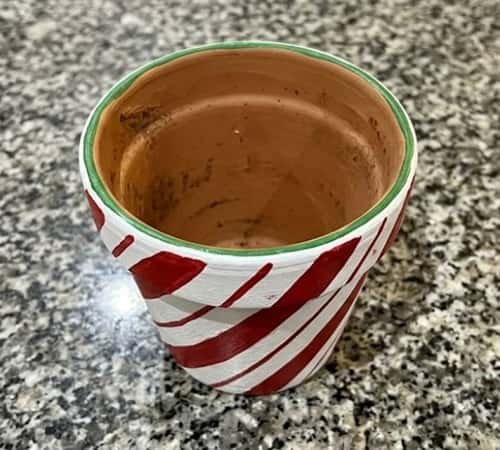
Simple does not mean boring.
Paint the entire pot white and let it dry completely.
Use a pencil to mark diagonal lines running around the pot.
Fill alternate sections with bright Christmas red.
Keep the stripes slightly irregular instead of obsessively perfect.
Add a thin green line along the upper rim if you want another festive color.
These painted flower pots would look lovely grouped together in three different sizes.
7. Christmas Sweater Pattern Pot
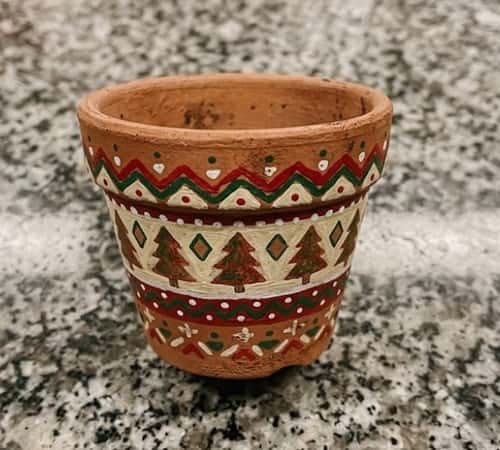
Think of your favorite ugly Christmas sweater, but shrink it onto a pot.
Start with a deep green, red or cream base.
Paint horizontal bands around the pot.
Within those bands, add tiny Christmas trees, diamonds, dots and zigzags.
You don’t need a complicated pattern. Repeating three or four simple shapes is enough.
For children, this becomes a creative activity rather than a strict painting exercise. Let them invent their own sweater pattern.
This is one of those diy pots that can look completely different every time.
8. Christmas Holly Berry Clay Pot
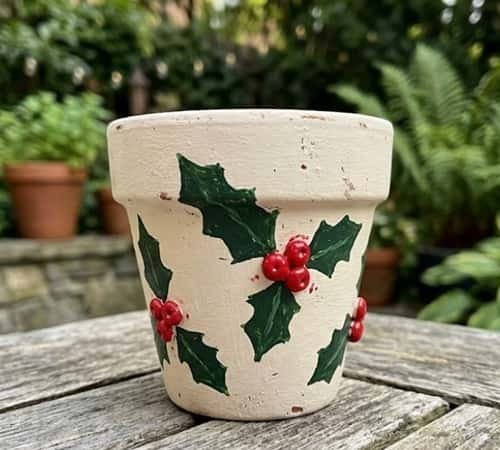
For this design, let the clay itself remain part of the look.
Paint the pot a soft ivory.
Create several clusters of holly leaves using dark green paint.
Then add three or four bright red berries beside each cluster.
Want a raised effect? Make tiny air dry clay balls for the berries instead of painting them.
Once dry, paint them glossy red and attach them with craft glue.
That little bit of dimension makes the pot look far more expensive than the materials actually cost.
9. Snowman Face Clay Pot
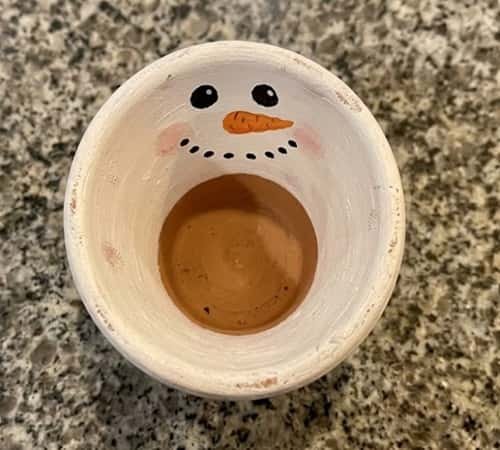
Paint the pot white.
Then use black paint to create two coal-style eyes and a dotted smiling mouth.
Add an orange triangular carrot nose.
Paint two tiny pink circles for rosy cheeks.
For an extra detail, add a narrow black line around the upper rim to imitate a winter hat edge.
This is particularly suitable for kids painting activities because the shapes are large and forgiving.
10. Christmas Night Sky Pot
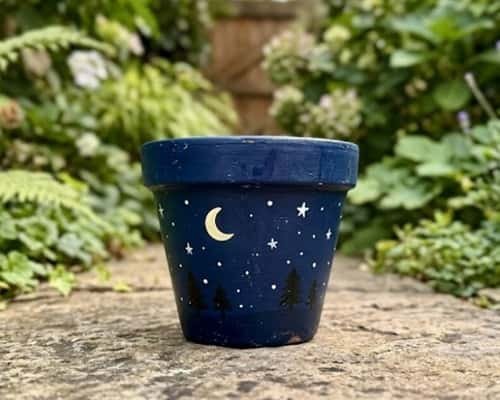
Now let’s make something moodier.
Paint the pot navy blue.
Once dry, use a small brush to add scattered white stars.
Paint a simple crescent moon in pale yellow.
At the bottom, add tiny black or dark-green Christmas tree silhouettes.
You can also add a few white dots around the trees to represent falling snow.
This design works beautifully as a Christmas planter because the dark background makes green foliage pop.
11. Christmas Pudding Pot
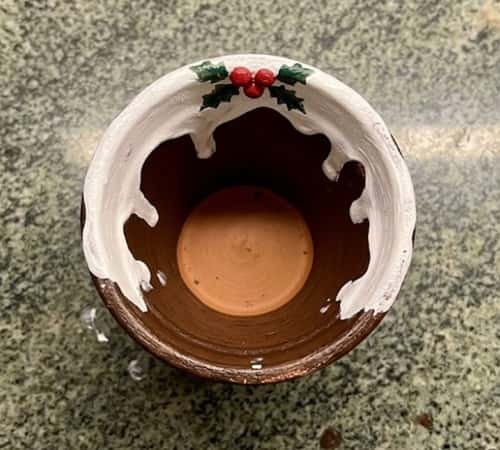
This one is wonderfully unusual.
Paint the pot dark brown to resemble a Christmas pudding.
After it dries, paint a thick irregular white section around the upper portion. Don’t make the edge straight. The icing should look like it is dripping.
Add three small red berries.
Paint tiny green leaves beside them.
For more dimension, use small pieces of air dry clay for the berries and leaves.
The finished pot becomes a playful Christmas centerpiece rather than just another set of painted pots.
12. Tiny Christmas Village Pot
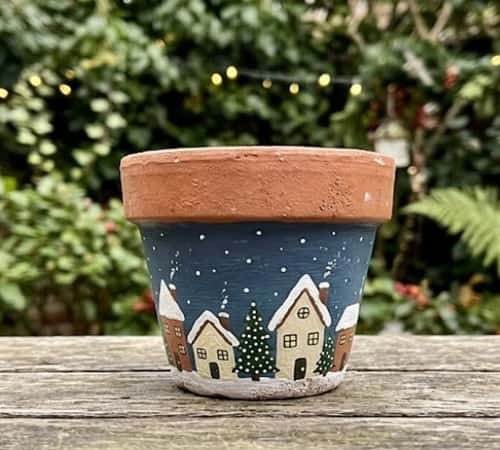
Let’s finish with the most detailed design.
Paint the entire pot a deep blue, cream or muted gray.
Now paint tiny house shapes around the outside.
Give each house a triangular roof.
Add tiny yellow windows and white snow-covered rooftops.
Between the houses, paint miniature Christmas trees.
Don’t worry about perfect perspective. In fact, a little unevenness makes the miniature village feel handmade.
If you’re creating these for selling crafts, this is the design I’d consider turning into a small collection. Make one winter village, one Santa village and one snowy woodland version.
These kinds of pot designs can work as seasonal planters, tabletop decor or handmade Christmas gifts.
Final Thoughts
The trick with Christmas clay pot projects isn’t chasing perfectly smooth paint.
Handmade characters are part of the appeal. If you’re making these as diy clay gifts, leave a little of the clay texture visible instead of covering every inch with heavy paint.
For pots that will sit outdoors, use paint and a sealer intended for exterior use, and remember that terracotta absorbs moisture.
If you’re experimenting with diy garden decor, test your sealer on a spare piece first because some finishes can slightly change the paint color or sheen.
And if you’re thinking about selling crafts, make small coordinated collections rather than twelve completely unrelated pieces. A matching Christmas collection usually feels much more intentional.





