Christmas walls don’t always need expensive ornaments or store-bought signs.
Sometimes, a little air dry clay, some paint and an empty wall is enough to create something surprisingly beautiful.
I especially like clay wall decor for Christmas because the handmade texture makes every piece feel different.
It can be neat, rustic, playful or even a little imperfect. That is the charm!
These Christmas crafts also work well as weekend clay activities with older kids, although some designs are better suited for adults. So, ready to turn a plain wall into a tiny Christmas wonderland?
Choose Your Air Dry Clay Type
Regular Air Dry Clay | Cornstarch Clay | Homemade Clay
Affiliate Disclaimer: Some of the links in this post may be affiliate links, which means I may earn a small commission if you choose to make a purchase through them – at no extra cost to you. I only share products that genuinely fit this project and can help make your ceramic mug clay craft process easier and smoother. Your support helps keep ideas like this coming.
1. Air Dry Clay Christmas Village Wall Plaque
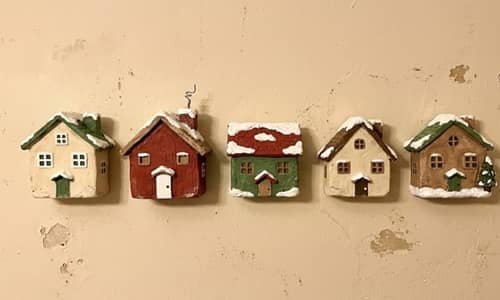
Imagine a tiny Christmas village sitting on your wall. That is exactly what this project creates.
What you need
- Air dry clay
- Rolling pin
- Craft knife
- Toothpick
- Acrylic paints
- Paintbrushes
- Strong double-sided mounting tape or removable wall strips
- Clear matte sealer
How to make it
Start by rolling your clay into a slab about 5 mm thick. Don’t make it paper-thin because the houses can crack or warp while drying.
Cut several simple house shapes. Make them different heights. One can have a triangular roof, another a flat roof and another a little chimney.
Now add windows and doors using a toothpick. Keep the details shallow rather than cutting right through the clay.
For the village base, cut one long curved strip. Place the houses against it while the clay is still workable so you can check the composition.
Let everything dry completely. Depending on thickness and humidity, this can take 24 – 36 hours.
Paint the houses in muted red, cream, green and brown. Add tiny white snow details around the roofs.
Once dry, seal everything and attach the pieces to the wall.
My twist: Leave a little of the raw clay texture visible instead of making everything perfectly smooth. It gives the piece a handmade Christmas-market feel.
2. Rustic Clay Christmas Tree Wall Hanging
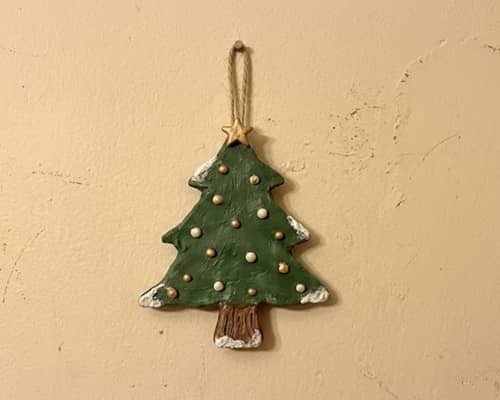
This one is ridiculously simple but can look surprisingly stylish.
Roll out an air dry clay slab and cut a large Christmas tree shape. Use a ruler to make the sides reasonably symmetrical, but don’t worry if they’re slightly uneven.
Press a few shallow lines into the clay to represent branches.
Make a small hole near the top before the clay dries.
After drying, paint the tree deep green. Add tiny cream or gold dots as ornaments.
For a more rustic finish, lightly brush darker paint into the grooves. Wipe the raised areas gently so the texture remains visible.
Thread through a piece of jute or cotton cord and hang it on the wall.
Selling crafts idea: Make three sizes and sell them as a coordinated Christmas wall set rather than individually.
3. Clay Santa Face Wall Medallion
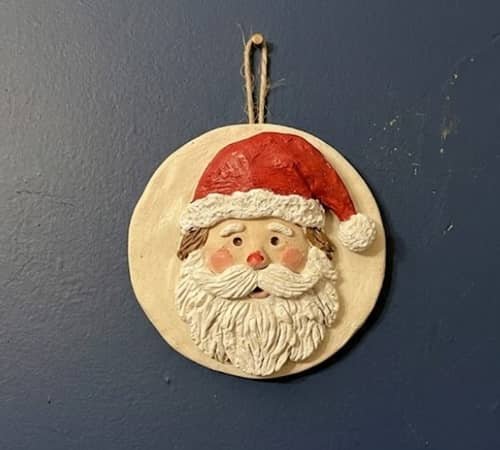
Want something a little more playful?
Create a round clay medallion about 12 cm wide.
Roll the clay evenly and cut a circle using a bowl or cookie cutter as your guide.
Add Santa’s face using separate thin pieces of clay. A small nose, moustache, beard and hat are enough.
Press the pieces gently onto the base while both surfaces are slightly soft.
Don’t use too much water. Excess moisture can weaken the bond.
Dry completely before painting.
Use red for the hat, cream for the face and white for the beard. Add two tiny black eyes last.
A slightly uneven beard actually makes Santa look more handmade.
4. Clay Christmas Wreath With Tiny Clay Berries
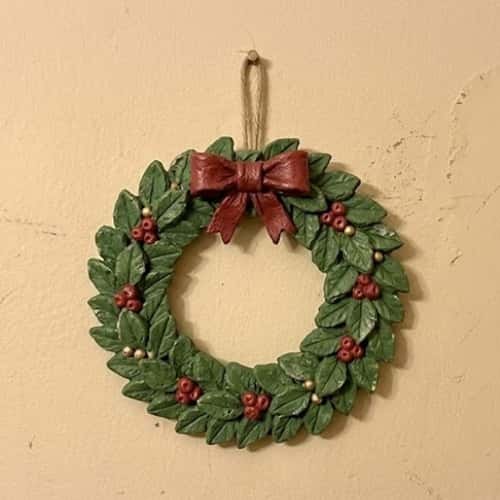
Forget the traditional leafy wreath for a moment.
Roll small clay leaves individually. Make roughly 20 to 30 leaves in slightly different shapes.
Create a thin circular clay ring as the base.
Attach the leaves around the ring, overlapping them slightly.
Add tiny red clay balls between the leaves for berries.
Allow the whole wreath to dry slowly on a flat surface. If you hang it before it has fully hardened, the shape may distort.
Paint the leaves in two or three shades of green. Leave some areas slightly lighter to make the wreath less flat.
Finish with a small clay bow.
This is one of those DIY Christmas decorations that can be customized endlessly.
5. Mini Clay Stocking Wall Trio

Make three little Christmas stockings instead of one large decoration.
Roll clay to about 5 mm thick and cut three stocking shapes.
Add a raised cuff to each stocking using a separate strip of clay.
Before drying, make a tiny hole at the top of each one.
Once hardened, paint them red, cream and green.
You can add small stars, dots or snowflakes.
Hang all three vertically or arrange them in a slight curve.
Why stop at one when three looks more intentional?
6. Clay Snowflake Wall Collection
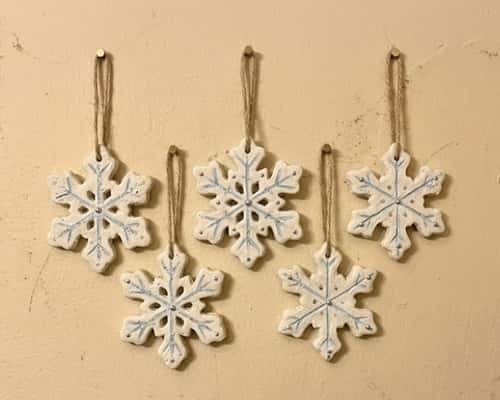
Snowflakes are perfect for beginners because they don’t have to look identical.
Roll several small clay slabs.
Cut simple six-point snowflake shapes using a craft knife or handmade paper template.
Use a toothpick to add grooves and tiny holes.
Make different sizes.
Once dry, paint them off-white instead of bright white. Add a tiny amount of silver or pale blue around the grooves.
Arrange them on the wall like falling snow.
This makes beautiful Christmas wall decor using clay without needing complicated sculpting.
7. Clay Gingerbread House Wall Art
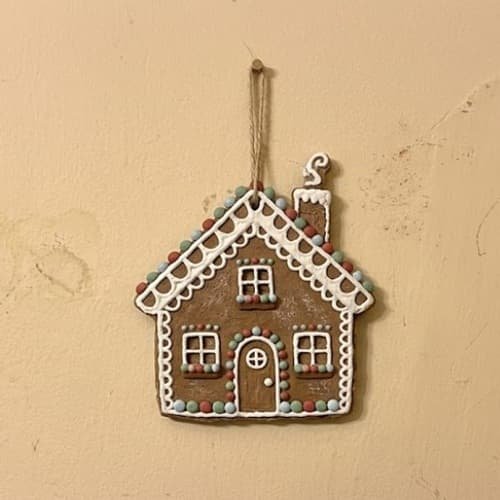
This is one of my favorite ideas for a cozy Christmas wall.
Cut a simple gingerbread-house shape from clay.
Add raised clay icing lines around the roof, door and windows.
Make tiny clay candies from small balls and flattened pieces.
Dry everything completely.
Paint the house warm gingerbread brown. Use white for the icing and tiny red and green details for the candy.
The secret is restraint. Too many decorations can make the piece look messy.
For a vintage inspired Christmas look, use slightly muted colors rather than very bright paint.
8. Clay Christmas Angel Wall Plaque
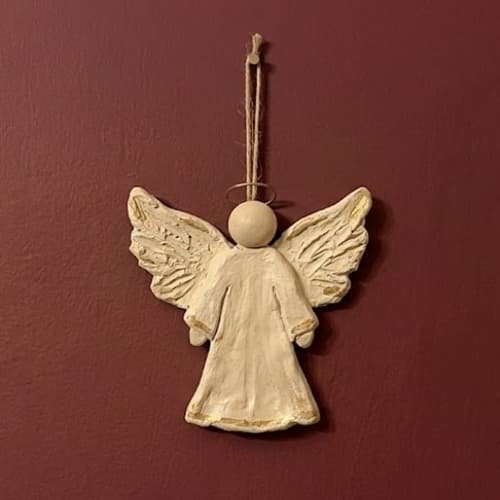
Make a simple angel using three clay components: body, wings and head.
Shape the body into a small cone.
Flatten two pieces for wings and press feather lines into them.
Add a small clay ball for the head.
Join the pieces while the clay is still soft.
Let the entire figure dry before painting.
Cream, white and muted gold work beautifully here.
Don’t try to make the face too detailed. A minimalist face keeps the piece looking handmade rather than toy-like.
9. Clay Christmas Ornament Wall Garland

Instead of putting ornaments on a tree, put them directly on the wall.
Make small round, oval and teardrop-shaped clay ornaments.
Before they dry, punch a tiny hole into each one.
Paint them in a coordinated palette such as red, cream and muted green.
Draw simple patterns with a fine brush.
Thread them onto thick cotton cord after they’re completely dry.
You can hang the garland horizontally or create a gentle downward curve.
It is an easy diy wall decor for christmas using clay and works particularly well above a desk or small empty wall section.
10. Clay Reindeer Head Wall Decor
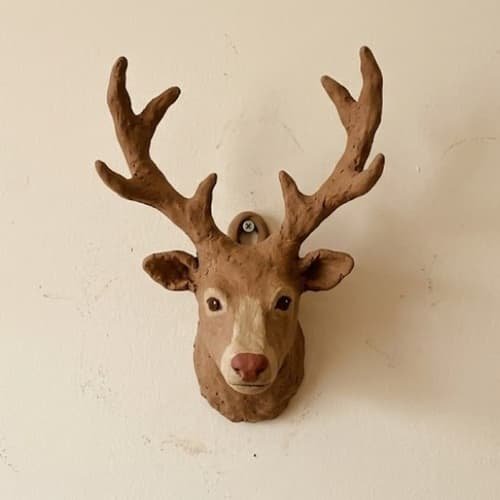
A reindeer silhouette can look much more sophisticated than you might expect.
Draw a simple reindeer head template on paper first.
Roll clay into a slab and place the template over it.
Cut around the silhouette.
Add raised antlers using thin clay strips. Reinforce the connection points by gently pressing them into the base.
Once dry, paint the entire piece warm brown.
Add a small red nose if you want a Rudolph-inspired version.
For a more grown-up look, skip the red nose and add a muted cream patch instead.
11. Clay Christmas Tree Forest
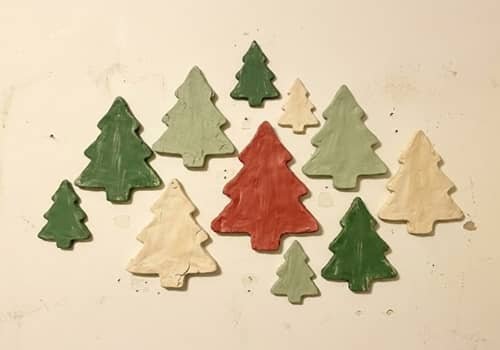
Why make one tree when a whole tiny forest looks better?
Create 7 to 12 miniature flat clay trees in different heights.
Use simple triangular shapes with slightly irregular edges.
Add shallow horizontal grooves to some trees.
Paint them in several Christmas shades: forest green, sage, cream and muted red.
Arrange them in a staggered pattern on the wall.
Keep enough space between them so each little tree remains visible.
This works especially well as a minimalist Christmas wall arrangement.
12. Clay Christmas Bell Wall Hanging

Christmas bells are easy to sculpt and can become a lovely little accent piece.
Roll clay into a small bell shape or use two curved clay pieces joined together.
Add a tiny clay clapper underneath.
Create a small bow above the bell.
Once dry, paint the bell cream, red or muted gold.
Use a darker wash around the grooves to emphasize the handmade texture.
Hang one bell by itself or make three in graduated sizes.
13. Clay Christmas Star Cluster

Finally, here’s a very beginner-friendly one.
Cut several five-point clay stars in different sizes.
Don’t make every star identical. Slight differences make the arrangement feel handmade.
Add tiny dots or shallow lines to a few stars.
Paint them cream, red and muted gold.
Let them dry completely and seal them with a matte finish.
Arrange the stars in a loose cluster rather than a perfect pattern.
It becomes a simple piece of Christmas inspiration that can work on a small empty wall.
Final Thoughts
What makes these air dry clay crafts interesting isn’t perfect symmetry.
It is the tiny variation from one handmade piece to another. That’s also why clay can work beautifully for seasonal selling crafts.
A simple Christmas tree can become a wall set, a personalized family village or even a custom name plaque.
I would also experiment with removable wall strips rather than permanent adhesive, especially for renters.
And don’t forget the back of the piece – adding the finished dimensions and recommended hanging method makes a handmade product feel much more professional.
Your wall doesn’t need to become a giant Christmas display. Sometimes three imperfect little clay pieces create more character than twenty store-bought decorations.





