Have you ever looked at one of those Fimo earrings on Instagram or Pinterest and thought, “I could probably make those myself”? OR At least I along with kids can give it a try? That is exactly where this fimo clay earrings craft comes in.
Instead of buying another perfectly polished pair that looks instagram-worthy, I am going for something much more fun… tiny, slightly imperfect autumn leaf earrings with a soft handmade character.
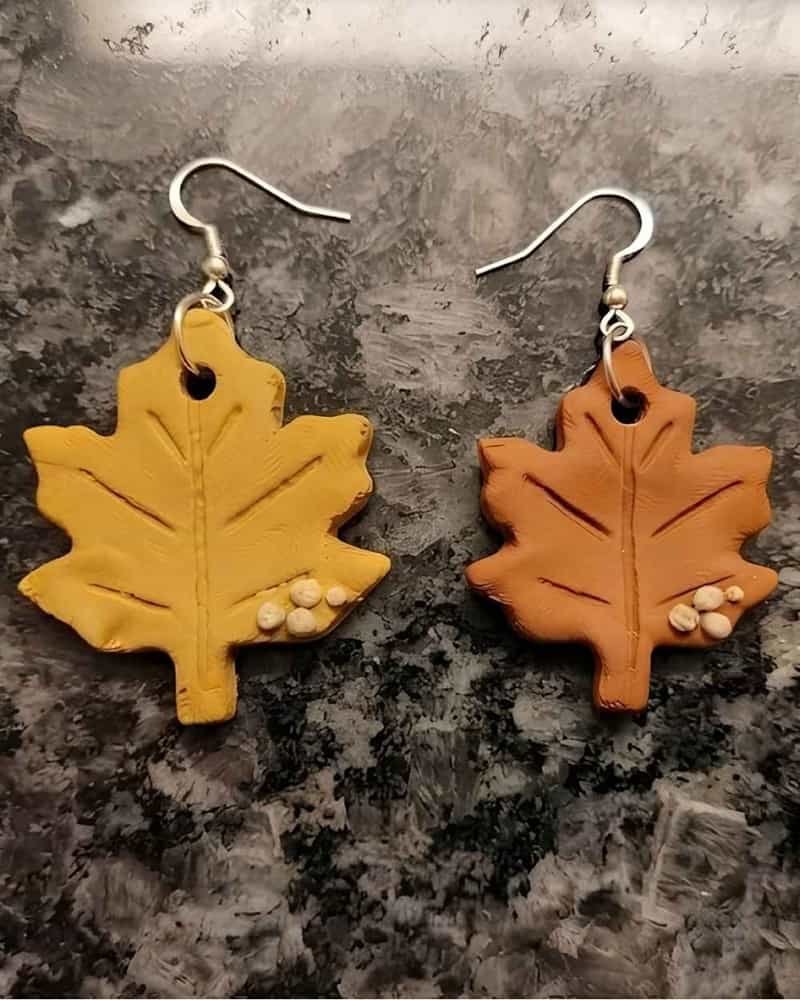
Just look at this design and you’ll realize that they are simple enough for beginners, interesting enough for adults and older kids to help design, and potentially useful if you enjoy making and selling crafts later.
FIMO kids is particularly soft and designed specifically for children, making it a practical choice for supervised clay activities.
What Makes These FIMO Clay Earrings Different?
The fun part is that these are not supposed to look identical.
One leaf can be a little wider. The other might have a slightly deeper vein. Maybe one edge has a tiny fingerprint in it.
And honestly, that is not a mistake here… it becomes part of the handmade personality and since it looks handmade it looks authentic..
We will create a pair of small leaf-shaped earrings using clay and then add simple raised veins, make the hanging holes followed by having an adult bake the finished pieces.
This pair of fimo themed clay earrings also gives kids several little clay activities in one i.e. rolling, flattening, shaping, pressing, pattern-making and colour mixing… therefore making the process enjoyable.
And if you are thinking about fimo clay jewelry, this basic method can become a starting point for many other designs.
Choose Your Air Dry Clay Type
FIMO Clay | Cornstarch Clay | Homemade Clay
Affiliate Disclaimer: Some of the links in this post may be affiliate links, which means I may earn a small commission if you choose to make a purchase through them – at no extra cost to you. I only share products that genuinely fit this project and can help make your ceramic mug clay craft process easier and smoother. Your support helps keep ideas like this coming.
Materials Needed To Make FIMO Clay Earrings
For one pair of simple leaf earrings:
- FIMO kids oven-hardening modelling clay in 2 or 3 colours
- A smooth working surface
- Small rolling pin or smooth cylindrical object
- Child-friendly modelling tool
- Toothpick or similar pointed craft tool, used by an adult or under close supervision
- Baking paper
- Baking tray
- Two small earring hooks or findings
- Two small jump rings
- Jewellery pliers for the adult assembling the earrings
- A ruler, optional
FIMO kids is divided into portions, is particularly soft to shape and comes in a range of bright colours.
Step 1: Choose Your Leaf Colours
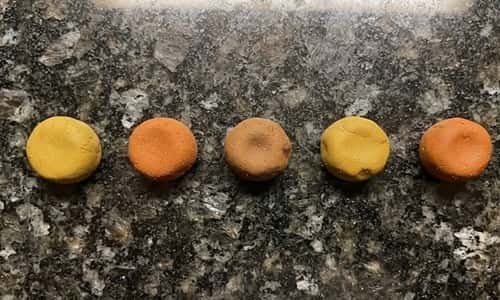
The very first step is to think about the personality of the earrings… so start with the personality of your earrings.
If you are doing it for autumn season for an autumn inspired or fall inspired pair, try mustard yellow with burnt orange, rust with cream, or brown with a muted green, it looks nice.
You don’t need many colours. Two main colours can actually look more interesting than six.
Break off two similarly sized portions for the main leaves. Try to keep the amounts roughly equal because eventually they need to become a matching pair.
Want a more playful result? Mix a tiny amount of one colour into another without completely blending it. That gives the clay a subtle marbled appearance.
No need to overwork it… keep things nice and easy.
I would say little variations are what make these diy earrings feel handmade rather than mass-produced.
Step 2: Soften and Flatten the Clay
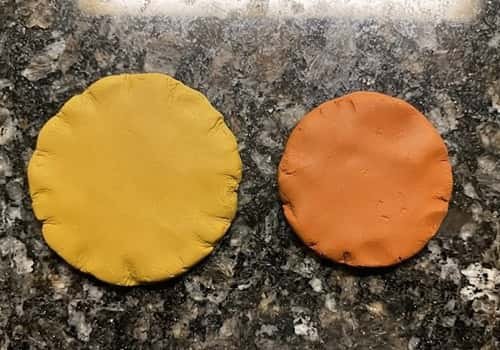
Take the first portion of clay and gently knead it between your fingers.
This is where little hands can really participate.
Press, fold and roll the clay until it feels flexible and smooth enough to shape. Then place it on your clean work surface and flatten it gently.
You are aiming for a slab roughly 2 mm thick.
Don’t make it paper thin as super thin earrings can become fragile, while a slightly thicker piece gives you that extra material or room to create texture without making the earrings ridiculously heavy.
Repeat with the second colour or second portion.
Try to keep both slabs approximately the same thickness, but don’t obsess over perfection.
A tiny difference actually gives the finished pair some personality.
Step 3: Turn the Slabs Into Leaf Shapes
Now comes the satisfying bit.
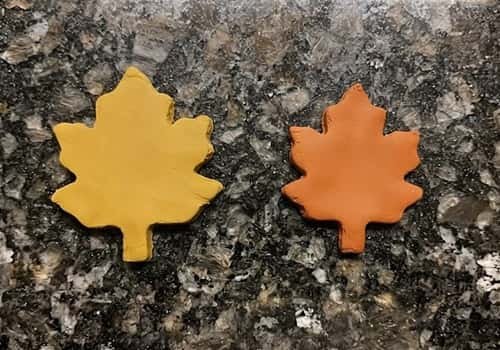
Take one flattened piece and gently pinch one end into a point.
Then curve the opposite end slightly so the overall shape resembles a simple leaf.
You don’t need a perfect botanical shape.
In fact, avoid making it too perfect.
Use your modelling tool to gently trim or define the outer edges if necessary. Then repeat the same process for the second piece.
Place both leaves beside each other and compare them.
Are they wildly different?
Make a few tiny adjustments now.
Maybe shorten one. Maybe widen the other.
The goal isn’t mathematical symmetry; it is visual balance.
In fact, if possible… you can even make one leaf slightly larger than the other for a quirky mismatched style, it looks nice.
And honestly, that little change can turn an ordinary DIY clay earring project into something much more memorable.
Step 4: Add the Leaf Veins
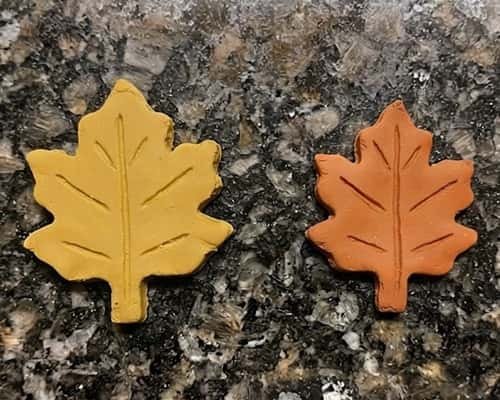
A flat leaf is cute.
A textured leaf is better.
I would say take your modelling tool and then lightly press a central line from the wider end toward the pointed tip of each leaf to make it look attractive.
Don’t cut all the way through.
You’re simply creating a shallow groove.
Now add three or four shorter diagonal lines branching away from the centre.
Keep them irregular.
One line can be slightly longer. Another can curve a little.
This is basically a miniature clay sculpture technique, except you’re creating texture rather than building a three-dimensional figure.
If you’re doing this with children, this is a great point to let them invent their own patterns.
Maybe they want zigzags.
Maybe dots.
Maybe little hearts.
Who said every leaf needs to look botanically accurate?
Step 5: Make the Hanging Holes
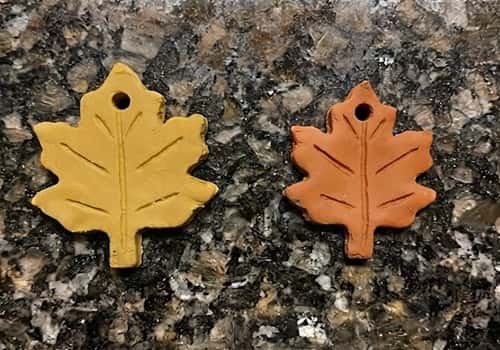
This tiny detail matters more than it looks.
Without a hole, you have two cute clay leaves.
With a hole, you have earrings.
Position the hole near the top of each leaf, leaving enough clay around it so the edge doesn’t become too thin.
An adult or closely supervised older child can use a pointed tool to make the hole.
Push straight through carefully.
Then gently rotate the tool once to make sure the opening is clear.
Don’t make the hole extremely close to the edge.
You need enough material around it to support the jump ring later.
Check both pieces side by side.
The holes should be positioned at approximately the same height.
Step 6: Add One Tiny Handmade Detail
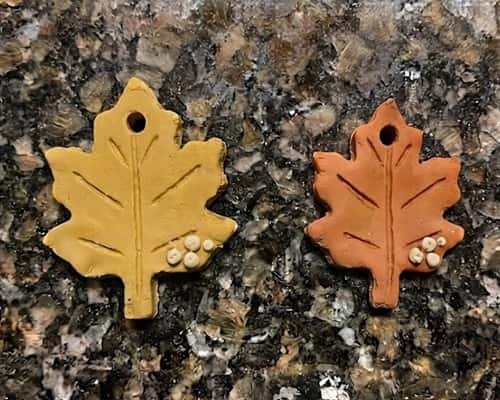
Here’s where we give the earrings their own identity.
Take a very tiny piece of contrasting FIMO clay.
Flatten it.
Then add one small dot, stripe, crescent or tiny accent to each leaf.
For an autumn theme, a little cream-coloured dot can look lovely against rust orange.
Don’t cover the whole leaf.
The detail should feel like a small surprise.
Press it gently enough that it attaches to the surface without completely flattening the texture underneath.
If you are making these as fimo clay autumn earrings, try using earthy colours rather than extremely bright ones.
And if your child is making them, let them choose the accent.
The strange colour combination they pick might actually turn out surprisingly good.
Step 7: Prepare the Earrings for Baking
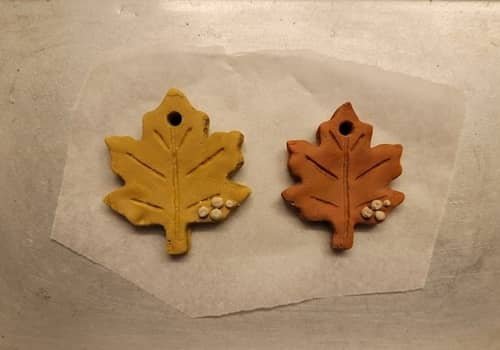
Before baking, inspect both pieces carefully.
Check that the holes are still open.
Check that the clay isn’t touching another piece.
Check that the leaves haven’t become accidentally bent while you were decorating them.
Place the finished pieces on baking paper on a baking tray.
Now stop.
This is the adult’s job.
FIMO kids instructions specify 110°C/230°F for 30 minutes, and the manufacturer says the oven temperature should be checked accurately and the hardening process supervised by an adult.
Do not improvise a higher temperature because you want the project to finish faster.
After baking, allow the pieces to cool completely before handling them.
They become fully hardened as they cool.
Step 8: Add the Jewellery Findings
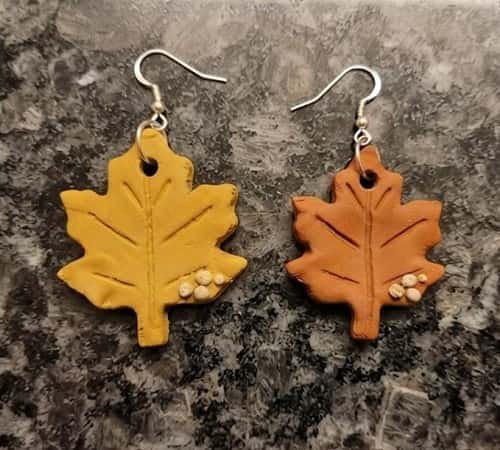
Once completely cool, inspect the earrings one more time.
If a little clay has partially covered a hole, gently clear it.
An adult can now attach a small jump ring through each hole.
Open the jump ring sideways rather than pulling it apart, place it through the clay hole, add the earring hook, and close the ring securely using jewellery pliers.
Repeat with the second leaf.
And that’s it.
Your little clay slabs have officially become wearable diy earrings.
Keep the findings lightweight because the whole charm of this project is having small, comfortable handmade pieces rather than heavy statement earrings.
If you’re making these purely as a craft project, you can also skip the jewellery findings and turn the leaves into clay ornaments, bag charms or decorative tags.
Common Beginner Mistakes to Avoid
Making the clay too thin: Thin pieces can be more fragile, especially around the hanging hole.
Putting the hole too close to the edge: Leave enough clay around it for strength.
Overworking the surface: Fingerprints are fine, but excessive handling can make your texture disappear.
Making both earrings perfectly identical: They don’t need to be factory twins.
Forgetting the hole: It sounds obvious, but people absolutely do this.
Guessing the baking temperature: Don’t. Follow the instructions for the exact FIMO product you are using. For FIMO kids, STAEDTLER lists 110°C for 30 minutes and recommends an accurate oven thermometer.
Can Younger Kids Make This Project?
Yes, with an important distinction.
FIMO kids is specifically developed for children and its soft consistency makes it easier for little fingers to manipulate. STAEDTLER also notes that modelling activities can support creativity, spatial perception and fine motor skills.
But the finished earrings still require an oven-hardening stage.
So think of this as a shared clay craft project rather than something a young child completes independently.
Let the child choose colours.
Let them knead the clay.
Let them flatten it.
Let them design the leaf veins.
Let them decide whether the earrings should match.
The adult handles the oven and jewellery assembly.
That division actually works nicely because the child gets the creative part without being exposed to the hot equipment.
Final Thoughts
The best thing about making fimo clay earrings isn’t really the finished jewellery.
It is learning how a very ordinary lump of clay can become something with a recognizable personality.
A slightly crooked leaf can look more handmade than a flawless one, and that is useful knowledge if you’re exploring selling crafts.
Buyers often notice the little design decisions – the colour combination, texture and shape—that make an item feel individual.
Once you understand those basics, you can move beyond earrings into miniature clay ceramics, charms, ornaments and other diy clay projects.
Start small, experiment often, and don’t smooth away every imperfect fingerprint. Sometimes that tiny imperfection is the part people remember.





