A Handmade Rakhi has a charm that no store-bought thread can really replace.
During raksha bandhan, I always enjoy making one from scratch because every tiny detail carries a little memory.
Have you ever noticed how a simple handmade thread somehow feels much more valuable than an expensive gift? This project is beginner-friendly, fun for families, and works beautifully as a kids craft too.
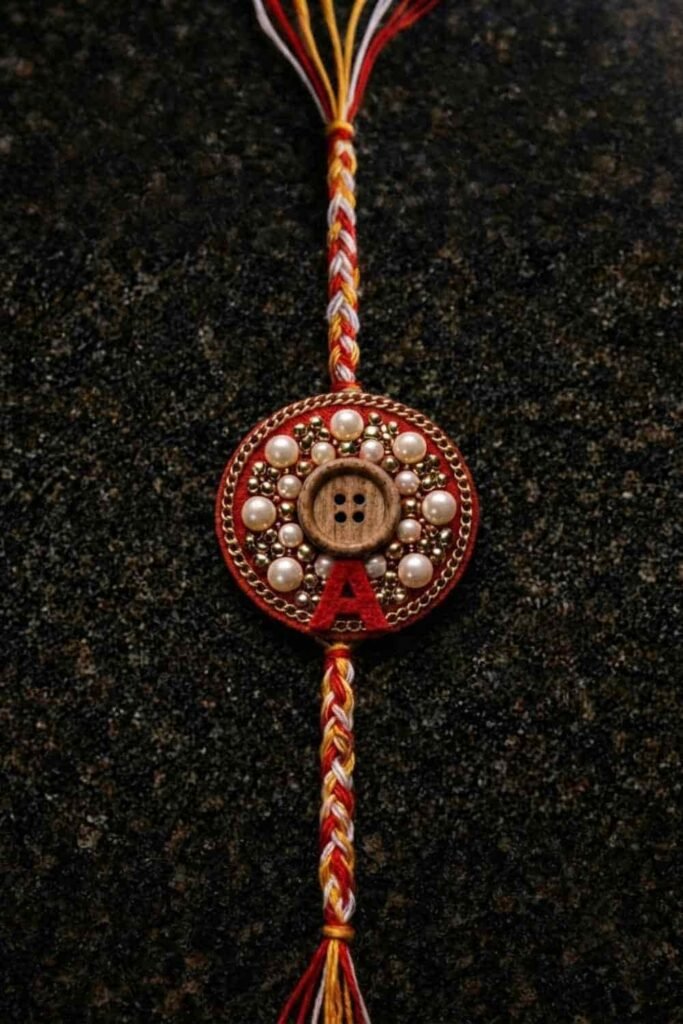
Whether you’re searching for DIY handmade rakhi, easy handmade rakhi designs, or simply want a meaningful craft to enjoy together, this tutorial walks through every single step without making things confusing.
Materials You’ll Need To Make Handmade Rakhi
- Thick felt sheet (red, yellow, or orange)
- Cotton embroidery thread (3 colors)
- Satin ribbon (optional)
- Small wooden button (1)
- Tiny flat-back pearls
- Golden bead chain or decorative lace
- Craft glue
- Sharp scissors
- Pencil
- Ruler
- Small round coin (for tracing)
- Needle (optional)
- Transparent glue dots (optional)
Difficulty: Easy
Time Required: 25 to 35 minutes
Step 1: Create The Felt Base
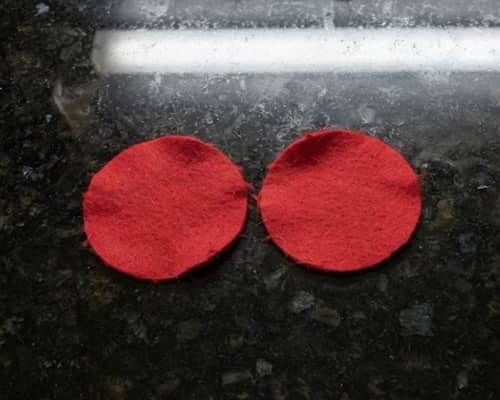
Start with a felt sheet because it gives the rakhi enough strength without becoming bulky.
Place a small coin over the felt and lightly trace two identical circles about 1.75 inches wide.
Cut both circles carefully since uneven edges become noticeable later.
One circle becomes the front while the second one supports everything from behind.
Sounds simple, right? It really is. Don’t rush this part because a neat foundation makes the finished rakhi look much cleaner.
I almost skipped measuring once and it weren’t nearly as balanced as I expected.
Step 2: Build A Raised Center
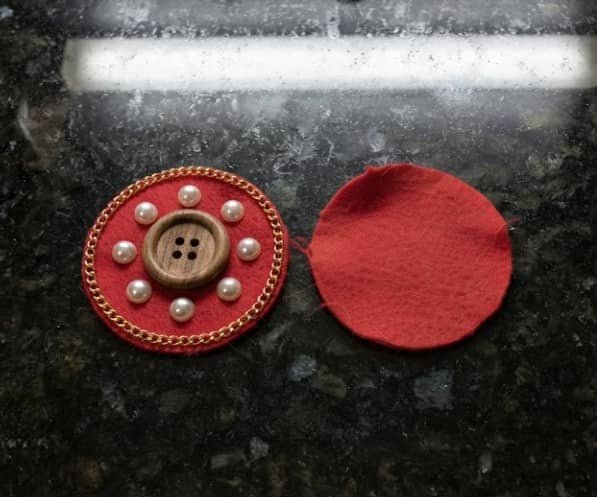
Take one felt circle and glue a wooden button directly in the middle.
Now arrange six tiny pearls evenly around the button, almost like flower petals.
Next, wrap a thin golden decorative chain around both the button and pearls to frame the design.
Suddenly it starts looking like a proper rakhi instead of random supplies.
Isn’t it satisfying when the pattern finally appears? Leave everything untouched for five minutes so the glue grabs properly.
The pearls doesn’t have to be perfectly identical, and that’s part of its handmade charm.
Step 3: Prepare The Rakhi Thread
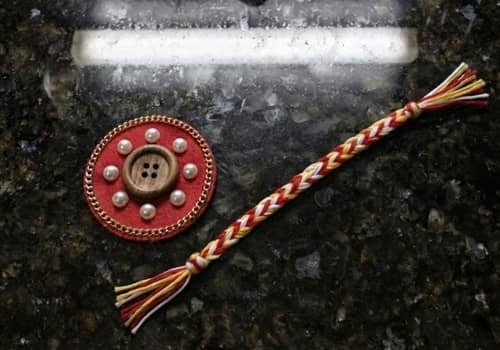
Choose three embroidery thread colors like red, yellow, and white.
Cut strands around 18 inches long.
Fold them together and tie one end securely before making a simple three-strand braid.
Keep gentle tension while braiding because loose sections may twist later.
Once finished, knot the opposite end too.
The braid don’t need to be factory perfect.
In fact, tiny imperfections remind everyone that this is genuinely handmade instead of machine produced.
Step 4: Assemble Everything Together
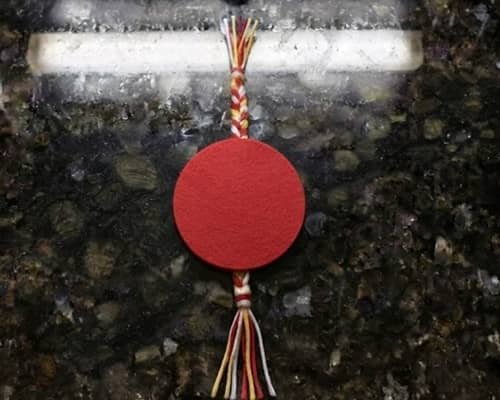
Turn the decorative felt piece upside down.
Place the braided thread horizontally across the center of the back.
Add the second felt circle over it like a sandwich and glue firmly so the thread becomes trapped securely inside.
Press gently using your fingers for about one minute.
This hidden construction makes the rakhi stronger and gives it a polished finish.
Looking better already, isn’t it? Wait another five minutes before decorating further so nothing shifts while drying.
Step 5: Finish With Tiny Decorative Details
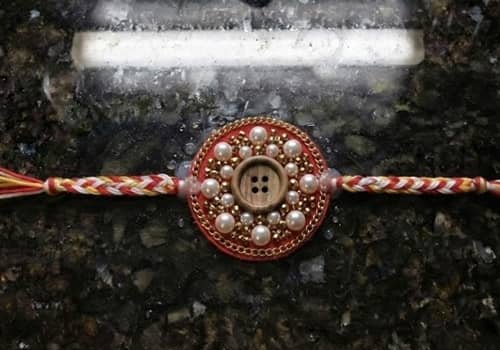
Add three miniature pearls above and below the center flower.
Glue two tiny golden beads on each side for extra sparkle without overwhelming the design.
Less decoration often creates a richer appearance than covering every empty space.
If you’re exploring latest handmade rakhi designs, you’ll notice many modern styles actually keep the embellishments minimal.
This step transforms a simple home made rakhi into something that looks thoughtfully designed while still feeling personal.
Step 6: Check Strength Before Tying
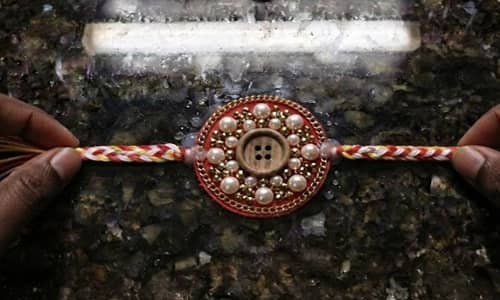
Hold both thread ends and gently pull several times to confirm the felt backing grips tightly.
Trim away any dried glue strings with small scissors.
If a pearl feels loose, add one tiny drop of glue instead of covering the entire surface again.
This quick inspection only takes a minute but prevents surprises during raksha bandhan celebrations.
I always does this before gifting one because a strong rakhi lasts much longer throughout the day.
Step 7: Personalize Your Handmade Rakhi
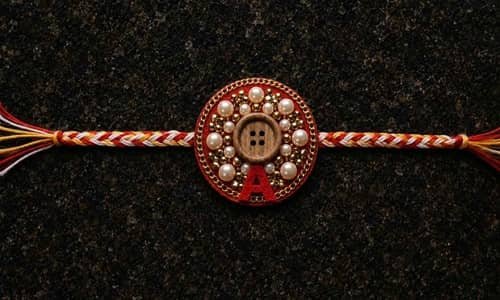
Want to make it even more memorable? Write your brother’s initial on a tiny felt heart and glue it beneath the center flower, or replace the wooden button with a miniature clay charm.
Small personal touches often mean far more than expensive decorations.
These ideas work wonderfully for home made rakhi designs, home made rakhi ideas for brother, classroom activities, and creative DIY projects alike.
After all, isn’t that what raksha bandhan celebrates… relationships made stronger through thoughtful effort instead of perfection?
Helpful Tips
- Use fabric glue for better durability.
- Let each glued layer dry before adding the next.
- Keep embellishments lightweight.
- Felt is easier than cardboard for beginners.
- Younger children should use child-safe scissors with supervision.
- Mix colors to create your own easy handmade rakhi designs instead of copying existing patterns exactly.
Final Thoughts
Making a Handmade rakhi craft is more than finishing another seasonal activity.
Every choice, from the thread colors to the tiny pearls, quietly tells a story that can’t be picked off a store shelf.
That’s why many traditional craft techniques still stay relevant even today.
A carefully made DIY handmade rakhi also becomes a wonderful keepsake long after raksha bandhan ends, especially when little fingerprints, uneven cuts, or slightly crooked decorations remain visible.
Those tiny imperfections aren’t mistakes at all… they’re proof that someone invested real time, patience, and affection into creating something truly one of a kind.





