There is something ridiculously fun about turning Mickey Mouse’s instantly recognizable shape into tiny handmade creations.
These minimuse clay crafts for kids take inspiration from his round ears, cheerful face, red-and-yellow color palette and playful personality, then turn them into projects children can actually make.
I wanted these to be more than ordinary kids clay crafts, so each idea has its own little twist.
Some become decorations, some are pretend-play pieces and others can become tiny gifts.
Grab some air dry clay and let the imperfections stay. After all, handmade doesn’t need to look factory-made.
Choose Your Air Dry Clay Type
Regular Air Dry Clay | Cornstarch Clay | Homemade Clay
Affiliate Disclaimer: Some of the links in this post may be affiliate links, which means I may earn a small commission if you choose to make a purchase through them – at no extra cost to you. I only share products that genuinely fit this project and can help make your ceramic mug clay craft process easier and smoother. Your support helps keep ideas like this coming.
1. The Classic Mini Mickey Face
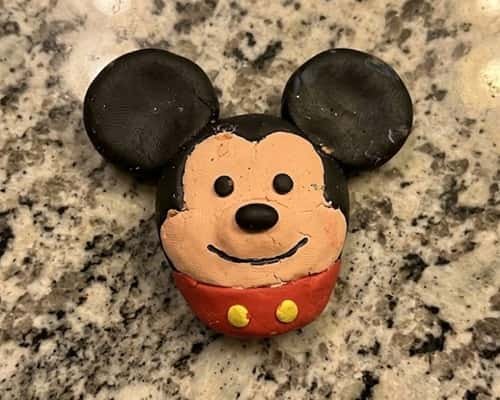
Let’s start with the shape everybody recognizes.
Take a small piece of black air dry clay and roll it between your palms until you have a ball.
Don’t make it perfectly smooth. A few fingerprints actually make the finished air dry clay craft look more handmade.
Flatten the front very gently.
Now comes the important part i.e. the ears.
Make two smaller black balls and flatten them slightly. Push them onto the back-left and back-right sides of the head.
Keep the ears almost the same size. If one is a little wonky, leave it. Perfect symmetry can actually make a child’s clay sculpture look less interesting.
For the face, add two small cream or peach-colored pieces. Place tiny black dots over them for the eyes.
A small oval nose goes in the centre.
Then add a simple smiling mouth.
Finish with tiny red and yellow details underneath the face to suggest Mickey’s famous outfit.
The twist: instead of painting the entire character afterward, use colored clay for the major areas. It gives the project a richer, tactile finish.
2. Mickey’s Tiny Red Shorts
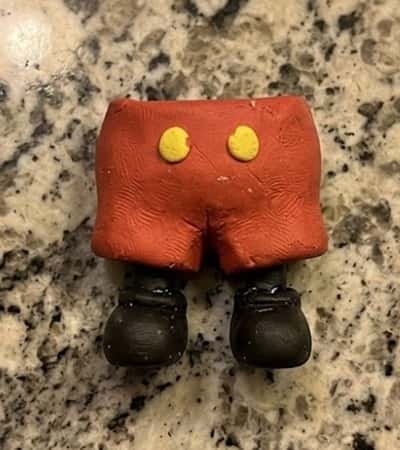
What if we skip the face entirely and make the clothing the star?
This is a surprisingly good diy clay craft for kids because the shapes are simple.
Start with red air dry clay and roll it into a thick little rectangle. Flatten the front slightly. Now pinch the middle to suggest two tiny shorts legs.
Add two small yellow clay circles.
That’s basically the recognizable part.
For extra character, use a toothpick to create a shallow seam between the legs. You can also make tiny black shoes underneath, but don’t make them too thin because they’ll be difficult to attach.
I would leave the surface slightly rough rather than smoothing it endlessly.
Once dry, add a very thin coat of red acrylic paint if the color needs strengthening.
This works especially well as part of a larger collection of clay craft projects featuring Mickey-inspired objects.
3. Make a Mickey Ear Clay Bowl
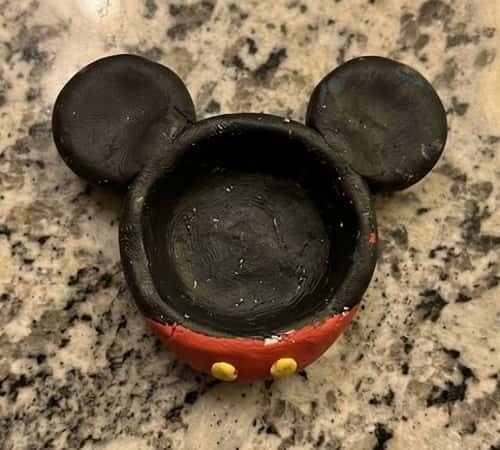
Now let’s make something useful.
Roll black clay into a thick ball.
Press your thumb into the middle.
Keep turning the piece while gently pushing outward. You’re trying to create a shallow bowl rather than a deep cup.
Once the centre looks right, attach two flattened black clay circles to the outside edge.
Those are the ears.
The bowl suddenly becomes Mickey-inspired without needing a complicated face.
Add two tiny yellow clay circles near the front if you want a clothing-inspired detail.
Kid-friendly trick: place a small rolled ball of clay underneath while shaping the bowl. It gives you something to work around and helps prevent the bottom becoming completely flat.
Let the bowl dry naturally. Don’t rush it with strong heat because uneven drying can cause cracking.
This makes a particularly cute desk trinket holder, although I wouldn’t use an ordinary air dry clay version for food unless the clay manufacturer specifically says it is suitable and properly sealed.
4. A Mickey Mouse Clay Pencil Buddy
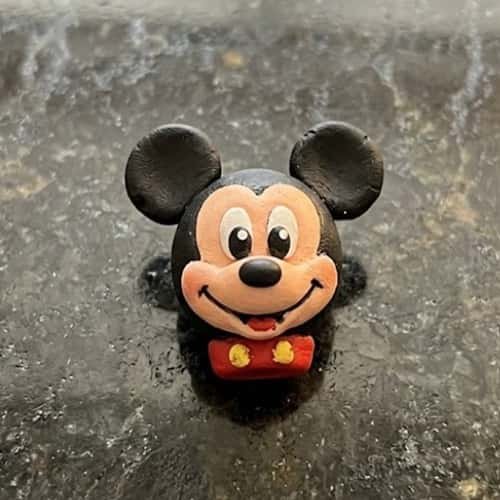
This one is almost like giving a pencil its own tiny character.
Make a small black clay ball first.
Then flatten only the front.
Two smaller balls become the ears. Press them into place while the head is still soft.
Now create the face with tiny pieces of cream, black and red clay.
Here is where I would make the character deliberately expressive. Give him oversized eyes. Maybe a tiny smile. Perhaps one eyebrow raised.
Push the pencil gently into the bottom.
Remove it again.
That hole is going to become your pencil opening.
After the piece dries, slide it back onto the pencil.
Don’t make the topper too large or heavy. Otherwise it will keep tipping the pencil over.
Mini challenge: Can your child make three expressions – happy, surprised and sleepy?
That turns one clay activity into a little character-design exercise.
5. Mickey as a Tiny Clay Magnet
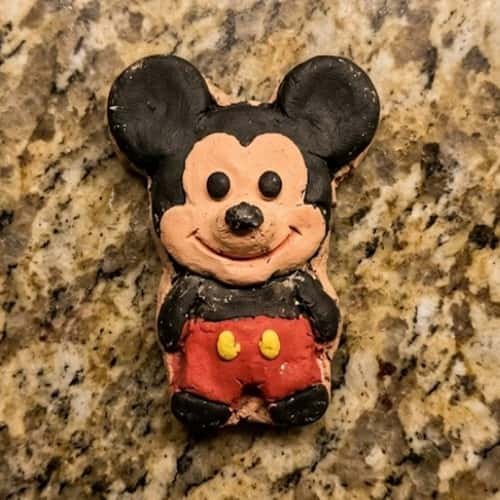
Here’s a fun one for the refrigerator.
Instead of making a complicated full-body figure, create Mickey’s face as a chunky medallion.
Flatten a piece of black clay into a thick disc.
Add the ears.
Then build the face upward with separate pieces. Cream cheeks. Black nose. Small smiling mouth.
Don’t paint everything black afterward. Leaving some of the natural clay texture exposed makes the little character much more interesting.
When completely dry, glue a suitable craft magnet onto the back with adult supervision.
And there you have it – a tiny Mickey-inspired fridge decoration.
One important detail: keep the magnet securely attached and away from very young children because loose magnets can be dangerous if swallowed.
6. Mickey’s Little Clay Flower Pot
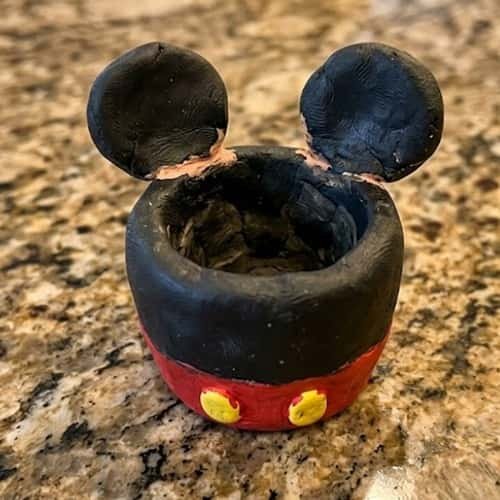
This one takes the famous mouse shape and sneaks it into a home-decor project.
Imagine a tiny black pot.
Now imagine two round ears sticking from either side.
That’s the whole visual trick.
Shape your pot first by rolling a ball of black clay and slowly pressing your thumb into the centre. Widen the opening gradually. Keep the walls reasonably thick.
Once the shape is stable, add two flattened black circles to the upper sides.
Let it dry.
Then paint two yellow circles near the front and add a tiny red band around the lower portion.
Cute? Very.
For actual plants, I’d use a properly manufactured plant pot.
This version is better treated as a decorative diy clay sculpture or miniature display piece unless your particular clay and sealant are suitable for that use.
7. Turn Mickey Into a Tiny Clay Donut
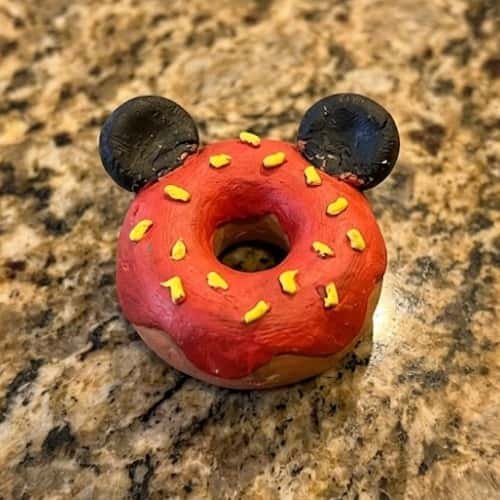
Okay, this one gets playful.
Take beige or light brown clay and make a small donut shape.
Poke the centre through.
Now cover the top with a thin layer of red clay or paint it red after drying.
Add two tiny black circular pieces near the top.
And suddenly the donut has a Mickey-inspired personality.
For the ears, don’t use huge pieces. Two small black circles are enough.
Add yellow sprinkles if your child wants to connect it with Mickey’s classic color palette.
The result doesn’t need to look like a character’s face. The silhouette does most of the work here.
This would be adorable in a pretend bakery collection alongside tiny clay cupcakes, cookies and cakes.
8. Mickey’s Mini Clay Picture Frame
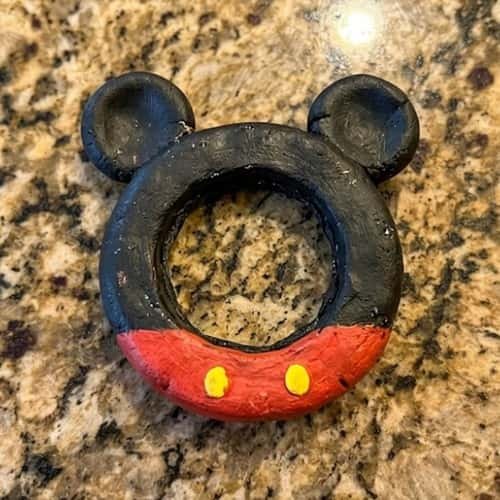
This idea is a little different because the Mickey shape becomes the frame itself.
Cut a thick black clay circle.
Carefully remove the centre while the clay is still soft.
You now have a chunky ring.
Attach two black clay circles at the top.
That’s your basic Mickey silhouette.
After drying, paint the outer section black again if needed. Add a thin red strip around the bottom and two tiny yellow dots.
A photograph can later be placed behind the opening, but for the craft photograph itself, keep the frame empty.
Why I like this one: children learn that clay doesn’t always have to become a three-dimensional figure. Sometimes the outline is enough.
That’s a useful lesson when moving from basic kids clay crafts toward more creative clay sculpture work.
9. A Mickey-Inspired Clay Coin Dish
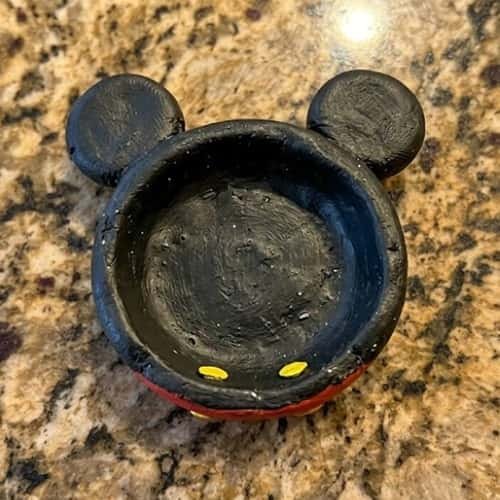
Let’s make this one almost ridiculously simple.
Roll black clay into a thick disc.
Pinch the edges upward.
Keep rotating it between your fingers until it resembles a shallow dish.
Now add two black ears to the outer edge.
Once you see the silhouette, stop.
Seriously.
You don’t need to cover it with twenty tiny details.
Add two yellow dots on the front and a little red strip underneath them. Those small accents are enough to make the Mickey connection obvious.
After drying, this can hold paper clips, erasers or other lightweight desk items.
It could even become part of a child’s pretend Mickey-themed bedroom setup.
10. The Mini Mickey Clay Face Badge
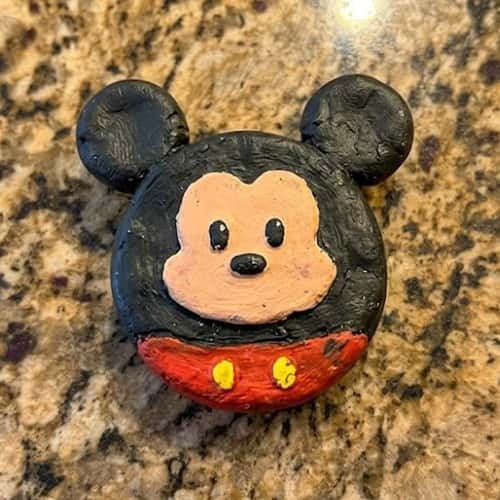
This is where your child can experiment with layers.
Think of the face as a tiny stack.
Bottom layer: black head.
Second layer: two black ears.
Third layer: peach face.
Fourth layer: eyes and nose.
Final layer: red and yellow clothing detail.
Press each piece down gently rather than flattening everything together.
That gives the badge a raised, almost miniature relief-sculpture appearance.
Once dry, you can leave it as a little display piece or attach an appropriate craft backing with adult supervision.
The raised construction is also a nice way to introduce children to basic clay sculpture techniques without making the project complicated.
11. Mickey’s Tiny Clay Story Character
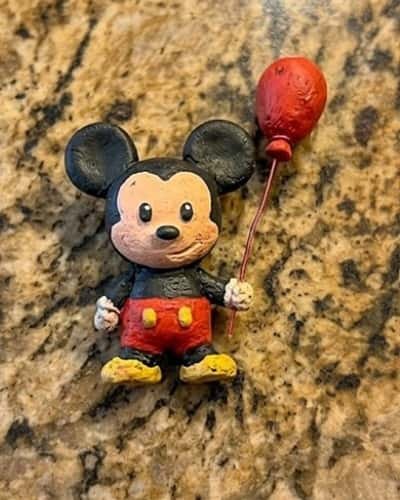
This one isn’t about making an object.
It’s about making a character.
Start with a small black clay head. Make the ears oversized because exaggerated proportions make miniature characters more expressive.
Add a peach face.
Then give your character a tiny red body and yellow shoes.
Now change one thing.
Maybe he is holding a tiny clay balloon.
Maybe he has a little hat.
Maybe his ears are tilted slightly.
Ask your child: What is Mickey doing today?
That question changes the project from a simple clay Mickey Mouse crafts for kids session into storytelling and imaginative play.
The character doesn’t have to perfectly copy an official Mickey design. The idea is to use recognizable visual cues and let your child’s imagination take over.
12. The Mini Mickey Clay Puppet
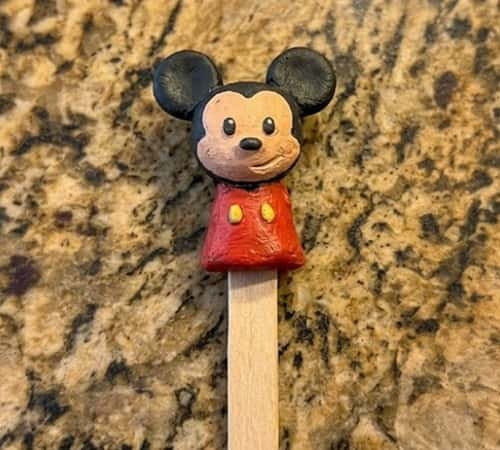
And finally, let’s make something that isn’t just for looking at.
Create a small Mickey-inspired head using black clay.
Make the ears slightly thicker than usual.
Add the face and simple red-and-yellow clothing details.
Let everything dry completely.
Then attach the finished clay character to a wooden craft stick using strong adhesive, with an adult doing the gluing.
Now your child has a miniature puppet Mickey Mouse character.
But here’s my favorite twist: make a second character with a different expression.
Maybe one is happy.
The other looks surprised.
Suddenly two tiny clay figures can become the beginning of a little puppet show.
This is also a great way to combine clay activities, storytelling, role-play and fine-motor practice in one afternoon.
If you eventually make several original characters, accessories and scenes, you could even explore the idea of selling crafts as a supervised family project.
Kids can learn about creativity and presentation without turning every craft session into a business.
Final Thoughts
The interesting thing about character-based minimuse clay crafts for kids is that children are really learning visual shorthand.
Two black circles can suggest ears.
A red shape can suggest clothing.
A simple face can suddenly give a lump of clay a personality.
That is a powerful creative skill. I’d also encourage kids to change one feature instead of copying every detail.
Make the ears huge, create a sleepy expression or invent a tiny accessory.
Those small decisions turn imitation into original design. And when the clay dries, don’t throw away the imperfect pieces.
Those fingerprints, uneven edges and little color mistakes are evidence that a child actually made it.





