Valentine’s Day crafts do not always need glitter, paper hearts, or complicated supplies.
I love the slightly imperfect look of handmade clay, especially when it turns into something useful.
These clay lanterns for valentines day combine simple clay building with soft heart-shaped cutouts, tiny windows, flowers, stars, and cozy patterns.
The best part? Most of these designs can be made with air-dry clay and basic household items.
Kids can roll, press, cut, decorate and personalize them without needing fancy tools.
Looking for a cute valentines day craft that can double as room decor or a handmade gift? Let’s make these little lanterns!
Choose Your Air Dry Clay Type
Regular Air Dry Clay | Cornstarch Clay | Homemade Clay
Affiliate Disclaimer: Some of the links in this post may be affiliate links, which means I may earn a small commission if you choose to make a purchase through them – at no extra cost to you. I only share products that genuinely fit this project and can help make your ceramic mug clay craft process easier and smoother. Your support helps keep ideas like this coming.
Before You Start… A Kid-Friendly Clay Lantern Setup (if Kids want to join)
For these diy clay valentines day lanterns, I recommend using air-dry clay rather than anything that needs a kiln, oven or high heat.
You will need:
- Air-dry clay
- Rolling pin or smooth bottle
- Plastic knife or clay tool
- Drinking straw
- Small cookie cutters
- Pencil or blunt skewer
- Water in a small cup
- Baking paper
- Battery-operated LED tea light
Important: Use an LED tea light, not a real candle. That keeps these clay activities suitable for children and removes the flame and heat hazard.
Before adding any light, make sure the clay is completely dry.
1. Heart Window Clay Lantern
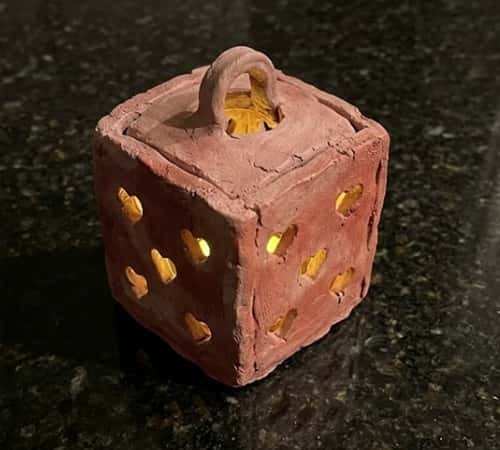
This is the one I would make first with kids.
Roll the clay into a slab about 5 mm thick.
Cut four rectangles of roughly equal size for the walls. Make a slightly smaller square or rectangle for the base.
On each wall, cut several small hearts using a tiny heart cutter. If you don’t have one, draw a heart and carefully cut around it with a plastic clay tool.
Join the four walls around the base. Lightly score both edges first, add a tiny amount of water, then press them together. Smooth the inside seams with a damp fingertip.
Leave the top open.
Once the lantern has dried, add an LED tea light underneath. The little hearts will glow beautifully when the light shines through them.
2. Pink Love-Letter Lantern
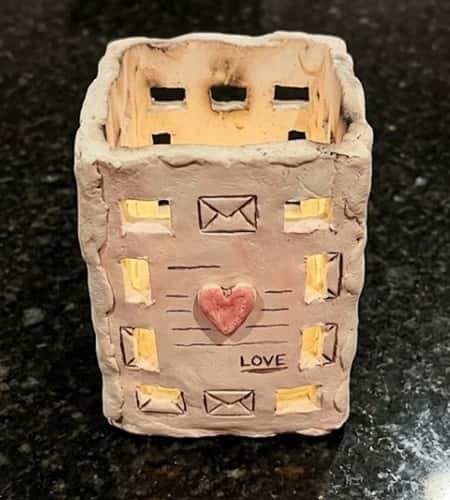
Want something a little different?
Instead of cutting hearts everywhere, create a lantern inspired by an old-fashioned love letter.
Build a simple four-sided clay lantern using the slab method. Keep the walls fairly plain.
While the clay is still soft, press tiny rectangular openings into two sides.
Then use a blunt pencil to draw simple lines underneath the openings, almost like writing on paper.
Add a tiny raised heart near the top corner.
For children, don’t worry about creating actual words. Random little lines look more handmade anyway.
Let it dry completely before placing an LED light inside.
3. Strawberry Heart Clay Lantern
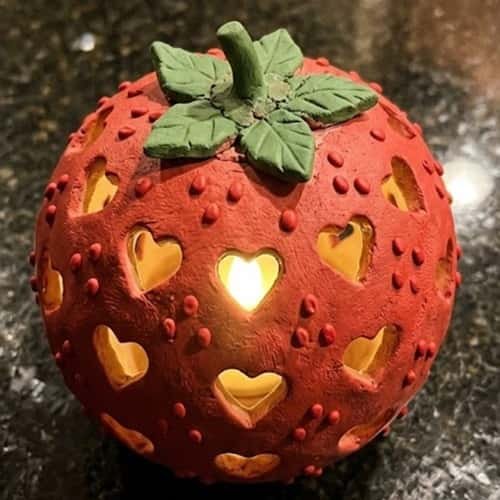
This one feels playful rather than overly romantic.
Make a basic rounded lantern body from air-dry clay. Instead of making straight walls, gently curve the slabs before joining them.
Press tiny heart-shaped holes across the surface.
Then add small raised clay dots to mimic strawberry seeds.
For the top, make a small green clay leaf cluster.
Keep the holes reasonably large. Very tiny cutouts can weaken the clay walls, especially when children are making the project.
Once dry, place a battery LED underneath.
This could easily become one of those valentines day clay gifts that grandparents actually keep.
4. Cupid Arrow Clay Lantern
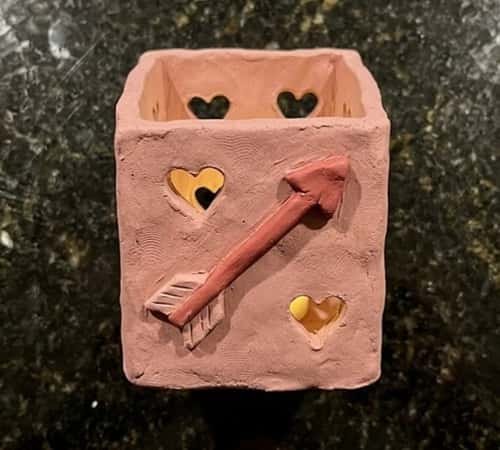
Make a rectangular clay lantern first.
Cut small heart windows into the front and back. Then roll a thin clay rope and attach it diagonally across the front.
At both ends, create simple arrowhead shapes.
Don’t make the clay rope too thin because it can break while drying.
Press the decoration gently into the lantern surface and blend the edges with a damp fingertip.
The finished design looks almost like Cupid shot an arrow straight through the lantern.
Cute, right?
5. Tiny Rose Cutout Lantern
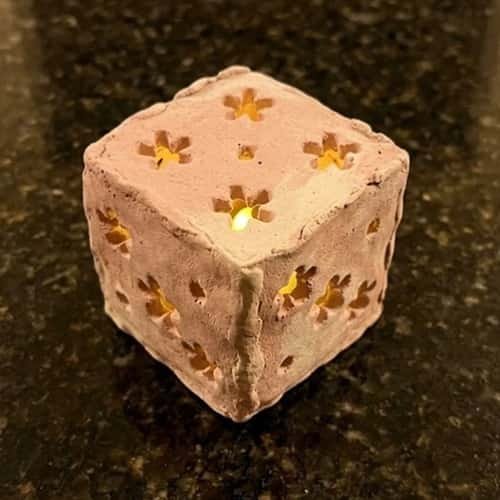
This design uses flowers instead of hearts.
Roll the clay into four slabs and create a small lantern. Use a simple flower cutter or draw five-petal flowers and carefully cut them out.
Add a few tiny circular holes between the flowers.
Don’t cover the entire wall with openings. Leave plenty of clay between them so the structure stays strong.
Once the lantern is dry, you can paint the flowers slightly darker than the main clay body.
This gives the piece a subtle romantic clay crafts look without making it overly decorative.
6. XO Clay Lantern
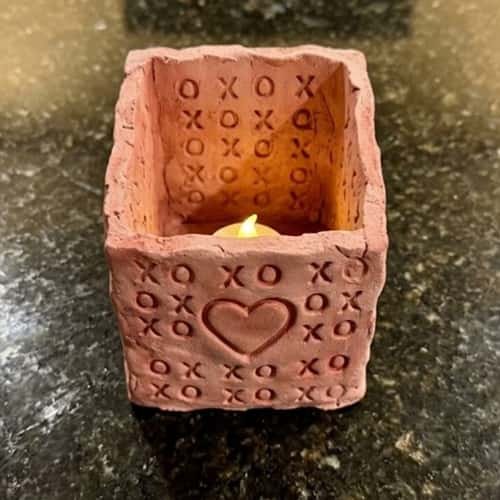
This one is especially easy for younger children.
Build a simple rectangular lantern and let the clay firm up slightly.
Instead of cutting large openings, use a blunt pencil to press X and O shapes into the clay.
Make a repeating pattern around all four sides.
Because the shapes are pressed rather than completely cut out, the lantern stays stronger.
Add one larger heart on the front.
The pattern gives it a cute retro vday home decor feeling.
7. Conversation Heart Lantern
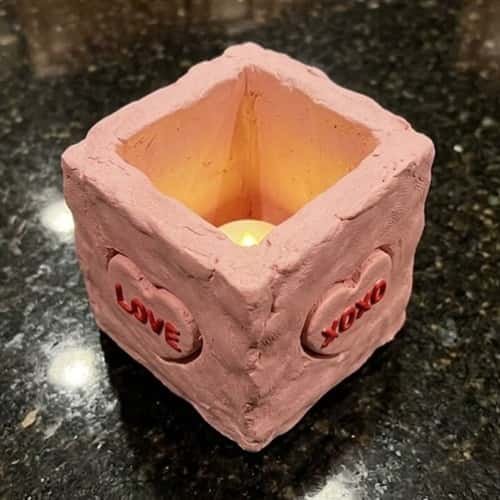
Remember those little candy hearts?
Use them as inspiration without trying to make the lantern look perfectly manufactured.
Create a chunky square lantern from pale clay. Press small rectangular panels into the surface.
Inside each panel, use a blunt pencil to make simple words such as:
LOVE
HUG
XOXO
Keep the letters shallow.
For younger kids, adults can lightly mark the letters first and let children press over them.
This is one of those diy clay valentines day lanterns where imperfect lettering actually makes the finished project better.
8. Moon and Heart Clay Lantern
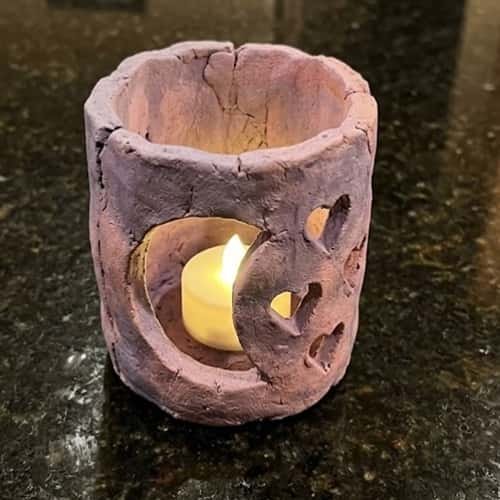
For a slightly more unusual design, combine a crescent moon with hearts.
Make four clay walls.
Cut one large crescent shape into the front wall. Add several tiny hearts around it.
You can make the moon slightly uneven on purpose.
In fact, don’t try to fix every little fingerprint. That’s what gives handmade clay sculpture its character.
Use pale blue, lavender or dusty purple clay if you want something different from traditional Valentine red.
9. Lace-Pattern Clay Lantern
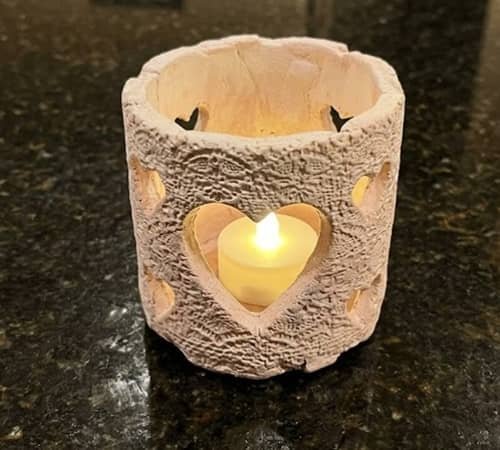
This design looks complicated but the technique is surprisingly simple.
Roll the clay into a slab.
Take a piece of textured lace or a plastic textured object and gently press it into the clay.
Remove it carefully.
You should now have a repeating pattern.
Cut the slab into four walls and join them together. Avoid pressing too deeply because thin textured areas can become weak.
The result resembles handmade lace wrapped around a tiny lantern.
It works beautifully with a soft cream or blush clay color.
10. Love Tree Clay Lantern
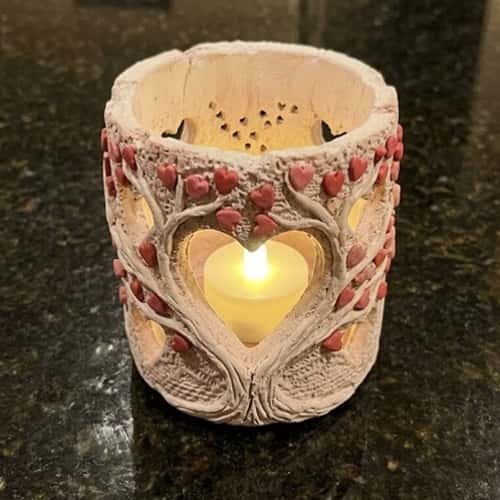
Make a simple tree branch pattern across the front of the lantern.
Roll thin clay ropes for the branches and attach them gently.
Add tiny heart-shaped leaves along the branches.
For the background, use small punched holes rather than more decorations.
The little hearts become the “leaves” of your Valentine tree.
Kids can choose their own colors here. Red hearts on cream clay looks lovely, but purple and pink works too.
And honestly, the uneven branches make it more charming.
11. Heart Maze Clay Lantern
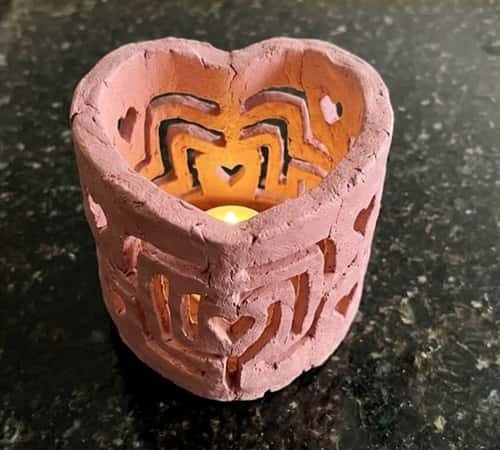
Here’s where older kids can get creative.
Create a thick clay lantern wall and draw a simple maze pattern across it.
Cut several sections of the maze completely through the clay, leaving thick clay pathways between them.
Add two or three heart-shaped openings.
The trick is to keep the pathways wide. If they become too thin, the wall can crack during drying.
This makes a fun clay activity because children aren’t simply decorating the lantern. They’re designing the pattern themselves.
12. Polka-Dot Heart Lantern
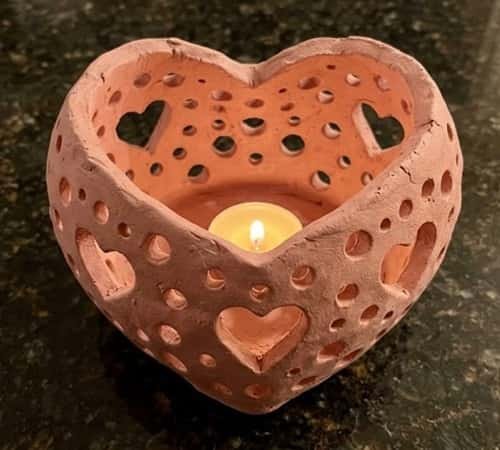
Sometimes simple wins.
Make a basic rounded clay lantern and punch evenly spaced circular holes across the walls.
Then add a few larger hearts between the dots.
You can make every hole slightly different. Don’t obsess over perfect circles.
Once the clay dries, the LED light creates a beautiful dotted glow.
This is also a practical option if you’re thinking about selling crafts, because the basic shape can be repeated while the cutout pattern can be customized for different occasions.
13. Personalized Initial Clay Lantern
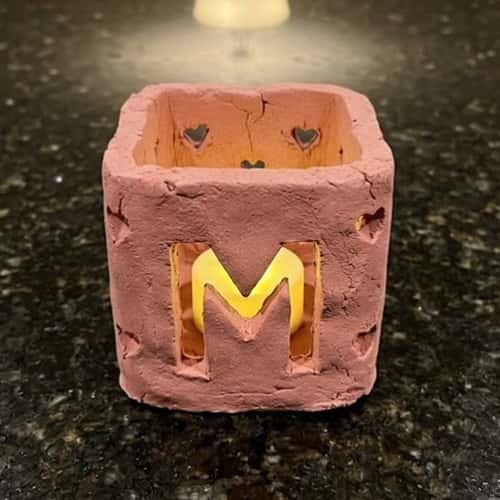
Why stop at hearts?
Make a small lantern with the child’s initial cut into the front.
For example, an A, M, S or R can become the main opening.
Add two or three hearts around it.
Keep the letter large enough that it doesn’t weaken the wall.
This could make a lovely personalized Valentines day clay gift for parents, grandparents or siblings.
And because every child can choose their own initial, no two lanterns need to look exactly the same.
Can You Sell These Clay Lanterns?
Absolutely, but I would change the approach slightly.
Instead of selling one generic lantern, create small collections.
For example:
- Initial lanterns
- Heart-window lanterns
- Moon-and-heart lanterns
- Personalized family lanterns
- Matching sibling lanterns
Personalization gives a simple handmade item a stronger gift angle.
You can also photograph the same design in several clay colors and offer customers a choice.
That is where selling crafts becomes more interesting. You’re not just selling clay. You’re selling a small personalized piece of Valentine’s decor.
Final Thoughts
The interesting thing about these clay lanterns for valentines day is that their charm doesn’t come from perfect finishing.
It comes from the tiny differences that happen when real people make them.
A slightly crooked heart, uneven lettering or visible fingerprint can make the lantern feel personal instead of factory-made.
If you’re making these with children, let them own those imperfections.
For a stronger valentines decor aesthetic, keep the shape simple and let the cutout pattern do the work.
And if you’re making them as gifts, add an initial or personal message.
Suddenly a basic clay project becomes something the receiver might actually keep long after Valentine’s Day.





