Have you ever looked at a plain sheet of paper and wondered if it could become something wild? That’s exactly what this therian mask project is all about.
Instead of buying an expensive animal mask, why not create one that feels completely your own? This beginner-friendly therian mask craft walks you through every stage using simple supplies and easy techniques.
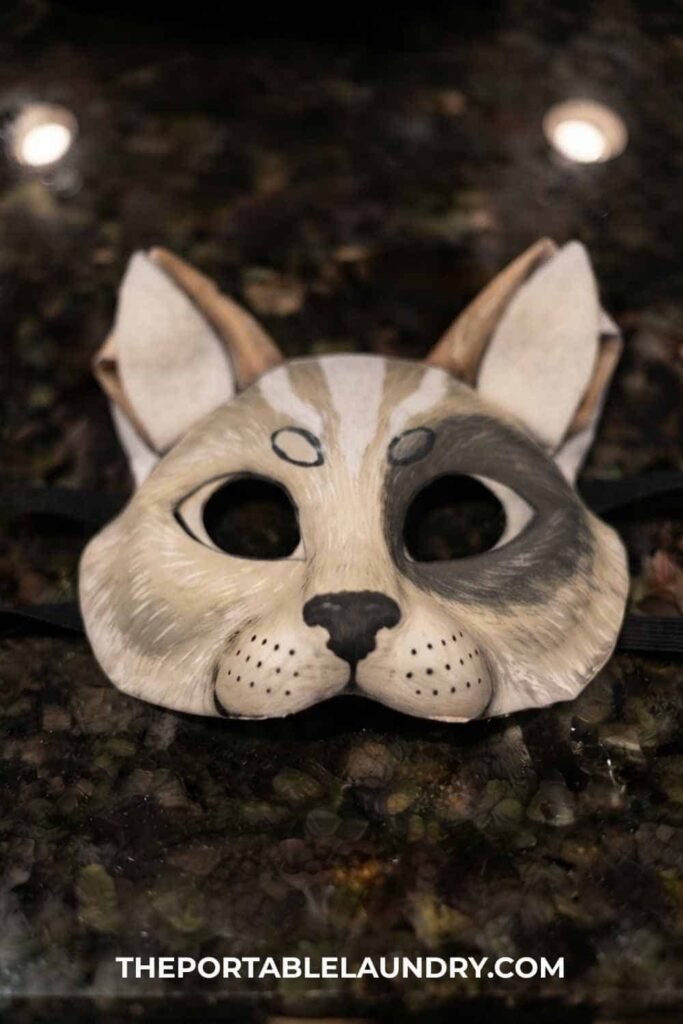
Whether you’re making a playful animal mask for dress-up, a school kids craft, or exploring an original animal mask design, you’ll end up with something full of personality.
Ready to turn ordinary paper into a creature you’ll actually want to wear?
Materials Needed To Make Therian Mask
- Thick cardstock or lightweight cardboard
- White printer paper
- Pencil
- Eraser
- Black marker
- Craft scissors
- White school glue
- Glue stick
- Mask elastic or ribbon
- Acrylic paints (white, brown, black, gray, beige, pink)
- Paintbrushes
- Cotton swabs
- Paper towel
- Hole punch
- Optional: Soft craft fur, felt scraps, colored pencils, fine paint pen
→ Download The Template Here ←
Step 1: Sketch The Foundation Of Your Therian Mask
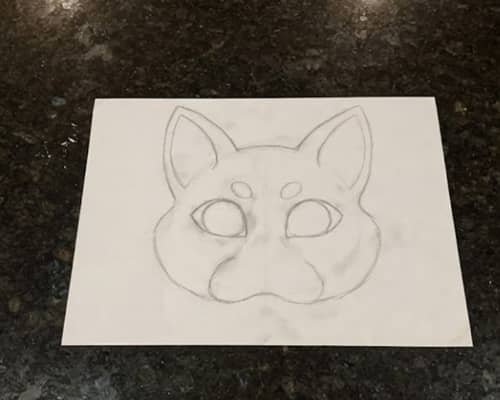
Start with a sheet of cardstock placed vertically.
Lightly draw a large rounded head shape that fills most of the page.
Keep the cheeks slightly wider than the forehead so the mask looks expressive instead of flat.
Next, add two large pointed ears that flow naturally from the head rather than sitting on top like triangles.
Draw two oversized eye openings first before adding the nose area. This helps balance the whole face.
Don’t worry if the lines look rough. Nobody gets the first sketch perfect, and thats completely normal.
Ask yourself, does the face already look friendly or mysterious? Tiny changes around the eyes can completely change its personality.
Step 2: Cut, Strengthen And Build Gentle Layers
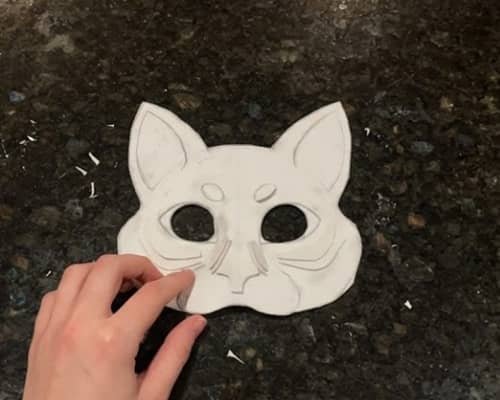
Carefully cut around the outer shape before cutting the eye openings.
Move slowly around the ears because sharp corners can easily bend.
Once finished, glue another piece of cardstock behind the main mask to make it sturdier.
While the glue dries, cut several small paper pieces shaped like eyebrow ridges, cheek fluff, and a slightly raised muzzle.
These layered pieces create depth without making the mask bulky.
This simple trick gives your animal mask a handcrafted appearance instead of looking like a flat school project.
It doesn’t need to be perfectly symmetrical because real animals aren’t either.
Step 3: Shape The Facial Features Before Painting
Now comes the fun part because the mask finally begins to look alive.
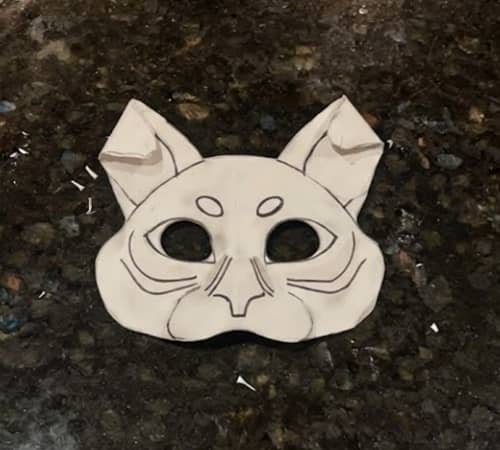
Roll a pencil gently across the muzzle from underneath to create a soft curve.
Press lightly around the cheeks using your fingers so they lift ever so slightly.
Fold each ear just a little along its center line to give a natural standing effect.
Use a black marker to redraw clean outlines around the eyes, nose, and mouth.
If you’re wondering how to make a therian mask out of paper, this little bit of shaping is often the secret people skip.
Suddenly the face gains expression without needing fancy materials.
Step 4: Paint The Base Colors And Add Soft Fur Patterns
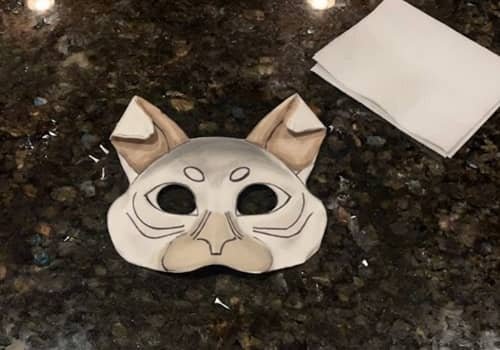
Before adding details, paint the whole mask with a thin white base coat so later colors stay bright. Let it dry completely.
Next, use light gray across the forehead, soft brown around the ears, and creamy beige on the muzzle.
Blend the colors while they’re still slightly wet using a barely damp brush.
Avoid harsh lines because gentle transitions resemble natural fur much better.
A cotton swab works surprisingly well for soft blending if you’re nervous with a brush.
This step slowly transforms the project from paper into something that resembles a theriotype mask, a creative costume mask, or even a beginner-friendly cosplay mask.
Step 5: Bring Your Animal To Life With Fine Details
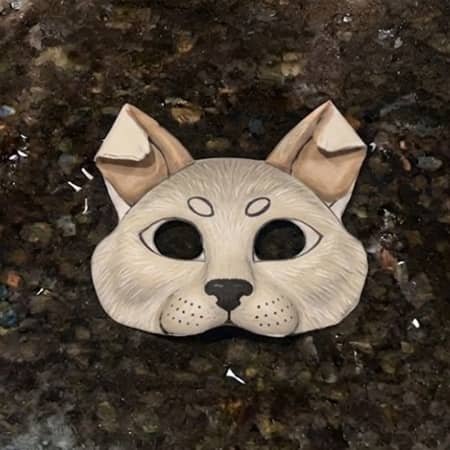
Now the personality starts showing.
Grab a thin paintbrush and add short, flicking strokes that follow the direction real fur would grow.
Begin near the nose, then work outward across the cheeks and forehead.
Mix white, gray, and brown in tiny amounts instead of using solid blocks of color.
Paint a small black nose, outline the lips, and add a few tiny dots where whiskers would grow.
Doesn’t it already feel more alive? If you want a softer animal mask design, lightly dry-brush white along the cheek edges to create fluffy highlights.
This simple technique makes the therian mask craft look much richer without making it difficult.
Step 6: Add Ears, Texture And Personal Touches
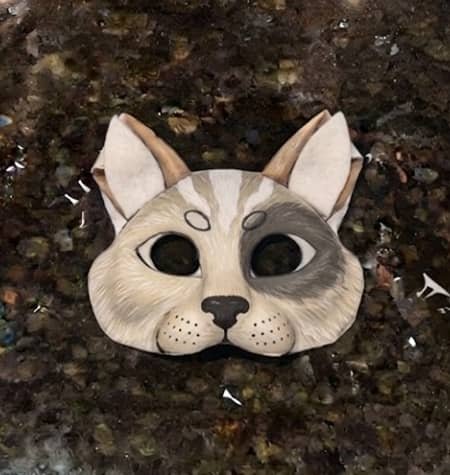
Your mask is already looking great, but little details make it feel truly yours.
Glue soft white felt inside each ear or paint the inner ears with pale pink if you prefer an all-paper version.
Add tiny darker patches around one eye, a white blaze down the forehead, or gentle freckles across the muzzle.
These small changes create an original look instead of copying another therian mask tutorial online.
You could even invent your own woodland creature by blending fox, wolf, and lynx features together.
There is so many possibilities once you stop worrying about perfection.
Step 7: Attach The Elastic And Make It Comfortable
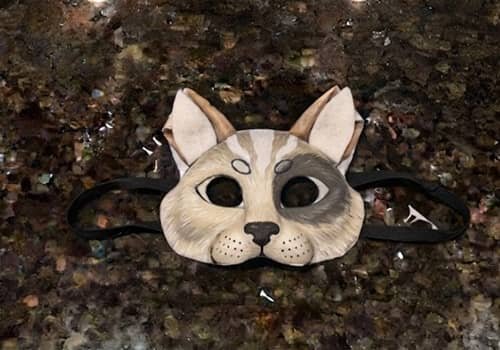
Punch one hole on each side of the mask, keeping both holes level with the eyes.
Thread elastic or ribbon through each hole and tie secure knots on the back.
Before tightening everything, hold the mask against your face to check the fit. It should rest comfortably without squeezing your head.
If the nose feels too flat, gently bend the muzzle forward using both hands.
This tiny adjustment often makes the mask sit much better.
Whether you’re creating a playful kids craft, preparing a costume party accessory, or making a lightweight cosplay mask, comfort matters just as much as appearance.
Step 8: Final Touches And Make It Truly Yours
Put the mask on and look in a mirror from different angles.
Notice any empty spots? Add a few more fine fur lines, brighten the muzzle, or deepen the shadows under the eyes.
If you’re creating this as an animal craft idea for younger children, keep the design playful with softer colors and rounded features.
Older kids may enjoy sharper markings and more dramatic expressions.
One last tip: spray a light coat of clear matte craft sealer if the mask will be worn often.
Your handmade creation is now ready for pretend play, photography, school activities, or simply displaying proudly on your craft shelf.
Final Thoughts
One of my favorite things about making a Therian Mask is that no two ever end up looking the same, even when people begin with the exact same template.
That’s the beauty of handmade creativity.
As you experiment with different fur patterns, ear shapes, colors, and facial expressions, you’ll naturally develop your own style instead of following trends.
Learning how to make animal masks also builds useful crafting skills like layering, painting, and shaping paper that carry into future DIY projects.
So don’t chase perfection. A few tiny imperfections often become the details that make a handmade animal mask feel genuine, memorable, and full of character.
After all, the best crafts usually tell a story before anyone even puts them on.





