A totem clay sculpture is one of those clay projects where a few simple shapes can turn into something that looks surprisingly artistic.
I especially like using air dry clay crafts for this because I don’t need a kiln or complicated equipment.
You can build a small tabletop piece, a quirky shelf decoration, or even a taller garden-inspired sculpture with the same basic technique.
The trick is to stack forms that feel connected, then give each section its own personality. Ready to make your own?
These 12 clay craft projects take that idea in very different directions, from celestial faces to miniature garden pottery and playful ceramic people crafts.
Choose Your Air Dry Clay Type
Regular Air Dry Clay | Cornstarch Clay | Homemade Clay
Affiliate Disclaimer: Some of the links in this post may be affiliate links, which means I may earn a small commission if you choose to make a purchase through them – at no extra cost to you. I only share products that genuinely fit this project and can help make your ceramic mug clay craft process easier and smoother. Your support helps keep ideas like this coming.
1. Moon Face Totem With Tiny Stars
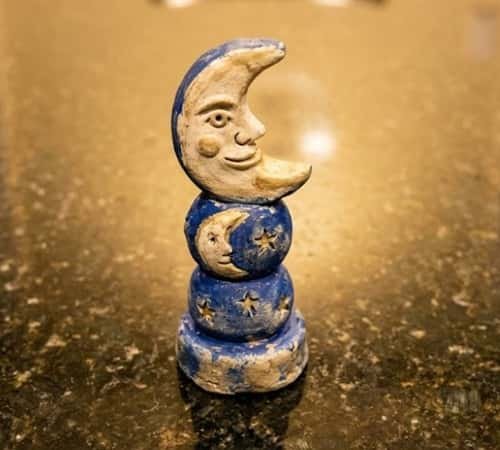
This one feels like a little piece of nighttime folk art.
What you’ll need: air dry clay, acrylic paint, a toothpick, rolling pin, craft knife and clay adhesive if your pieces need extra reinforcement.
Start by making three different-sized clay balls.
Flatten each one slightly, then shape them into rounded discs with gently uneven edges. Make the bottom section wider so your sculpture has a stable footprint.
For the face, press shallow eye sockets into the middle section using the rounded end of a tool.
Add a small raised nose and curved lips. Don’t make everything perfectly symmetrical… the slightly crooked expression gives it character.
For the top section, create a crescent moon instead of another face. Cut the crescent from rolled clay and let it firm up for 20 to 30 minutes before attaching it.
Add tiny stars around the sides with a toothpick. Once completely dry, paint the sculpture in deep blue, cream and muted gold.
2. Three-Eyed Guardian Totem
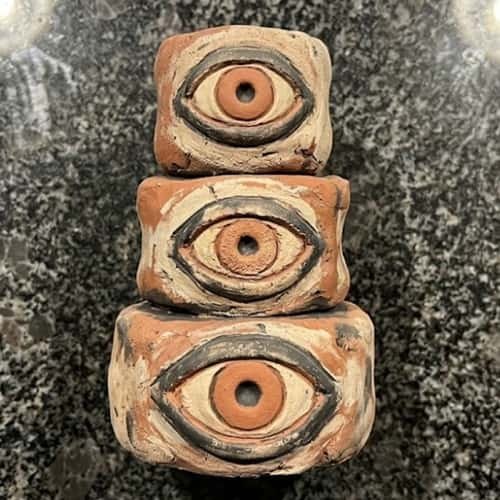
Want something that looks mysterious without being difficult?
Build three chunky clay sections, keeping the bottom one noticeably wider.
Instead of making three ordinary faces, give each face one large central eye.
Roll small clay coils for the eyelids and flatten them gently. Add a tiny raised clay ball for each pupil.
Press the pupil slightly off-center on one face, another upward and another downward. That tiny difference makes the sculpture feel handmade.
Stack the sections while the clay is still workable, but don’t make them too wet. If they begin sliding, allow each piece to dry until leather-hard before assembling.
Paint the faces in earthy terracotta, cream and charcoal. Add thin geometric lines around the eyes with a fine brush.
This can also become a striking piece for a collection of clay totems.
3. Stacked Mushroom Totem
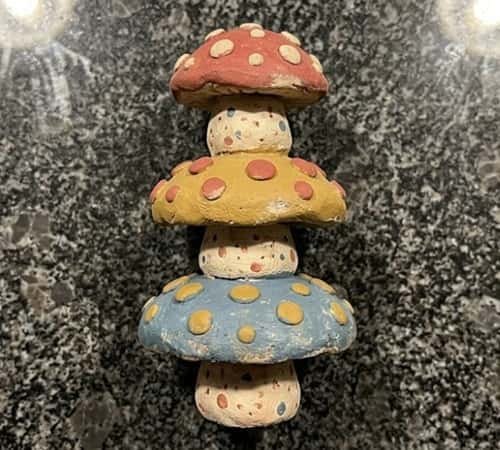
This is where I would go playful.
Make three mushroom shapes in different sizes.
For each one, roll a clay ball, flatten the underside and pinch the top into a rounded cap. Create a short stem beneath each cap.
The unusual twist is to stack the mushrooms vertically instead of placing them separately.
Use a narrow clay cylinder between the larger sections as a connector. Score both surfaces with a toothpick, apply a little water or slip, then press them together gently.
Add small raised dots to the mushroom caps. Let everything dry slowly to reduce cracking.
Paint the caps in different colors, but keep the stems neutral. White dots on red, mustard or dusty blue look great.
It becomes a cheerful little garden totem without looking like mass-produced garden decor.
4. Folk Bird Totem
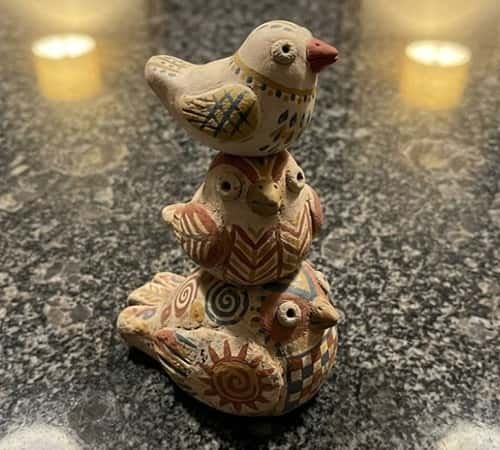
Forget the usual human faces. Make birds the main characters.
Shape three simple bird bodies from clay.
Each body should be slightly oval, with a flatter bottom so it can stack more securely. Add tiny triangular beaks and raised wings.
For the eyes, don’t use painted circles only. Press tiny clay beads into shallow sockets before drying. This gives the faces more dimension.
Stack the birds from largest to smallest. Angle one bird slightly to the left and another slightly to the right.
Paint each bird differently using cream, rust, mustard and dark blue. Add simple folk-art stripes and dots.
This design fits beautifully into clay totem decor crafts, especially if you like handmade pieces with a slightly primitive appearance.
5. Sun, Face and Mountain Totem
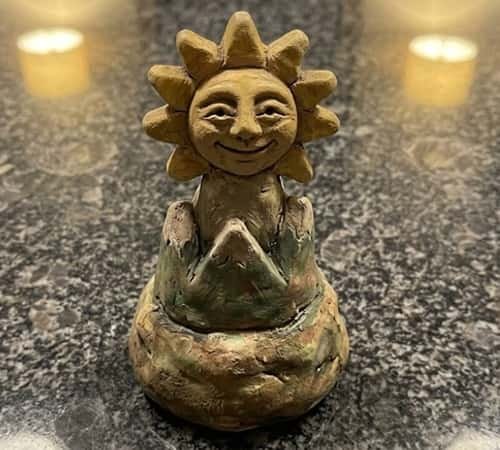
This one mixes natural shapes into one sculpture.
Start with a wide rounded base. Above it, create a simple mountain-shaped section by rolling clay into a thick slab and cutting a soft triangular silhouette.
The middle section gets a sun face. Make a shallow circular disc, then attach a small nose, eyes and mouth. Around the outer edge, add short triangular rays.
The top section can be a tiny cloud or mountain peak.
Keep the forms chunky. Thin pieces are more likely to crack while drying.
Paint the base earthy brown, the mountain muted green and the sun warm yellow. Add a few imperfect brush strokes instead of trying to make the surface flawless.
It has the handmade quality I love in small new ceramic ideas, even though you can make it without a ceramic kiln.
6. Miniature Totem House
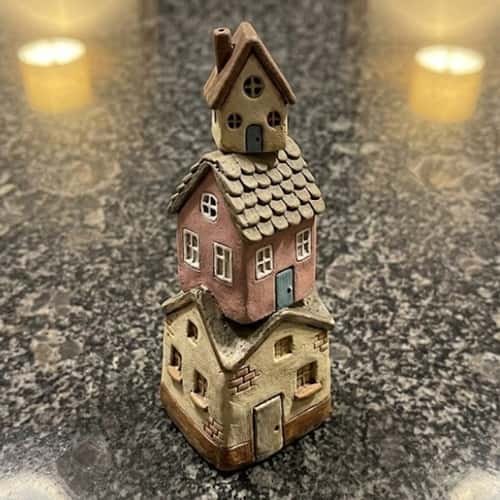
Think tiny architectural sculpture rather than traditional totem.
Build three little house sections using flattened clay slabs. Cut simple door and window shapes into the slabs before assembling them.
Make the bottom house widest. Stack a smaller house above it and finish with a tiny pointed roof.
Use scoring and slip whenever joining slabs. This matters because flat pieces can separate after drying if they are simply pressed together.
Add tiny clay bricks around the doors and windows. Keep them irregular.
Paint the houses in cream, dusty pink, muted green and brown. A little unevenness makes this look like miniature folk architecture rather than a factory-made ornament.
It would also work nicely as one of those unusual diy clay gifts people don’t see everywhere.
7. Abstract Face Column
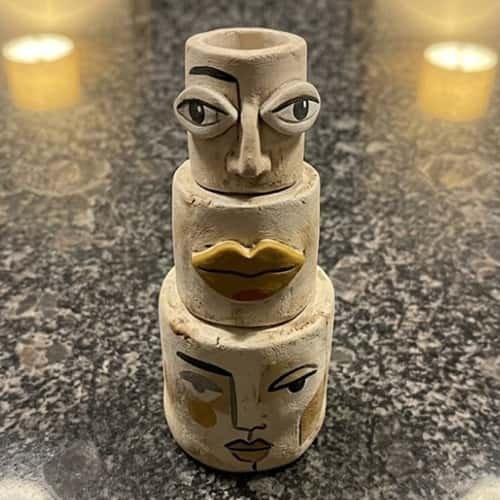
Here’s where you can stop worrying about making a recognizable character.
Roll several clay cylinders in different widths. Flatten and distort them slightly using your fingers. Add one facial feature to each section… perhaps an eye on one, a nose on another and lips on the third.
Stack them vertically.
The trick is negative space. Don’t cover every surface with decoration. Leave some raw clay showing between painted areas.
Use black, off-white and one accent color. Paint broad blocks instead of detailed patterns.
Don’t panic if the sculpture looks odd while you’re making it. Abstract work often looks much better once the pieces are painted and assembled.
This is also a fun clay activity for experimenting with shape, balance and proportion.
8. Totem With Tiny Hands
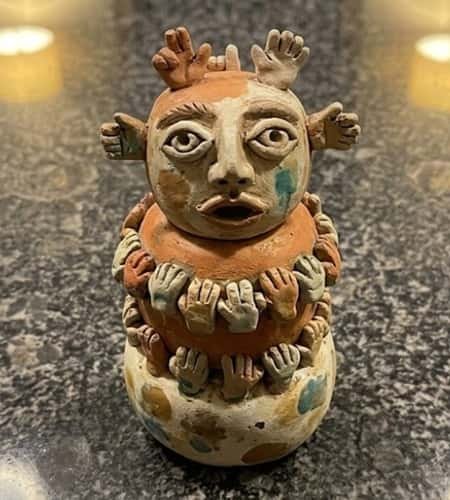
This design is strange in the best way.
Create three rounded clay bodies and stack them from large to small. Instead of adding faces to every section, give each body a pair of tiny clay hands.
Roll extremely thin clay coils and flatten them.
Cut three or four small fingers into the ends with a craft knife. Keep the fingers chunky enough that they won’t snap during drying.
Attach the hands using scored surfaces and a tiny amount of slip.
Give only the top section a face. The lower sections can have painted symbols, stripes or simple dots.
Paint the bodies in contrasting earthy colors.
Because the hands are dimensional, let them firm up before attaching them. Otherwise they can droop or deform.
9. Totem With a Secret Door
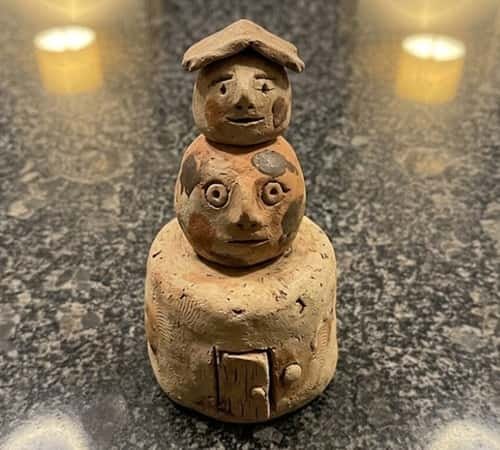
This one has a little surprise built into it.
Make a wide cylindrical base and two smaller sections.
Before the clay dries, cut a tiny rectangular doorway into the front of the bottom section.
Don’t remove too much clay. You only need a shallow opening that suggests a door.
Create a tiny circular knob from clay and attach it beside the opening. Above it, build two irregular faces or symbols.
For the top, make a miniature roof with a slight overhang.
Paint the exterior warm beige and terracotta. Paint the doorway dark brown so it looks deeper.
If you want to explore assemblage art, you could later add a tiny clay moon or star beside the doorway.
10. Flower-Powered Totem
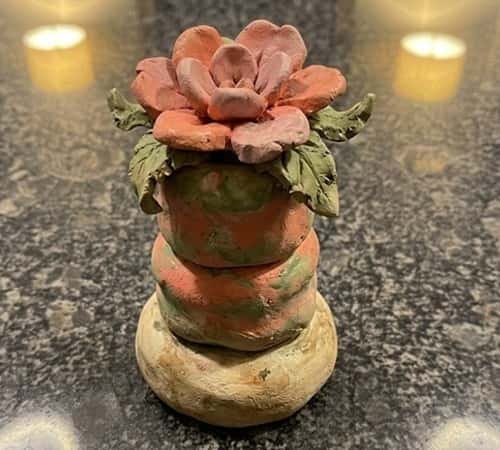
Make the sculpture look like it grew from a garden.
Create a sturdy rounded base. Add two stacked oval sections and finish with a large clay flower.
For the flower, flatten five or six small clay balls into petals.
Arrange them around a central clay ball. Don’t make the petals identical. Handmade differences make the flower look alive.
Add two small leaves to one side.
Use scoring and slip to secure the flower because the top-heavy shape needs a strong connection.
Paint the body in earthy cream and green. Use coral, yellow or dusty pink for the flower.
This could easily become part of a larger collection of garden pottery if you decide to make several.
11. Animal Spirit Totem
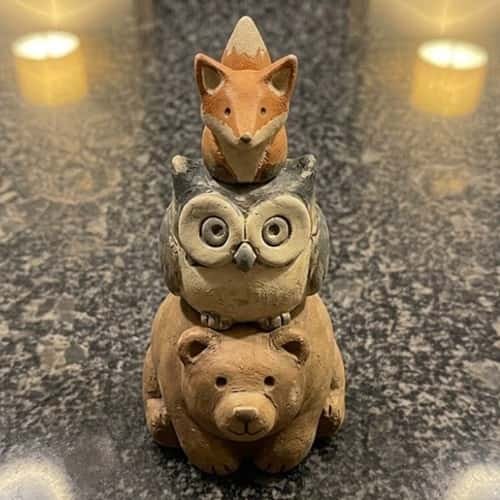
Pick three animals that have completely different silhouettes.
I would choose a bear, owl and fox.
Make each animal as a chunky simplified clay form rather than trying to sculpt realistic anatomy.
The bear can have rounded ears, the owl large circular eyes and the fox a pointed snout.
Keep the bottom animal largest. This gives the sculpture a stronger base.
Join the pieces only after they become slightly firm. Score, add slip and press together gently.
Once dry, paint each animal in its own palette. Add tiny painted markings instead of excessive details.
The result feels like a handmade interpretation of a traditional animal totem while still fitting modern clay activities.
12. The Quirky “Found Objects” Totem
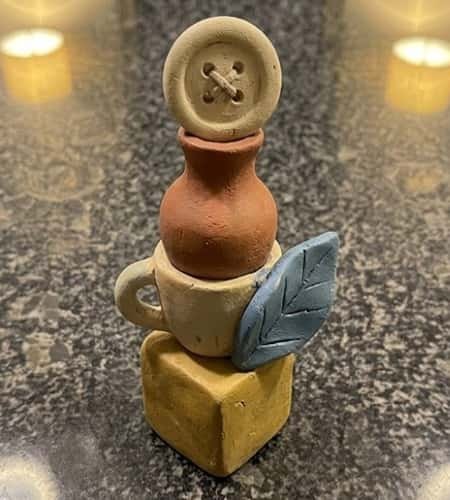
This is my favorite idea for experimenting with assemblage art.
Instead of making every section from scratch, sculpt simple clay shapes that imitate objects — a tiny vase, a button, a face, a leaf, a little cup and a geometric block.
Make the pieces different sizes and stack them into an unexpected column.
Don’t force perfect symmetry. In fact, tilt one section slightly while keeping the overall sculpture stable.
Use clay slip to join the sections. If the sculpture becomes too tall, insert a wooden skewer through the center while the clay is soft, then remove it before the clay fully dries if you don’t want the support permanently embedded.
Paint the whole piece after drying. Use a limited palette so all the odd shapes still feel connected.
This is where new ceramics and experimental new ceramic ideas can really inspire your own diy clay sculpture style, even when you’re working entirely with air dry clay.
Final Thoughts
The most interesting thing about a totem clay sculpture isn’t actually the individual face, animal or decoration.
It’s the relationship between the shapes. A narrow section above a heavy base creates tension.
A crooked piece can make a sculpture feel more handmade. Even the small fingerprints left behind can become part of its personality.
If you’re thinking about selling crafts, don’t immediately make 50 identical pieces.
Try creating a recognizable series with different faces, animals or symbols while keeping one consistent color palette.
That gives your work a visual identity. And remember, air dry clay is forgiving.
If one idea goes wrong, reshape it, cut it apart or turn the mistake into a new feature. Sometimes that accidental part becomes the best bit.





