There is something extra magical about tiny lanterns appearing around the house when the elf arrives for Christmas.
I love making these kinds of projects because they combine a simple clay activity with a little holiday storytelling.
These diy elf on the shelf clay lantern ideas are designed around small, handmade lanterns that children can actually help create, paint and decorate.
You don’t need a pottery wheel, kiln or expensive supplies either.
A little air dry clay, some paint and imagination can turn into surprisingly cute Christmas decor.
And because every lantern can have its own tiny personality, why not make several and create a whole glowing village for your elf?
Safety note: For kids, use non-toxic air dry clay and water-based, child-safe paints. Avoid candles, flames, glass, sharp craft wire and small loose pieces around very young children. Use battery-operated LED tea lights for the finished lanterns.
Choose Your Air Dry Clay Type
Regular Air Dry Clay | Cornstarch Clay | Homemade Clay
Affiliate Disclaimer: Some of the links in this post may be affiliate links, which means I may earn a small commission if you choose to make a purchase through them – at no extra cost to you. I only share products that genuinely fit this project and can help make your ceramic mug clay craft process easier and smoother. Your support helps keep ideas like this coming.
1. Tiny Elf Door Lantern
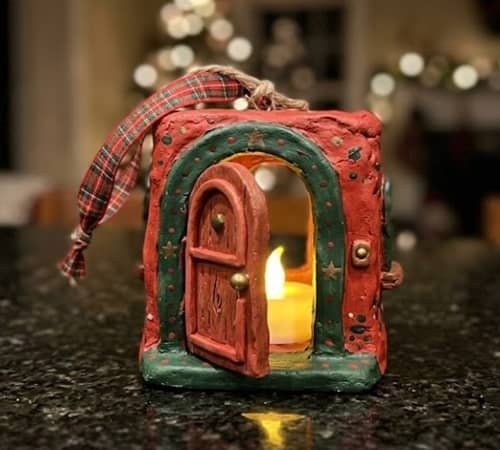
This one is probably the easiest place to start.
Make a little, elf-sized entryway with a lighted entrance in place of a conventional lantern.
The finished piece looks like a miniature entrance to the elf’s imaginary workshop.
What you’ll need
- Air dry clay
- Rolling pin or smooth bottle
- Child-safe sculpting tool
- Acrylic or washable craft paint
- Paintbrushes
- Battery-operated LED tea light
- A little ribbon or cotton cord for hanging
How to make it
- Roll out the clay until it is about 6 mm thick.
- Cut a rounded rectangle approximately 12 cm tall.
- Cut a smaller arched doorway in the middle. Don’t throw away the clay from the opening.
- Use that leftover clay to create a raised door frame.
- Add tiny vertical lines to suggest wooden boards.
- Make a miniature doorknob from clay and attach it with a little water.
- Let the whole piece dry completely according to your clay manufacturer’s instructions.
- Paint the door red, green or warm brown.
- Add tiny white dots around the frame to resemble Christmas lights.
- Place an LED light behind the opening.
- If you want it hanging, make two holes near the top before the clay dries and thread ribbon through them.
The trick is keeping the doorway opening fairly large. A tiny opening may look adorable but won’t let much light through.
2. Elf Hat Hanging Lantern

Why make a boring rectangular lantern when an elf hat can become one?
Shape the clay into a long, slightly floppy elf hat, then hollow out the lower section so the LED light shines through.
How to make it
Roll out a 4 to 7 mm thick slab of clay. Cut a wide triangular shape with a curved top. Bring the edges together carefully and join the seam with a little water.
Don’t completely seal the bottom.
Instead, create a small circular opening underneath where the LED light can sit.
Add a round clay pom-pom to the tip. Press the edges gently so the details look handmade rather than perfectly molded.
Once dry, paint the hat bright green with a red band. You can add tiny yellow dots as decoration.
For hanging, make a hole near the upper edge while the clay is still soft.
The hat should look slightly crooked. That’s actually part of its charm.
3. Mini Christmas Stocking Lantern

A stocking-shaped lantern gives you a completely different silhouette.
Roll out your clay and sketch a chunky Christmas stocking shape. Cut it out twice.
Place the two pieces together and gently seal the edges, leaving the top open. Before joining everything, create several tiny holes across the front.
These holes become the “fairy lights” when the LED shines from inside.
Add a thick cuff at the top using a separate strip of clay.
Once dry, paint the stocking red with a cream-colored cuff.
Even basic star forms can be pressed into the clay before it dries.
The little holes are what make this design special. When the light is switched on, they look like tiny glowing decorations.
4. Elf Workshop Window Lantern
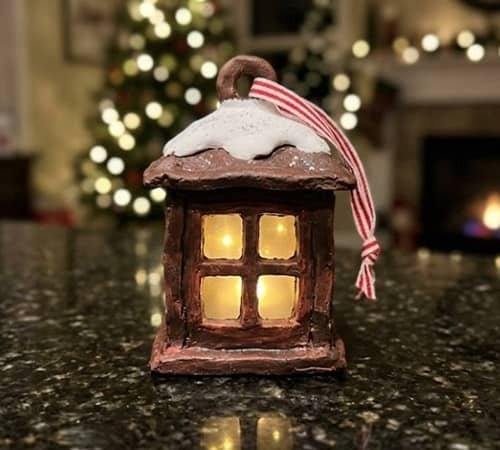
This design looks like a tiny window from an elf’s workshop.
Make a small rectangular clay frame around 10 cm wide.
Instead of making a completely solid piece, create four window openings. Divide the front into sections with thin clay strips.
Behind each opening, add a thin sheet-like piece of translucent clay if your clay allows it, or simply leave the openings empty and position the LED behind them.
Add a tiny chimney, roof shape or miniature snow cap.
Paint the frame brown and the trim cream.
A little red door beside the window can make it look like a miniature Christmas cottage.
This is where the project starts becoming a little clay sculpture for Christmas rather than just a lantern.
5. Elf Sleigh Lantern
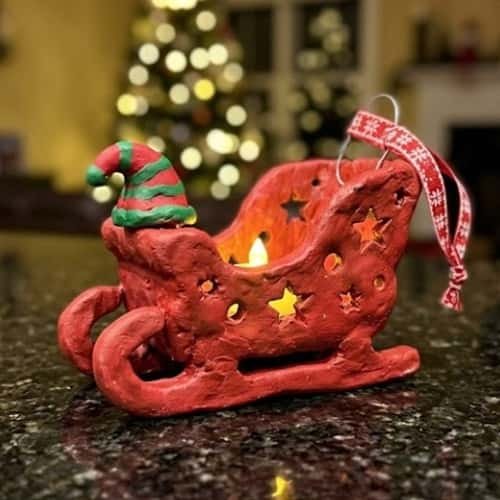
This one takes a little more shaping but looks fantastic.
Create two curved clay runners first.
Then make a small rectangular sleigh body and attach it between the runners. Keep the body fairly chunky so it doesn’t become fragile after drying.
Cut several small star-shaped openings into the sides.
Add a raised front section and a tiny clay elf hat sitting inside.
Place the LED underneath or behind the sleigh rather than inside a completely enclosed cavity.
Paint it red and add simple gold-colored details.
If you’re making these for selling crafts, I’d simplify the tiny elf figure and focus on the recognizable sleigh silhouette. It will make production much easier.
6. Elf Candy Cane Lantern
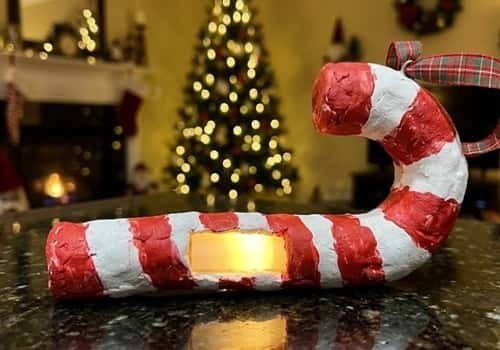
Candy cane shapes instantly make this feel festive.
Roll two long clay ropes and twist them gently together.
Curve the top into a candy cane shape.
Now create a slightly thicker back layer of clay and attach it behind the candy cane outline. Leave a central open section where the light can shine through.
Once dry, paint alternating red and white stripes.
Make two tiny holes near the top for hanging.
This design works particularly well as christmas decoration with lanterns because several of them can hang together like a little candy-cane cluster.
7. Elf’s Hot Cocoa Mug Lantern

Here’s a fun one for children.
Shape a chunky little mug from clay. Keep the walls thick enough that the finished piece doesn’t crack easily.
Cut several tiny circles or stars around the outside.
Add a clay handle and a small whipped-cream-looking mound on top.
Don’t make the top completely closed. The LED can sit inside the mug.
Paint the mug red, green or cream.
You could even add tiny clay marshmallow shapes, but make sure they are securely attached.
The light shining through the holes makes this look like a tiny magical cocoa cup.
And honestly, it looks adorable sitting beside an elf.
8. Elf House Number Lantern
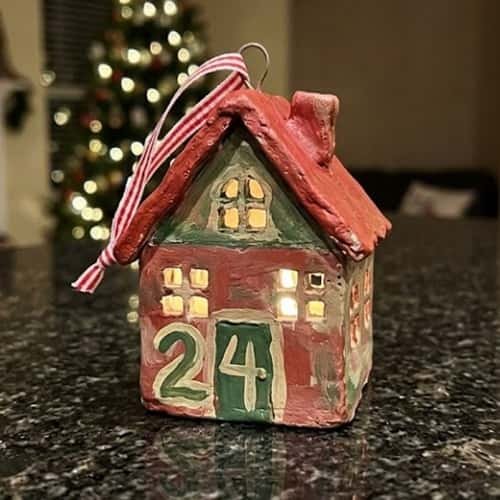
Give your elf a proper little house.
Create a simple rectangular cottage shape from air dry clay. Add a triangular roof and one small window.
Instead of decorating it heavily, cut the elf’s “house number” into the front.
You could use 1, 24, 25, or any number that has meaning for your family.
Cut a few stars into the roof.
Once everything is dry, paint the house in muted Christmas colors.
Put the LED behind the house so the windows and number glow.
This is also one of the easier diy festive decor using lanterns projects to customize for different children.
9. Snow Globe Style Elf Lantern
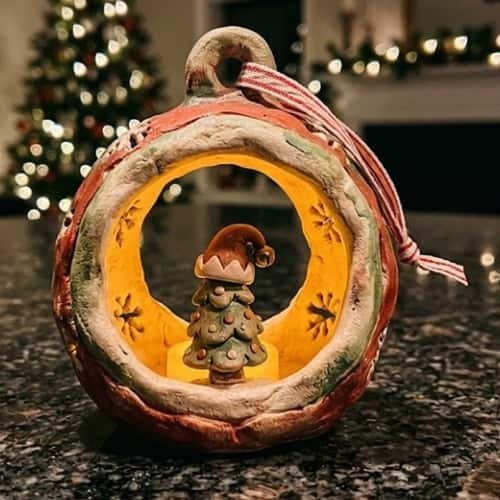
This one doesn’t need to look like an actual glass snow globe.
Create a rounded clay frame with a large circular opening.
Around the opening, press tiny clay snowflakes, stars and dots.
Inside the circle, make a tiny raised elf hat or Christmas tree.
Once dry, paint the frame white or pale blue.
The LED sits behind the opening.
The result looks like a glowing miniature winter scene.
If the clay is cracking while you’re shaping the circle, stop and let it firm up for a few minutes. Working with clay that’s too soft often creates more problems later.
10. Elf Boot Lantern
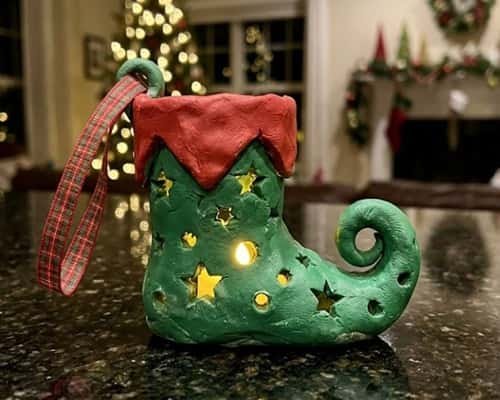
A tiny elf boot makes a surprisingly good lantern.
Build it using two pieces.
Create a thick boot-shaped front and a matching back piece. Join the edges carefully, leaving the upper opening accessible.
Cut small stars and circles into the boot.
Add a folded clay cuff around the top.
Paint the boot green and red.
For extra character, make the toe curl slightly upward.
Don’t make the curl too thin. Thin clay details break much easier after drying.
This is a perfect clay activity for older kids who already have some experience handling air dry clay.
11. Christmas Tree Elf Lantern
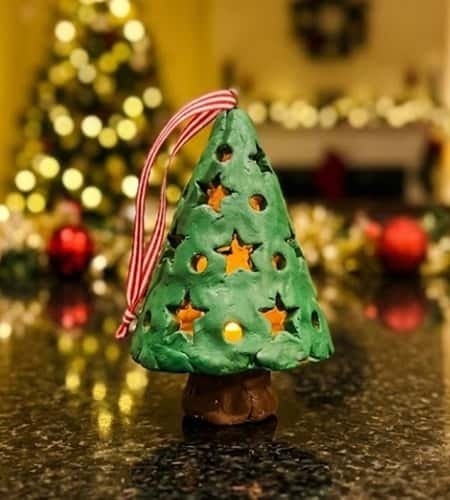
Make a miniature Christmas tree, but turn it into a lantern.
Roll out a thick clay sheet and cut two matching triangular tree shapes.
Cut little stars and circles into both pieces.
Join the edges with a narrow clay strip, leaving the bottom open.
Add a small clay trunk underneath.
Paint the tree green and add tiny red and yellow painted dots.
Put the LED inside.
When it glows, the punched holes become tiny Christmas lights.
This one is especially nice for diy clay lantern ideas for christmas because the basic shape is simple enough for children to customize themselves.
12. Elf Mailbox Lantern
Let’s finish with something a little unexpected.
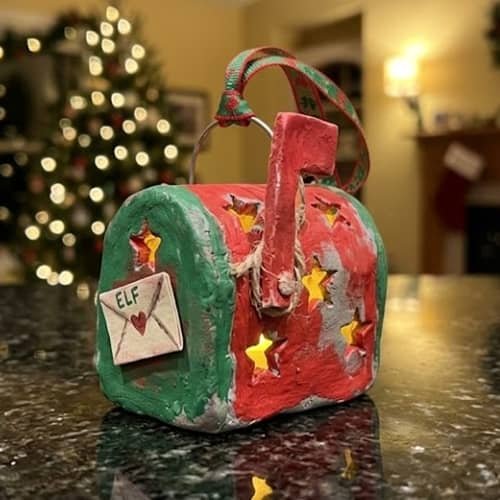
Create a tiny red elf mailbox from clay.
Make a rectangular body with a rounded top. Add a small front door and a raised flag.
Cut tiny star-shaped holes across the sides.
Leave the bottom open so an LED tea light can sit underneath.
Add a little clay envelope on the front, but keep it firmly attached.
Paint the mailbox red and add cream details.
You can even personalize it with the words “ELF MAIL” carved into the clay before it dries.
This could also be a fun product idea if you’re experimenting with selling crafts, because personalized versions can feel much more special than generic Christmas decorations.
Final Thoughts
The most interesting thing about these elf on the shelf clay lanterns for christmas isn’t actually the lantern shape.
It’s the little story each one creates. A mailbox can become the elf’s delivery station.
A tiny door can become the entrance to his workshop. A Christmas tree can become his night-light.
That makes this more than another Christmas clay craft.
If you’re making decorations for lanterns with kids, let them decide what the lantern represents before they start sculpting.
Their strange little ideas often become the most memorable pieces.
And if you’re thinking about selling craft pieces, personalization is worth exploring too. Names, house numbers and tiny elf “addresses” can turn a simple clay lantern into something that feels made specifically for one family.





