Halloween decorations don’t have to be expensive or complicated.
Look… this ghost in a jar craft is one of those crafts that appears supernatural yet requires materials that you most likely already have at home.
I love this idea because every child can give their ghost a different personality, which means no two jars ever turn out the same.
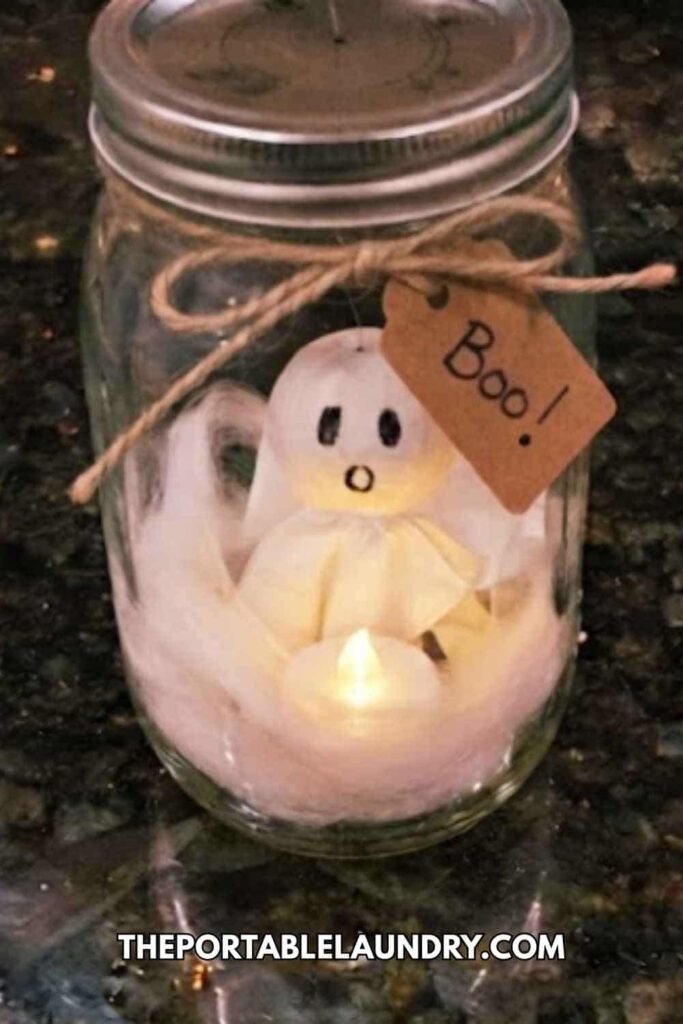
Looking for a simple Halloween craft that works for preschoolers, elementary kids, classrooms, or a weekend family activity? You just found it.
Even better, this little glowing ghost becomes a decoration after the crafting fun is over, and that’s something kids really gets excited about.
Why You’ll Love This Ghost in a Jar Craft
There are countless ghost crafts online, but most of them either need special supplies or end up looking exactly the same.
This version adds tiny handmade details that make every ghost unique while keeping the project beginner friendly.
This project is perfect for:
- Halloween parties
- Family craft nights
- Classroom activities
- Rainy day kids craft Activities
- Halloween decorations
- Shelf or mantel decorations
- Handmade Halloween gifts
It even fits nicely into a Halloween theme alongside pumpkins, bats, witches, spiders, and friendly monsters.
Supplies Needed To Make Ghost In A Jar
Gather everything before you begin.
Materials
- 1 clean clear mason jar or recycled glass jar
- White polyester fiberfill (toy stuffing)
- White tissue paper
- Small foam ball (about 2 inches)
- Black permanent marker
- Thin black craft wire
- White pipe cleaner
- White craft glue
- Hot glue (adult supervision recommended)
- Small battery-operated LED tea light
- White ribbon or twine
- Small Halloween tag (optional)
- Fine glitter (optional)
- Cotton balls (optional for extra fog)
Step 1: Create the Ghost’s Head and Body
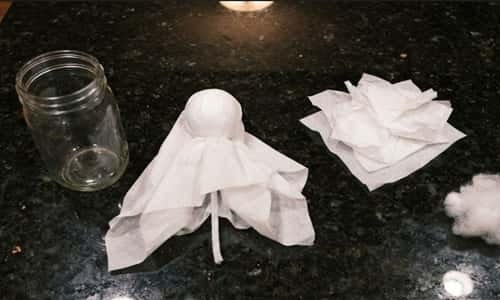
Start with the foam ball.
Lay a square of white tissue paper flat on your table. Place the foam ball in the center.
Gather the tissue paper underneath the ball so it naturally drapes downward like a tiny floating ghost.
Instead of pulling the paper tight, leave soft folds.
Those wrinkles are what make the ghost feel ghostly instead of looking like a wrapped candy.
Twist the paper gently underneath the head.
Secure the twist using a short piece of white pipe cleaner or a little craft wire.
Now fluff the bottom of the tissue paper slightly so the ghost looks like it’s floating rather than standing.
Already looks cute, doesn’t it?
Step 2: Give Your Ghost a Friendly Face
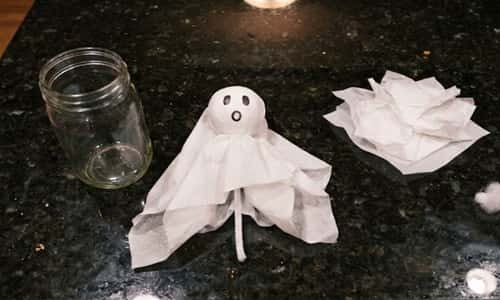
Now comes the personality.
Using a fine-tip black permanent marker, draw two medium-sized oval eyes.
For the mouth, you have choices.
A small “O” shape creates a surprised ghost.
A curved smile makes it friendly.
A tiny wavy mouth gives it a playful spooky expression.
Don’t make the face perfectly symmetrical. Real handmade crafts rarely are, and tiny imperfections actually make the ghost more charming.
If younger children are helping, lightly sketch the face with pencil first before tracing it with marker.
Its okay if one eye is a tiny bit higher than the other because nobody will notice once it’s inside the jar.
Step 3: Create the Floating Mist
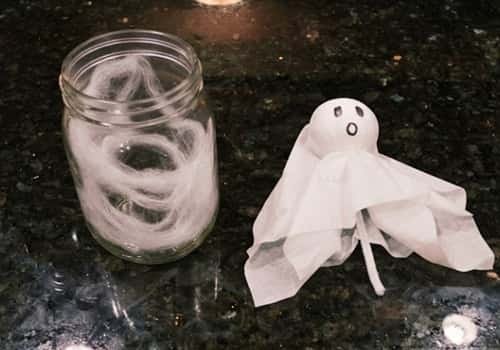
The floating effect is what makes this ghost in a jar craft stand apart from many other DIY jar decorations.
Pull apart small pieces of polyester fiberfill.
Don’t roll it into balls.
Instead, stretch it gently until it becomes light and airy like real fog.
Place a thin layer inside the bottom of the jar.
Add another loose layer halfway up.
Finally tuck tiny wisps around the inner glass walls.
This layered approach creates depth, making the ghost appear suspended inside swirling mist instead of simply sitting in stuffing.
If you’d like extra sparkle, lightly dust just a pinch of fine glitter onto the upper layer. Less is definitely more here.
Step 4: Position the Ghost Inside the Jar
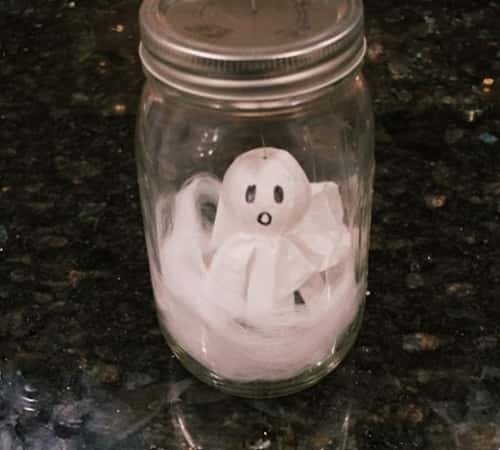
Carefully lower the ghost into the center of the jar.
Here’s a simple trick.
Instead of letting the ghost rest on the bottom, glue a short piece of thin craft wire behind the tissue twist.
Attach the other end of the wire inside the lid.
When the lid closes, the ghost hangs naturally in the middle of the jar.
Pretty clever, right?
Adjust the tissue folds after lowering it inside.
Spread the bottom gently over the fiberfill so everything blends together naturally.
The ghost should look like it’s quietly floating through fog.
Step 5: Add the Halloween Glow
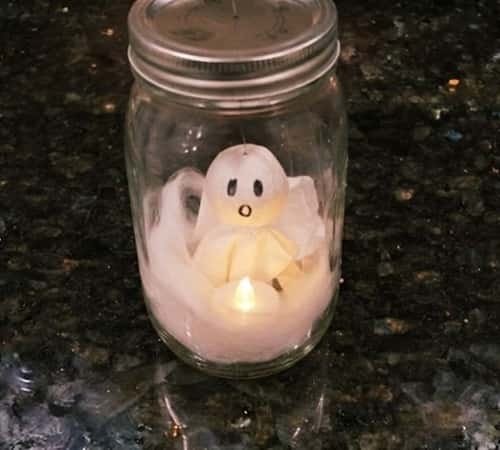
Place a battery-operated LED tea light underneath the hanging ghost.
Avoid real candles.
The LED creates a soft glow without heating the tissue paper.
Turn off the room lights for a quick check.
The white tissue begins glowing while the fiberfill softly diffuses the light around the jar.
This is honestly my favorite moment because everything suddenly comes alive.
If you want a cooler haunted look, choose a flickering warm white LED instead of bright pure white.
Step 6: Decorate the Outside Without Overdoing It
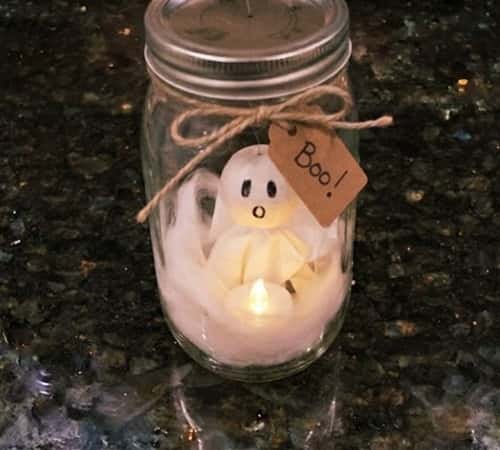
Less decoration often looks better.
Wrap white ribbon or rustic twine once around the neck of the jar.
Tie a simple bow.
Attach a small handmade Halloween tag if you’d like.
You can write:
- Boo!
- Happy Halloween
- Spooky Friend
- Peek-a-Boo Ghost
Avoid covering too much glass.
The floating ghost is the main attraction, so let it stay the star of the project.
Some people likes adding spiders everywhere, but I think keeping the outside simple makes the ghost stand out much more.
Step 7: Display Your Ghost in a Fun Way
Now your ghost in a jar craft is ready to show off.
Place it on:
- An entryway table
- A bookshelf
- A classroom reading corner
- A fireplace mantel
- A Halloween party snack table
- A bedroom shelf
- A window ledge (away from direct sunlight)
Want another creative idea?
Build three jars with different ghost faces to create a tiny ghost family.
Older children can even make themed versions inspired by Minecraft DIY builds using square facial expressions while still keeping the ghost simple enough for younger makers.
This little variation turns one project into a complete Halloween display without adding much extra work.
Tips for Success
- Use thin tissue paper instead of thick paper towels.
- Stretch fiberfill instead of packing it tightly.
- Keep decorations minimal.
- Use only battery-operated LED lights.
- Let kids design different ghost faces.
- Recycled pasta sauce jars work beautifully too.
- Make several jars using different ghost expressions.
- Store the craft in a dry place so the tissue paper stays crisp.
Easy Variations to Try
If your family enjoys fun Halloween crafts, here are a few creative twists:
- Add tiny paper bats inside the lid.
- Sprinkle glow-in-the-dark glitter into the fiberfill.
- Make a sleepy ghost with closed eyes.
- Create a tiny ghost holding a paper pumpkin.
- Add cotton “fog” spilling slightly over the rim.
- Turn it into a classroom name tag by attaching each child’s name.
- Pair it with paper pumpkins for a complete Halloween craft display.
These variations also make wonderful Halloween crafts for kids because everyone can personalize their own creation without changing the basic process.
Final Thoughts
The reason this ghost in a jar craft feels memorable isn’t because of expensive materials or complicated techniques.
It’s the illusion you create with simple layers, soft textures, and careful spacing that tricks the eye into seeing a tiny floating spirit.
Once you understand that idea, you’ll start noticing how light, shadow, and depth can completely transform other kids DIY project ideas too.
That’s a fun skill to carry into future easy Halloween crafts, whether you’re making pumpkins, haunted houses, or more playful ghost crafts.
Sometimes the simplest materials quietly teaches the biggest creative lessons.
Frequently Asked Questions
Can preschoolers make this ghost in a jar craft?
Yes. Adults should handle the hot glue, while children can assemble the ghost, draw the face, fluff the fiberfill, and decorate the jar.
Can I skip the foam ball?
You can substitute a tightly rolled ball of tissue paper, although the ghost’s head won’t be quite as smooth.
Can I use cotton instead of fiberfill?
Yes, but polyester fiberfill creates a lighter, mist-like appearance that better resembles floating fog.
How long does this ghost in a jar Halloween craft last?
Stored indoors and away from moisture, it can easily be reused every Halloween for several years.





